Table of Contents

Subscribe to Our Youtube Channel
Related Manuals for Vivitar DVR 865HD


Summary of Contents for Vivitar DVR 865HD
- Page 1 DVR 865HD Digital Video Camcorder User’s Manual © 2009 Sakar International, Inc. All rights reserved. Windows and the Windows logo are registered trademarks of Microsoft Corporation. All other trademarks are the property of their respective companies.
-
Page 2: Table Of Contents
Inserting an SD Memory Card ....................8 DVR Function Control ......................10 Install the Vivitar Experience Image Manager Software ............. 36 Connect your camera to the computer ................40 Get photos and videos from your camera to your computer ..........40 Get started! ........................ -
Page 3: Introduction
Introduction Thank you for purchasing the DVR 865HD Digital Video Camcorder. With your camera you can shoot video clips, take individual photos and record audio files. In addition, a SD compatible memory card of up to 8GB needs to be inserted in order to expand the memory of your DVR camera. -
Page 4: What Your Digital Video Camera Includes
Delete, protect and print photos directly from your camera Vivitar Experience Image Manager software for uploading and managing photos and videos to or from the most popular photo sharing and social network websites Plugging in your camera to the PC automatically opens up YouTube on your... -
Page 5: Computer System Requirements For Windows Xp
Computer System Requirements for Windows XP To be able to download photos and videos to your PC, you will need the following minimum configuration: Pentium 4 processor or above with Windows XP service pack 2 512 MB RAM, with 100MB of free disk space ... -
Page 6: Computer System Requirements For Macintosh
Support for Super VGA graphics Available USB Interface CD-ROM drive QuickTime 6 or higher Microsoft Internet Explorer 7 or higher Internet connection required Computer System Requirements for Macintosh Macintosh with Intel processor running Mac OS X v10.4.6 or later ... -
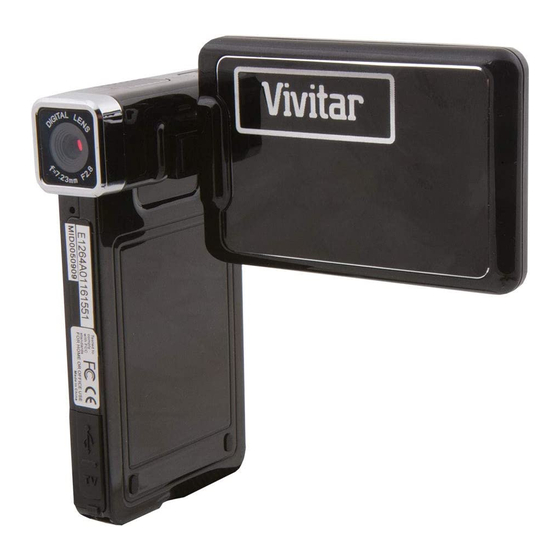
Page 7: A Quick Look At Your Digital Video Camera
A Quick Look at your Digital Video Camera... -
Page 8: Preparing Your Camera For Use
Preparing Your Camera for Use Battery Installation Your DVR camcorder requires a Li-ion rechargeable battery (included in packaging). Open the battery compartment on the side of the camera. Insert the battery in accordance with the polarity indicated. Return and close the battery cover. To charge your battery the camera should be off. -
Page 9: Inserting An Sd Memory Card
Note: On removing the battery from the camera all photos and videos clips in limited built-in memory will be lost. Limited internal memory is provided in order to take test photos and videos. A SD Memory card is required for normal use. All the media in the built-in memory will be lost if no SD Memory Card has been inserted in the DVR when you remove your battery or when the camera is turned off. - Page 10 Media sitting on the memory card is not lost when your camera’s power runs low or on removing the battery. Locate the SD card slot on the bottom of the camera. Insert a compatible SD memory card correctly in the direction shown. Press the memory card until you hear a “Click”...
-
Page 11: Dvr Function Control
Note: After you insert an SD memory card, the icon will appear on the LCD, indicating that your SD memory card has been installed successfully, and the media you capture will now be stored on the card and not in the limited internal memory. ... -
Page 12: Capturing Videos
Press the Power button to turn your DVR camera off. The DVR camera will switch off. If the DVR camera is not in use or in an operational mode for 60 seconds it will switch off automatically. When there is insufficient battery power, a “Low Battery” message will appear on the LCD screen. - Page 13 appear on the top right of the LCD. Press the Shutter button again to stop the recording. The recorded file will be saved in AVI format. Note: During shooting the video you can adjust the zoom to focus in on your subject.
- Page 14 Scene Your camcorder comes supplied with different scenes for you to take images in almost every type of environment - Auto, Scenery, Night Scenery, Portrait, Night Portrait, Beach, Sports and Party. Select the scenery for the present light and environmental conditions. 1.
- Page 15 1. Press the OK button. 2. Press the Right/Left button to select the Resolution icon that appears on the bottom left of the LCD. 3. Press the Up/Down button to select the desired resolution option from the menu that appears. 4.
- Page 16 White Balance This setting is used to adjust the color of your videos as per your light source. 1. Press the OK button. 2. Press the Right/Left button to select the White Balance option. 3. Press the Up/Down button to choose the best option from the menu that appears: Auto/Daylight/Cloudy/Fluorescent/Incandescent.
- Page 17 LCD screen. Delete last file In video mode, you can delete the last video by pressing the Left/Delete button. 1. A Delete message will appear on the LCD. 2. Use the Right/Left button to select “Yes” or “No”. 3. Press the OK button to confirm your choice. 4.
- Page 18 5. When the camcorder's internal memory is full, “Disk Full” will appear on the LCD screen when you attempt to press the Shutter button to take a photo. Either download the photo to your computer using the Vivitar Experience Image Manager software as described below in the section “Transfer photos and videos to your computer”...
- Page 19 Press the Left/Delete button. A Delete message appears on the LCD Use the Right/Left button to select either “Yes” or “No”. Press the OK button to confirm and save your choice and revert to the camera mode. Digital Zoom function You can magnify your subject up to 8 times using the digital zoom.
- Page 20 Press the Right/Left button to select the Scene icon that appears on the bottom left of the LCD. Press the Up/Down button to select the desired scenery option from the menu that appears. Press the OK button to confirm, save your choice and exit. Note: After selecting your scenery, the corresponding icon will appear on the left hand side of the LCD.
- Page 21 Press the Up/Down button to select the resolution size you choose – 8MP (3264x2448), 7MP (3072x2304), 5MP (2592x1944), 3MP (2048x1536), 2MP (1600x1200) or 1.3MP (1280x960). Press the OK button to confirm, save your choice and exit. Note: The resolution icon appears beneath the camera icon on the LCD screen.
- Page 22 Press the OK button. Press the Right/Left button to select the Exposure option. Press the Up/Down button to select an exposure value (from +2 to -2) from the menu that appears. Press the OK button to confirm, save your choice and exit. Note: The corresponding exposure number will appear on the left side of the LCD screen.
- Page 23 Sharpness This setting allows you to adjust the sharpness of your images, making edges more or less distinct. Press the OK button. Press the Right/Left button to select the Sharpness option. Press the Up/Down button to select a sharpness value from the menu that appears –...
- Page 24 Anti-Shake Your Digital Camcorder has a function that prevents blurry photos as a result of trembling when taking photos. Due to this function, you are not required to use a tripod for steady photo shots. Press the OK button. Press the Right/Left button to select the Anti-Shake option Press the Up/Down button to select “On”...
- Page 25 Note: The corresponding Noise Reduction icon will appear on the left side of the LCD screen. Time Stamp With this function, you may record the date and time on your photo. Press the OK button. Press the Right/Left button to select the Time Stamp option. Press the Up/Down button to select “On”...
- Page 26 of the LCD screen. 3. Press the Up/Down button to select one of the options 5S/10S/Off from the menu that appears. 4. Press the OK button to confirm, save the choice and exit. 5. The Self Timer icon selected now appears on the top of the LCD screen. 6.
-
Page 27: Audio Mode
The camera will take 3 consecutive photos Note: The default setting for the Multi-snapshot icon that appears at the top of the LCD is Off. Audio Mode An SD card needs to be inserted to use this mode. Switch on the camera. Press the Mode button. -
Page 28: Playback Mode
Playback mode Switch on the camera. Press the Mode button. Use the Up/Down button to select the PLAYBACK option from the menu that appears. Press the OK button to enter the Playback mode. The Playback icon will appear on the top left of the LCD. You can playback the photos and videos in your camcorder. - Page 29 Press the Down button for the images to appear as thumbnails. Select a JPG file and press the OK button for the image to appear in full screen. In full screen display mode, you can press the W/T button up/down to either zoom in or out of your photo.
- Page 30 Note: At step 3, select “Unlock One/Unlock All” and press the OK button to unlock the file. Delete You can delete unwanted photos and videos at any time to free up memory. You can delete one image or video clip at a time or delete all the unprotected photos and videos that are currently recorded on the memory card at once.
- Page 31 Press the OK button. Press the Right/Left button to select the PictBridge option. Press the Up/Down button and select PictBridge to print the photo. Press the OK button to enter the PictBridge mode. If you are not connected to a printer the following message will appear on the LCD “Please connect to device”.
-
Page 32: Setup Mode
Setup Mode Switch on the camera. Press the Mode button. Use the Up/Down button to select the SETUP option from the menu that appears. Press the OK button to enter the Setup mode. In this mode you can set the Default setting, Format, Date format, Time format, Date/Time setting, Frequency, TV out, Auto power off and Buzzer. - Page 33 feature as all the images sitting in the card will be erased from the card or internal memory. This process is irreversible. Press the OK button. Press the Right/Left button to select the Format option. Press the Up/Down button to select “OK” or “Cancel” Press the OK button.
- Page 34 Time Format You can set the time up in either a 12 hour or 24 hour format. Press the OK button. Press the Right/Left button and select the Time Format option. Press the Up/Down button to select one of 12 hour/24 hour/Hide. Press the OK button to confirm, save and exit.
- Page 35 Once you have set the Date and Time continue to use the Left/Right button to select the Confirm option. Press the OK button to confirm, save and exit. Note: The Date/Time format will be displayed on the LCD screen in both the camera and video mode.
- Page 36 Press the Up/Down button to select either NTSC or PAL mode according to how your TV is set. Press the OK button to confirm and save this choice. Connect your DVR to your TV with the supplied TV cable. Note: When plugged into the TV the image will not appear on the LCD screen. Auto Power Off In order to conserve the energy supply of your camera when it is not in use you can set the time the camcorder will automatically turn off when not...
-
Page 37: Install The Vivitar Experience Image Manager Software
Press the OK button to confirm and save your choice. Install the Vivitar Experience Image Manager Software Warning: Do not plug your camera into the computer until the software installation is complete. You must be connected to the internet to install and run the Vivitar Experience Image Manager software. - Page 38 Insert the installation CD into your CD-ROM drive. The installation screen should automatically open. On PC: The Vivitar Experience Image Manager Installer window appears. If the window does not appear, open the application’s CD/DVD drive and click on “Setup.bat” to launch the installer.
- Page 39 If you do not have internet access at the time of inserting the CD-ROM, connect to the internet and then click the “Install Vivitar Experience Image Manager” button to begin the installation Note: If you do not have internet access, you can still download media from the camera.
- Page 40 On Macintosh: Click the “I accept the terms of this license agreement” and then click “Next” to continue. 10. On PC only: Let the “Vivitar Experience Image Manager” installer create the folder to where the program will be installed, and then click “Install”.
-
Page 41: Connect Your Camera To The Computer
Connect your camera to the computer Use the USB cable that came with your camera to connect your camera to your computer. Turn your camera on. The first time you connect the device to the computer you will have to wait a few seconds until the computer recognizes the device. - Page 42 The “Get media from device” window opens. You can select to download photos, videos or both.
-
Page 43: Get Started
Get started! Using the Vivitar Experience Image Manager, you can upload and manage photos and videos to and from the most popular photo sharing and social networking sites - Facebook, Flickr, MySpace, Picasa, Photobucket and YouTube. -
Page 44: Transfer Media From My Camera To My Computer Manually (Using Windows)
For more details on how to use the Vivitar Experience Image Manager open the Help file or click the “Take the Tour” button on the application`s Home page. Transfer media from my camera to my computer manually (Using Windows) Use the USB cable that came with your camera to connect your camera to your computer. -
Page 45: Maintenance Of Your Digital Camera
The camera’s device icon appears on the desktop. Click on the device icon and open the DCIM folder and the folder inside to view the media files. Select the files and drag them into your computer. Optionally, select the files and choose Copy from the Finder’s Edit menu. - Page 46 Attention: Service Department 195 Carter Drive Edison, NJ 08817 TECHNICAL SUPPORT For technical support issues please visit our website at www.vivitar.com. You can find manuals, software and FAQ’s at the website. Can’t find what you are looking for? E-mail us at support@vivitar.com and one of our technical support team members will answer your questions.
-
Page 47: Technical Specifications
Technical Specifications Image Sensor CMOS Sensor 3264*2448(8.1M),3072*2304(7.0M), Image 2592*1944(5.0M),2048*1536(3.0M), Resolution 1600*1200(2.0M). 1280*960 (1.3M) HD: 1280*720p (20fps); Video VGA: 640*480 (30fps ); Resolution QVGA: 320*240 (30fps ) LCD Display 2.4’’TFT(4:3) LCD Swivel 90° Internal Memory 16MB External SD card up to 8 GB Memory Internal Memory: Still Image: 2PCS/8.1M/7.0M/5.0M/3.0M/2.0M/1.3M... - Page 48 Lens f=7.45mm, F=3.0 Digital Zoom Self-timer 5s/10s File Format JPEG ( Still Image) /AVI ( Video) / WAV (Audio) Shutter Speed 1/6-1/15000S 2 ~ -2 Exposure 100~3200 White Balance Auto, Daylight, Cloudy, Fluorescent, Incandescent Auto, Scenery, Night Scenery, Portrait, Night Portrait, Beach, Scene Sports, Party, High Sensitivity Anti-Shake...
-
Page 49: Trouble Shooting
Trouble Shooting Q: I have taken photos and selected the “Get Images” button. I get a message that the images were successfully transferred but the photos do not appear on my computer. What do I do? - Page 50 We recommend always downloading your photos to your computer as soon as possible to prevent unintentional data loss. Q: I deleted images using the Vivitar Experience Image Manager. The photo was also deleted from my computer. How do I recover photos that I accidently...
Need help?
Do you have a question about the DVR 865HD and is the answer not in the manual?
Questions and answers