GE JAS02 Use And Care & Installation Manual
Hide thumbs
Also See for JAS02:
- Owner's manual and installation instructions (44 pages) ,
- Owner's manual & installation instructions (88 pages) ,
- Owner's manual and installation instructions (88 pages)
Table of Contents
Advertisement
Quick Links
Use andCare & Installation Guide
Operating Instructions, Tips
Aluminum Foil .................................... 4, 9, 11
Features ........................................................... 5
Oven .......................................................... 7-10
Baking/Roasting ........................................ 8
Broiling, Broiling Guide...................... 9, 10
Control Settings.......................................... 7
Surface Cooking ............................................ 6
Control Settings.......................................... 6
Cookware Tips ............................................ 6
Broiler Pan and Grid.................................... 13
Control Knobs .............................................. 13
Lift-Off Oven Door ....................................... 12
Porcelain Oven Interior.............................. 13
Shelves .......................................................... 11
Surface Units and Drip Pans .................... 11
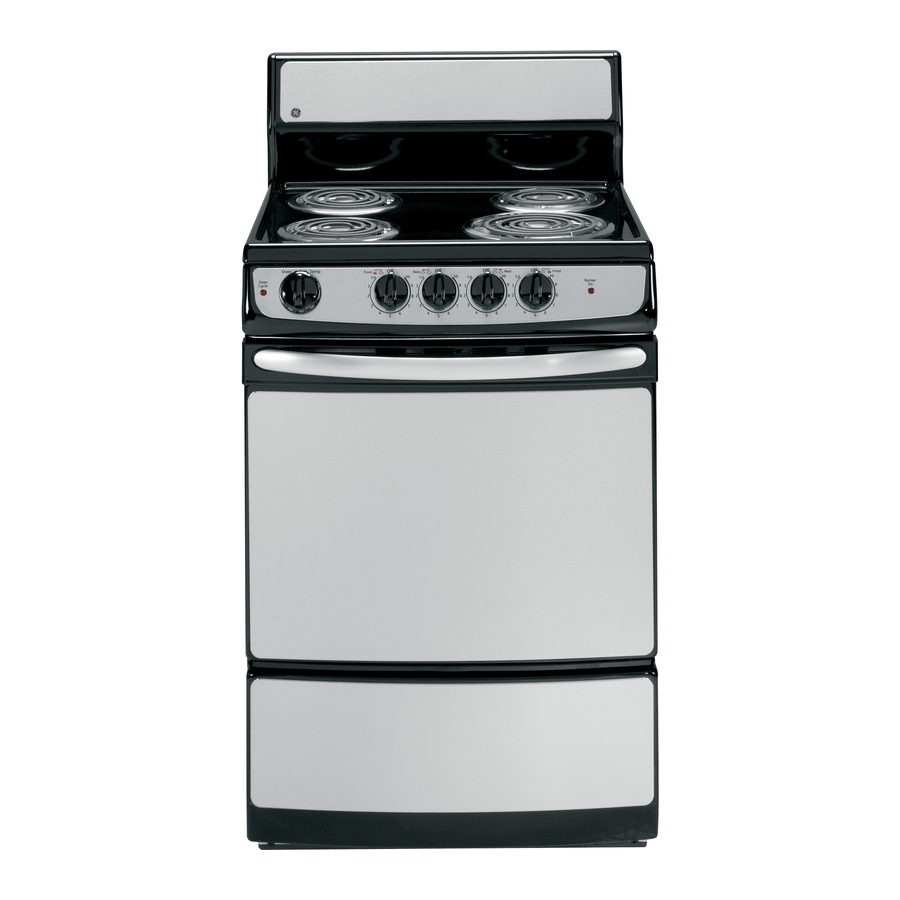
GE Appliances
Electric Range
........................ 3, 4
....................... 11-13
................................... 18
More questions ?...call
GE Answer Center® 800.626.2000
Anti-Tip Device........................................ 3, 14
Flooring Under the Range......................... 17
Leveling ......................................................... 17
Appliance Registration................................. 2
Important Phone Numbers....................... 19
Model and Serial Number Location .......... 2
Warranty ....................................... Back Cover
.. 14-17
......................... 19
Advertisement
Table of Contents

Subscribe to Our Youtube Channel
Related Manuals for GE JAS02


Summary of Contents for GE JAS02
-
Page 1: Table Of Contents
Use andCare & Installation Guide Electric Range Problem Solver Safety Instructions ........18 ......3, 4 More questions ?…call GE Answer Center® 800.626.2000 Operating Instructions, Tips Aluminum Foil ........4, 9, 11 Installation, Adjustments .. 14–17 Features ............5 Anti-Tip Device........3, 14 Oven ............ -
Page 2: Appliance Registration
Check the Problem Solver in the back of this guide. It ® lists causes of minor operating problems that you can GE Answer Center correct yourself. 800.626.2000 24 hours a day, 7 days a week Write down the model and serial numbers. -
Page 3: Safety Instructions
IMPORTANT SAFETY INSTRUCTIONS Read all instructions before using your appliance. When using electrical appliances, basic safety • Never wear loose-fitting or hanging garments precautions should be followed, including the while using the appliance. Flammable material following: could be ignited if brought in contact with hot heating elements and may cause severe burns. -
Page 4: Oven
IMPORTANT SAFETY INSTRUCTIONS (continued) Oven • Only certain types of glass, glass/ceramic, earthenware or other glazed containers are • Stand away from range when opening oven suitable for range-top service; others may break door. Hot air or steam which escapes can cause because of the sudden change in temperature. -
Page 5: Features
FEATURES OF YOUR RANGE Feature Index Feature Index (Not all models have all features. (Not all models have all features. Appearance of features varies.) page(s) Appearance of features varies.) page(s) 1 Chrome Plated Drip Pans 7 Model and Serial Numbers 2 Plug-In Surface Units 8 Broil Element 9, 12... -
Page 6: Surface Cooking
SURFACE COOKING Surface Cooking Controls Your surface units and controls are designed to give you a variety of heat settings for surface unit cooking. At both OFF and HI positions, there is a slight niche so control ‘‘clicks’’ at those positions; HI marks the highest setting; LO, the lowest setting. In a quiet kitchen, you may hear slight ‘‘clicking’’... -
Page 7: Control Settings
USING YOUR OVEN Oven Temperature Control The OVEN TEMP knob is located on the control panel on the front of the range. Simply turn the knob to the desired cooking temperatures, which are marked in 25°F. increments on the dial. OVEN TEMP maintains the temperature you set, from WM (170°F.) to BROIL (550°F.). -
Page 8: Baking/Roasting
BAKING/ROASTING How to Set Your Range for Baking/Roasting 1. Position the shelf or shelves in the oven. If cooking 3. Place food in oven on center of shelf. Allow at least on two shelves at the same time, stagger the pans 2 inches between edge of bakeware and oven wall for best heat circulation. -
Page 9: Aluminum Foil
BROILING Broiling may be slightly different from any previous Step 4: Close the door. Always broil with the broiling you may be acquainted with, so be sure to door closed. read this section completely. Step 5: Turn the OVEN TEMP knob clockwise Broiling is cooking food by intense radiant heat from to BROIL. - Page 10 BROILING GUIDE 1. If desired, marinate meats or chicken before 3. Frozen steaks can be broiled by positioning the broiling, or brush with barbecue sauce last 5 to 10 oven shelf at next lowest shelf position and minutes only. increasing cooking time given in this guide 1 ⁄...
-
Page 11: Care And Cleaning
CARE AND CLEANING Proper care and cleaning are important so your range will give you efficient and satisfactory service. Follow these directions carefully in caring for your range to assure safe and proper maintenance. Porcelain Enamel Cooktop Oven Shelves The porcelain enamel finish is sturdy but breakable if misused. -
Page 12: Lift-Off Oven Door
CARE AND CLEANING (continued) Lift-Off Oven Door (on some models) The oven door is removable (on some models) but it To replace the door, is heavy. You may need help removing and replacing position the slots in the door. the bottom of the To lock apply door squarely over... -
Page 13: Broiler Pan And Grid
Broiler Pan and Grid If food has burned on, sprinkle the grid with After broiling, remove the broiler pan from the oven. Remove the grid from detergent while hot and cover with wet paper towels the pan. Carefully or a dishcloth. Soaking the pan will remove burned pour out grease from on foods. -
Page 14: Installation, Adjustments
INSTALLATION INSTRUCTIONS ANTI-TIP BRACKET INSTALLATION INSTRUCTIONS WARNING 3. Screw the bracket securely to the floor with the screw provided. The screw is self-drilling in • ALL RANGES CAN TIP wood, plywood, particle and chip board, and most metal framing. If attaching to masonry, you •... - Page 15 TO MAKE ELECTRICAL CONNECTION: THREE-WIRE CORD CONNECTION 1. Remove the junction block access cover Junction Block (on range back). on Range Back Black 2. Effective Januar y 1, 1996 the National Electrical Code requires that new construction (not existing) utilize a 4-conductor connection to an electric range.
-
Page 16: Models Jas02 Jas24
7. Push the strain relief upward (to relieve strain) while tightening the strain relief clamp. Max. Counter height should not Flush exceed 36″ Mount Surface Outlet Mount Outlet From bottom of range to strain relief clamp Models ″ JAS02 20″ ⁄ 2″ ″ JAS24 24″ ⁄ 0″... -
Page 17: Flooring Under The Range
INSTALLATION OF RANGE (continued) LEVELING THE RANGE For proper cooking and baking the range must PREPARATION be leveled. Leveling legs are located on each corner at the base of the range. • Remove all tape and packaging. • Take the accessor y pack out of the oven. •... -
Page 18: Problem Solver
• Surface units are not plugged in solidly. FUNCTIONING PROPERLY • Drip pans are not set securely in the cooktop. • Surface unit controls are not properly set. If you need more help…call, toll free: ® GE Answer Center 800.626.2000 consumer information service... -
Page 19: Consumer Services
We’ll Be There With the purchase of your new GE appliance, receive the assurance that if you ever need information or assistance from GE, we’ll be there. All you have to do is call—toll-free! GE Answer Center® 800.626.2000 ® Whatever your question about any GE major appliance, GE Answer Center information service is available to help. - Page 20 To know what your legal rights are in your state, consult your local or state consumer affairs office or your state’s Attorney General. Warrantor: General Electric Company If further help is needed concerning this warranty, write: Manager—Consumer Affairs, GE Appliances, Louisville, KY 40225 JAS02 Part No. 164D3333P007 JAS24 Pub No.
Need help?
Do you have a question about the JAS02 and is the answer not in the manual?
Questions and answers