Table of Contents
Advertisement
The company behind Clifford
Systems is Directed.
Since its inception, Directed has had one purpose, to
provide consumers with the finest vehicle security and
accessories available. The recipient of nearly 100 pat-
ents and Innovations Awards in the field of advanced
electronic technology.
Quality Directed products are sold and serviced
throughout North America and around the world.
Call (800) 876-0800 for more information about our
products and ser vic es.
©
2016 Directed, All rights reserved.
Vista, CA 92081
Directed is committed to delivering world class
www.clifford.com
quality products and services that excite and
delight our customers.
Auto Security
®
G4105X ML 2016 06
O W N E R' S
T H E S C I E N C E O F S E C U R I T Y
™
G U I D E
M
O
D
E
L
4105X
Advertisement
Table of Contents

Related Manuals for Clifford 4105X


Summary of Contents for Clifford 4105X
- Page 1 The company behind Clifford Auto Security ® Systems is Directed. Since its inception, Directed has had one purpose, to provide consumers with the finest vehicle security and accessories available. The recipient of nearly 100 pat- ents and Innovations Awards in the field of advanced electronic technology.
-
Page 2: Congratulations
Congratulations Congratulations on the purchase of your state-of-the-art keyless entry and remote start system. Reading this Owner’s Guide prior to using your system will help maximize the use of your system and its many features. For more information please visit us online (see back cover for URL). -
Page 3: Your Warranty
Your Warranty Your system comes with a warranty. The warranty terms are detailed at the end of this guide. Make sure that you receive the proof of purchase from your dealer, indicating the product was installed by an authorized Directed dealer. Replacement remote controls Please see your authorized dealer or visit us at www.directedstore.com to order additional remote controls. -
Page 4: Table Of Contents
Contents Congratulations ....................i Important Information ..................i Government Regulations and Safety information ...........i Your Warranty ..................ii Replacement remote controls ..............ii Remote Control ....................3 Remote Control Functions ...................3 Standard Configuration ................3 Using the System .....................6 Locking ....................6 Unlocking ....................6 Disabling (optional) Starter Disable ............6 Panic Mode .....................6 Remote Start .....................7 Key Takeover....................8... -
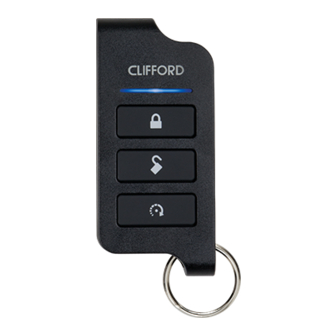
Page 6: Remote Control
Remote Control Feature Description Internal Antenna Used for transmitting information Transmit LED Active when transmitting information Command buttons (4) Used to perform: Locking Unlocking Remote Start Silent mode/Auxiliary channel* Your 1-way remote coin cell battery can be changed by using a small at blade screwdriver to pry case apart. Replace battery and then snap case together. Your 1-way remote coin cell battery can be changed by using a small at blade screwdriver to pry case apart. - Page 7 Button The unlocking function is controlled by pressing on the remote con- trol for one second. You can also turn Panic off with this button. Button Your 1-way remote coin cell battery can be changed by using a small at blade screwdriver to pry case apart. Replace battery and then snap case together. Silent Mode and an optional auxiliary function are controlled by ™...
- Page 8 Buttons Timer Mode is activated when these buttons are pressed simultaneously. When you activate Timer Mode the parking lights flash four times, after a one second delay the engine starts. To turn the engine off, without exiting Your 1-way remote coin cell battery can be changed by using a small at blade screwdriver to pry case apart. Replace battery and then snap case together. Timer Mode, press the Your 1-way remote coin cell battery can be changed by using a small at blade screwdriver to pry case apart.
-
Page 9: Using The System
Using the System Locking Pressing for one second locks the system (if the door locks are con- nected). The horn honks and the parking lights flash once to confirm the system is locked. The Failsafe ® Starter Disable also activates and prevents the vehicle’s starter from cranking. -
Page 10: Remote Start
tion by trig ger ing the system with your remote control. Press approximately two seconds to enter Panic Mode. In Panic Mode, the horn will honk and the parking lights will flash for 30 seconds. To stop Panic Mode at any time, press , or on the remote control. -
Page 11: Key Takeover
* The factory setting is one press but this can also be programmed for two or three presses maximum (see your authorized Directed installer for the amount of presses programmed). Record the number of presses to activate remote start here:____ If the engine fails to start, refer to "Disabling the Remote Start System"... -
Page 12: Safety Features
Safety Features The following safety features will disable the remote start when acti- vated or not allow the engine to start if not properly set before starting. • Foot Brake is depressed. • Hood is opened. • Garage Mode is ON (see Disabling the Remote Start System). •... -
Page 13: Car Finder
Note If your vehicle uses a Smart Key or PTS (Push-To-Start) system, please refer to the vehicle specific instructions included with the owner's guide of the interface module or consult your authorized dealer. Car Finder Car finder allows you to locate your vehicle, by having the system flash the parking lights. -
Page 14: Remote Start Diagnostics
Turn Garage Mode ON or OFF: Turn the ignition on then off. Within 10 seconds, press and release the Valet button once. The parking lights flash: • Nine times quickly when turning on. • Nine times slowly when turning off. Remote Start Diagnostics For user safety, the system must be properly configured or remote start will not activate. -
Page 15: Pairing A Remote Control
Pairing a Remote Control Your system comes with the remote controls already programmed, how- ever, if you are replacing or adding additional remote controls, they must be paired to the system prior to operating the system. To pair the remote, you need to know where the Valet button is located. If the horn honk is not connected, the main unit LED needs to be visible for visual confirmation. -
Page 16: Programming Options
Programming Options Feature options will control your system's normal operation. Some op- tions may require additional parts and installation labor. The following is a list of the programmable options with the factory settings in bold. 12 minute to 60 minute runtime. Your system can be programmed •... -
Page 17: Battery Information
Battery Information The remote control* is powered by two 3V, CR2016 batteries. When the battery begins to weaken, operating range is reduced and the LED on the remote control dims. * Some remote controls are powered using a single coin cell battery (CR-2032), so please verify which type and quantity is used before replacing. -
Page 18: Patent Information
Patent Information This product is covered by one or more of the following United States patents: Remote Start Patents: 5,349,931; 5,872,519; 5,914,667; 5,952,933; 5,945,936; 5,990,786; 6,028,372; 6,467,448; 6,561,151; 7,191,053; 7,483,783 Vehicle Security Patents: 5,467,070; 5,532,670; 5,534,845; 5,563,576; 5,646,591; 5,650,774; 5,673,017; 5,712,638; 5,872,519; 5,914,667; 5,952,933;... -
Page 19: Government Regulations
Government Regulations This device complies with Part 15 of FCC rules. Operation is subject to the fol- lowing two conditions: (1) This device may not cause harmful interference, and (2) This device must accept any interference received, including interference that may cause undesirable operation. -
Page 20: Warning! Safety First
Warning! Safety first Please read the safety warnings below before proceeding. Improper use of the product may be dangerous or illegal. Installation Due to the complexity of this system, installation of this product must only be performed by an authorized Directed dealer. If you have any questions, ask your retailer or contact Directed directly at 1-800-753-0600. -
Page 21: Interference
test, the remote start unit has not been properly installed. The remote start module must be removed or the installer must properly reinstall the remote start system so that the vehicle does not start in gear. All installations must be performed by an authorized Directed dealer. OPERATION OF THE REMOTE START MODULE IF THE VEHICLE STARTS IN GEAR IS CONTRARY TO ITS INTENDED MODE OF OPERATION. -
Page 22: Limited Lifetime Consumer Warranty
Limited lifetime consumer warranty Directed Electronics. (“Directed”) promises to the original purchaser to repair or replace (at Directed’s election) with a comparable reconditioned model any Directed unit (hereafter the “unit”), excluding without limitation the siren, the remote transmitters, the associated sensors and accessories, which proves to be defective in workmanship or material under reason- able use during the lifetime of the vehicle provided the following conditions are met: the unit was purchased from an authorized Directed dealer, the unit was professionally installed... - Page 23 REINSTALLATION OF THE UNIT OR ANY CONSEQUENTIAL DAMAGES OF ANY KIND. IN THE EVENT OF A CLAIM OR A DISPUTE INVOLVING DIRECTED OR ITS SUBSIDIARY, THE VENUE SHALL BE SAN DIEGO COUNTY IN THE STATE OF CALIFORNIA. CALIFORNIA STATE LAWS AND APPLICABLE FEDERAL LAWS SHALL APPLY AND GOVERN THE DISPUTE.
Need help?
Do you have a question about the 4105X and is the answer not in the manual?
Questions and answers