Table of Contents
Advertisement
Quick Links
Advertisement
Table of Contents

Related Manuals for wbox DVR 160

Summary of Contents for wbox DVR 160
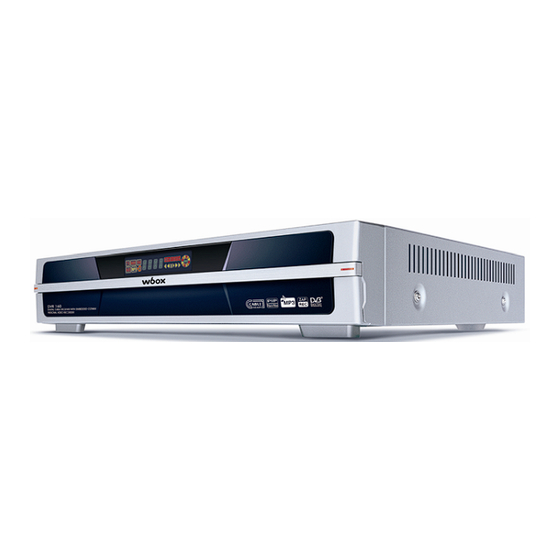
- Page 1 DVR 160 User Manual | 1...
- Page 2 DVR 160. All the safety and operating instructions should be read before DVR 160 is operated. Please keep the manual in a fixed place so that it can be easily referred to later.
-
Page 3: Safety And Precautions
DVR 160 User Manual | 3 Safety and Precautions <Attention when installing the product> The socket-outlet shall be installed near the equipment and shall be easily accessible. Install on an even plane. Don’t install in the cold or under direct sunlight. -
Page 4: Table Of Contents
4 | DVR 160 User Manual Table of Contents Chapter 1. Before You Begin ························ 5 4.11 Changing Channel Mode ················ 35 1.1 Features ············································· 6 4.12 Viewing Program Guide·················· 35 1.2 Package Contents ······························ 7 4.13 Viewing PIP ···································· 37 1.3 Names of Each Part ···························... -
Page 5: Chapter 1. Before You Begin
DVR 160 User Manual | 5 Chapter 1 Before You Begin... -
Page 6: Features
6 | DVR 160 User Manual 1.1 Features With the new DVR 160 enjoy the convenience of receiving the digital Cable broadcasts and digitally recording of the programming on its hard disk. You may also record two shows at the same time or watch one while recording the other. -
Page 7: Package Contents
DVR 160 User Manual | 7 <Other Features> Capable of receiving both SCPC and MCPC channels Powerful and easy functions for editing (Lock, Delete, Move, Rename Channel & Favorite group) Electronic Program Guide (EPG) for On Screen Channel Information 19 OSD languages and 16 bit RGB color OSD menu Auto searching &... -
Page 8: Names Of Each Part
Inserts two CI modules. 9. LED STANDBY: Lights in red to indicate DVR 160 is in Standby mode. This light is turned off when the product is in operation. LOCK: Lights in green to indicate the channel is searched properly. -
Page 9: Rear Panel
DVR 160 User Manual | 9 1.3.2 Rear Panel 1. CABLE IN, OUT Connect cable out1 to cable in2 via a loop cable. 2. VCR SCART Connect this connector to your VCR via a SCART cable. 3. TV SCART Connect this connector to your TV via a SCART cable. -
Page 10: Names Of Remote Button
10 | DVR 160 User Manual 1.4 Names of Remote Button 1.4.1 Names of Remote Button STANDBY ( To switch the product On or Standby. MUTE ( To mute the sound. HELP ( To display all help icons. A/R ( Adjust picture ratio. -
Page 11: Slow Motion Playback
To show the progress bar. If you press the button in change the value of an item with preprogrammed the trick mode or paused state, DVR 160 resumes values. The “◄” button can be used as a to the playback with normal speed. - Page 12 12 | DVR 160 User Manual Cutting Data ( Showing and changing the Size of the PIP ( To cut the desired section from the recorded file. Whenever you press the button, the Picture in Bookmark ( Picture(PIP) mode changes sequentially such as showing the PIP on the screen→changing the size...
-
Page 13: Universal Remote Control
DVR 160 User Manual | 13 1.4.2 Universal Remote Control 1. Programming your device (MANUAL) Configure your devices ( ) with 3-digit code. Press one of the device buttons ( ) you want to program and OK ( ) together and hold both for about 2 seconds. - Page 14 14 | DVR 160 User Manual 4. Factory Default You can reset the configuration of the universal remote to the point of purchase. Press one of the device button ( ) and OK together and hold both for about 2 seconds.
-
Page 15: Chapter 2. Connections
DVR 160 User Manual | 15 Chapter 2 Connections... -
Page 16: Connecting A Tv & Vcr
16 | DVR 160 User Manual This chapter describes how to connect the product to your home entertainment system. Choose the most appropriate procedure depending on your environments. : If you encounter with any problems or have any questions during connecting the product, please contact your local product distributor. -
Page 17: Connect The Optical S/Pdif
DVR 160 User Manual | 17 2. Connecting a TV and VCR with a Scart Cable 1) Connect the TV cable to CABLE IN of the product. 2) Connect the RF-IN of VCR to the CABLE OUT of the product. -
Page 18: Connect The Usb
18 | DVR 160 User Manual 2.3 Connect the USB Connect the USB to your PC to copy MP3 file from PC. 2.4 Starting Up Connect the power cord of the product to a power outlet and press the “Power” button on the rear panel to turn the product on. -
Page 19: Chapter 3. Basic Settings
DVR 160 User Manual | 19 Chapter 3 Basic Settings... -
Page 20: Language
20 | DVR 160 User Manual If you use the product for the first time after connecting, you have to perform basic settings. Once the setup procedure is finished successfully, you can start watching TV or listening to radio. Turn on your TV and the product. Follow the instruction on the screen. -
Page 21: Time Setting
DVR 160 User Manual | 21 3.2 Time Setting You can set the current time. 1. Select Time Mode between Time Zone and Local time using the “ ◀▶ ” button. 2. Select the appropriate Time Zone value using the “ ◀▶ ” button. -
Page 22: Automatic Searching
22 | DVR 160 User Manual 3.4 Automatic Searching You can automatically search all channels. 1. Move cursor to the “OK” button, When Channel Search is finished, the following message will appear. Move cursor to the “OK” button and press the “OK” button to save the changes. -
Page 23: Chapter 4. Operations
DVR 160 User Manual | 23 Chapter 4 Operations... -
Page 24: [Basic Functions]
24 | DVR 160 User Manual [Basic Functions] 4.1 Changing Channels There are several ways to change the channels. Press the “ ▲▼ ” button on the remote control to access the channels sequentially. Enter your desired channel number using the “0~9“ buttons directly. -
Page 25: Viewing Program Information
DVR 160 User Manual | 25 4.3 Viewing Program Information You can view the 3 steps information window by pressing the “INFO” button while watching a program. Press the “EXIT” or “INFO” button to hide the program information. Step 1: Basic Information The Basic Information is displayed as following on the screen. -
Page 26: Switching Tv And Radio
26 | DVR 160 User Manual 4.4 Switching TV/Radio Press the “TV/RADIO” button to switch TV or Radio. 4.5 Freezing Screen/Zooming Screen You can zoom in or out the current screen. 1. Press the “EXIT/ZOOM” button to select zooming mode. -
Page 27: Changing Subtitle Language
DVR 160 User Manual | 27 4.6 Changing Subtitle Language If the current program provides Subtitle information, you can select the subtitle language. 1. Press the “ ” button to display the subtitle language list. 2. Select the desired subtitle language using the “▲▼” button, and press the “OK” button. The subtitle language will be displayed at the bottom of the screen. -
Page 28: Changing Audio Language
28 | DVR 160 User Manual 4.7 Changing Audio Language If the current program provides multiple audio languages, you can select the desired language. 1. Press the “ ” button to display the audio language list. 2. Select the desired audio language using the “▲▼” button, and press the “OK” button. The audio language will be changed immediately. -
Page 29: [Advanced Functions]
DVR 160 User Manual | 29 [Advanced Functions] 4.9 Managing Channel List 4.9.1 Displaying Channel List You can see various channel lists and change the channels from the channel list more conveniently. 1. Press the “OK” button while watching a program to display the selected channel list. -
Page 30: Searching Channel
30 | DVR 160 User Manual 4.9.2 Searching Channel You can search the specific channel among various channel lists more conveniently. 1. Press the “OK” button while watching a program to display the selected channel list. 2. Press the “Green” button to sort the channel lists by alphabetic order. -
Page 31: Viewing Multi-Channels Window
DVR 160 User Manual | 31 4.9.3 Viewing Multi-Channels Window You can display multi-channels window and select a channel to watch. 1. Press the “OK” button while watching a program to display the selected channel list. 2. Press the “Yellow” button to display the number of the multi-channel among 2, 4, 9, 10, 13, or 16. -
Page 32: Editing Channels
32 | DVR 160 User Manual 4.9.4 Editing Channels You can edit (such as lock, delete, move, and rename) all channels or each channel. Press the “EXIT” or “MENU” button to save the changes and return to the previous menu. -
Page 33: Managing Favorite Channel Lists
DVR 160 User Manual | 33 4.10 Managing Favorite Channel Lists You can create and edit favorite channel list(s) or group(s). 1. Press the “FAV” button to create new favorite channel group. OK: Deletes channel(s). Red: Locks/unlocks channel(s). Green: Renames a channel name. - Page 34 34 | DVR 160 User Manual 2. You can edit favorite channel list(s) or group(s). If you want to add channel(s), select the desired channel, and then press the “OK” button. ▶ ● : Switches Right column. ◀ ● : Switches Left column.
-
Page 35: Changing Channel Mode
DVR 160 User Manual | 35 4.11 Changing Channel Mode You can change the channel mode by group. 1. Press the “OK” button to display All Channel or Favorite Channel lists according to the current channel mode. 4.12 Viewing Program Guide The Program Guide shows program information about each channel-by date and time. - Page 36 36 | DVR 160 User Manual 2. Press the “Red” button to view daily schedule for the selected channel. Help : View the key information. Info: View the information. Play/REC: Reserves selected program. Left/Right: Move channel Up/Down: View the now/next event.
-
Page 37: Viewing Pip
DVR 160 User Manual | 37 4.13 Viewing PIP The advanced PIP function allows you to watch two different screens at once, even if you don’t have a VCR connected to your TV. If you change the main screen channel into the one of different transponder, the PIP screen will be disappeared automatically. - Page 38 38 | DVR 160 User Manual 3. Press the “ ” button to change the PIP channel. The PIP channel lists will appear. You can move to the desired channel using the “▲▼” button, and then press the “OK” button.
-
Page 39: Recording & Playback
DVR 160 User Manual | 39 4.14 Recording & Playback DVR 160 provides three recording modes such as the instant recording, the normal recording, and the reservation recording. 4.14.1 Instant Recording The instant recording function automatically saves one hour amount of the broadcasting program to the built-in hard disk temporarily, so that you can watch program as you watch a videotape using functions such as rewind, fast forward, replay and pause. -
Page 40: Normal Recording
40 | DVR 160 User Manual 4. If you move to other channel, it stops instant recording and restarts instant recording. The previous saved data is deleted. 4.14.2 Normal Recording The normal recording function saves the programs up to 4 programs at once. You can also watch program using functions such as rewind, fast forward, replay, pause, and recording. - Page 41 DVR 160 User Manual | 41 You can only change the duration option during the recording. The mode provides the Normal and EPG time option. You can select the EPG time option when there is any EPG data. 2. Press the “Red” button to start recording immediately for the program you are watching. Press the “MENU”...
- Page 42 42 | DVR 160 User Manual : There is limitation to change the channel during the recording.
-
Page 43: Reservation Recording
DVR 160 User Manual | 43 4.14.3 Reservation Recording The reservation recording function saves the desired programs automatically. You can watch program using functions such as rewind, fast forward, replay, pause, and recording. 1. Press the “MENU” button to set the reservation recording options. - Page 44 44 | DVR 160 User Manual 3. Set the Mode to ‘Record’ using the “ ◀▶ ” button, and then set the Cycle, Time, and Duration. ① The timer ”Mode” is by default set to ”Record”. This is the recording-timer. Instead of a recording-timer, the user can add sleep- and reminder-timers.
- Page 45 DVR 160 User Manual | 45 4. Whenever you press the “MENU” button after completing setup, the following message will appear. Move cursor to the “OK” button and press the “OK” button to save the changes.
-
Page 46: Recorded File Playback
46 | DVR 160 User Manual 4.14.4 Recorded File Playback You can play the recorded file by selecting a desired file. 1. Press the “PVR” button to display the file list. Or press the “OK” button during the playback. 2. Select the desired file to playback using the “ ▲▼ ” button, and then press the “OK” button. -
Page 47: Mp3 File Playback
DVR 160 User Manual | 47 4.14.5 MP3 File Playback You can listen to the MP3 file by selecting a desired file. 1. Press the “PVR” button to display the file list. Or press the “OK” button during the playback. -
Page 48: Bookmark
48 | DVR 160 User Manual 4.14.6 Bookmark You can search positions very quickly and easily by bookmark during the recorded file playback. 1. Press the “ button at the desired position to set a bookmark during a recorded file playback. -
Page 49: Viewing Teletext
DVR 160 User Manual | 49 4.15 Viewing Teletext Teletext Service is text data service from Service Provider. It is available only when the program provides teletext data service. 1. Press the “ ” button. Teletext Service Data is displayed. Select the desired language using the “... - Page 50 50 | DVR 160 User Manual...
-
Page 51: Chapter 5. Settings
DVR 160 User Manual | 51 Chapter 5 Settings... - Page 52 52 | DVR 160 User Manual This chapter describes how to search for channels, edit channel, setup for language (OSD, Timer, etc.), and show tools. 1. Press the “MENU” button to display the Menu OSD. 2. Move to the appropriate Menu using the “ ◀▶ ” button, and then press the “OK” button to select the menu.
-
Page 53: Search Channel
DVR 160 User Manual | 53 5.1 Search Channel You can set the antenna's properties and search channel. Automatic Search: Searches all channels automatically. Manual Search: Searches the only channels assigned by region. 5.1.1 Automatic Search You can automatically search all channels. -
Page 54: Manual Search
54 | DVR 160 User Manual 5.1.2 Manual Search You can search the channel(s) assigned by region. ① Move to the Search Channel menu using the “ ◀▶ ” button. ② Move to the Manual Search sub-menu using the “ ▲▼ ” button, and press the “OK” button. ③ Enter your password using the 0 ~9 buttons. -
Page 55: Edit
DVR 160 User Manual | 55 5.2 Edit You can edit channel(s), favorite channel(s). Edit Channel: Lock/delete all channel. Edit Favorite: Lock/renames channel/move/ rename favorite group. 5.2.1 Edit Channel You can edit (such as lock, delete all channel) all channels or each channel. Refer to Chapter 4.9.4 Editing Channels for more information. -
Page 56: Setup
56 | DVR 160 User Manual 5.3 Setup You can setup additional function such as Language Setting, OSD, Output Setting, Time & Timer Setting, and Lock Control. Language: Selects the language. OSD Setting: Sets the OSD. Output Setting: Sets the connected devices. -
Page 57: Osd Setting
DVR 160 User Manual | 57 5.3.2 OSD Setting You can set the interval for the program information bar hide-out. ◀▶ : Selects the desired value. ▲▼ : Moves to other items. MENU: Exits the menu. EXIT: Returns to the previous screen. -
Page 58: Time Setting
58 | DVR 160 User Manual : TV, Aspect Ratio (You can adjust 16:9 stream to 4:3 TV, In case 4:3 stream no change). TV – 4 : 3 (You can adjust 4:3 stream to 16:9 TV, In case 16:9 stream no change). -
Page 59: Lock Control
DVR 160 User Manual | 59 5.3.6 Lock Control You can prevent wrong usage by using the Install/Menu/IRD Lock and Password. ◀▶ : Selects the desired value. ▲▼ : Moves to other items. MENU: Exits the menu. EXIT: Returns to the previous screen. -
Page 60: Hdd
60 | DVR 160 User Manual 5.5 HDD You can view the hard disk information, the hard disk format, the recording, and the instant recording. HDD Information: Shows the hard disk information such as the model name, the remained storage, and etc. -
Page 61: Hdd Format
DVR 160 User Manual | 61 5.5.2 HDD Format The HDD can be formatted in this menu. This action will erase all data from the harddrive. IF you want to format, select ”Yes” in the menu. Enter the system password as confirmation. -
Page 62: File Management
62 | DVR 160 User Manual 5.5.5 Descrambling The PVR can create descrambled recording-files out of scrambled recordings. Select first the ”Method” for descrambling the files. If the setting ”weekly” is selected, enter the date and time for when the descrambling should take place. Select a time when the HDD usage is minimal. -
Page 63: Chapter 6. Appendix
DVR 160 User Manual | 63 Chapter 6 Appendix... -
Page 64: Trouble Shooting
64 | DVR 160 User Manual 6.1 Trouble Shooting If the product does not work properly after checking it, please contact your local dealer. Don't open the product. It may result in a dangerous electric shock and will invalidate your warranty... -
Page 65: Specification
DVR 160 User Manual | 65 6.2 Specification 1. Main System uPD61130 (EMMA2) CPU Speed 200 MIPS @ 167Mhz Flash Memory 4 Mbytes Graphic & System SDRAM 64 Mbytes EEPROM 128Kbit 2. Conditional Access System Smart Card Reader 1 Smart card reader for embedded CONAX CAS 3. -
Page 66: Power Supply
66 | DVR 160 User Manual 6. MPEG Transport Stream & Audio / Video Decoding MPEG-2 ISO/IEC 13818 Transport Stream Transport Stream Specification Profile Level MPEG-2 MP@ML (PIP) Aspect Ratio 4:3, 16:9, 4:3Letter box Video Resolution 720 x 576(PAL), 720 X 480(NTSC) Audio Decoding MPEG/Musicam Layer 1,2 &... - Page 67 DVR 160 User Manual | 67 9. Environment Operating Temperature +5 ~ +50 Storage Temperature -40 ~ +65 10. Physical Specification Size (W X D X H) 370 x 270 x 60 mm Weight (Net) About 3.5kg...
- Page 68 68 | DVR 160 User Manual...
-
Page 69: Chapter 7. Brand List
DVR 160 User Manual | 69 Chapter 7 Brand List... -
Page 70: Device: Tv
70 | DVR 160 User Manual 7.1 Device : TV... - Page 71 DVR 160 User Manual | 71...
- Page 72 72 | DVR 160 User Manual...
- Page 73 DVR 160 User Manual | 73...
- Page 74 74 | DVR 160 User Manual...
- Page 75 DVR 160 User Manual | 75...
- Page 76 76 | DVR 160 User Manual...
- Page 77 DVR 160 User Manual | 77...
- Page 78 78 | DVR 160 User Manual...
- Page 79 DVR 160 User Manual | 79...
- Page 80 80 | DVR 160 User Manual...
- Page 81 DVR 160 User Manual | 81...
- Page 82 82 | DVR 160 User Manual...
-
Page 83: Device: Vcr
DVR 160 User Manual | 83 .2 Device : VCR... - Page 84 84 | DVR 160 User Manual...
- Page 85 DVR 160 User Manual | 85...
- Page 86 86 | DVR 160 User Manual...
- Page 87 DVR 160 User Manual | 87...
- Page 88 88 | DVR 160 User Manual...
-
Page 89: Device: Dvd
DVR 160 User Manual | 89 7.3 Device : DVD... - Page 90 90 | DVR 160 User Manual...
- Page 91 DVR 160 User Manual | 91...
- Page 92 92 | DVR 160 User Manual WEL/DVR160/AC9411PVR/GP6/REV1.0/ENG...
Need help?
Do you have a question about the DVR 160 and is the answer not in the manual?
Questions and answers