Table of Contents
Advertisement
Available languages
Available languages
Quick Links
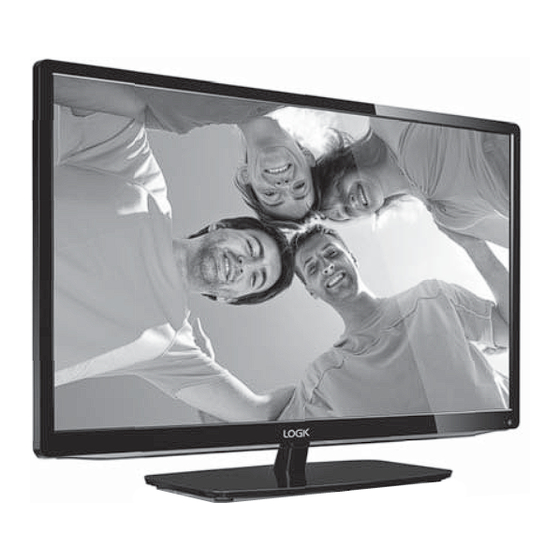
29" HD Ready LED TV
Quick Start Guide
GB
29" HD LED TV
Thank you
for purchasing your new Logik TV.
Your new TV incorporates the latest technology to enhance your viewing experience. We would suggest that you allow about 20 mins for initial setup.
Please follow this guide for a successful first time installation.
1
1
Unpacking
Remove all packaging from the TV. Retain the packaging. If you
dispose of it please do so according to any local regulations.
TV with Stand Support
Screw A x 3
TV Base
Component Adapter Cable (YPbPr)
Instruction Manual
Remote Control /
AAA Batteries x 2
Quick Start Guide
2
2
Operating Your Remote Control
1. Press and lift the back
cover up to open the
battery compartment of
the remote control.
2. Insert two AAA size
batteries. Close the
battery compartment
cover.
Install the batteries correctly by following the polarity (+
and -) indications in the battery compartment.
L29HE13N
3
3
Installing the Base Stand
screw
TV Front
Base Stand
Front
Screw A x 3
1. Lay the TV down on a flat surface with the back side facing up. Please
make sure a soft cushioned material (such as a pillow or thick piece
of foam) is placed beneath the screen.
2. To install the TV stand, first attach the base stand to the TV by using
screw A. Align the screw holes, then secure with a screw driver (not
included) using the 3 screw A provided.
4
4 4
Connecting the Aerial and the Mains Socket
1. Connect one end of the RF coaxial cable to the aerial socket on the
wall and the other end of the cable to the RF (75Ω) socket at the rear
right side of your TV.
Do not connect the TV to the mains supply until you
have completed all the connections.
2. Connect the mains cable to the mains socket after you have
completed all the connections.
3. Switch on the POWER ON/OFF switch which is located at the front
right side under the frame. At this stage, the TV switches to
standby mode. The red LED indicator will illuminate on the front
panel of the TV.
4. In standby mode, press the
button on the right side panel of the
TV or on the remote control to turn the TV on. The red LED
indicator will turn blue.
5
5
Turning the TV On for the First Time
First Time Installation
Please ensure aerial is plugged in!
Then press OK button.
1. The first time you turn the TV on, it will go
4. Press the
straight into First Time Installation menu.
DVB-C and then press the OK button to
Press the OK button to start First Time
confirm.
Installation menu.
Please select an OSD Language
Tune Type
English
esky
Suomi
Germany
Svenska
Slovak
Greece
Dansk
Norsk
Hungary
OK
2. Press the
buttons to select your
4a. If you select DVB-T, press the
desired language to be displayed on the
select DTV / ATV / ATV + DTV. Press the
menu. The default on-screen menu language
button and then press the
is set as English. Press the OK button to
to select the desired country and. Press the
confirm.
OK button to start tuning.
Mode Select
Scan type
Home Mode
Frequency
Shop Mode
Network ID
Symbol(ks/s)
OK
3. Press the
buttons to select your desired
4b. If you select DVB-C, the next step is to
configure the DVB-C system (Scan type /
mode and then press the OK button. Press the
button to select Yes to confirm or the
Frequency / Network ID / Symbol(ks/s)). Press
button to select No to cancel and return to the
the OK button to go to the tune type and
add country select menu. This step is the
Mode Select menu.
same as the DVB-T's select the tune type (DTV
/ ATV) process. Press the
select the desired country and then press the
OK button to start tuning.
Well done,
your new TV is now ready to use. You will find that there are many exciting features available. To get to know all these features, please
take some time to read the instruction manual provided with your TV.
2
To mains
socket
3
RF Coxial Cable
(not included)
COMMON INTERFACE (CI)
USB
HDMI2
HDMI1(ARC)
HEADPHONE
PC AUDIO
Channel Tuning
DVB Select type
DTV
: 3 Channel(s)
Radio : 0 Channel(s)
Data
: 0 Channel(s)
DVB-T
36%
UHF CH
DVB-C
Press [MENU] to skip.
buttons to select DVB-T /
5. Channel tuning will commence. This operation
may take up to 6 minutes. The display will
show the progress of the tuning and the
number of channels found.
Target Region Setting
DTV
During tuning your TV may have received signals
Italy
Netherlands
from more than one transmitter. If this has
Ireland
Norway
occurred the Target Region Setting screen will be
displayed. This will enable you to select the
Luxembourg
Poland
correct regional transmission for the local news
MENU
service that you require.
buttons to
Press the
buttons to adjust each option's
setting and then press the OK button to confirm.
buttons
Target Region Setting
1
Country Code
2
Primary Region
DVB-C Scan Menu
3
Secondary Region
Full
610000
4
Tertiary Region
Auto
Auto
OK
MENU
1
This will be shown as GBR for the UK.
This will show the regional country (England, Wales,
2
Scotland, NI).
3
This will allow you to set the region for your local
news service on BBC and ITV (London, Beds and
Cambs etc).
You may receive signals from more than one
4
buttons to
transmitter within the Secondary Region, (e.g Beds
and Cambs may have Luton or Sandy Heath).
1
PC IN
RF
(DTV)
GBR
England
London
(QSG-L29HE13N-130808V2-1)
Advertisement
Table of Contents

Related Manuals for Logik l29he13n


Summary of Contents for Logik l29he13n
- Page 1 (DTV) Thank you DVB-C for purchasing your new Logik TV. Press [MENU] to skip. Your new TV incorporates the latest technology to enhance your viewing experience. We would suggest that you allow about 20 mins for initial setup. 1. The first time you turn the TV on, it will go 4.
- Page 2 Takk for UHF CH (DTV) at du kjøpte ny Logik TV. DVB-C Trykk [MENU] for å hoppe over. Dette nye TV-apparatet har innebygd den nyeste teknologien for å gi deg den beste seeropplevelsen. Vi anbefaler at du setter av omtrent 20 minutter på det første oppsettet.
- Page 3 Tack för UHF CH (DTV) att du köpte din nya Logik TV. DVB-C Tryck på [MENY] för att hoppa över. Din nya TV använder den senaste tekniken för att förbättra din tittarupplevelse. Vi föreslår att du avsätter minst 20 minuter för att göra initialinställningarna.
- Page 4 : 0 Ohjelma Then press OK button. DVB-T Kiitos, UHF CH (DTV) kun ostit uuden Logik TV:n. DVB-C Paina [MENU] ohittaaksesi. Uusi TV-vastaanottimesi sisältää uusinta teknologiaa katsomiskokemuksesi parantamiseksi. Ehdotamme, että käyttäisit vähintään 20 minuuttia ensimmäiseen asennukseen. 1. Kun käynnistät TV-vastaanottimen 4.
- Page 5 (DTV) Tak for DVB-C købet af dit nye Logik tv. Tryk på [MENU] for at springe over. Dit nye tv bruger den seneste teknologi, der forbedrer gengivelsen. Vi foreslÃ¥r, at du bruger cirka 20 minutter til den indledende installation. 1. Den første gang du tænder for tv'et, åbnes 4.
- Page 6 Data Then press OK button. DVB-T Děkujeme, že jste zakoupili nový televizor Logik. DVB-C Váš nový televizor obsahuje nejnovější technologie, které vám poskytnou lepší zážitek. Doporučujeme, abyste si na přípravu k použití vyhradili přibližně 20 vyberte DVB-T / DVB-C a minut.
- Page 7 Ďakujeme vám, UHF CH (DTV) že ste si zakúpili nový televízor Logik. DVB-C Vo vašom novom TV je zabudovaná najnovšia technológia na zvýšenie vášho zážitku zo sledovania. Chceli by sme vám navrhnúť, aby ste si na počiatočné nastavenie rezervovali 20 minút.
Need help?
Do you have a question about the l29he13n and is the answer not in the manual?
Questions and answers