
Related Manuals for Yamaha NS-P350


Summary of Contents for Yamaha NS-P350
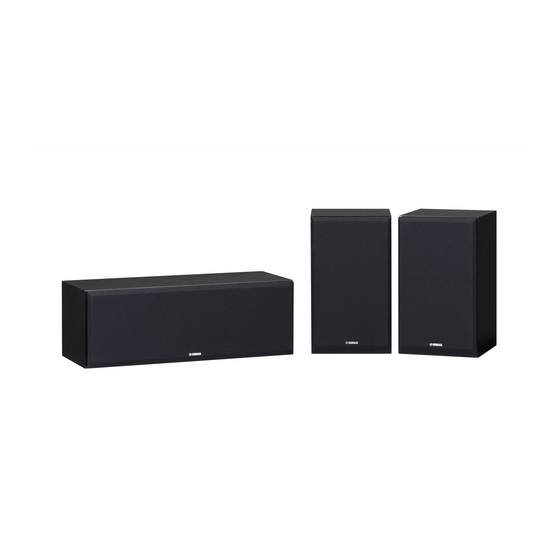
- Page 1 Speaker Package Package Enceintes NS-P350 (NS-PC350 + NS-PB350) Owner’s Manual Mode d’emploi Bedienungsanleitung Manual De Instrucciones Инструкция По Эксплуатации...
-
Page 2: Table Of Contents
Precautions Please read the following operating precautions before use. Yamaha will not be held responsible for any damage and/or injury caused by not following the cautions below. 1. To assure the finest performance, please read this Information for Users on Collection and Disposal of manual carefully. -
Page 3: Features
Features [NS-PC350] [NS-PB350] • Type: 2-way, 3-speaker acoustic suspension speaker for • Type: 2-way, 2-speaker bass-reflex speaker for main center channels channels • 2-way Acoustic Suspension • Woofer: Dual 13 cm PMD cone Tweeter: 3 cm Aluminum dome • Woofer: Dual 13 cm PMD cone Tweeter: 3 cm Aluminum dome Package contents Make sure the package contains the following items. -
Page 4: Installing The Center Speaker
Installing the speakers Installing the center speaker Place the center speaker centrally between the front speakers, facing directly forward. When placing it on a flat surface (TV rack, etc), affix the supplied fasteners to bottom of the speaker. Refer to the illustration. Fastener Note Wipe the surface clean before affixing the fasteners. -
Page 5: Connecting The Speakers
Connecting the speakers Note Make sure the power cables for your other AV components are disconnected from the AC wall outlets before making any connections. Connection diagram Front speakers Center speaker Right Left Amplifier/Receiver Note: The exact layout of the speaker terminals depends on your amplifier. -
Page 6: Connecting To An Amplifier
Connecting the speakers ■ Operating the speaker terminals Rotate the speaker terminal counterclockwise to loosen it. Tighten Loosen Insert the bare wire. Rotate the speaker terminal clockwise to tighten it. Negative (–) Positive (+) Insulation Test the security of the connection by pulling gently coating on the cable. -
Page 7: Removing / Attaching The Grille
Removing / Attaching the grille The grille is attached to protect the speaker unit, but you can remove it if necessary. To remove the grille, hold on to both sides and slowly pull straight away from the speaker. To reattach, line up the four holes on the inside surface of the grille with the four corresponding pegs on the speaker and push gently. - Page 8 Précautions Lisez attentivement les précautions d’utilisation suivantes. Yamaha décline toute responsabilité en cas de dommages et/ ou de blessures découlant du non respect de ces consignes. 1. Pour profiter au mieux de votre acquisition, lisez Information concernant la Collecte et le Traitement attentivement ce mode d’emploi.
-
Page 9: Fonctionnalités
Fonctionnalités [NS-PC350] [NS-PB350] • Type : enceinte suspension acoustique 2 voies à 3 haut- • Type : enceinte Bass-Reflex 2 voies à 2 haut-parleurs parleurs pour voies centrale pour voies principales • Haut-parleur grave : double cône PMD de 13 cm •... -
Page 10: Installation De L'enceinte Centrale
Installation des enceintes Installation de l’enceinte centrale Placez l’ e nceinte centrale exactement au milieu des enceintes avant, orientée directement vers l’avant. Quand vous les placez sur une surface plane (ou sur un meuble de téléviseur, etc.), attachez les patins antidérapants fournis sous l’... -
Page 11: Connexion Des Enceintes
Connexion des enceintes Remarque Veuillez vous assurer que votre prise d’alimentation pour vos composantes AV soit débranchée de la fiche murale CA avant de faire des connexions. Diagramme de raccordement Enceintes avant Enceinte Centrale Droite Gauche Amplificateur/Récepteur Remarque: La disposition exacte des bornes des enceintes dépend de votre amplificateur. - Page 12 Connexion des enceintes ■ Fonctionnement des bornes d’enceinte Dévissez le bouton de la borne dans le sens inverse des aiguilles d’une montre. Visser Dévisser Insérez l’extrémité dénudée. Vissez le bouton de la borne dans le sens des Négatif (–) Positif (+) aiguilles d’une montre.
-
Page 13: Enlever / Mettre La Grille
Enlever / Mettre la grille L’ e nceinte comporte un grille protégeant son haut-parleur. Si nécessaire, vous pouvez le retirer. Pour retirer la grille, tenir les deux côtés et tirer légèrement en ligne droite vers l’ e xtérieur de l’ e nceinte. Pour le remettre en place, aligner les quatre trous sur la surface intérieure de la grille avec les quatre fiches correspondantes sur l’... - Page 14 Vorsichtsmaßnahmen Bitte lesen Sie sich die folgenden Sicherheitshinweise vor der Inbetriebnahme durch. Yamaha kann für etwaige Schäden und/oder Verletzungen, die durch eine Nichtbeachtung der folgenden Sicherheitshinweise entstehen, nicht haftbar gemacht werden. 1. Um optimales Leistungsvermögen sicherzustellen, 13. Verantwortung des Anwenders. Yamaha übernimmt lesen Sie bitte diese Anleitung aufmerksam durch.
-
Page 15: Eigenschaften
Eigenschaften [NS-PC350] [NS-PB350] • Typ: 2-Weg-, 3-Wandler-Acoustic-Suspension- • Typ: 2-Weg-, 2-Wandler-Bassreflex-Lautsprecher für Lautsprecher für Center-Kanäle Hauptkanäle • Tieftöner: Doppelter 13 cm PMD-Konus • Tieftöner: Doppelter 13 cm PMD-Konus Hochtöner: 3 cm Aluminium-Kalotte Hochtöner: 3 cm Aluminium-Kalotte Lieferumfang Überprüfen Sie zunächst, ob die nachfolgend aufgeführten Teile und Geräte im Lieferumfang enthalten sind. Center-Lautsprecher Surround-Lautsprecher (NS-PC350) -
Page 16: Aufstellen Des Center-Lautsprechers
Positionierung der Lautsprechers Aufstellen des Center-Lautsprechers Stellen Sie den Center-Lautsprecher mittig zwischen die beiden Frontlautsprecher auf und richten ihn geradeaus nach vorn. Wenn Sie den Lautsprecher auf einer ebenen Oberfläche wie einem TV-Rack o. ä. aufstellen, bringen Sie die im Lieferumfang enhaltenen Haftunterlagen an der Haftunterlagen Unterseite des Lautsprechers an. -
Page 17: Anschließen Der Lautsprecher
Anschließen der Lautsprecher Hinweis Vor dem Anschließen oder Abtrennen der Lautsprecher sollten die entsprechenden AV-Geräte vom Netz getrennt werden. Anschlussschema Frontlautsprecher Center-Lautsprecher Rechts Links Verstärker/Receiver Hinweis: Die Anordnung der Lautsprecheranschlüsse richtet sich nach dem verwendeten Verstärker. Rechts Links Surround-Lautsprecher ■ Vorbereiten der Lautsprecherkabel Nach dem Aufstellen der Lautsprecher müssen Sie die Lautsprecherkabel zum Anschluss der Lautsprecher vorbereiten. - Page 18 Anschließen der Lautsprecher ■ Anschließen der Kabel an die Lautsprecherklemmen Drehen Sie die Lautsprecherklemme gegen den Uhrzeigersinn, um sie zu lösen. Festziehen Lösen Stecken Sie den blanken Draht ein. Drehen Sie die Lautsprecherklemme im Minuspol (–) Pluspol (+) Uhrzeigersinn, um sie zu sichern. Isolierungs- beschichtung Ziehen Sie vorsichtig am Kabel, um zu überprüfen,...
-
Page 19: Abnehmen / Anbringen Des Schutzgitters
Abnehmen / Anbringen des Schutzgitters Das Schutzgitter dient zum Schutz der Lautsprechereinheit. Nehmen Sie ihn bei Bedarf ab. Greifen Sie das Schutzgitter zum Abnehmen an beiden Seiten und ziehen Sie es behutsam vom Lautsprecher ab. Richten Sie zum Anbringen des Schutzgitters die vier Aufnahmen an dessen Innenseite auf die entsprechenden Haltestifte am Lautsprecher aus und drücken Sie es behutsam an. - Page 20 Precauciones Lea las siguientes precauciones de funcionamiento antes de iniciar el uso del aparato. Yamaha no se responsabilizará de cualquier daño o lesión causada por no seguir las precauciones que aparecen a continuación. 1. Para asegurar el mejor rendimiento posible, lea con Información para Usuarios sobre Recolección y...
-
Page 21: Características
Características [NS-PC350] [NS-PB350] • Tipo: Altavoz de suspensión acústica con 3 altavoces y 2 • Tipo: Altavoz de reflejo de bajos con 2 altavoces y 2 vías vías para canales central para canales principales • Graves: Altavoz con cono PMD de 13 cm dual •... -
Page 22: Instalar Los Altavoces En La Pared
Instalar los altavoces Instalar el altavoz central Sitúe el altavoz central justo entre los altavoces frontales, totalmente hacia delante. Cuando lo coloque sobre una superficie plana (estante de TV, etc.), coloque las sujeciones proporcionadas en la parte inferior del altavoz. Consulte la ilustración. Nota Sujeción Limpie la superficie antes de colocar las sujeciones. -
Page 23: Conectar Los Altavoces
Conectar los altavoces Nota Antes de realizar las conexiones, compruebe que los cables de alimentación y los otros componentes AV no estén conectados a las tomas de CA. Diagrama de conexión Altavoces frontales Altavoz central Derecha Izquierda Amplificador/Receptor Nota: La distribución exacta de los terminales del altavoz depende del amplificador. - Page 24 Conectar los altavoces ■ Utilizar los terminales del altavoz Gire el terminal del altavoz en dirección contraria a las agujas del reloj para aflojarlo. Apretar Aflojar Inserte el cable pelado. Negativo (–) Positivo (+) Gire el terminal del altavoz en dirección de las Recubrimient agujas del reloj para apretarlo.
-
Page 25: Cómo Colocar/Quitar La Rejilla
Cómo colocar/quitar la rejilla La rejilla está incluida para proteger la unidad del altavoz. Extráigala si lo cree necesario. Para retirar la rejilla, sujete los dos lados y tire lentamente para extraerla del altavoz. Para volver a colocarla, alinee los cuatro orificios de la superficie interna de la rejilla con las cuatro clavijas correspondientes del altavoz y empuje suavemente. - Page 26 Меры предосторожности Прочитайте описание следующих мер предосторожности перед использованием аппарата. Yamaha не несет ответственность за любые повреждения и (или) травмы, вызванные несоблюдением приведенных ниже мер предосторожности. 1. Для обеспечения наилучшего результата, 13. Владелец аппарата несет ответственность за его пожалуйста, внимательно изучите данную...
-
Page 27: Свойства
Свойства [NS-PC350] [NS-PB350] • Тип: 2-ходовая колонка с 3 динамиками • Тип: 2-ходовая колонка с 2 динамиками акустическая типа для Центральная каналов фазоинверторного типа для основных каналов • НЧ-динамик: два PMD конического типа • НЧ-динамик: два PMD конического типа диаметром 13 см диаметром... -
Page 28: Установка Центральной Колонки
Расположение колонок Установка центральной колонки Поместите центральную колонку посредине между фронтальными колонками, лицевой стороной к слушателю. Установите ее на ровную поверхность (тумбу для телевизора и т.п.), предварительно прикрепив к основанию колонки крепежные элементы, входящиев Крепежные элементы комплект поставки. См. рисунок. Примечание... -
Page 29: Подключение Колонок
Подключение колонок Примечание Перед выполнением каких-либо подключений убедитесь в том, что силовые кабели аудио- и видеокомпонентов отсоединены от розеток переменного тока. Схема подключения Фронтальные колонки Центральная колонка Правая сторона Левая сторона Усилитель/ресивер Примечание: Точное расположение клемм колонок зависит от используемого усилителя. Правая... - Page 30 Подключение колонок ■ Работа с клеммами колонок Ослабьте зажим клеммы, вращая ее против часовой стрелки. Затяните Ослабьте Вставьте оголенный конец кабеля в клемму. Чтобы зажать клемму, вращайте ее по часовой Черный (–) Красный (+) стрелке. Изоляционная оплётка Проверьте надежность подключения, слегка Оголённый...
-
Page 31: Снятие И Установка Сетки
Снятие и установка сетки Сетка устанавливается для защиты акустической системы, но при необходимости ее можно снять. Чтобы снять сетку, медленно потяните ее на себя, удерживая с обеих сторон. Чтобы снова установить ее, совместите четыре отверстий на внутренней поверхности сетки с четыре соответствующими выступами на колонке... - Page 32 © 2015 Yamaha Corporation Printed in Indonesia ZU72690...
Need help?
Do you have a question about the NS-P350 and is the answer not in the manual?
Questions and answers