Table of Contents
Advertisement
Quick Links
Advertisement
Chapters
Table of Contents

Subscribe to Our Youtube Channel
Related Manuals for Konica Minolta KIP 2100

Summary of Contents for Konica Minolta KIP 2100
- Page 1 2100 User Guide A.1...
-
Page 2: Before Use,
Thank you for purchasing the KIP 2100 Scanner. This User's Manual contains functional and operational explanations. Please read this User's Manual carefully before use, in order to understand the KIP 2100 Scanner completely and to use more efficiently. Keep this User's Manual for future reference. - Page 3 SAFETY WARNINGS (OBSERVE THESE WARNINGS) The following warnings are very important to use this equipment safely and to prevent the operator from danger and his/her property from being damaged. Hazardous or damage degree is classified and shown as follows when this machine is erroneously used ignoring this USER'S MANUAL.
- Page 4 WARNING Electrically ground the scanner with a ground wire. Otherwise you may receive an electric shock to include lightning strikes. If the outlet does not have a Grounding Terminal or if it is impossible to connect, call the vendor or service professional for installation. 1.
- Page 5 CAUTION Do not install the machine at the following places. 1. Humidified, damp or dusty place. 2. Unstable floor. (if the machine falls, it may cause injury.) Be careful not to catch your hand between Upper Unit and Main Unit when you close the Upper Unit.
-
Page 6: Table Of Contents
1-12 1. 6 Specifications for Scan Originals 1-13 2. 0 Basic Operation 1-15 2. 1 Turning on the KIP 2100 1-15 2. 2 Turning off the KIP 2100 1-17 2. 3 Positioning Original 1-18 2. 4 Cancelling the Current Scan 1-21 2. -
Page 7: Installation Requirements
6A or higher Frequency 50 or 60Hz. KIP 2100 can be supplied with any voltage between 100V and 240V (plus / minus 10%). If the voltage is within this range, please connect to the outlet simply. (No setting has to be changed.) 2. - Page 8 Reference Machine Noise Information Ordinance 3. GSGV January 18, 1991 : The maximum sound pressure level is equal or less than 70dB (A) according to ISO 7779. NOTE 1. For U.S.A. This device complies with part 15 of the FCC Rules. Operation is subject to the following two conditions: (1) This device may not cause harmful interference, and (2) this device must accept any interference received, including interference that may cause undesired operation.
-
Page 9: Originals Prohibited From Duplication
1. 2 Originals Prohibited from Duplication It may be illegal to duplicate or copy certain types of originals and you may be punished by local or regional laws, if copies are made of these types of originals. Please be aware of your local or regional laws and which originals they forbid you to duplicate. Some Examples: [Originals prohibited from copying by the law(s)] 1. -
Page 10: Features
Inch 36”, 34”, 30”, 24”, 22”, 18”, 17”, 12”, 11”, 8.5” High resolution Scanner Head KIP 2100 is equipped with a 600dpi CCD Heads which produces fine and distinct scans and copies. Various operations (1) Color / Monochrome scans - Mono Copies to a KIP printer (2) Color copy is available with a third party inkjet printer via KIP IPS. -
Page 11: Specifications
100 to 240V (+/-10%) Current Frequency 50/60Hz NOTE The KIP 2100 accepts the inlet voltages of 100 to 240VAC without additional voltage transformation. Power consumption 240W Environmental conditions 10 - 32.5 C ( 50 – 90F), 20 - 85 percent RH (No condensing) -
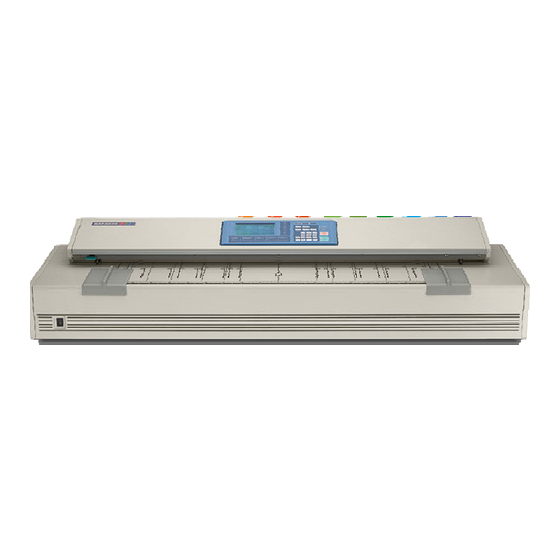
Page 12: Front View
These Trays receive the original ejected from the scanner after the scan. Power Switch Press “I” side of the Power Switch to turn on the KIP 2100, and press “O” side to turn it off. Original Receiver Place a rolled original on the Original Receivers, and feed it for scanning from this position. -
Page 13: Rear View
1. 5. 2 Rear view Name Function Earth Connect the earth wire here. USB 2.0 Terminal Connect the USB Cable here to connect to the KIP IPS or Scan PC. Chapter 1 Basic Functions... -
Page 14: Operation Panel
1. 5. 3 Operation Panel Name Function Power Save key Enters Power Save Mode. Stop / Eject key Stops the current scan. Ejects an original remained in the scanner. POWER LED Lighting green: Turned on and ready to scan Not lighting: Turned off Blinking green: Starting up Lighting red: System error ERROR LED... -
Page 15: Copy Mode Screen
1. 5. 4 Copy Mode Screen (on KIP printer’s UI) Name Function Mode Selects the “Mode” of the system. (Copy Mode for this screen shown) Media Displays Media type and quantity installed. Includes Cut Sheet Functions and Media Selection Original Type User Selects the type of original to copy. -
Page 16: Scan Mode Screen
1. 5. 5 Scan Mode Screen (on KIP printer’s UI) Name Function Mode Selects the “Mode” of the system. (Scan Mode for this screen shown) Original Size Use automatic settings or manually set width, length and rotation of the images. Original Type User Selects the type of original to copy. - Page 17 1. 5. 6 Job Info Screen (on KIP printer’s UI) Name Function Mode Selects the “Mode” of the system. (Job Mode for this screen shown) User Name – Job # Display the User and any user info of the job ID. A job can be selected for other functions noted below.
- Page 18 1. 5. 7 Information / Help Screen (on KIP printer’s UI) Name Function Mode Selects the “Mode” of the system. (Info/Help Mode for this screen shown) Meter – Versions Display the current meter counts as well as all Software/Firmware versions, IPS number, Host Name/IP (The area may vary depending on KIP printer model) KIP Contact Shows the contact information for the KIP Service and...
- Page 19 1. 6 Specifications for Originals An original must satisfy the following specifications. Thickness From 0.05mm to 1.6mm (Weight) (50g to 120g/centare) Width 210mm (8.5”) to 940mm (37” ) Length 210mm (8.5”) to 16,000mm ( 50’ ) NOTE Please select 50% or larger zoom ratio if the original is 1.2mm or thicker. Do not scan the following kinds of original, because you may damage the original or scanner itself! Sticked with paste Paste...
- Page 20 So much curled Irregular shape (Not square) K I P K I P Wet (Ink is not dried) Made of metal or cloth Metal Cloth K I P K I P Patched Clipped or stapled Clipped Stapled K I P K I P 1-15 Chapter 1 Basic Functions...
- Page 21 Rough surface Rough surface (Carbon paper for example) Punched 1-16 Chapter 1 Basic Functions...
- Page 22 3. 1 Original Misfeed If the Scanner transports an original incorrectly, the original should be removed manually by hand. CAUTION Be careful not to catch a finger in Upper Unit. 1. Pull Lever (1) upward to lift up Upper Unit fully. 2.
- Page 23 ERROR Indication 3. 2. 1 ERROR LED lights red ERROR LED (1) light red in the following situation; • An original is left on the KIP 2100’s startup. • An original is misfed. See [3. 1 Original Misfeed]. • Some errors occur on the KIP printer.
- Page 24 3. 4 Other Errors The following screens will appear on the KIP printer’s UI if some other errors occur. The screens may differ from the actual ones depending on the KIP printer model. 3. 4. 1 Top Cover Open If the scanner lid is open, the UI Screen will display the following: Press down Top Cover to close firmly.
- Page 25 Printer’s User Guide or by following the help on the Touch Screen. 3. 4. 4 Color Printer Configuration If the below dialog appears on the UI Screen, the KIP 2100 requires Color Printer Configuration. Remove the original and press OK.
- Page 26 4. 1 Cleaning Clean the following parts once a week or as needed (if dirty copies or scans appear). 4. 1. 1 Original Glass and Platen Wipe the Original Glass and the Platen with a soft Platen cloth impregnated with a little water or neutral detergent, and then wipe it with a dry soft cloth.
- Page 27 4. 1. 2 Feed Rollers Wipe the following rollers with a soft cloth impregnated with a little water or neutral detergent, and then wipe them with a dry soft cloth. Front Counter Rollers Rear Counter Rollers Front Original Feeding Rollers Rear Original Feeding Roller NOTE (1) Do not wipe the sponge rollers near the Rear...
- Page 28 NOTE Plastic sheets (2) When you clean the Rear Original Feeding Rollers, be careful not to damage the plastic sheets beside them. 1-30 Chapter 1 Basic Functions...
- Page 29 Section 2 Copy Mode - Monochrome 1. 0 Copy Mode - Monochrome..................... 2- 3 Main Screen - General ....................2- 3 Simple Copying ......................2- 4 1.2.1 Select Copy Mode ....................2- 4 1.2.2 Select Size Mode ..................... 2- 4 1.2.3 Select Original Image Type ..................
- Page 30 2.8.1 Preset Percentages....................2-25 2.8.2 Percentage Key Pad ....................2-25 2.8.3 Page Size Zoom....................... 2-26 2.8.4 Auto Zoom........................ 2-27 2.8.5 Clear......................... 2-27 Start..........................2-27 2.10 View Last........................2-27 2.11 Recall Job ........................2-27 2.12 Stop / Reset ......................... 2-28 2.13 Interrupt........................
-
Page 31: Copy Mode - Monochrome
1. 0 Copy Mode - Monochrome 1.1 Main Screen - General Name Function Mode Selects the “Mode” of the system. (Copy Mode for this screen shown) Media Displays Media type and quantity installed. Includes Cut Sheet Functions and Media Selection Original Type User Selects the type of original to copy. -
Page 32: Simple Copying
1.2 Simple Copying To copy, please follow these basic steps. The following chapters have details on adjustments and parameters that the user can change to modify the copies as required. 1.2.1 Select Copy Mode On the lower region of the Operator Panel, select “COPY”. 1.2.2 Select Size Mode Select whether the document is an engineering or architectural size document. -
Page 33: Select Original Image Type
1.2.3 Select Original Image Type Set the original image type you will copy. The selections are: Line - used for simple line documents Line / Photo - used for a combination of lines & photos documents Grayscale - used for a combination of lines & areas of shade (CAD) originals Photo - used for photographic originals... -
Page 34: Media
1.2.5 Media Selects automatic (for best possible fit) or manual roll selection. 1.2.6 Length Select Auto for automatic cut length (to the length of the original) or Standard Cut for a manual length. (A number pad will request the desired length to be entered) Section 2 Copy Mode - Monochrome... -
Page 35: Size
Using the guides on the feed table, center the original face up and push forward until the KIP 2100 accepts it. The KIP 2100 will automatically commence to copy. While this occurs the image will be displayed on the Operator Panel for your reference. -
Page 36: Operation Details
This button is used to select the Size Mode of Engineering or Architectural. This will allow the automatic width detection system to determine the image width when an original is placed in the KIP 2100. Engineering widths = 34, 22, 17, 11, and 8.5 inches... -
Page 37: Original Type
2.2.2 Original Type Select one of the four different predetermined original types. The selections are: a) Line - used for simple line documents b) Line / Photo - used for a combination of lines & photos documents c) Grayscale - used for a combination of lines & areas of shade (CAD) originals d) Photo - used for photographic originals... -
Page 38: Threshold
2.3.2 Threshold To override the “Automatic” settings, “Threshold” can be adjusted. Deselect “Auto” to enable “Threshold”. Pressing the arrows manually adjusts the threshold. This will suppress or enhance the lines and images from the original. 2.3.3 Density To override the “Automatic” settings, “Density” can be adjusted. -
Page 39: Copy Count
2.4 Copy Count In this region the number of copies, and set copy / collation can be set. 2.4.1 Arrows - Count Increase / Decrease Use the arrows to increase or decrease the total numbers of copies desired by one with each press of the button. -
Page 40: Clear
c) Copying will not commence until the set is closed. To close a set, press the start button. The set with the total number of copies will be printed. Originals An example of Set Copy: 3 originals with 3 sets or copies Copies 2.4.4 Clear... -
Page 41: Advanced Settings
2.5 Advanced Settings The Advanced Setting button contains the additional parameters on a sub screen: a) Mirror b) Invert c) Fold (if optional device connected) d) Stamp (Water Mark) e) Lead Edge Adjustment f) Trail Edge Adjustment When any of the adjustments / selections is selected, the selections will now be displayed on the main Copy screen 2.5.1 Mirror... -
Page 42: Fold
2.5.3 Fold Select “Fold” to display the fold sub screen. This will allow the selection of a “Fold Pattern” to be applied to the copy. a) Use the Arrow buttons to scroll through the available folds and select a desired fold from the list. -
Page 43: Stamp
2.5.4 Stamp Select “Stamp” to display another sub screen. This will allow the selection of a “Stamp” or “Water Mark” to be placed on the scanned image. It will be imbedded into the image. a) Use the Arrow buttons to scroll through the available stamps and select the desired stamp from the list. -
Page 44: Leading Edge Adjustment
2.5.5 Leading Edge Adjustment The leading edge of a copy can be altered. ( +/- 4” ) a) additional void area can be placed on the lead edge of a scan or b) image can be removed (such as a binding strip or a file hanger) Leading Edge + Leading Edge - Image... -
Page 45: Trailing Edge Adjustment
2.5.6 Trailing Edge Adjustment The trailing edge of each copy can be altered. ( +/- 4” ) c) Additional void area can be placed on the bottom of a copy or d) Image can be removed (such as a binding strip or a file hanger) Trail edge + Trail Edge - Image... -
Page 46: Auto
2.6.1 Auto This default setting allows the copier to automatically select the best media roll width to print the image onto. It selects the roll noting the amount of image area to prevent surplus media consumption. (applies to the option - two or more roll model) Example: 22”... -
Page 47: Enabling Cutsheet
2.6.3 Enabling Cutsheet Some KIP printers are equipped with a cut sheet feeder that can be enabled in the configuration menu of the UI. This can be accomplished by following these steps 1. Select the (?) button in the bottom left corner of the user interface. -
Page 48: Copying To Multiple Cutsheets
Select desired settings from the main copy screen. Feed your original (s) into the KIP 2100. Prepare Cut Sheet Feeder on your printer and WAIT until prompted by the UI. Insert the original into the Cut Sheet Feeder. Note: Only one cut sheet may be fed at a time and this function will time out after 3 minutes if no paper is inserted. -
Page 49: Installing Roll Media
2.6.7 Installing Roll Media When media is replaced or installed, a screen will automatically appear. This screen allows the setting of the media type and width. Please see the KIP Printer’s manual for the procedures to replace a roll of media. a) If no changes are required, press cancel b) If changes are required from the currently settings displayed, select the correct media type and size for each deck and press OK. -
Page 50: Length
2.7 Length Two methods determine the length of the copy in the KIP printer. These two methods are Auto (may also be known as Synchro Cut or Automatic Cut) and Standard Cut. 2.7.1 Auto This mode allows the media length to be determined by the original length. - Page 51 If a roll is already selected in Media, then the following screen appears now only requesting the length. b) Once the roll is determined (if so required) the length can now be set. - Standard Length - Auto Length - Custom Length c) Standard Length –...
-
Page 52: Size - Zoom
e) Custom Length – set the custom length in the key pad and press enter f) The cut length will now be displayed in the main Copy screen in the Standard Cut button. 2.8 Size – Zoom Image size / Zoom can be altered in this region on the UI. This includes automatic zooming, predetermined percentages, or ratio calculations to page size, and simply percentage increments. -
Page 53: Preset Percentages
2.8.1 Preset Percentages The KIP printer has several predetermined industry standard zoom percentages used for quick access. These can be access with the arrow buttons. The pre-programmed percentages are: 50 - 66.7 - 70.7 - 100 - 141 - 150 - 200 2.8.2 Percentage Key Pad To enter a percentage directly into the UI,... -
Page 54: Page Size Zoom
2.8.3 Page Size Zoom To enter a zoom percentage based on pages sizes into the UI: Press on the Percentage value displayed (the number is a button). This will show a keypad to enter the value. Select Standard button. Select the original page size by pressing onto the original page size button. -
Page 55: Auto Zoom
The copier is always set to “Auto Start”. That is when an originally is inserted into the KIP 2100, it will start without other user intervention. The start button is used when a job is recalled. The start button will “start”... -
Page 56: Stop / Reset
2.12 Stop / Reset This button has two functions. 1) Press the Stop button to stop the current scan. The original will be ejected automatically. If not, open Top Cover to remove the original. 2) Press the Reset button to restore the “default settings” in Copy Mode. - Page 57 Section 3 Copy Mode - Color Copy Mode – Color ......................3- 2 Main Screen - General ......................3- 2 Simple Copying ........................3- 3 1.2.1 Select Copy Mode......................3- 3 1.2.2 Select Size Mode ......................3- 3 1.2.3 Select Original Image Type....................3- 4 1.2.4 Print Quality........................3- 4 1.2.5 Copy Count ........................3- 5...
-
Page 58: Copy Mode - Color
1. 0 Copy Mode - Color 1.1 Main Screen - General Name Function Mode Select Color Mode from Mono Mode Original Size Select the size of the original in length and rotation Original Type User Selects the type of original to copy. Also select Eng/Arch Modes here. -
Page 59: Simple Copying
1.2 Simple Copying To copy, please follow these basic steps. The following chapters have details on adjustments and parameters that the user can change to modify the copies as required. Please note that a third party color printer, supported by KIP, must first be calibrated in the “?”... -
Page 60: Select Original Image Type
1.2.3 Select Original Image Type Set the original image type you will copy. The selections are: Line - used for simple color line documents Line / Photo - used for a combination of lines & photos color documents Photo - used for color photographic originals This will allow automatic image quality adjustments for the scan. -
Page 61: Copy Count
1.2.5 Copy Count Press the arrow buttons to scroll through the number of copies required or press on the actual number to set the quantity with the number pad. 1.2.6 Original Size This selects automatic (for best possible fit) or manual page size selection. Section 3 Copy Mode –... -
Page 62: Size
Using the guides on the feed table, center the original face up and push forward until the KIP 2100 accepts it. The KIP 2100 will automatically commence to copy. While this occurs the image will be displayed on the Operator Panel for your reference. -
Page 63: Operation Details
This button is used to select the Size Mode of Engineering or Architectural. This will allow the automatic width detection system to determine the image width when an original is placed in the KIP 2100. Engineering widths = 34, 22, 17, 11, and 8.5 inches... -
Page 64: Original Type
2.2.2 Original Type Select one of the three different predetermined original types. The selections are: a) Line - used for simple color line documents b) Line / Photo - used for a combination of color lines & photos c) Photo - used for color photographic originals Press the desired original setting from one of the three diagrams. -
Page 65: Copy Count
2.4 Copy Count In this region the number of copies, and set copy / collation can be set. 2.4.1 Arrows - Count Increase / Decrease Use the arrows to increase or decrease the total numbers of copies desired by one with each press of the button. -
Page 66: Set Copy
2.4.3 Set Copy Has no function in Color Copy Mode. 2.4.4 Clear Press the “eraser” button to reset the quantity to “1”. 2.5 Advanced Settings The Advanced Setting button contains the additional parameters on a sub screen: a) Mirror b) Invert c) Lead Edge Adjustment d) Trail Edge Adjustment When any of the adjustments / selections is selected, the... -
Page 67: Leading Edge Adjustment
2.5.3 Leading Edge Adjustment The leading edge of a copy can be altered. ( +/- 4” ) a) additional void area can be placed on the lead edge of a scan or b) image can be removed (such as a binding strip or a file hanger) Leading Edge Leading Edge - Image... -
Page 68: Trailing Edge Adjustment
2.5.4 Trailing Edge Adjustment The trailing edge of each copy can be altered. ( +/- 4” ) Additional void area can be placed on the bottom of a copy or Image can be removed (such as a binding strip or a file hanger) Trail edge + Trail Edge - Image... -
Page 69: Original Size
This region allows automatic or manual roll detection of the original. 2.6.1 Auto This default setting allows the KIP 2100 to automatically detect the width and length of the original. Please note the correct “Original Size Mode” in 2.2.1 must be select prior to the copy. -
Page 70: Custom
2.6.3 Custom This mode allows the original width and length to be determined by the number pad. a) Set the width of the scan. Note that these are only Standard Sizes. b) Set a Standard Length or Custom Length – set the Custom length in the key pad and press enter. -
Page 71: Rotation
2.6.4 Rotation Select the rotation to save copy media. This function may be void dependent on the third party printer ability in media width and auto rotate function programmed in the printer. Example: D Size copy may waste less media if printed 36” wide (if the printer so supports this size and is installed in the printer) rather than 24”... -
Page 72: Percentage Key Pad
2.7.2. Percentage Key Pad To enter a percentage directly: a) Press on the Percentage value displayed (the number is a button). b) This will show a keypad to enter the value (please note that the button Manual on the side is a default). c) Press the desired zoom value and press enter. -
Page 73: Clear
b) Select Standard button. c) Select the original page size by pressing onto the original page size button. d) Please note either Engineering or Architectural mode can be utilized by pressing on the button below the original page size. e) Select the desired Copy page size. Again please note either Engineering or Architectural mode can be utilized. -
Page 74: Start
The copier is always set to “Auto Start”. That is when an original is inserted into the KIP 2100, it will start without user intervention. The start button is used when a job is recalled. The start button will “start”... - Page 75 Section 4 Scan Mode - Monochrome 1. 0 Scan Mode - Monochrome ..................... 4- 2 Main Screen ......................... 4- 2 Simple Scanning ......................4- 3 1.2.1 Select Scan Mode ....................4- 3 1.2.2 Select Size Mode ..................... 4- 3 1.2.3 Select Original Image Type ..................
-
Page 76: Scan Mode - Monochrome
1. 0 Scan Mode - Monochrome 1.1 Main Screen Name Function Mode Selects the “Mode” of the system. (Scan Mode for this screen shown) Original Size Use automatic settings or manually set width, length and rotation of the images. Original Type User Selects the type of original to scan. -
Page 77: Simple Scanning
1.2 Simple Scanning To scan to file, please follow these basic steps. The following chapters have details on adjustments and parameters that the user can change to modify the scans. 1.2.1 Select Scan Mode On the lower region of the UI, select “SCAN”. 1.2.2 Select Size Mode Select whether the document is an engineering or architectural size document. -
Page 78: Select Original Image Type
1.2.3 Select Original Image Type Set the Original Image type you will scan. The selections are: Line - used for simple line documents Line / Photo - used for a combination of lines & photos documents Grayscale - used for a combination of lines & areas of shade (CAD) originals Photo - used for photographic originals This will allow automatic image quality adjustments for the scan. -
Page 79: Select Format
1.2.4 Select Format Press the button to scroll through the file formats available. TIF-G4 - tif format Group 4 level compressed - KIP format compressed CAL-G4 - Cals Group 4 level - PDF Level 3 - Design Web Format (AutoCAD) Multipage TIF-G4 - Tif format Group 4 level compressed Multipage PDF... -
Page 80: Select Mailbox
Using the guides on the feed table, center the original face up and push forward until the KIP 2100 accepts it. The KIP 2100 will automatically commence to scan. While this occurs the image will be displayed on the Operator Panel for your reference. -
Page 81: Operation Details
Image type. This will allow the automatic width detection system to determine the image width when an original is placed in the KIP 2100. (Eng) Engineering widths = 34, 22, 17, 11, and 8.5 inches (Arch) Architecture widths = 36, 30, 24, 18, 12, and 9 inches... -
Page 82: Original Type
This region is used to select the image size of the original being scanned. 2.3.1 Automatic Size For most scans, “Automatic” should be selected. This will allow the KIP 2100 to automatically determine the width and length of the scan without any user intervention. (Please also note “Original Size Mode” in 2.2) -
Page 83: Manual Size
2.3.2 Manual Size To select an original size manually, select Manual and a sub screen displays all current standard page sizes. Select a desired size of the sheet. Or use “Custom” to select a width. c) Set a standard size width. Section 4 Scan Mode - Monochrome... -
Page 84: Hard Drive Space Monitor
d) Select a standard size length or e) Select a custom length with the key pad. f) Press “Reset” to begin again, “Enter” to accept the settings or Cancel” to cancel “Manual” image size. g) The main Scan screen will now display the custom or manual size settings for the next image. -
Page 85: Rotation
2.3.4 Rotation The file can be saved rotated, from the actual feed direction. This can be used to reduce the scan time on certain orientation of originals, when they are archived. Press the “Rotation” button to select either one of four settings: 2.4 Quality This region is used to change the image quality settings from the automatic setting. -
Page 86: Density
2.4.3 Density To override the “Automatic” settings, “Density” can be adjusted. Deselect “Auto” to enable “Density”. Pressing the arrows manually adjusts the background density. This will suppress or enhance the background from the original. 2.4.4 Sharpness To override the “Automatic” settings, “Sharpness” can be adjusted. Deselect “Auto”... -
Page 87: Format
2.6 Format Press the “Format” button to toggle through the file formats available. TIF-G4 - tif format Group 4 level compressed - KIP format compressed CAL-G4 - Cals Group 4 level - PDF Level 3 - Design Web Format (AutoCAD) Multipage TIF-G4 - Tif format Group 4 level compressed Multipage PDF... -
Page 88: Advanced Settings
2.7 Advanced Settings The Advanced Setting button contains the additional parameters on a sub screen: a) Invert b) Mirror c) Stamp (Water Mark) d) Lead Edge Adjustment e) Trail Edge Adjustment Make any required adjustments / selections and press “OK” to accept. The selections will now be displayed on the main Scan screen. -
Page 89: Stamp
2.7.3 Stamp Select “Stamp” to display another sub screen. This will allow the selection of a “Stamp” or “Water Mark” to be placed on the scanned image. It will be embedded digitally into the image. a) Use the Arrow buttons to scroll through the available stamps and then select the stamp from the list. -
Page 90: Leading Edge Adjustment
2.7.4 Leading Edge Adjustment The leading edge of a scan can be altered. ( +/- 4” ) a) additional void area can be placed on the lead edge of a scan or b) image can be removed (such as a binding strip or a file hanger) Leading Edge + Leading Edge - Image... -
Page 91: Trailing Edge Adjustment
2.7.5 Trailing Edge Adjustment The trailing edge of a scan can be altered. ( +/- 4” ) c) additional void area can be placed on the bottom of a scan or d) image can be removed (such as a binding strip or a file hanger) Trail edge + Trail Edge - Image... -
Page 92: Mailbox
2.8 Mailbox This region of the Scan screen allows the user to select where the files will be placed. 2.8.1 Selecting a Mailbox a) Use the arrow keys to scroll through the list as needed. b) Select the location by pressing on it. 2.8.2 Removing a Mailbox a) Press the “-“... -
Page 93: Creating A New Mailbox
c) Press “Remove”. 2.8.3 Creating a New Mailbox a) Press the Mailbox Button. b) The Mailbox Setup screen is displayed. 4-19 Section 4 Scan Mode - Monochrome... -
Page 94: Smb Setup
c) Select Mailbox Name. A screen keyboard will be displayed. Enter the new Mailbox name. d) Enter the new location using standard protocols of networking for scans to the: IPS Mailbox Set a name for the location Examples: Dsmith B_Project Team_XYZ Michele Access to these folders and the scanned images is preformed from the KIP... -
Page 95: Network Location (Smb/Cifs) - Ips Setup
2.8.4.2 Network Location (SMB/CIFS) – IPS Setup Server Message Block/Common Internet File System (SMB/CIFS) allows the user to create a semi-permanent connection to a network resource for scan to file. Function Button Description Mailbox Name Descriptor to be displayed on SCAN screen (Preceded by SMB:) This will turn green when connected Destination IP address or NetBIOS name of destination workstation/server... - Page 96 d) Touch Domain button to enter the client authorization information. This entry will work in conjunction with the Username/Password entries as defined in later steps. c. Some facilities will have user credentials stored on a central authorization server (Domain Controller/Active Directory Server) that will grant connection access to the KIP IPS for shared resources.
- Page 97 d. If the KIP IPS is in a workgroup setting (No Domain Controller/Active Directory Server), the authorization credentials will be supplied by the destination workstation/server (WS06). If the user is connecting to a shared resource on a workstation (Scans folder) with the NetBIOS (computer) name of WS06, the user would input WS06 for the Domain section.
-
Page 98: Ftp Site
It is possible to scan all file formats to an SMB location. Please note that color image data is much larger and may take considerable network resources in order to transfer from the IPS to the SMB location. (A full color, 600 DPI, tiff packbit can be several gigabytes in size). When scanning multi page documents (PDF, DWF and TIFF), the images are scanned to a temporary location on the IPS and then transferred to the SMB location once the Close File button has been pressed. - Page 99 c) Send to the KIP IPS by using Transfer and then Upload Settings to Printer d) At the KIP IPS, enter (?) and then Service. Once you are in the Service menu, (password required) use the arrow keys at the bottom until “Import Settings” is shown (this will appear grayed out at first) touch the button labeled Touch.
-
Page 100: Start
2.9 Start No function at this time in Scan Mode. All scans in Scan Mode are “Auto Start”. 2.10 Reset / Stop This button has two functions. 1) Press the Stop button on the UI to stop the current scan. The original will be ejected automatically. - Page 101 Section 5 Scan Mode - Color 1. 0 Scan Mode – Color......................5- 2 Main Screen ......................... 5- 2 Simple Scanning ......................5- 3 1.2.1 Select Scan Mode ....................5- 3 1.2.2 Select Size Mode ..................... 5- 3 1.2.3 Select Original Image Type ..................5- 3 1.2.4 Select Format ......................
-
Page 102: Scan Mode - Color
1. 0 Scan Mode – Color 1.1 Main Screen Name Function Mode Selects “Color Mode” while in Scan mode Original Size Use automatic settings or manually set width, length and rotation of the image. Original Type User Selects the type of original to scan. Also select either Eng/Arch Mode here. -
Page 103: Simple Scanning
1.2 Simple Scanning To scan to file in color, please follow these basic steps. The following chapters have details on adjustments and parameters that the user can change to modify color scans. 1.2.1 Select Scan Mode On the lower region of the UI, select “SCAN” then select Color Mode in the upper left corner. -
Page 104: Select Format
This will allow automatic image quality adjustments for the color scan. 1.2.4 Select Format Press the button to scroll through the file formats available. JPEG PDF Color Select a desired file format. 1.2.5 Select Mailbox Select the location to where the file will be saved. -
Page 105: Insert Original
Using the guides on the feed table, center the original face up and push forward until the KIP 2100 accepts it. The KIP 2100 will automatically commence to scan. While this occurs the image will be displayed on the Operator Panel for your reference. -
Page 106: Operation Details
This button is used to select the Size Mode of Engineering or Architectural. This will allow the automatic width detection system to determine the image width when an original is placed in the KIP 2100. Engineering widths = 34, 22, 17, 11, and 8.5 inches Architectural widths = 36, 30, 24, 18, 12, and 9 inches 2.2.2... -
Page 107: Original Size
This region is used to select the image size of original being scanned. 2.3.1 Automatic Size For most scans, “Automatic” should be selected. This will allow the KIP 2100 to automatically determine the width and length of the scan without any user intervention. (Please also note “Original Size Mode” in 2.2.) 2.3.2... -
Page 108: Hard Drive Space Monitor
b) Or use Custom to select a width. c) Set the width of the scan. Note that these are only Standard Sizes. d) Set a Standard Length or Custom Length – set the Custom length in the key pad and press enter. Standard Length Custom Length e) The cut length will now be displayed in the Manual button. -
Page 109: Rotation
2.3.4 Rotation The file can be saved rotated from the actual feed direction. This can be used to reduce the scan time on certain orientation of originals, when they are archived. Press the “Rotation” button to select either one of four settings: 2.4 DPI Scroll through the DPI button to select the required scan resolution. -
Page 110: Advanced Settings
2.6 Advanced Settings The Advanced Setting button contains the additional parameters on a sub screen: a) Mirror b) Invert c) Lead Edge Adjustment d) Trail Edge Adjustment When any of the adjustments / selections is selected, the selections will now be displayed on the main Scan screen. -
Page 111: Trailing Edge Adjustment
To adjust the Leading Edge, use the arrows to denote the quantity you wish to add or remove. Touch the value displayed area to reset the quantity. 2.6.4 Trailing Edge Adjustment The trailing edge of each scan can be altered. ( +/- 4” ) c) additional void area can be placed on the bottom of a scan or d) image can be removed (such as a binding strip or a file hanger) Trail edge +... -
Page 112: Mailbox
2.7 Mailbox This region of the Scan screen allows the user to select where the color files will be placed. 2.7.1 Selecting a Mailbox a) Use the arrow keys to scroll through the list as needed. b) Select the location by pressing on it. 2.7.2 Removing a Mailbox a) Press the “-“... -
Page 113: Creating A New Mailbox
c) Press “Remove”. 2.7.3 Creating a New Mailbox a) Press the Mailbox Button. b) The Mailbox Setup screen is displayed. 5-13 Section 5 Scan Mode - Color... -
Page 114: Smb Setup
c) Select Mailbox Name. A screen keyboard will be displayed. Enter the new Mailbox name. d) Enter the new location using standard protocols of networking for scans to the: IPS Mailbox Set a name for the location Examples: Dsmith B_Project Team_XYZ Michele Access to these folders and the scanned images is preformed from the KIP... -
Page 115: Network Location (Smb/Cifs) - Ips Setup
2.7.4.2 Network Location (SMB/CIFS) – IPS Setup Server Message Block/Common Internet File System (SMB/CIFS) allows the user to create a semi-permanent connection to a network resource for scan to file. Function Button Description Mailbox Name Descriptor to be displayed on SCAN screen (Preceded by SMB:) This will turn green when connected Destination IP address or NetBIOS name of destination workstation/server... - Page 116 c. Some facilities will have user credentials stored on a central authorization server (Domain Controller/Active Directory Server) that will grant connection access to the KIP IPS for shared resources. If the KIP IPS is connecting to a workstation (WS01) that is a part of the Acme.com domain, then the user would enter Acme in the Domain section.
- Page 117 d. If the KIP IPS is in a workgroup setting (No Domain Controller/Active Directory Server), the authorization credentials will be supplied by the destination workstation/server (WS06). If the user is connecting to a shared resource on a workstation (Scans folder) with the NetBIOS (computer) name of WS06, the user would input WS06 for the Domain section.
-
Page 118: Ftp Site
It is possible to scan all file formats to an SMB location. Please note that color image data is much larger and may take considerable network resources in order to transfer from the IPS to the SMB location. (A full color, 600 DPI, tiff packbit can be several gigabytes in size). When scanning multi page documents (PDF, DWF and TIFF), the images are scanned to a temporary location on the IPS and then transferred to the SMB location once the Close File button has been pressed. - Page 119 c) Send to the KIP IPS by using Transfer and then Upload Settings to Printer d) At the KIP IPS, enter (?) and then Service. Once you are in the Service menu, (password required) use the arrow keys at the bottom until “Import Settings” is shown (this will appear grayed out at first) touch the button labeled Touch.
-
Page 120: Start
2.8 Start No function at this time in Scan Mode. All scans in Scan Mode are “Auto Start”. 2.9 Reset / Stop This button has two functions. 1) Press the Stop button to stop the current scan. The original will be ejected automatically. - Page 121 Section 6 “?” Screen 1.0 ? – Configuration Screen ...................6- 2 1.1 Overview ....................6- 2 1.2 “?” Screen – General.................6- 3 2.0 Main Screen - Details ..................6- 4 2.1 Information Region ..................6- 4 2.1.1 Meter A ..................6- 4 2.1.2 Total Run ..................6- 5 2.1.3 Meter B ..................6- 5 2.1.4 Scan Count................6- 5 2.1.5 Scan Count- Temp ..............6- 5...
-
Page 122: Configuration Screen
1.0 Help – Configuration Screen 1.1 Overview The KIP printer has the ability to display information about the system and allow detailed configuration or setting of the KIP printer for Copy and Scan modes. It also has visual user guides which can assist the user in perform the functions of the KIP printer. -
Page 123: Screen - General
1.2 “?” Screen – General No. Name Function Mode Selects the “Mode” of the system. (Help Mode shown) Information Region Displays meter counts and version number of the system. Support / Supplies Displays the contact information for technical support and printer supplies. User Guide Enters the Graphical Users Guides. -
Page 124: Main Screen - Details
2.0 Main Screen - Details 2.1 Information Region This area of the Screen includes meter counts and software versions. 2.1.1 Meter A Displays the total number of units run on the printer. This counter should match the hard counter on the right mid- front section on the printer. This unit is in square feet in North America and in Square Meters in all other countries. -
Page 125: Total Run
2.1.2 Total Run This meter counts the total number of linear meters run on the printer in all countries. One count = one linear meter NOTE The units of this counter are from the internal processor of the printer and cannot be “reset”... -
Page 126: Machine Serial Number
2.1.9 Machine Serial Number Displays the KIP printer hardware serial number, this is also located on the lower rear of the printer. NOTE If this serial number differs from the “hard coded” number on the lower rear of the printer, contact your local service company! The hard code serial number is to be taken as correct in case of any discrepancies. -
Page 127: User Guides
3.0 User Guides Press the User Guides button to gain access to the KIP printer User Guides on the KIP printer. The User guides cover the most basic functions of the system operations including media / toner replacement on the KIP printer. For comprehensive details please consult this User Manual. -
Page 128: Configuration
4.0 Configuration There are five pages in the Configuration. Page 1 of 5 4.1 Printer Density Sets the printer density for all images, including copy and print jobs. Section 6 ?” Screen... -
Page 129: Power Save Settings
4.2 Power Save Settings The KIP printer incorporates timers to save power and place the printer in “cold sleep mode” to suit individual company production requirements. These timers can be used to automatically turn off the printer when the “office is closed”, for example overnight. -
Page 130: Master Lead / Trail Adjustment
Page 2 of 5 4.4 Master Lead / Trail Adjustment The leading and trailing edges on copies or scans can be adjusted to best suit user requirements. This adjustment adds or removes image / media from all scans and copies and should be considered a default setting of such. -
Page 131: Options
4.6 Options Enables options on the KIP printer. Please contact your local dealer for more details and for the Key Code for your system. NOTE Incorrect codes will prevent your system from functioning. Please do not enter or modify the current code without your supervisor’s permission. The codes may be locked and only accessed granted by a technician. -
Page 132: Language
Page 3 of 5 4.9 Language Set the UI into a desired language. 4.10 English or Metric Units Set the system from “English Mode” to “Metric Mode” by pressing the English or Metric button. This will effect the entire KIP printer System, including Scan, Print and Copy. -
Page 133: Copy And Scan Menu Defaults
Page 4 of 5 4.11 Copy and Scan Menu Defaults Each KIP printer provides powerful options regarding the preferred condition of the system upon start up. KIP printer operators may designate features to be active when the system is powered on to ensure efficient use. 1) Set up Copy or Scan Modes in their main menu to the desired features 2) Access the configurations menu by pressing (?) 3) Select the “Configuration”... -
Page 134: Fold
4.12 Fold Sets the system to accept fold parameter loaded by KIP Request and enables the pull downs on the screens. Please contact your local certified service technician for configuration of this feature. 4.13 Cut Sheet Enables / Disables the cut sheet function, which may not be required in certain installation. -
Page 135: Reset Job Info
Page 5 of 5 4.15 Reset Job Info If the current job in the Job Info queue is printing unsuccessfully, the user can manually cancel the file within that job. This is done by going into the “Help/Info” screen and then to “Configuration”. Select the “Reset Job Info”... -
Page 136: Color Configuration
This menu will allow a) A third party color printer to be connected to the KIP IPS. b) The KIP 2100 to be calibrated to the printer and media type. This is a simple closed loop calibration. Manufacturer For color mode operation (copy / scan), select from the list your third party color printer’s manufacturer. -
Page 137: Media Type
Media Type Only some models of some manufacturers will require the media to be set. If displayed, select the media type that is loaded and will be copied onto. Color Printer Destination IP The specified printer will have an IP address assigned to spool data to it. -
Page 138: Color Printer Calibration
8.5 x 11 size (remove any excess media) and then press the Scan Calibration Target button. f) Insert the target face up in the center of the KIP 2100 noting the arrow’s direction. g) After the scan is completed, the IPS will automatically calibrate the scanner - media –... -
Page 139: Other Buttons
1. Specify your color printer. (See 5.1 to 5.4) 2. Select all of the following 4 modes. 3. Perform the above d) to g). 4. When finished all of the modes, turn the KIP 2100 off and back on again. 6.0 Other Buttons 6.1 Service This button is used to access service technician functions of the IPS. - Page 140 Section 7 Productivity Reports Productivity Reports 7- 3 Creating Productivity Reports 7- 4 2. 1 Printing 7- 5 2. 2 Scanning 7- 6 2. 3 Meter Reading 7- 7 Automatic Metering 7- 8 3. 1 Configuration of Monthly Meter Reports 7- 8 3.
- Page 141 Productivity Reports - KIP 6.2 Software The KIP Productivity Reporting is designed to use information gathered from accounting fields in KIP Request along with various applications that have been linked to KIP Request such as: KIP AutoCAD Driver KIP PrintNet KIP Windows Driver KIP 5000 Copy and Scan By sharing accounting data generated in KIP Request users have the ability to link multiple...
- Page 142 KIP 5000 User Log on Screen On the Copy / Scan screen if accounting enabled PrintNet Accounting fields entered into the Request software installed on the Web server host pc being utilized by KIP PrintNet will also be transferred to the to users accessing the PrintNet via the intranet or internet.
- Page 143 Creating Productivity Reports Productivity reports can be generated from KIP Request 6.x and can be very helpful in keeping track of accounting data. These can be generated on a daily, weekly, monthly or custom time frame. The Productivity reports can be accessed by doing the following: a) On the Request main screen select “Manage”...
- Page 144 Printing This report will include both prints and copies that have been sent to the 5000 print engine. The report will include Date, Time, Requester, Media, # of originals, # of Copies and Sq. Feet. The information for Requester and Job Number shown below are gathered from all KIP printing applications.
- Page 145 Scanning This report will include all files that have been scanned to file using the Scan Mode of the 5000 UI. The report will include Date, Time, Requester, Location, Type, Format and Sq. Feet. The information for Requester shown below is gathered from all KIP printing applications.
- Page 146 Meter Reading This report will include daily Meter readings from the desired dates set in the Start Date and End Date. The report will include Date, Meter A, Meter B (KIP 8000 Only) and Total run. This meter reading should closely match the actual meter reading on the KIP 5000 printer.
- Page 147 3.0 Automated Metering Overview The PrintNet software built into every KIP IPS includes the ability to automatically generate reports that covers a complete month of copying, scanning, and network printing. The automatic generation of Monthly Meter reports is designed to provide simple cost recovery information and general meter readings from the Log data that is stored on the IPS.
- Page 148 c) The Total Run is a meter that covers the overall total linear amount of media has been fed through the machine over the life of the printer. d) The Copy and Network Printing meters individually capture the number of square feet for copying and network printing volumes.
- Page 149 printing and copying and generally matches the mechanical meter on the front of the machine. Meter A can be reset or adjusted by a Service Technician in the Service Mode settings as shown in the Service Manual (Chapter 8) “Software Counter”.
- Page 150 3.8 Sample Report: This is an example of a Monthly Report that contains meter readings and details of copy, scan-to-file, and network printing volume. The email was sent to a local email account as well as to a cell phone/PDA. A PDF of the report is automatically included.
- Page 151 4.0 Automatic Email Reports Overview An e-mail notification system can be activated which will provide printer status information to any accessible email address. The KIP IPS utilizes the same SMTP email settings to send the email notifications. In the event that the paper or toner supply is depleted, designated users may have email alerts sent to their choice of PC, laptop, PDS, or cell phone based emails.
- Page 152 4.2 Email Address Support. The Printer Error Message can be emailed to several types of email addresses simultaneously. For example, the report could be sent to a local email address while at the same time sent to a cell phone. Each email address needs to be separated by a semi-colon.
- Page 153 KIP 2100 Image Scanner User’s Manual Version A.1 Published by Katsuragawa Electric Co., Ltd. 21-1 Shimomaruko 4-Chome, Ohta-ku, Tokyo 146-8585, Japan All rights reserved. Please note that some articles, illustrations and photographs may different from the actual machine due to modifications or new features of the machine.
Need help?
Do you have a question about the KIP 2100 and is the answer not in the manual?
Questions and answers