Table of Contents

Related Manuals for Russell Hobbs RHSM1001


Summary of Contents for Russell Hobbs RHSM1001
- Page 1 Steam & Clean Steam Mop Model Number: RHSM1001 For Customer Services & Spare Parts please call 0345 209 7461 Opening times: Monday - Friday 8am – 8pm & Saturday 9am – 1pm Or visit us at www.productcare.co.uk PLEASE RETAIN FOR FUTURE REFERENCE...
-
Page 2: Table Of Contents
18-19 Disposal information Thank you for purchasing your Russell Hobbs Steam & Clean Steam Mop. To get the best from your new cleaner, take a few moments to read these instructions, and keep them in a safe place for future reference. -
Page 3: Safety Instructions
SAFETY INSTRUCTIONS IMPORTANT SAFETY INSTRUCTIONS READ CAREFULLY AND KEEP FOR FUTURE REFERENCE WARNING: • It is hazardous for anyone other than a competent person to carry out any service or repair operation that involves the removal of a cover which gives protection against exposure to electrical parts. - Page 4 SAFETY INSTRUCTIONS IMPORTANT SAFETY INSTRUCTIONS READ CAREFULLY AND KEEP FOR FUTURE REFERENCE WARNING: • Do not direct steam at people, animals, electrical outlets, or equipment containing electrical components. • Unplug from power outlet when not in use. Do not leave steam mop unattended while plugged in.
- Page 5 SAFETY INSTRUCTIONS IMPORTANT SAFETY INSTRUCTIONS READ CAREFULLY AND KEEP FOR FUTURE REFERENCE WARNING: • The use of accessory attachments not recommended by the appliance manufacturer may cause fire, electric shock or injury. Only use the accessories supplied by the manufacturer. •...
-
Page 6: Safety Instructions
SAFETY INSTRUCTIONS IMPORTANT SAFETY INSTRUCTIONS READ CAREFULLY AND KEEP FOR FUTURE REFERENCE WARNING: • Close attention is necessary when used near children. • Do not store with a wet mop pad still attached. • Using distilled or demineralized water will maximize the performance of your steam mop. -
Page 7: Steam Mop Feature Diagram
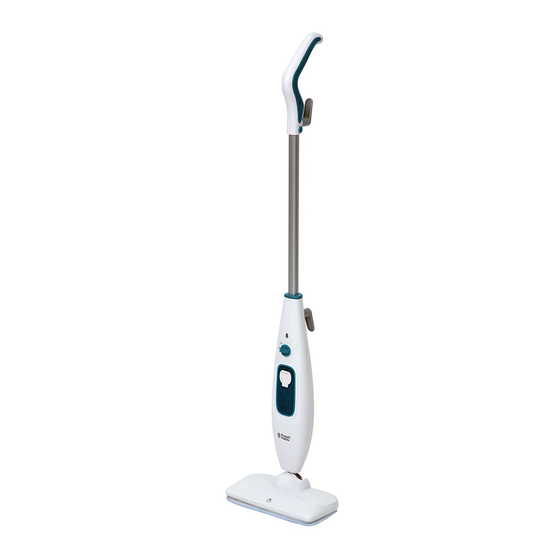
STEAM MOP FEATURE DIAGRAM Power cord Power indicator light Power dial Water tank and cap Mop head Handle top release button Quick cord release and hook Handle tube Handle assembly release button Measuring jug Microfibre mop pad Carpet glider For Customer Services & Spare Parts please call 0345 209 7461 Opening times: Monday - Friday 8am –... -
Page 8: Steam Mop Assembly
STEAM MOP ASSEMBLY Before using your steam mop: Remove all packaging and lay out the separate components. Check the steam mop after unpacking for any visual damage such as: • Misaligned or damaged parts • Damage to the main body and separate components •... - Page 9 STEAM MOP ASSEMBLY Microfibre mop pad attachment The steam mop should never be operated without the mop pad attached. To attach the pad, place it on the floor with the velcro facing upwards and removal lip to the back. Lift the mop above the pad and align the head with the mop pad.
-
Page 10: Filling The Water Tank
FILLING THE WATER TANK Note: Before filling/re-filling the water tank, unplug the steam mop. Do not touch any hot parts before allowing them to cool sufficiently. 1. Lay the steam mop horizontally. 2. Pull open the cap on the water tank. 3. -
Page 11: Using Your Steam Mop
USING YOUR STEAM MOP Preparing for use After all required parts are assembled, make sure your floors are vacuumed/swept before using the steam mop. Using 1. Twist the cord release, plug the steam mop into a mains socket and switch the power on. -
Page 12: Storing Your Steam Mop
STORING YOUR STEAM MOP After use 1. When you require a break or have finished steam cleaning, tilt the steam mop forwards so that it is stood vertical. This will stop the unit from steaming. 2. Turn the power dial to the ‘off’ position and allow the unit to cool. 3. -
Page 13: Cleaning And Care
CLEANING AND CARE Before you clean the appliance, disconnect the mains plug from the wall socket. To clean the exterior of the device, use a damp, soft cloth and mild detergent. NEVER IMMERSE THE STEAM MOP IN WATER. When wiping off the main body, do not allow moisture in the area around the indicator light. -
Page 14: Problem Solving
PROBLEM SOLVING PROBLEM POSSIBLE PROBLEM POSSIBLE SOLUTION 1. Water tank may not be 1. Make sure the water tank is filled. Refer to page 10 of filled. the instruction manual provided. 2. The unit may not be 2. Verify the unit is plugged into an approved electrical plugged in properly/the outlet and that the fuse or breaker is functioning properly. - Page 15 PROBLEM SOLVING PROBLEM POSSIBLE PROBLEM POSSIBLE SOLUTION I have lost the 1. The instruction manual 1. It is important to have a copy of the instruction manual. instruction manual has been lost or Visit www.productcare.co.uk or contact customer services provided misplaced.
-
Page 16: Guarantee And Customer Services
GUARANTEE AND CUSTOMER SERVICES At Russell Hobbs, we take all our customer feedback seriously. Feel free to contact our Product Care Team, on 0345 209 7461 Monday – Friday: 8am-8pm & Saturday: 9am – 1pm, who will be more than happy to assist you. -
Page 17: Notes
NOTES... -
Page 18: Connection To The Mains Supply
CONNECTION TO THE MAINS SUPPLY WARNING- THIS APPLIANCE MUST BE EARTHED This appliance is designed to operate from a mains supply of 220-240V~ 50Hz. Check that the voltage marked on the product corresponds with your supply voltage. This product is fitted with a 13A plug complying with BS1363. If this plug is unsuitable or needs to be replaced, refer to customer services. -
Page 19: Connection To The Mains Supply
CONNECTION TO THE MAINS SUPPLY For UK use only – PLUG • As the colours of the wires in the mains lead of this appliance may not correspond with the coloured markings identifying the terminals in your plug, proceed as follows: •... -
Page 20: For Customer Services & Spare Parts Please Call 0345 209 7461
Opening times: Monday - Friday 8am – 8pm & Saturday 9am –1pm Or visit us at www.productcare.co.uk Revision 2 Model: RHSM1001 Produced for G2S Ltd, Wigan, WN2 4AY This symbol is known as the 'Crossed-out wheelie bin Symbol'. When this symbol is marked on a product/batteries, it means that the product/batteries should not be disposed of with your general household waste.
Need help?
Do you have a question about the RHSM1001 and is the answer not in the manual?
Questions and answers