
Related Manuals for Kitsound Chorus


Summary of Contents for Kitsound Chorus
- Page 1 Chorus kitsound.co.uk soundbar system User ManUal JB. 3722 / Made in China. © KitSound™ 2015 Christchurch, Dorset, BH23 4FL, UK...
- Page 2 We are craftspeople. We are musicians. We are Kitsound ™ And we all commit ourselves to achieving one shared goal: Bringing people closer to their music. By truly understanding music we stay true to its craft. Pure, rich, incredible sound.
- Page 3 At KS we believe your music deserves to be showcased on great quality products that don’t cost the earth. We might not all share the same taste in music (the ferocious disputes on music forums prove that), but whether it’s Irish folk, death metal or any number of obscure genres which seem to be multiplying by the minute, the artists responsible for connecting with you through their craft have bared their souls to do so.
-
Page 4: Table Of Contents
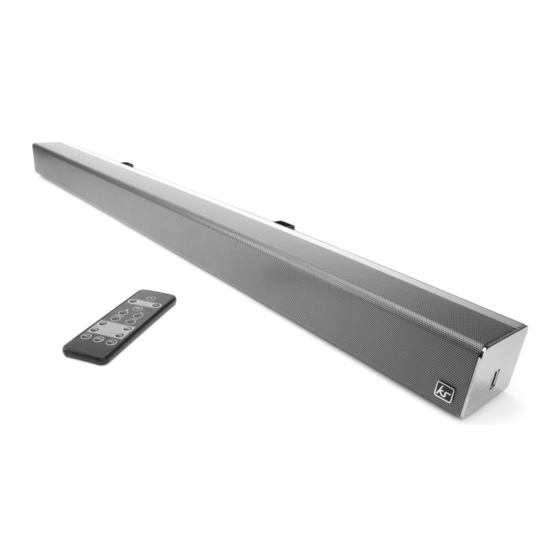
Please read this manual carefully before use. Box contents Functions • KS Chorus soundbar On the top • Wall mounting bracket A. Power and hardware B. Input C. Previous/Next track • Remote control D. Volume –/+ • UK clamp over plug On the front and side •... -
Page 5: Power
3. Press the power button (A/1) to turn the Chorus on 5. Pair 4. Press the power button (A/1) again to put the Chorus in standby mode 6. Previous/Next track 5. The Standby LED (E) will be solid red in standby mode 7. -
Page 6: Optical Input
Using an optical cable (not supplied), connect note: If your device requests a password, enter ‘0000’. one end to the optical input (I) on the Chorus, and the other to your device. note: Refer to your device’s user manual for instructions on pairing and If your TV has an optical audio output, we recommend connecting this to connecting Bluetooth devices. -
Page 7: Coaxial Input
(4) on the remote or cycle through the inputs until coaxial mode or press the play/pause button (7) on the remote activates by pressing the input button (B) on the Chorus. The display (G) 5. To skip track, use the controls on your device or press the previous/ will show ‘COAX’... - Page 8 You can plug a USB cable into the USB socket (H) to charge a smartphone 3. Place the 2 brackets on the Chorus and using Screws A x 4 supplied, device. The output voltage and current is 5 V/500 mA. Tablets will not screw them into the holes at the rear of the unit charge when connected to the USB charge port (H).
- Page 9 8. Ensure that all cables are connected to the Chorus no sound in Bluetooth mode 9. Attach the Chorus to the screws by sliding the brackets over the screws A Bluetooth connection has not been established or there are no •...
- Page 10 Drop the Chorus as this will invalidate your warranty • Bluetooth range up to 10 m Open up the Chorus. There are no user serviceable parts inside • Max output RMS 60 W Use any other mains adaptor than the one supplied •...
Need help?
Do you have a question about the Chorus and is the answer not in the manual?
Questions and answers