
Related Manuals for Apricus etc

Summary of Contents for Apricus etc
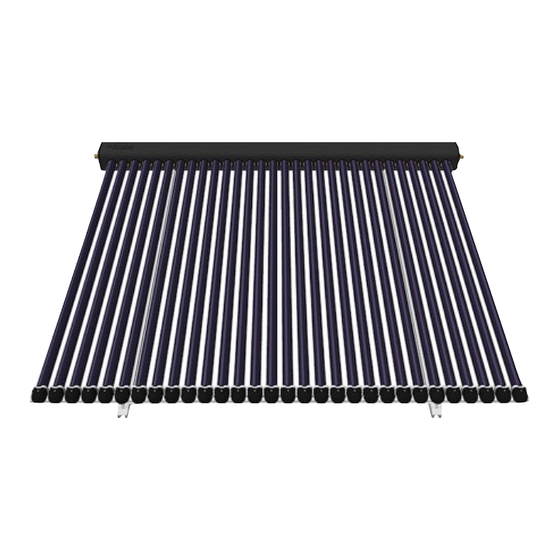
- Page 1 November 2015 ETC SOLAR COLLECTOR Installation & Operation Manual © 2015 - Apricus Solar Co., Ltd service@apricus.com www.apricus.com...
-
Page 2: Table Of Contents
Apricus ETC Solar Collector Installation and Operation Manual - International Edition Contents 1. Important Information ........................ 1.1. Scope of Manual ............................1.2. Local Standards ............................. 1.3. Authorised Person(s) ............................1.4. Component Materials ............................. 1.5. Collector Specifications ..........................2. Transport, Unpacking and Inspection .................. -
Page 3: Important Information
1.1. Scope of Manual a) This manual pertains only to the installation and operation of the Apricus ETC evacuated tube solar collector. Details for the installation, operation and maintenance of the complete solar system components should be provided separately by their respective manufacturers. -
Page 4: Collector Specifications
Apricus ETC Solar Collector Installation and Operation Manual - International Edition 1.5. Collector Specifications Not all models listed below are available in all markets. ETC-10 Dimensions (LxWxH) * 796x2005x136mm Peak Output* 671W Aperture Area 0.947m Gross Area 1.59m Gross Dry Weight... -
Page 5: Transport, Unpacking And Inspection
Do not remove and/or expose the tubes to sunlight until ready to install, otherwise the heat pipe tip will become very hot, and may cause serious skin burns. The outer glass surface will not become hot. d) Apricus does not warrant the tube or heat pipes against failure as a result of damage incurred during transport or installation. -
Page 6: System Design
Only authorised installers are permitted to install the solar collector. e) Apricus does not provide warranty coverage and will not be held liable for any damage to person or property that results from solar collectors that are installed by unauthorised persons. -
Page 7: Heat Transfer Fluids
Apricus ETC Solar Collector Installation and Operation Manual - International Edition 3.8. Heat Transfer Fluids a) In regions where freeze protection is not a concern, water is the most appropriate heat transfer fluid. Water must be potable rated (suitable for drinking) if the system is direct flow. -
Page 8: Pressure And Temperature Control And Relief
(pressure reduction) valve on the mains cold supply line. b) For closed loop systems, the recommended system pressure setting is 4 bar filling pressure, with expansion tank sized to allow maximum pressure of 5bar during stagnation. Use the Apricus toolkit to help correctly size the expansions tank. -
Page 9: Wind Loading
Insulation must be run right up to the end plates of the collector manifold and sealed with silicone sealant to prevent water ingress. d) Evacuated tubes are not susceptible to damage in cold weather, and Apricus heat pipes are protected against damage that could result from the freezing of the water inside. -
Page 10: Collector Mounting
• Adhere to relevant local safety regulations when working on roofs. 4.1. Frame Material a) Apricus ETC collectors are supplied as standard with high strength, corrosion resistant frames made from anodised aluminium alloy with marine grade 316 stainless steel fasteners (attachment plates, nuts, bolts and washers). -
Page 11: Frame Front Track & Leg Spacing
(B), locates the Front Tracks directly underneath the evacuated tubes. b) For angled frames the X Brace (EAXB- XX T) sets the standard position of the Front Tracks and Rear Legs. c) Spacing between 2 collector joined in series using Apricus connector (BF-ST-FL19xFL19) is 110mm +/- 2mm. 110mm (+/- 2mm) Front Track (EAFT) “FT”... -
Page 12: Standard Frame Overview
Apricus ETC Solar Collector Installation and Operation Manual - International Edition 4.8. Standard Frame Overview a) The ETC solar collector standard frame is suitable for flush mounting on a >20 pitched roof. b) Depending on the roof type, there are many methods of attachments formats that can be used, bolted through the sides or top of the Front Tracks. -
Page 13: Angled Frame
Extensions. c) Leg Extensions can also be used to extend the Front Track to raise the front of the collector in snowy regions. d) Diagram below shows various different mounting and adjustment hardware offered by Apricus. X Brace (EAXB-__T) Front Track (EAFT) Rear Leg (EARL-__ D) Bottom Track ... -
Page 14: Frame Attachment Option (Roof Rails)
Apricus ETC Solar Collector Installation and Operation Manual - International Edition 4.10. Frame Attachment Option (Roof Rails) a) Designed for use where Front Tracks cannot be aligned neatly with roof mounting points or where many attachment points are required to ensure suitable strength. -
Page 15: Frame Attachment Option (U Feet)
Apricus ETC Solar Collector Installation and Operation Manual - International Edition 4.11. Frame Attachment Option (U Feet) a) Ideal for flat roof mounting on concrete blocks or metal framework. b) Normally used with angled frames (rather than standard frame flush mount). -
Page 16: Frame Option (Leg Extensions)
Apricus ETC Solar Collector Installation and Operation Manual - International Edition 4.12. Frame Option (Leg Extensions) a) Extend rear legs (RL) to achieve larger installation angle. b) Extend front tracks (FT) to lift front of collector off roof in high snowfall regions. -
Page 17: Mounting Frame Leg Length & Feet Spacing
Apricus ETC Solar Collector Installation and Operation Manual - International Edition 4.13. Mounting Frame Leg Length & Feet Spacing a) Rear Legs can be adjusted between Min & Max positions to make small adjustments to the angle. b) Leg positions outside this range are not structurally sound and must not be used. -
Page 18: Mounting Frame (Depth & Height Dimensions)
Apricus ETC Solar Collector Installation and Operation Manual - International Edition 4.14. Mounting Frame (Depth & Height Dimensions) a) The following diagram and table provides the overhead depth (D) and height (H) of the collector at each 5 incremental angle between the allowable 20-80 range. ... -
Page 19: Wall Mounting
Apricus ETC Solar Collector Installation and Operation Manual - International Edition 4.15. Wall Mounting a) The collector may be mounted on a wall with the bottom of the tubes angled away from the wall. The maximum collector installation angle for this format is 80 b) Ideally use short Rear Legs (EARL-20D) attached to the bottom of the front tracks rather than the top. -
Page 20: Manifold Attachment
Apricus ETC Solar Collector Installation and Operation Manual - International Edition 4.16. Manifold Attachment a) The manifold is secured to the frame front tracks using special attachment plates that lock into grooves along the front and rear of the manifold casing. -
Page 21: Piping Connection
22mm OD copper pipe. 5.2. Pipe Size and Flow Rates a) As a general rule piping should be chosen to achieve a maximum flow speed of 1m/s. Use the Apricus toolkit to help determine suitable pipe sizes. b) Maximum total flow-rate through any collector is 15L/min (~1m/s). -
Page 22: Flow Rate & Temperature Rise
5.3. Flow Rate & Temperature Rise a) Recommended flow for ETC collectors is 0.07 L/tube/min. (ie. ETC-30 = 2 L/min). This will achieve up to 14 temperature rise in peak sunlight, and avoid excessive stop-starting during periods of lower solar insolation. -
Page 23: Pipe Insulation
Apricus ETC Solar Collector Installation and Operation Manual - International Edition b) If using a variable speed pump, a target delta-t of 7 C is recommended. c) If the system is not achieving the desired flow, troubleshooting can include: i) Checking for air lock in the collector or flow and return lines; repeat filling/air vent process. -
Page 24: Evacuated Tube Installation
Apricus ETC Solar Collector Installation and Operation Manual - International Edition 6. Evacuated Tube Installation WARNING DO NOT INSTALL THE HEAT PIPES AND EVACUATED TUBES UNTIL SYSTEM PIPING IS COMPLETED, SYSTEM IS FILLED AND THE PUMP AND CONTROLLER ARE OPERATIONAL ALWAYS WEAR SAFETY GLASSES WHEN HANDLING EVACUATED TUBES 6.1. -
Page 25: Post Installation Cleaning
Apricus ETC Solar Collector Installation and Operation Manual - International Edition g) As each tube is inserted, or alternatively once all tubes have been inserted, secure the tubes to the bottom track using the stainless steel clips as follows: 1. Line up the clip with the hook on the hole in bottom track and push down on one side until a “click”... -
Page 26: Post Installation Check
Apricus ETC Solar Collector Installation and Operation Manual - International Edition 8. Post Installation Check After installing all the tubes, and in good sunlight, the solar collector will begin to produce heat after a 5-10min “warm up” period. Check the controller and pump for correct operation and adjust settings as required. -
Page 27: Maintenance
Apricus ETC Solar Collector Installation and Operation Manual - International Edition 9. Maintenance Under normal conditions the solar collector is maintenance free. Other system components such as the pump, glycol liquid (if used) may require periodic inspection and changing/maintenance. Please refer to the documentation provided by the manufacturer of these other components. -
Page 28: Draining The Collector
Apricus ETC Solar Collector Installation and Operation Manual - International Edition 9.5. Draining the Collector a) Draining of the manifold may be required if maintaining the system or in preparation for extremely cold conditions (extended snow cover). b) Only drain systems when the collector is operating at a safe temperature (<50 c) Direct flow system draining instructions:... -
Page 29: Troubleshooting
Apricus ETC Solar Collector Installation and Operation Manual - International Edition 10. Troubleshooting In some cases it may be possible for the those inspection items with an (H) to be completed by the home-owner, but only if such investigation is clearly both SAFE and the home-owner has sufficient technical understanding. -
Page 30: Disclaimer
This booklet is only a guide and as such Apricus Solar Co., Ltd will not be held responsible for any damage to person or property that results during the installation or subsequent use of this solar collector and related system components. -
Page 31: Manufacturer's Limited Warranty
The Products are not installed or repaired in accordance with applicable local codes; We believe you will be fully satisfied by the service you receive from the local Apricus c) The Products are not installed by qualified, suitably licensed persons;... -
Page 32: Installation Record Form
Apricus ETC Solar Collector Installation and Operation Manual - International Edition 13. Installation Record Form If an installation record form is not provided with the solar system, please use this form. Customer’s Name: Address of Installation: Date of Product Installation: Installer’s Name:...
Need help?
Do you have a question about the etc and is the answer not in the manual?
Questions and answers