Table of Contents
Advertisement
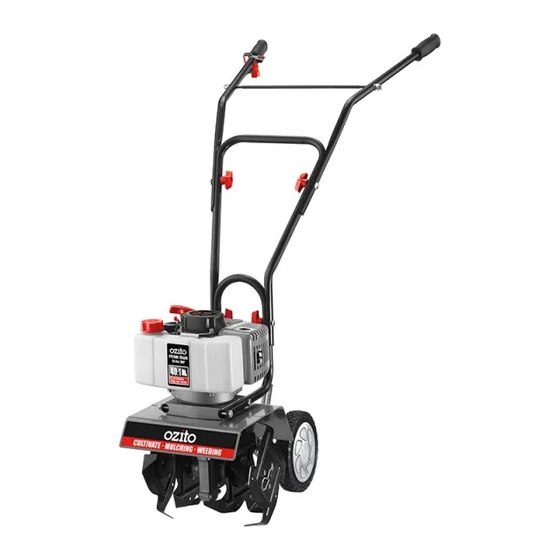
PETROL
TILLER
51.7 cc 2 HP
INSTRUCTION MANUAL
SPECIFICATIONS
Engine:
51,7cc 2 Stroke, Air Cooled
Power:
1.5kw (2HP)
Fuel & Oil Mix:
40:1
Fuel Tank Capacity:
1000ml
Starter Type:
Recoil
No Load Speed
Idle:
3000 +/- 200 rpm
Max.:
8300 +/- 300 rpm
Tilling Width:
250-300mm
Tilling Depth:
60-100mm
Net Weight:
16kgs
ozito.com.au
Spanners x 2
Cable ties x 2
Fuel mixing
5mm
bottle
Spark plug
hex key
spanner
Cross bar, spring washers x 2, nuts x2
Mid handle
frame
Handle lock knob
and bolt set x4
Right and
left handle
hex bolt and
nut set x2
Drag bar,
clevis pin
WHAT'S IN THE BOX
Petrol Tiller
Fuel Mixing Bottle
Spark Plug Spanner
Spanners, Hex Wrench &
Cable Clips
Handle Lock Knob & Bolt
Set x4, Bolt & Nut Set x 2
PTL-4300
Advertisement
Table of Contents

Subscribe to Our Youtube Channel
Related Manuals for Ozito PTL-4300


Summary of Contents for Ozito PTL-4300
-
Page 1: Specifications
Net Weight: 16kgs Cable Clips ozito.com.au Handle lock knob Handle Lock Knob & Bolt and bolt set x4 Set x4, Bolt & Nut Set x 2 Right and left handle hex bolt and nut set x2 PTL-4300 Drag bar, clevis pin... -
Page 2: Know Your Product
KNOW YOUR PRODUCT ASSEMBLY PETROL TILLER 1. ASSEMBLING THE HANDLES 1. Throttle lock-off Connection plate 2. Throttle lever Drag stake The handles and mid handle frame need to be secured in place before 3. On/Off switch 16. Fuel tank the unit can be used. 4. -
Page 3: Setup & Preparation
SETUP & PREPARATION 2. ATTACHING THE WHEEL ASSEMBLY 3. ADJUSTING THE TILLING DEPTH 1. Insert the front The drag bar is used to regulate the depth of the turning tiller tines. It also section of the serves as a brake, slowing the tiller’s forward motion, enabling the blades connection plate into to penetrate the soil. - Page 4 4. ADJUSTING THE WHEEL HEIGHT 3. Adjusting the wheel height 1. The transport wheels can be adjusted into one of three grooves in is achieved by gripping the connection plate. When tilling, adjust the wheels so that they the axle collar, forcing it are set within the top groove.
-
Page 5: Operation
OPERATION 5. FUEL 6. STARTING & STOPPING Starting WARNING!: PETROL IS VERY FLAMMABLE. AVOID Note: Do not squeeze the throttle before starting. SMOKING OR CAUSING ANY SPARKS OR FLAMES NEAR FUEL. MAKE SURE THAT YOU STOP THE MOTOR 1. Press the ignition switch on the AND ALLOW IT TO COOL BEFORE REFUELLING THE handle to the ON (I) position. -
Page 6: Operating The Tiller
OPERATION 6. STARTING & STOPPING cont. 7. OPERATING THE TILLER 6. Tilt the tiller backwards, so 1. Start the engine, tilt the unit back that the blades are clear of the on the depth stake until the blades ground. are off the ground. Disengage the throttle lock-off and squeeze the throttle lever. -
Page 7: Maintenance
Flammable material. cause severe injury. Note: Ozito Industries will not be responsible for any damage or injuries caused by the repair of the tool by an unauthorised person or by Contact with rotating Extremely hot surface. - Page 8 Tool: Tiller - 2 Stroke Model No. PTL-4300 Tool: SPARE PARTS Model No. The following is a list of spare parts carried by Ozito. Please contact Customer Service for any parts not listed. Item Item Description Part No. Description Part No.
-
Page 9: Safety Instructions
SAFETY INSTRUCTIONS RISK OF EXPLOSION OR FIRE c) Remove any adjusting key or wrench before turning the tool on. A wrench or a key that is left attached to a rotating part of the petrol tool may result in personal injury. What can happen: d) Do not overreach. -
Page 10: Warranty
• Failure to perform maintenance as set out within the instruction manual. • If the tool is disassembled or tampered with in any way. OZITO Australia/New Zealand (Head Office) 1-23 Letcon Drive, Bangholme, Victoria, Australia 3175. 0913...
Need help?
Do you have a question about the PTL-4300 and is the answer not in the manual?
Questions and answers