Table of Contents
Advertisement
Quick Links
This manual deals with the operation and care of your Volvo.
This manual deals with the operation and care of your Volvo
Welcome to the world-wide family of Volvo owners. We trust that you will enjoy many years of safe driving in your
Volvo, an automobile designed with your safety and comfort in mind. To help ensure your satisfaction with this
vehicle, we encourage you to familiarize yourself with the equipment descriptions, operating instructions and
maintenance requirements/recommendations in this manual. We also urge you and your passengers to wear seat belts
at all times in this (or any other) automobile. And, of course, please do not operate a vehicle if you may be affected by
alcohol, medication or any impairment that could hinder your ability to drive.
Your Volvo is designed to meet all applicable safety and emission standards, as evidenced by the certification labels
attached to the driver's door opening and on the left wheel housing in the engine compartment.
For further information please contact your
retailer, or:
In the USA:
Volvo Cars of North America
Customer Relations
P.O. Box 914
Rockleigh, New Jersey 07647-0914 800-663-8255
800-458-1552
We also invite you to visit our Home Page on the Internet at:
http://www.volvocars.com
Contents
Contents
Chapter 1 - Safety
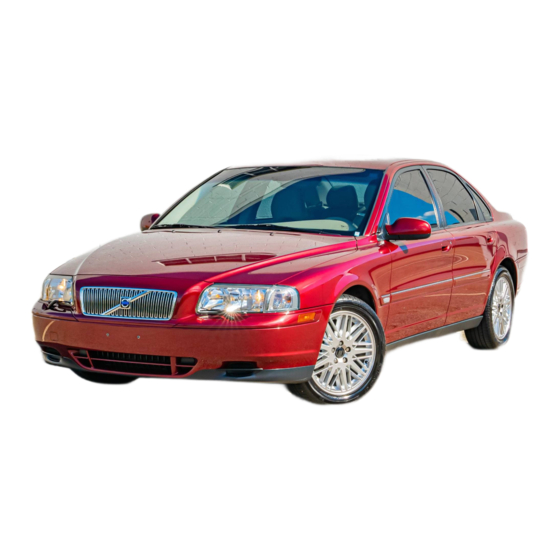
2 0 0 2
VOLVO
S80
In Canada:
Volvo Canada Ltd.
175 Gordon Baker Road
Willowdale, Ontario M2H 2N7
Advertisement
Table of Contents

Related Manuals for Volvo 2002 S80


Summary of Contents for Volvo 2002 S80
- Page 1 This manual deals with the operation and care of your Volvo Welcome to the world-wide family of Volvo owners. We trust that you will enjoy many years of safe driving in your Volvo, an automobile designed with your safety and comfort in mind. To help ensure your satisfaction with this vehicle, we encourage you to familiarize yourself with the equipment descriptions, operating instructions and maintenance requirements/recommendations in this manual.
- Page 2 Chapter 10 - Audio systems HomeLink® Universal Transceiver (option) Index Back Cover © 2001 Volvo Cars of North America Inc. General information Shiftlock When your car is parked, the gear selector is locked in the (P)ark position. To release the selector from this position, turn the ignition key to position II (or start the engine), depress the brake pedal, press the button on the front side of the gear selector and move the selector from (P)ark.
- Page 3 Volvo and the environment Volvo is committed to the well being of our customers. As a natural part of this commitment, we care about the environment in which we all live. Caring for the environment means an everyday involvement in reducing our environmental impact.
- Page 4 When you drive a Volvo, you become our partner in the work to lessen the car's impact on the environment. To reduce your vehicle's environmental impact, you can: · Maintain proper air pressure in your tires. Tests have shown decreased fuel economy with improperly inflated tires ·...
- Page 5 Volvo also believes no child should sit in the front seat of a car.
- Page 6 Seat belts Always fasten the seat belts before you drive or ride. A chime will sound several times if the driver has not fastened his seat belt. To buckle: Pull the belt out far enough to insert the latch plate into the receptacle until a distinct click is heard. The seat belt retractor is normally "unlocked"...
- Page 7 · Never repair the belt on your own; have this work done by an authorized Volvo retailer only. · Any device used to induce slack into the shoulder belt portion of the three-point belt system will have a detrimental effect on the amount of protection available to you in the event of a collision.
- Page 8 As an enhancement to the three-point seat belt system, your Volvo is equipped with a Supplemental Restraint System (SRS). The Volvo SRS consists of an airbag (2) on both the driver's and passenger's sides and seat belt tensioners in both front door pillars (4). The system is designed to supplement the protection provided by the three-point seat belt system.
- Page 9 There is no maintenance to perform on the SRS yourself. The month and year shown on the decal on the door pillar indicate when you should contact your Volvo retailer for specific servicing or replacement of airbags and seatbelt tensioners. This service must be performed by an authorized Volvo retailer.
- Page 10 This is a normal characteristic and does not indicate fire. NOTE: Volvo's dual-threshold air bags use special sensors that are integrated with the front seat buckles. The point at which the air bag deploys is determined by whether or not the seat belt is being used, as well as, the severity of the...
- Page 11 The amount of damage to the bodywork does not reliably indicate if the airbags should have deployed or not. Seat belts the heart of the Volvo safety system The heart of the Volvo safety system is the threepoint seat belt (a...
- Page 12 (see below). This may cause airbag deployment which could result in personal injury. Have the car towed to an authorized Volvo retailer for repairs. Automatic transmission: Before attempting to tow the car, use the following procedure to override the shiftlock system to move the gear selector to the neutral position.
- Page 13 9 Volvo Inflatable curtain (VIC) Volvo Inflatable curtain (VIC) This system consists of inflatable curtains located along the sides of the roof liners, stretching from the center of both front side windows to the rear edge of the rear side windows. It is designed to help protect the heads of the occupant of the front seat and the occupant of the outboard rear seat position in certain side impact collisions.
- Page 14 · The IC system is a supplement to the Side Impact Protection System. It is not designed to deploy during collisions from the front or rear of the car or in most rollover situations. · Never try to open or repair any components of the IC system. This should only be done by an authorized Volvo service technician.
-
Page 15: Instruments, Switches And Controls
2 0 0 2 VOLVO Chapter 2 - Instruments, switches and controls pg. 19 Instruments, switches and controls Interior 20 Exterior 21 Instruments 22 Instrument panel 23 Indicator and warning lights 24 Indicator and warning lights 24 Text information window 26... - Page 16 Locking and unlocking the car 56/59 Alarm Power windows Sideview mirror controls Glove compartment Automatic transmission Geartronic Parking brake Center console switches Power seat adjustment Heated seats (option) Cleaning upholstery Folding rear seat Panel for long loads Folding down head restraint Adjusting head restraint Child safety locks Integrated booster cushion...
- Page 17 Sun roof (option) Fuel tank cover Refuelling Economical driving Replacing a back-up light Replacing a brake light Replacing a tail light Replacing a direction indicator Replacing a fog light Replacing license plate lights Tires Wheels Brake system Spare wheel Changing wheels Replacing a high beam Replacing a low beam Replacing a parking light...
- Page 18 Temperature gauge Speedometer Odometer Trip odometer Warning lights Text window Tachometer Clock Ambient temperature sensor Fuel gauge Hazard warning flashers Audio system Electronic climate control Heated seats (option) Heated rear window/rearview mirrors Steering wheel adjustment Airbag Cruise control Windshield wipers/washer Turn signal lever Trip computer Audio system controls...
- Page 19 Instrument panel lighting Button to unlock fuel filler door pg. 23 Instrument panel 1 Turn signals 2 Text window 3 Temperature gauge The pointer should be approximately midway on the gauge when driving. Do not drive the car if the warning light is on. The text window will provide you with additional information. If the engine temperature remains high, check coolant level - see page 112.
- Page 20 If the light comes on (or stays on after the vehicle has started), the SRS diagnostic system has detected a fault. Drive to an authorized Volvo retailer for an inspection of the system. See the SRS section for more information.
- Page 21 117. If the light stays on after restart, have the car towed to the nearest authorized Volvo retailer. After hard driving, the light may come on occasionally when the engine is idling. This is normal, provided it goes off when the engine speed is increased.
-
Page 22: Seat Belt Reminder
NOTE: If the fuel filler cap is not closed tightly or if the engine is running when the car is refueled, the Malfunction Indicator Lamp may indicate a fault. However, your vehicle's performance will not be affected. Use only Volvo original or approved fuel filler caps. -
Page 23: Climate Control System
2 0 0 2 VOLVO Chapter 3 - Climate control system pg. 39 Climate control system Ventilation 40 Electronic Climate Control (ECC) 41 Climate control system - general information 44 pg. 40 Ventilation Air vents (dash) A Open B Closed... - Page 24 Air flow The air that is drawn into the passenger compartment is distributed from 14 ventilation points. Air vents in door pillars A Closed B Open C Horizontal air flow D Vertical air flow Direct the air vents toward the rear side windows to demist. Direct the air vents toward the rear seat for the best heating/cooling effect.
- Page 25 pg. 42 Electronic Climate Control (ECC) AUTO This function automatically regulates the Electronic Climate Control system so that the selected temperatures are maintained. The blower, heating, air distribution (air flow) and air conditioning are controlled. If you prefer to manually set any of these functions, the remaining functions will still be controlled automatically. Pressing the AUTO button overrides any settings that were previously made manually.
-
Page 26: Interior
Heated rear window/sideview mirrors This function demists/de-ices the rear window and sideview mirrors. The LED in the switch will light up to indicate that the heating function is engaged. See page 33 for additional information on this function. CAUTION: Never use ice scrapers made of metal as they can easily scratch the mirror surface. pg. - Page 27 Air flow Press AUTO to automatically regulate air flow or press any combination of the controls shown in the illustration to manually adjust air flow. An LED in the switch will light up if an air flow control has been pressed. Air conditioning ON/OFF Press the switch to turn the air conditioning on or off.
- Page 28 The air conditioning is momentarily disengaged during full-throttle acceleration. ECC maintenance All maintenance on the climate control systems should be carried out by an authorized Volvo service technician only. Refrigerant Volvo cares about the environment. The air conditioning system in your car contains a CFC-free refrigerant - R134a.
- Page 29 by repeatedly pressing Keep the following in Mind: · Make it a rule to have the air quality sensor activated at all times. · Recirculation is limited in cold climates to avoid misting up. · If misting occurs, you should deactivate the Air quality sensor. ·...
- Page 30 2 0 0 2 VOLVO Chapter 4 - Interior pg. 47 Interior Front seats 48 Coat hanger 49 Interior lighting 50 Storage compartments 51 Storage compartments in center console 52 Spare tire, Cargo net in trunk 53 Folding rear seat backrests, Carrying long loads 54 pg.
- Page 31 Move the seat as far rearward as possible for easiest access to the lumbar support control. Electrically operated seats with memory function * A Front edge of seat (raise/lower) B Forward - rearward C Rear edge of seat (raise/lower) D Backrest tilt WARNING! ·...
- Page 32 Electrically operated seats - general information Adjusting the front seats: Passengers's seat: The passenger's seat can only be adjusted if the ignition key is in position I or II (see page 48). Driver's seat: The driver's seat can be adjusted if the ignition key is in position I or II (see page 48).
- Page 33 The courtesy light timer periods can be changed.Consult your Volvo retailer. Overriding the Interior and Trunk Courtesy Lights...
- Page 34 Normally if a car door is left open with the engine turned off, the interior courtesy light will stay on for 10 minutes. Normally, if the trunk is left open with the engine turned off, the trunk courtesy lights will stay on for 10 minutes. If a car door is left open or the interior courtesy lights are turned on while the engine is left running, the interior courtesy lights will stay on indefinitely.
- Page 35 WARNING! Packages on the rear window shelf can obscure vision and may become dangerous projectiles in the event of a sudden stop or an accident. Anchor any heavy objects to help prevent them from moving during sudden stops. pg. 52 Storage compartment in center console Storage compartment in center console/cup holders ·...
- Page 36 · Press button B to open the storage space in the center console for cassettes, change holder, etc. Carry long loads The center backrest cushion folds forward, allowing you to transport long, light cargo such as skis in the trunk of your car.
- Page 37 NOTE: See page 92 for information on how the jack should be used. Cargo net in the trunk The cargo net in the trunk can be used to secure light objects.Pull the net out and slide the runner in the handle down into one of the two slots provided at the rear edge of the trunk.
- Page 38 · Pull the release control handle(s) in the trunk to release the backrest(s) (see illustration above). If the outboard rear head restraints are folded down, they should be returned to the upright position before folding the backrest down. It may be necessary to manually adjust the center head restraint. ·...
-
Page 39: Keys, Locks, Alarm
2 0 0 2 VOLVO Chapter 5 - Keys, Locks, Alarm pg. 55 Keys, Locks, Alarm Keys, Exterior courtesy lights, Locking and unlocking the car 56 Remote keyless entry system 57 Unlocking the trunk with the master key, Central locking buttons, "Trunk lock" function 59... - Page 40 The headlights, parking lights, license plate lights and the lights in the sideview mirrors will now come on and remain on for 30, 60 or 90 seconds (the time interval is at your discretion and can be changed by an authorized Volvo retailer).
- Page 41 The car can also be locked/unlocked with the key. As an extra security precaution in certain situations (valet parking, etc.), Volvo recommends that the transmitter not be included when the keys are given to anyone. The service key can be used instead. If one of the transmitters is misplaced, contact the nearest authorized Volvo retailer for assistance.
- Page 42 pg. 58 Remote keyless entry system FCC ID:LQNP2T-APU This device complies with part 15 of the FCC rules. Operation is subject to the following conditions: (1) This device may not cause harmful interference, and (2) this device must accept any interference received, including interference that may cause undesired operation.
- Page 43 pg. 59 Locking and unlocking the car Unlocking the trunk with the master key Normally, the trunk should be locked and unlocked via the central locking system using the remote control or by using the key in the driver's door lock. The master key should be used only if it is not possible to unlock the trunk via the central locking system.
- Page 44 Central locking buttons These buttons (located on the both front door armrests) can be used to lock/unlock all doors and the trunk and set the alarm. The lock buttons on all doors can be used in the same way. Valet security locking The security locking feature of your car allow you to prevent unwanted access to your trunk and glove compartment, while still allowing a parking attendant to unlock, start, and relock the rest of your car.
- Page 45 The alarm is automatically set (armed) whenever you lock your car. When armed (set), the alarm continuously monitors a number of points on the car. The following conditions will set off the alarm: · The hood is forced opened. · The trunk is forced opened. ·...
- Page 46 · LED flashes rapidly before the ignition is switched on - the alarm has been triggered · Fault in the alarm system: If a fault has been detected in the alarm system, a message will be displayed in the text window. Contact a Volvo retailer. Automatic reset function If the car is unlocked with the remote, the car will re-lock and the alarm will re-arm after 2 minutes unless a door or the trunk has been opened.
- Page 47 Child safety locks - rear doors The controls are located on the rear door jambs. Use a screwdriver to adjust these controls. A The door cannot be opened from the inside. Normal operation from the outside. B The door lock functions normally. WARNING! Remember, in the event of an accident, the rear seat passengers cannot open the doors from the inside with the buttons in position A.
-
Page 48: Starting And Driving
Fuel requirements Octane rating Volvo engines are designed for optimum performance on unleaded premium gasoline with an octane rating AKI of 91, or above. AKI (ANTI KNOCK INDEX) is an average of the Research Octane Number, RON, and the Motor Octane... - Page 49 To meet seasonal air quality standards, some areas require the use of "oxygenated" fuel. Volvo allows the use of the following "oxygenated fuels; however, the octane ratings listed on this page must still be met.
- Page 50 exhaust emission control systems on your car, lead has been strongly linked to certain forms of cancer. Many fuels contain benzene as a solvent. Unburned benzene has been strongly linked to certain forms of cancer. If you live in an area where you must fill your own gas tank, take precautions. These may include: standing upwind away from the filler nozzle while refueling refueling only at gas stations with vapor recovery systems that fully seal the mouth of the filler neck during refueling wear neoprene gloves while handling a fuel filler nozzle.
- Page 51 * If the fuel filler cap is not closed tightly or if the engine is running when the car is refueled, the Check Engine Light (Malfunction Indicator Lamp) may indicate a fault. However, your vehicle's performance will not be affected. Use only Volvo original or approved fuel filler caps. pg. 69 Starting the engine Starting the engine 1.
- Page 52 wear. · Selecting P or N when idling at a standstill for prolonged periods of time will help prevent overheating of the automatic transmission fluid. · Do not race a cold engine immediately after starting. Oil flow may not reach some lubrication points fast enough to prevent engine damage.
- Page 53 R (Reverse) Never engage R while the car is moving forward. N (Neutral) Neutral - no gear engaged. Use the parking brake. D (Drive) D is the normal driving position and should be used as often as possible to help improve fuel economy. The car should not be moving when shifting from R to the D position.
- Page 54 Automatic transmission - shift gate positions The gear selector can be moved freely between N and D. Depressing the selector knob enables you to move the gear selector to positions P, R, N, D, 3, 2 and 1. W Winter/Wet driving mode - enhanced vehicle traction ·...
- Page 55 The parking brake should also be used when parking on grades. The gear selector is mechanically locked in the P position (SHIFTLOCK). To release the gear selector from this position, the engine must be running (or the ignition key must be in position II) and the brake pedal must be depressed.
- Page 56 Depress the selector knob on the front side of the gear selector to move between the R, N, D and P positions. Please see the following page for information on using the Geartronic manual shift mode. pg. 73 Automatic transmission (Geartronic) Manual shifting - Geartronic You can move the gear selector freely between the (MAN)ual and (D)rive positions while driving.
- Page 57 Economical driving conserves natural resources Better driving economy may be obtained by thinking ahead, avoiding rapid starts and stops and adjusting the speed of your vehicle to immediate traffic conditions. Observe the following rules: · Bring the engine to normal operating temperature as soon as possible by driving with a light foot on the accelerator pedal for the first few minutes of operation.
- Page 58 WARNING! Do not remove coolant expansion tank cap. The coolant will be extremely hot. If necessary, see See page 110 for information on checking and topping-up the coolant level. Contents Top of Page...
-
Page 59: Wheels And Tires
2 0 0 2 VOLVO Chapter 7 - Wheels and tires pg. 87 Wheels and tires General information, Wear indicator, Tire economy, Flat spots 88 Snow chains, Snow tires/studded tires 89 Inflation pressure, Spare tire 90 Uniform tire quality grading 91 Changing wheels 92 pg. - Page 60 · Unbalanced wheels impair tire economy and driving comfort. · Volvo does not recommend rotating the tires. If tires are rotated, they must be kept on the same side of the car so that they revolve in the same direction as before rotation.
- Page 61 Volvo recommends 215/55 R16 winter tires on all four wheels. Winter tires wear more quickly on dry roads in warm weather. They should be removed when the winter driving season has ended.
- Page 62 Vehicle loading The tires on your Volvo will perform to specifications at all normal loads when inflated as recommended on the tire information label located on the inside of the fuel filler door. This label lists both tire and vehicle design limits.
- Page 63 Uniform tire quality grading All passenger car tires must conform to Federal Safety Requirements in addition to these grades Quality grades can be found, where applicable, on the tire sidewall between the tread should and maximum section width. For example: Treadwear 200 Traction AA Temperature A TREADWEAR The treadwear grade is a comparative rating based on the wear rate of the tire when tested under controlled conditions...
- Page 64 Changing wheels The spare wheel is located under the carpet on the trunk floor. The jack and crank are secured in the wheel recess. There are two jack attachment points on each side of the car. To change a wheel: ·...
- Page 65 NOTE: To avoid excessive wear and the necessity of rebalancing, mark and reinstall wheels in the same location and position as before removal. To lessen the chance of imbalance, each wheel hub is equipped with a guide stud to ensure that a removed wheel can be reinstalled in its original position (as when changing over to winter tires/wheels).
- Page 66 · Correct tightening torque on wheel bolts must be observed. The wheel bolts should never be greased or lubricated. The extended, chromed wheel bolts must not be used with steel rims, as they make it impossible to fit the hub caps. pg.
-
Page 67: Maintenance/Servicing
2 0 0 2 VOLVO Chapter 8 - Maintenance/Servicing pg. 95 Maintenance/Servicing Fuses 96 Replacing bulbs 100 Paint touch up 107 Washing the car 108 Cleaning the upholstery 109 Maintenance service, Warranty 110 Fuel/emissions systems 111 Drive belt, Air pump system, Coolant 112... - Page 68 If so, put in a new fuse of the same color and amperage (written on the fuse). Spare fuses are stored in the fuse box in the passenger compartment. If fuses burn out repeatedly, have the electrical system inspected by an authorized Volvo retailer. WARNING! Never use fuses with higher amperage than those stated on the following pages.
- Page 69 A - To open, press the plastic catches on the rear side of the fuse box cover and lift. Ordinary fuses Location Amperage Accessories Auxiliary lamps (option) Vacuum pump Oxygen sensors Crankcase ventilation heater, Solenoid valves Mass airflow sensor, Engine control module, Injectors 15A Throttle module AC compressor, Accelerator pedal position sensor Horn...
- Page 70 Fuse box in the passenger compartment This fuse box is located at the far left side of the instrument panel. Extra fuses and the fuse removal tool are also stored here. When replacing a blown fuse, be sure to replace it with a new one of the same color and amperage (written on the fuse).
- Page 71 Ignition switch, Relay starter motor Control module - climate control blower Central locking system, power windows, defroster, lighting, sideview mirrors, door warning lights, power sideview mirrors Power sun roof, courtesy lights, vanity mirror lights Telephone (option) Left front/rear parking lights Right front/rear parking lights, license plate lights Central electrical module, vanity mirror lighting, interior courtesy lights, power steering...
- Page 72 Trunk release Folding rear outboard head restraints Central locking system - rear doors/fuel filler door 15A Trailer (30 supply) CD changer, CD ROM, VNS, antenna Electrical module - accesories Trailer (15 supply) pg. 100 Replacing bulbs Replacing high/low beam headlight bulbs The headlight bulbs must be replaced from the engine compartment.
- Page 73 · Reinstall the plastic cover and turn it clockwise until it is correctly in place (4). "TOP" must be upward. NOTE: If the vertical aim of your headlights needs to be adjusted for any reason (e.g., towing a trailer for extended periods), this should be done by an authorized Volvo retailer. pg. 101 Replacing bulbs Front parking lights ·...
- Page 74 · Switch on the ignition to test the bulb. · Reinstall the plastic cover and turn it clockwise until it is correctly in place. "TOP" must be upward) see illustration on previous page). Front direction indicators · Switch off the ignition. ·...
- Page 75 Tail lights 1. Brake light 2. Back-up light 3. Direction indicator 4/5. Tail lights 6. Fog light (left side only) All tail light bulbs are accessed from inside the trunk. · Switch off the ignition and open the trunk. · Fold the covering panel inward to access the bulbs. When replacing right tail light bulbs, access is made easier if you pull out the cargo net in the trunk completely before folding down the panel.
- Page 76 Front fog lights (option) CAUTION: Avoid touching the glass on the bulb with your fingers. · Switch off the ignition. · Turn the bulb holder slightly counterclockwise to release it. · Replace the bulb. The shape of the foot of the bulb corresponds to the shape of the bulb holder. ·...
- Page 77 Side direction indicator · Open the front door halfway. · From the inside of the fender, push the lamp housing out. · Turn the bulb holder 1/4 turn counterclockwise and pull it out from the lens. · Remove the defective bulb by pulling it straight out. ·...
- Page 78 Rear door step lights · Carefully insert a screwdriver and pry out the lens. · Disconnect the wiring from the lamp housing. · Remove the lens from the lamp housing by pressing the two side catches out. · Pull out the defective bulb and replace it. ·...
-
Page 79: Specifications
124 Label information 1 Vehicle Emission Control Information Your Volvo is designed to meet all applicable emission standards, as evidenced by the certification label on the underside of the hood. For further information regarding these regulations, please consult your Volvo retailer. - Page 80 (Canada) Your Volvo is designed to meet all applicable safety standards, as evidenced by the certification label on the facing side of the driver's door. For further information regarding these regulations, please consult your Volvo retailer. 7 Child safety latch label * The Vehicle Identification Number (VIN) should always be quoted in all correspondence concerning your vehicle with the retailer and when ordering parts.
- Page 81 ** See also section "Trailer towing" All specifications are subject to change without prior notice. pg.126 Engine/transmission specifications Engine specifications Designation: Volvo B 6284 T Output 268 hp at 5200 rpm (200 KW/87 rps) Max torque 280 ft. lbs. at 1800-5000 rpm (380 Nm at 35-83 rps)
- Page 82 Engine oil Meeting minimum ILSAC specification GF-2, including ACEA A1, API SJ, SJ/CF and SJ/Energy Conserving. Extra oil additives must not be used unless advised by an authorized Volvo retailer. Volume: (including filter): Normally-aspirated 6-cylinder engine - 7.3 US qts (6.9 liters).
- Page 83 Coolant: Volvo original coolant/antifreeze. Volume: Normally-aspirated 6-cylinder engine - 9.3 US qts (8.8 liters). Turbo 6-cylinder engine - 10.1 US qts (9.6 liters). Power steering fluid ATF fluid. Volume:6 cyl engine - 0.95 US qt (0.9 liter). Brake fluid DOT 4+ boiling point > 536°F (280° C) P/N 9437433 Volume: 0.6 US qt (0.6 liter)
- Page 84 Vehicle loading The tires on your Volvo should perform to specifications at all normal loads when inflated as recommended on the tire information label. The label is located on the inside of the fuel tank cover. The label lists both tire and vehicle design limits.
- Page 85 SV 8.5 Rear reading lights W2.1x9.5d Sideview mirror W2.1x9.5d All specifications are subject to change without prior notice. pg. 130 Volvo On Call Your new Volvo comes with a four year ON CALL road assistance. Additional information, features, and benefits are...
- Page 86 1-800-263-0475 Technician certification In addition to Volvo factory training, Volvo supports certification by the National Institute for Automotive Excellence (A.S.E.). Certified technicians have demonstrated a high degree of competence in specific areas. Besides passing exams, each technician must also have worked in the field for two or more years before a certificate is issued. These professional technicians are best able to analyze vehicle problems and perform the necessary service procedures to keep your Volvo at peak operating condition.
-
Page 87: Audio Systems
2 0 0 2 VOLVO Chapter 10 - Audio systems pg. 131 Audio systems HU-611 overview 132 HU-801 overview 133 Functions 134 Specifications 145 General information 146 HomeLink¨ Unversal Transceiver (option) 147 NOTE: The text on the face of the radio, describing the button functions, may vary slightly depending on which audio system you have in your car. - Page 88 CD changer TV (option on certain models) 4. Fader - press and turn Balance - press, pull and turn 5. Radio - Station seek up/down Cassette - selecting next/previous track CD - Selecting next/previous track 6. Radio - Manual station selection Cassette - Fast winding forward/backward CD - Fast forwards/backward 7.
- Page 89 Internal CD changer Station scan - press TV (option on certain models) External CD changer (option) 7. Radio - Station seek up/down CD - Selecting next/previous track 8. Radio - Manual station selection CD - Fast forward/backward 9. CD eject 10.
- Page 90 Adjust the bass by pressing the button to extend the control and turning it to the left (less bass) or to the right (more bass). A "detent" indicates "equalized" bass. Press the button back in when you have made the adjustment. Treble Adjust the treble by pressing the button to extend the control, pulling it out as far as possible, and then turning it to the left...
- Page 91 "detent" indicates "equalized" balance. Press the button back in when you have made the adjustment. A - Setting station Press the left side of the button to select lower frequencies and the right side for higher frequencies. Set frequencies are displayed.
- Page 92 Volvo was among the first to pioneer this technology throughout Europe and it is slowly making its way to North America. Coverage by local broadcasters may be limited at this time, but as the technology and benefits grow, you will find the radio in your car is equipped to take advantage of this system.
- Page 93 Traffic information (TP) - HU-801 only This feature may not be apply in your area and only functions with FM broadcasts. Push the "TP" button for traffic information from RDS stations. "TP" is displayed when the function is connected. When the unit is in Cassette or CD mode, the FM radio function will seek in the background for a station with a strong signal broadcasting traffic information.
- Page 94 Program types (HU-801 only) Program type Text displayed News News Information Inform Sports Sports Talk Talk Rock Rock Classic rock Cls_Rock Adult hits Adlt_Hit Soft rock Soft_Rck Top 40 Top_40 Country Country Oldies Oldies Soft Soft Nostalgia Nostalga Jazz Jazz Classical Classicl Rhythm and Blues...
- Page 95 1. Press "PTY" button to initiate the function. The currently tuned station's program type is displayed. 2. Scroll through the list of program types by turning the "1-20/DISC" button. 3. When you have reached the program type you require press the "1-20/DISC" button to begin the search. 4.
- Page 96 2 0 0 2 VOLVO HomeLink® Universal Transceiver (option) pg. 147 HomeLink® Universal Transceiver (option) HomeLink® Universal Transceiver HomeLink® is an advanced system that can be programmed to learn the codes of three different remote controlled- devices (e.g., garage door openers, remote lighting, entry door lock). HomeLink®'s sun visor-mounted transceiver, powered by your car's electrical system, may then be used in place of your hand-held remote controls..
- Page 97 been successfully programmed. Release both buttons. 5. If you are programming a rolling code-equipped device (e.g., garage door opener or entry door lock), refer to "Programming rolling codes" on the next page to complete the programming process. Repeat steps 3 and 4 to program the other two transceiver buttons.
- Page 98 Some garage door openers may require you to do this procedure a third time to complete the training. The programmed button on your HomeLink® Universal Transceiver should now operate your garage door opener. The original hand-held transmitter can also be used, if necessary, to operate the garage door.
- Page 99 car. · Metallic sun protection films should not be used on any windows in a car equipped with HomeLink® Universal Transceiver. This could interfere with the transceiver's function. Contents Top of Page...
-
Page 100: Index
2 0 0 2 VOLVO Index pg.162 Index ABS..17 ABS - warning light..25 Accessory lights..27 Adjusting the steering wheel..32 Advanced User Mode (AUM) - radio..139 Air conditioning..41- 45 Air pump system..112 Air vents..40 Airbag (SIPS)..8 Airbag (SRS)..4 Alarm..61, 62 Alarm - "panic" function..61 ALR/ELR..14... - Page 101 ..Kickdown..72 ..Specifications..126 Automatic transmission - cold starts..71 Auxiliary socket..27, Backrests, rear seat - folding..54 Battery..83, Battery maintenance..119 -120 Replacing the battery..120 Ventilation hose..120 Blinds - rear/side rear windows..38 Booster cushion..13, 15 Booster cushion - integrated..13 Brake failure warning light ..24 Brake fluid..118, Brake system..16...
- Page 102 Dimensions..125 Direction indicator bulbs (front)..101 Direction indicators..31 Distributor ignition system..128 Door step courtesy lights - replacing..104 Doors and locks..56 Drive belt..112 Driver's seat and remote keyless entry system..49 Driving economy..74 Driving mode indicator..23 Driving mode W..71, Driving with trunk open..75 Economical driving..74 Electrical system..129 Electrical system - general information..75...
- Page 103 Front fog lights..30 Front fog lights - replacing ..103 Front reading lights..50 Front seats - adjusting..48 Front seats - heated..33 Front suspension..128 Fuel..66, Fuel filler cap..68 Fuel filler door..68 Fuel gauge..23 Fuel requirements..66 Fuel system..111, Fuel/emissions systems..111 Fuses..96 - 99 Gas cap..68 Gasoline..66 Gear indicator..23...
- Page 104 Instrument illumination..30 Instrument panel..23 Instruments..22 Integrated booster cushion ..13 Interior Air Quality system ..45 Interior features - overview..20 Interior lighting..50 ISOFIX fasteners..12 Jack..53, 92, 93 Jump starting..82 Key - removing from ignition switch..69 Keyless entry system..57, 58 Keyless entry system - replacing batteries..58 Keylock..69 Keys..56 Kickdown..72...
-
Page 105: Seat Belts
Paint touch-up..107 Panic function (alarm)..61 Parking brake..34 Parking brake reminder light..24 Parking lights..30 Passenger's seat backrest - folding..49 Polishing..109 Power seats..48 Power steering - speed-sensitive..75 Power steering fluid ..118, Power windows..35 PROPOSITION 65 WARNING..119 Reading lights - front/rear ..50 Rear door step lights - replacing..104 Rear fog light..25,... - Page 106 Shiftlock..69, 70, 72 Side direction indicator - replacing..103 Side impact airbag system (SIPS)..8 Side marker lights - replacing..105 Sideview mirrors..36 Sideview mirrors - folding ..27 Sideview mirrors - heated..33 Sideview mirrors - memory function..36 Snow chains..89 Snow tires..89 Spare tire..Spark plugs..128 Specifications..126 Speed-sensitive power steering..75...
-
Page 107: Whiplash Protection System (Whips)
Unlocking the trunk with key..59 Upholstery - cleaning..109 Vanity mirror lights - replacing..103 Vehicle Identification Number (VIN)..124 Vehicle loading..128 Ventilation..40 Volumes (oils and fluids) ..127 Volvo On Call..130 Warning flashers..33 Warning light - center..24 Warning lights..24, 25 Warranty..110 Washer fluid reservoir..114 Washer fluid solvent..83 Washing the car..108, 109... - Page 108 Contents Top of Page...
-
Page 109: Back Cover
When used properly and safely, they enrich the driving experience. Improperly used, any of these could cause a distraction. For all of these systems, we want to provide the following warning that reflects the strong Volvo concern for your safety: Never use these devices or any feature of your vehicle in a way that distracts you from the task of driving safely. - Page 110 the vehicle and others sharing the roadway. Avoiding distractions is part of that responsibility. The following should be checked regularly: * 1 Washer fluid reservoir should be filled with water and solvent (wintertime: windshield washer anti-freeze). See page 114. 2 Power steering - When cold, the level must not be above the COLD mark and when hot it must not be above the HOT mark.
- Page 111 Bulbs Power Socket US no. Bulb Power Socket US no. 55 W H 7 21 W BAU 15s 21 W BA 15s 1156 W 2.1x9.5d - 55 W H 1 BA 15s Contents Top of Page...
Need help?
Do you have a question about the 2002 S80 and is the answer not in the manual?
Questions and answers