
Subscribe to Our Youtube Channel
Related Manuals for SCS CL 3622


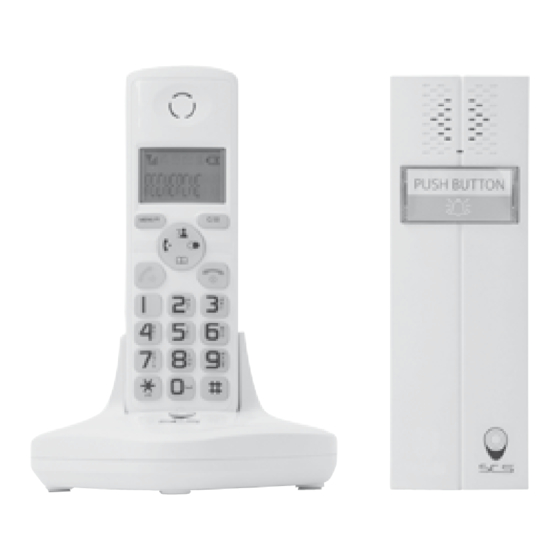
Summary of Contents for SCS CL 3622
- Page 1 portier audio sans fil Manuel d’installation téléphone DECT et d’utilisation blanc noir V.07-2014 / Ind.C...
-
Page 2: Table Of Contents
■ Sommaire : Avertissement Contenu kit Utilisation Fonctionnalités Installation Informations complémentaires Informations techniques Dépannage - 2 -... -
Page 3: Avertissement
Ne laissez pas les enfants jouer avec le produit ou avec les emballages. Il est impératif de garder une preuve d’achat durant toute la période de garantie. Hotline assistance technique au 0 892 350 490 (0.34 € TTC la minute) Horaire hotline : voir sur le site internet www.scs-laboutique.com - 3 -... -
Page 4: Contenu Kit
Unpacking Contenu kit ■ la composition de votre kit : Once you have unpacked your door phone, make sure that all the parts shown below are available. If Unpacking any pieces are missing or broken, please promptly call your dealer. Once you have unpacked your door phone, make sure that all the parts shown below are available. -
Page 5: Utilisation
Utilisation ■ Les commandes Combiné Phone Layout and Keys Function Indoor phone Handset Haut-parleur Earpiece touche Menu / OK Menu/OK key Display Annulation/ Haut-parleur Up/CID key Accès au Speaker coupure du micro Cancel/Mute key MENU/R MENU/R répertoire/au Left/Int key journal d’apel/ Right/Redial key touche «bis»... - Page 6 Utilisation Platine de rue Phone Layout and Keys Function (continued) Phone Layout and Keys Function (continued) Outdoor station Outdoor station Rear View vue arrière Rear View bouton Call button d’appel Call button 1- Entrée positive 12V DC 2. Entrée négative 12V DC 3.
- Page 7 Phone Layout and Keys Function (continued) Base Indoor phone (Base) arrière et vue de côté connectique pour Rear and bottom View recharger Charge pins Prise ligne Prise d’alimentation Phone Power Jack téléphonique Line Jack Bouton Page button page - 7 -...
- Page 8 Utilisation Réglages et mise en fonctionnement ■ Réglages et mise en fonctionnement Le combiné et sa platine de rue doivent être appairés pour pouvoir fonctionner ensemble. Cette opération est effectuée en usine. Si toutefois il s’avère nécessaire de refaire l’appairage, la procédure est la suivante : >...
- Page 9 Utilisation > Appuyez sur le bouton d’appel de la platine de rue, puis à l’aide d’un outil fin, maintenez la touche d’appairage de la platine de rue pendant au moins 5 secondes. > L’appairage est terminé. - 9 -...
- Page 10 Utilisation ■ Appel interne Appel interne > Un appui sur le porte-nom de la platine de rue fait retentir la sonnerie du combiné pendant quelques secondes. > Décrochez avec la touche pour parler avec votre visiteur. > Si vous avez installé le module de commande de gâche, maintenez la touche enfoncée pendant au moins 1 seconde pour déclencher l’ouverture.
- Page 11 Utilisation ■ Appel externe Appel externe > Une fois connecté au réseau téléphonique, votre interphone audio sans fil se comporte comme un téléphone conventionnel. > Pour passer un appel téléphonique, décrochez avec la touche puis composez le numéro de téléphone. >...
- Page 12 base de recharge de votre combiné et doit être aisément Utilisation accessible. ■ Vérifiez que vous avez intégré toutes les consignes ci-dessous : Vérifiez que vous avez intégré toutes les consignes ci-dessous. Ne laissez pas les enfants manipuler le produit. L’adaptateur secteur doit être branché...
- Page 13 Utilisation Installing Batteries (continued) ■ Remplacement des piles de la platine de rue Remplacement des piles de la platine reset the handset Outdoor station de rue You can install two C size batteries (not supplied) before using the outdoor station. >...
- Page 14 Utilisation 600mAh) come with your phone. Install the batteries ■ Remplacement des piles du combiné before use. Remplacement des piles du combiné Remplacement des piles du combiné Slide the battery cover in the direction of the > Utilisez 2 piles rechargeables 1,2V NiMH. arrow and pull it out.
-
Page 15: Fonctionnalités
fonctionnalité Symboles à l’écran ■ Symboles à l’écran : > Témoin de qualité du signal : est allumé fixe lorsque le combiné est à portée de la base, clignote si le combiné est trop éloigné de la base. > Témoin de communication : apparaît à l’écran lors de la prise de communication téléphonique ou lors de la prise d’un appel de la platine de rue. - Page 16 fonctionnalité ■ touches et fonctions : Touches et fonctions > Accès au menu de réglages depuis l’écran principal. > Validation de l’option/ l’opération en cours. > Annulation de l’option/l’opération en cours. > En cours de communication : coupure du micro (mode secret).
- Page 17 > Navigation vers la droite. fonctionnalité > Recomposition du dernier numéro appelé (fonction bis). > Navigation vers le bas. > Accès au répertoire. Clavier > Saisie de caractères ou de lettres (voir ci-après). alpha- numérique > Saisie du caractère «*». >...
- Page 18 fonctionnalité Saisie de texte ■ Saisie de texte > Si la saisie d’un texte est nécessaire (pour entrer le nom d’un contact dans le répertoire par exemple), la saisie se fait à l’aide du clavier alphanumérique : Touche 1er appui 2ème appui 3ème appui 4ème appui 5ème appui [espace] &...
- Page 19 fonctionnalité > Pour accéder au menu de configuration, appuyez sur la Configuration et fonctions avancées ■ Configuration et fonctions avancées touche > Pour accéder au menu de configuration, appuyez sur la > Utilisez ensuite les touches pour faire défiler les touche différents sous-menus ou options.
- Page 20 fonctionnalité ■ Menu «répertoire» Menu «Répertoire» Permet d’enregistrer les noms et numéros des personnes susceptibles d’appeler/ fréquemment appelées pour éviter d’avoir à saisir le numéro de téléphone. > Ajout fiche : permet d’ajouter une nouvelle entrée. Le combiné indique et attend successivement le nom, le numéro et la sonnerie à...
- Page 21 fonctionnalité Menu «Réglages BS» ■ Menu «réglages BS» Permet d’accéder aux réglages propres à la base du téléphone connectée au réseau téléphonique. > Sup combiné : permet de supprimer le combiné utilisé de la mémoire de la base. Oblige à réattribuer le combiné à la base pour que le produit fonctionne.
- Page 22 Menu «Réglages Comb» fonctionnalité (en anglais : HS setting) ■ Menu «réglages Comb» Permet d’accéder aux réglages propres au combiné. > Alarme : le combiné dispose d’une fonction réveil. Si vous activez cette fonction, le combiné demande l’heure souhaitée, puis l’activation ou non du haut-parleur lors de l’alarme. >...
- Page 23 retour au début de la liste. fonctionnalité > Langue (en anglais : Language): permet de choisir la langue d’affichage du combiné. Les langues disponibles sont : anglais, allemand, français, italien, espagnol, flamand, russe, portugais, turc, polonais, slovaque, tchèque, suédois. > Nom combiné : permet de choisir le nom du combiné qui apparaît à...
-
Page 24: Autres Fonctions
fonctionnalité ■ Menu «enregistrer» (apparaige combiné/base) Menu «Enregistrer» (appairage combiné/base) Permet d’attribuer le combiné à sa base. Cette manipulation est pré-effectuée en usine, il ne vous est normalement pas nécessaire de la faire à la mise en service. La procédure est la suivante : >... - Page 25 achevée. fonctionnalité ■ Autres fonctions Autres fonctions > Pour verrouiller le clavier et empêcher tout appui involontaire sur les touches, maintenez la touche > Maintenez de nouveau pour déverrouiller. > Pour éteindre totalement le combiné, maintenez la touche > Maintenez de nouveau pour rallumer, ou le placer dans sa base.
- Page 26 ning Handset On/Off the handset will enter t you place the handset on the base, it fonctionnalité automatically turns on. To turn the handset display will show handset name (if you on or off in standby mode, follow these dset is in power off mode, when If the handset is successful in finding a base, epeatedly to choose ■...
-
Page 27: Installation
Installation Instruction : Combiné Setting Date & Time struction 1. Date Format 1. Press the key. MENU/R phone line cord to the phone 2. Press key repea d the other end to a standard SETTING menu, then pres 3. Press key to cho d of the AC power adapter to press the... - Page 28 Installation 4. Si vous n’installez pas deux batteries, vous devez connecter l’entrée positive DC et l’entrée négative. En outre, si la fonction de déverrouillage est nécessaire, vous devez également connecter les deux autres bornes. 110.0 Note : Le bouchon de gel de silice à l’arrière de la platine de rue est utilisé pour Note: empêcher les vis de rouiller.
- Page 29 Installation HS S Connectez le fil entre la platine e wire between the outdoor station and the lock, please see de rue et la serrure, voir la figure on the right. Setting A de droite. Connect the wire between the outdoor station and the lock, please see You are ab the figure on the right.
- Page 30 Attention : Si vous vous êtes abonné à un service DSL Mettez un filtre de bruit entre l'unité de base et la prise de la ligne téléphonique, dans les cas suivants : If you subscribe to a DSL service - On entend du bruit pendant les conversations. Please attach a noise filter (contact your DSL provider) to the telephone line between the - Les caractéristiques de l'afficheur ne fonctionnent pas correcte- base unit and the telephone line jack in the event of the following:...
-
Page 31: Informations Complémentaires
Informations complémentaires • Garder une distance minimale (10 cm) autour de l’appareil pour une aération suffisante ; • Ne pas gêner l’aération par l’obstruction des ouvertures d’aération par des objets tels que journaux, nappes, rideaux, etc; • Ne pas placer sur l’appareil de sources de flammes nues, telles que des bougies allumées. •... - Page 32 à la santé et à l’environnement. Utilisez les moyens de collectes sélectives mis à votre disposition par votre commune ou votre distributeur. « Par la présente, SCS Sentinel déclare que l’appareil CL 3622 est conforme aux exigences essentielles et autres dispositions pertinentes de la directive 1999/5/CE.
-
Page 33: Informations Techniques
Marque commerciale : Blyss Informations techniques ■ Les caractéristiques Le combiné : Alimentation : 2.5V par 2 batteries NiMH (fournies) techniques Plage de température : 0°C à 40°C Sonneries : 10 sonneries au choix, 5 niveaux sonores Affichage : écran LCD 1.7’’ rétroéclairé La base : Alimentation : 7.5Vdc 300mA (fournie) Plage de température : 0°C à... -
Page 34: Dépannage
Dépannage Symptome vérifier et solution aucune opération - Vérifiez que l’adaptateur d’alimentation est correctement connecté . - Vérifiez que le cordon de la ligne téléphonique est correcte- ment branché . - Vérifiez que les batteries du combiné soient chargées complé- tements. - Page 35 N° lot (indiqué dans la zone du code barre du packaging) : ......en envoyant cette déclaration à SCS Sentinel - Service SAV Vous - Rte de St Symphorien - BP 69 Nom : ............
- Page 36 wireless intercom with DECT user’s manual White Black V.07-2014 / Ind.C...
- Page 37 « Hereby, SCS Sentinel declares that CL 3622 complies with the essential requirements and other relevant provisions of Directive 1999/5/EC. The declaration of conformity may be consulted on request at: SCS SENTINEL,...
- Page 38 Contents Part One: Cordless Phone Prior To Use Basic Functions Congratulations Safety Precautions Making a call Unpacking Receiving a call Phone Layout and Keys Function Muting the Microphone Keys Description Adjusting Audio Volume LCD Window Icons Description Ringer Setting Installing Batteries Last Number Redial Installation Instruction CID Book...
- Page 39 Contents Advanced Functions Technical Specifications Menu Navigation About the Noise Filter Menu Map Phone Book BS Settings HS Settings Registration Calling with more than one Handset Caller ID on call waiting Part Two: Wireless Doorbell Feature List Troubleshooting...
-
Page 40: Prior To Use
Prior To Use Congratulations on purchasing our high quality product. Please read the manual carefully before installing your system and follow all of the directions to ensure proper installation. Safety Precautions To reduce the risk of electrical shock and injury, please follow these basic safety precautions before using the phone. - Page 41 7. Unplug this phone from the wall outlet and refer servicing to qualified service personnel only. 8. Pay attention to the polarity of the batteries, insert the rechargeable batteries in accordance with polarity symbols (this instruction is found in the installing batteries section.) 9.
-
Page 42: Unpacking
Unpacking Once you have unpacked your door phone, make sure that all the parts shown below are available. If any pieces are missing or broken, please promptly call your dealer. MENU/R Indoor phone Indoor phone Outdoor User's manual Mounting (Base) (Handset) station bracket... -
Page 43: Phone Layout And Keys Function
Phone Layout and Keys Function Indoor phone Handset Earpiece Menu/OK key Display Up/CID key Speaker Cancel/Mute key MENU/R Left/Int key Right/Redial key Down /Phonebook key Dial/Speaker key Battery compartment End key cover Alph numeric keys Microphone Charging contacts - 4 -... - Page 44 Phone Layout and Keys Function (continued) Indoor phone (Base) Rear and bottom View Charge pins Phone Power Jack Line Jack Page button - 5 -...
- Page 45 Phone Layout and Keys Function (continued) Outdoor station Rear View Call button 1. 12V DC Positive input 2. 12V DC Negative input 3. Lock control positive terminal 4. Lock control negative terminal 5. Silica gel plug - 6 -...
-
Page 46: Keys Description
Keys Description Dial/Speaker key Make/Answer a call. Activates the speakerphone if pressed during a call. End/Power key End a call. Long press to activate power on/off, as described in page 15. Navigation key: Up/CID key Scroll up through lists and menu options. Increase the earpiece/speakerphone volume during a call. - Page 47 Keys Description (continued) Redial key Enter the redial book, as described in page 20. Insert a pause when pre-dialing a number. Menu/OK key (left) Enter the menu functions in standby mode. MENU/R Confirm selections & actions. Performs "Flash" function. Cancel/Mute key (right) Return to the previous menu.
-
Page 48: Lcd Window Icons Description
LCD Window Icons Description New Call Signal Icon Indicates you have missed one Indicates whether the current or more calls. signal exists not. handset is too far from the base, this icon will blink on the LCD. Off Hook Indicates the line is engaged. Keypad Lock Hands-free This... -
Page 49: Installing Batteries
Installing Batteries Indoor phone The rechargeable Ni-MH batteries (AAA size, 1.2V, 600mAh) come with your phone. Install the batteries before use. Slide the battery cover in the direction of the arrow and pull it out. Insert new batteries as indicated, matching Notes: correct polarity (+,-). - Page 50 Installing Batteries (continued) Outdoor station You can install two C size batteries (not supplied) before using the outdoor station. Slide the battery cover in the direction of the arrow and pull it out. Insert new batteries as indicated, matching correct polarity (+,-). Notes: 3.
-
Page 51: Installation Instruction
Installation Instruction Indoor phone Connect one end of the phone line cord to the phone line jack of the base, and the other end to a standard phone wall outlet. Connect the modular end of the AC power adapter to the power jack of the base, then plug the AC adapter To AC wall outlet into a standard AC wall outlet. - Page 52 110.0 Note: The silica gel plug on the rear of the outdoor station is used to prevent the screws from rusting. You should remove this plug before connecting the line. But after the connection, remember to cover it again. - 13 -...
-
Page 53: Charging Handset
Connect the wire between the outdoor station and the lock, please see the figure on the right. Wall Charging Handset MENU/R ! Important Note : Before initial operation, YOU SHOULD FULLY CHARGE THE HANDSET for about hours. To charge the handset, you should place it on the base. Result: When you place the handset on the base, the handset automatically turns on. -
Page 54: Turning Handset On/Off
Turning Handset On/Off If the handset is successful in finding a base, If the handset is in power off mode, when the handset will enter the standby mode, the you place the handset on the base, it automatically turns on. To turn the handset display will show... -
Page 55: Part One: Cordless Phone
Part One: Cordless Phone Basic Functions All descriptions in this manual assume that the handset is in standby mode. Set the telephone to standby mode by pressing the key. Making a Call You can enter the desired phone number in 1. -
Page 56: Receiving A Call
Receiving a Call When a new call is received, t he call Result: After you hang up, the LCD displays the information will appear on the LCD. call duration. If the caller can be identified, the caller's Notes: phone number is displayed. You can select the ringer volume by using key when the phone rings with an 1. -
Page 57: Muting The Microphone
Muting the Microphone During conversation, temporarily To mute your microphone, press the key during switch your phone's microphone off, so that the the conversation. The " CALL MUTED " appears on other party cannot hear you. the LCD. To unmute the microphone, press the key again. -
Page 58: Ringer Setting
Ringer Setting You can select your own external (from the Result: You can select the ring tone from Melody 1 to 10 or adjust the volume from Volume 1 telephone Network) or internal (from other handsets registered to the same base) ring to 5, or off. -
Page 59: Last Number Redial
Last Number Redial 1. Press the key in standby mode. Notes If no numbers are found, " EMPTY " is Result: The LCD displays the last number you displayed. dialed. When the redial book is full, each time you dial a new number, the oldest number stored 2. - Page 60 ADD TO PB: allows you to add the number to the phone book. Complete storing entry starting from step 4 described in par."Adding the Phone Book Entries" (obviously, you will find the number already entered in the appropriate field). DELETE: allows delete selected...
-
Page 61: Cid Book
CID Book When you receive a call, if the caller's View and dial any of the CID numbers information is transmitted from the network on which the call was made (and the caller 1. Press the key. MENU/R doesn't hide it), the caller's phone number is 2. - Page 62 4. Press the key, you are prompted to enter 5. Use key to choose DELETE , press the MENU/R the name. key. The display will show " CONFIRM ? ". Press key to confirm, you will hear a beep and MENU/R 5.
-
Page 63: Key Lock
Key Lock If you turn on this feature, all keys will be locked. To unlock the keys, keep the key pressed again You can answer calls by using the key. But till the key lock icon disappears from the when you hang up, the phone returns to the display. -
Page 64: Hs Name
HS Name "HS N" is the default name of the handset after 3. Use to choose HS LABEL , then registration of handset. The handset number N= press the key. MENU/R 1 to 5 reflects the handset is the Nth handset, which is registered to the base. -
Page 65: Paging
Paging To stop paging, press the key on the base again You can page the handset from the base unit making it ring with a special tone. It's useful to or any key on the handset. locate a lost handset. Note: Press the key on the bottom of the base (less... -
Page 66: Handsfree
Handsfree D u r i n g c a l l , y o u m a y t u r n t h e To turn the feature off, and keep on talking in speakerphone built in the handset. In this normal mode, press the key again. -
Page 67: Advanced Functions
Advanced Functions Menu Navigation To access a menu option: To return to standby mode: 1. To display menu items, press the key. If you press the key from any menu (not in MENU/R the number or text input mode), the phone 2. -
Page 68: Menu Map
Menu Map 4. HS SETTING 1. CID BOOK (see page 22) ALARM (see page 35) (see page 36) 2. PHONE BOOK AUDIO SETUP RING SETUP (see page 19) ADD ENTRY (see page 31) TONE S ETUP (see page 36) CHANGE ENTRY (see page 32) (see page 24) DELETE ENTRY... -
Page 69: Phone Book
Phone Book The phonebook built in your cordless phone allows you to store frequently used numbers so that you can easily make a call without having to remember or enter the phone number. Character Map To enter a specific alphanumeric character, press one or more times the relevant key for the required character according to the following table: once for the first character, twice for the second and so on. - Page 70 Adding the Phone book Entries Note: If you make a mistake while entering a 1. Press the key. MENU/R name or a number, use the key to correct it. Each time you press the key, the 2. Press the to choose PHONE BOOK last character or digit is deleted.
- Page 71 Dialing a Number from Phone book Deleting the Phone book Entries 1. Press the key. MENU/R Find out the number you want to dial. Refer to "Viewing the Phone book Entries". Then press the 2. Press the to choose PHONE BOOK key to dial out the number.
-
Page 72: Bs Settings
BS Settings Terminate HS Flash Time This function allows you to delete a handset You can select to change the Flash time by the registration from the base. following steps: 1. Press the key. 1. Press the key. MENU/R MENU/R 2. - Page 73 Modify PIN BS Reset This function allows you to reset the Base This function allows you to change the PIN setting to the factory default. number of the currently active Base. The default PIN is 0000. 1. Press the key. MENU/R 1.
-
Page 74: Hs Settings
HS Settings Setting Alarm 6. Press the key, a beep sounds and the MENU/R display shows SNOOZE ON/OFF, you can You are able to set the alarm on the handset press to enable or disable the and adjust the alarm settings. snooze function on the alarm and press the key. - Page 75 Audio Setup Key Tone You can also use the menu to adjust the audio Every time you press a key, your handset acknowledges it with a key tone. You can volume. disable the key tones for a silent use. In certain 1.
- Page 76 Setting Date & Time 1. Date Format 4. Press key to choose SET DATE SET TIME menu, press the key. MENU/R 1. Press the key. MENU/R 5. Enter the current date or time by numeric 2. Press key repeatedly to choose keypad and press the key to save and exit.
- Page 77 HS Reset Selecting a Base This function allows you to select a base from This function allows you to reset the handset those already registered to the handset. You can settings to the factory default. access the options by scrolling the menu. 1.
-
Page 78: Registration
Registration The supplied handset is already registered with 4. If the base is found, you will be prompted to the number 1. You can register up to 5 handsets enter the PIN code (the default one is 0000). (include an outdoor station) to the same base in Enter it then press the key. -
Page 79: Calling With More Than One
Calling with more than one Handset If you have more than one handset registered to Note: the same base, you can make internal calls and During the internal call, if an external call comes in, the LCD will show the caller's transfer an external call between the registered number. - Page 80 Setting up a 3-way conference call When you have both an external call and an intercom call in progress, you can set up a three- way conference call, like this: 1. During an external call, press the key and then input the number of the handset you want to join the 3-way call.
-
Page 81: Caller Id On Call Waiting
Caller ID on call waiting When you subscribe to Call Waiting service Note: from your local telephone company, the If you have transferred an external call to telephone will display the name and number another handset, you cannot use the call of the second caller while you are having a waiting function via the second handset. -
Page 82: Part Two: Wireless Doorbell
Part Two: Wireless Doorbell 1. To register Before using the outdoor station, you should first register it to the base unit. First, you should hold the key on the bottom of the base for 5 seconds or longer then release it. Second, please press the Call button of the outdoor bell then hold the Register... - Page 83 2. To call When the visitor presses the Call button on the outdoor station, the internal ring will sound to indicate the host. If the called handset is on an external line, the handset user will hear prompt tones, which allows he/she to hang up and wait for the ring to sound again.
- Page 84 Door bell POWER Blue wire LO K Brown wire LOCK Blue wire Brown wire Notes: The conversation can be up to 2 minutes. After 2 minutes, the line will be disconnected automatically. The ring will continue for about a minute if the indoor handset does not respond with it. - 45 -...
-
Page 85: Feature List
Feature List Indoor phone Call duration display 1.8GHz DECT technology with GAP Real time clock (set time) Keypad lock Up to 5 handsets for optional for one base 13 languages selectable Up to 4 bases for optional for one handset Auto answer ON/OFF selectable Phonebook with up to 50 entries... -
Page 86: Troubleshooting
Troubleshooting Symptom Check & Remedy Check that the power adapter is properly connected. No operation Check that the telephone line cord is properly connected. Check that the handset batteries in full power. Check that the handset batteries are installed properly. Check that the telephone line cord is properly connected. -
Page 87: Technical Specifications
Technical Specifications Frequency Range 1.88~1.90GHz Channels 120 Duplex channels Carrier Power <250mW Modulation GFSK Frequency Stability < ± 50 KHz Charging time 15 hours Ambient temperature Normal: ℃ ~ 35 , Extreme: 0 ℃ ℃ ~ 40 ℃ Humidity 0%~90% Indoor phone: (Base): 132.1 x 132.1 x 68.5;... -
Page 88: About The Noise Filter
If you subscribe to a DSL service Please attach a noise filter (contact your DSL provider) to the telephone line between the base unit and the telephone line jack in the event of the following: - Noise is heard during conversations. - Caller ID features do not function properly.
Need help?
Do you have a question about the CL 3622 and is the answer not in the manual?
Questions and answers