
Related Manuals for Skytrak 8042


Summary of Contents for Skytrak 8042
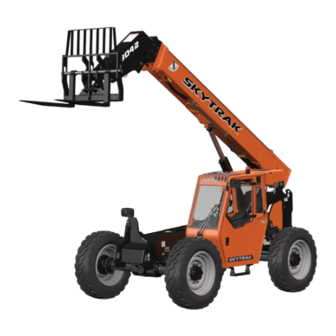
- Page 1 Operators and Safety Manual Model 8042/10042 S/N 9908 & Before 8990186-006 OCTOBER 1999 ANSI...
- Page 2 WARNING IMPROPER OPERATION OF THIS VEHICLE CAN CAUSE INJURY OR DEATH. BEFORE STARTING THE ENGINE, DO THE FOLLOWING: 1. READ THIS OPERATOR'S MANUAL. 2. READ ALL THE SAFETY DECALS ON THE VEHICLE. 3. CLEAR THE AREA OF OTHER PERSONS. LEARN AND PRACTICE SAFE USE OF VEHICLE CONTROLS IN A SAFE, CLEAR AREA BEFORE YOU OPERATE THIS VEHICLE ON A WORK SITE.
-
Page 3: Table Of Contents
Normal Starting ......24 3. Engine Cooling System ... 61 Stability Tipping Limits ....101 Cold Starting ......... 25 4. Engine Oil and Filter ....63 5. Engine Fuel System ....65 Page 1 8042/10042 Rev. 10/99 © 1999 JLG Industries, Inc. -
Page 4: Introduction
Sky Trak also reserves the the front of the machine's right to discontinue manufacturing any product at its frame tilt cylinder tower. discretion at any time. OH0280 Page 2 8042/10042 Rev. 10/99... -
Page 5: Safety Practices
Be sure to vehicle which could result in personal injury if the proper fully understand the potential causes of death or injury. precautions are not taken. Page 3 8042/10042 Rev. 10/99... -
Page 6: New Or Additional Operators
Wear the • turn engine off, protective clothing and personal safety gear issued • unbuckle the seat belt, and or called for by job conditions. • exit the vehicle using the hand holds. Page 4 8042/10042 Rev. 10/99... - Page 7 Fluid in the hydraulic system is under enough pressure that it can penetrate the skin causing serious injury or death. • HOT HYDRAULIC FLUID WILL CAUSE SEVERE BURNS. Wait for fluid to cool down before disconnecting lines. OG0360 Page 5 8042/10042 Rev. 10/99...
- Page 8 NEVER allow anyone to walk or stand under a raised immediately! boom. A lowering boom or falling load can result in serious injury or death. IMPORTANT: In case of internal contact, DO NOT give fluids that would induce vomiting! Page 6 8042/10042 Rev. 10/99...
-
Page 9: Operational Considerations
Holes, obstructions, debris and other work area service or diggers' hotline to mark all underground hazards can cause injury or death. Always walk hazards. around and look for these and other hazards before operating the vehicle in a new work area. Page 7 8042/10042 Rev. 10/99... - Page 10 Serious injury or death can occur if these rules are not obeyed. Riders can fall and be crushed or run over. Avoid accidents. For other specific precau- tions, see "Elevating Personnel" later in this manual. Page 8 8042/10042 Rev. 10/99...
- Page 11 • KEEP SEAT BELT FASTENED, • HOLD ON FIRMLY and • LEAN AWAY FROM THE POINT OF IMPACT. Indecision and trying to escape from a tipping vehicle can result in death or injury. Page 9 8042/10042 Rev. 10/99...
- Page 12 ALWAYS be sure the Stabil-TRAK system is compression braking by the engine and aid the functioning properly when operating the vehicle. application of the service brakes. Refer to “Stabil-TRAK System Test” later in this manual for proper system function. Page 10 8042/10042 Rev. 10/99...
-
Page 13: Equipment Considerations
Carbon monoxide fumes from the engine exhaust can also cause suffocation in an enclosed area. Good ventilation is very important when operating this vehicle. Page 11 8042/10042 Rev. 10/99... -
Page 14: Operation
Pressing down the brake pedal applies the wet disc steering modes are selectable. Refer to "Steering Select service brakes located in the axle wheel ends. It also Switch." activates and locks the rear axle lock system when Page 12 8042/10042 Rev. 10/99... - Page 15 NOTE: The travel select lever must be in NEUTRAL to per- mit engine starting and when boom angles are greater than OH0780 Refer to Steering under "Operating" for detailed information. 40°, shifting into NEUTRAL locks the Stabil-TRAK system. Page 13 8042/10042 Rev. 10/99...
- Page 16 The speed of boom movement depends on the amount Boom Retract ..move lever to the left of lever movement in the corresponding direction. The overall speed of movement depends directly upon the OH0170 speed of the engine. Page 14 8042/10042 Rev. 10/99...
- Page 17 Lower Right Outrigger ..push switch down OH0420 Attachment Tilt Up ..move lever backward OH0410 The attachment is self leveling and will retain any set angle throughout boom raising, lowering, retracting or extending operations. OUTRIGGER CONTROL SWITCHES OH0360 Figure 4 Page 15 8042/10042 Rev. 10/99...
- Page 18 2. Position the vehicle at the lift point and level the The sliding windows are latched with a combination slide vehicle to zero degrees (0°). If the vehicle cannot be bar and squeeze actuated latch. leveled, reposition the vehicle. Page 16 8042/10042 Rev. 10/99...
- Page 19 The windshield washer fluid tank is located to the rear of the right console (early models) or it is the front tank next to the seat support (later models). Page 17 8042/10042 Rev. 10/99...
- Page 20 HEATER Suspension — Turn the knob on the front of the seat to CONTROL CAB HEATER adjust suspension stiffness for operator weight. Height — Height adjustment is achieved by grasping the Figure 6 OA0071 Page 18 8042/10042 Rev. 10/99...
-
Page 21: Instruments/Indicators
ALWAYS be sure the Stabil-TRAK system is functioning properly when operating vehicle. Refer to “Understand- ing the Stabil-TRAK System” later in this manual for a detailed explanation of this system. STABIL-TRAK LIGHT Figure 7 OH0045 Page 19 8042/10042 Rev. 10/99... - Page 22 A convex lens mirror is TRANSMISSION/ mounted on the right side of the frame. Both mirrors are ENGINE OIL HYDRAULIC OIL adjustable to obtain the best rear view by the operator. TEMPERATURE PRESSURE LIGHT LIGHT OH0371 Page 20 8042/10042 Rev. 10/99...
- Page 23 INDICATOR operator’s position. Use this indicator to determine the OA0092 boom angle when reading the capacity chart (see Figure 8 "Using The Capacity Chart"). Page 21 8042/10042 Rev. 10/99...
-
Page 24: Optional Controls
OFF position after the indicated turn is negotiated. To operate the emergency flashers, push or lift up the slide control. To cancel the flashers, engage the Figure 10 OA0612 directional lever momentarily. Page 22 8042/10042 Rev. 10/99... - Page 25 When the control lever is moved to the right it will provide hydraulic system pressure through the female disconnect coupling for the auxiliary attachment. Hydraulic fluid will return to the tank OH0431 through the male disconnect coupling. Page 23 8042/10042 Rev. 10/99...
-
Page 26: Walk-Around Inspection
If engine fails to start on first try, wait until engine and starter come to a complete stop before cranking engine again. IMPORTANT: DO NOT crank starting motor continuously for more than 15 seconds. This will avoid starter motor overheating. Page 24 8042/10042 Rev. 10/99... -
Page 27: Cold Starting
As the engine starts, stop injection of starting fluid and release the ignition key to the RUN position. 1. Using hand holds, enter the cab and adjust the Release the accelerator pedal to give a smooth idle operator’s seat for comfortable operation. speed. Page 25 8042/10042 Rev. 10/99... - Page 28 Avoid soaking the air cleaner element with ether. This is extremely important because a backfire of flame can completely destroy both the primary and secondary air cleaner elements and other possible engine damage may occur. Page 26 8042/10042 Rev. 10/99...
-
Page 29: Jump Starting
Never jump start a frozen battery as it will explode. Keep sparks, flames and lighted smoking materials away from the battery. Lead acid batteries generate explosive gases when charging. Wear safety glasses when working near batteries. Page 27 8042/10042 Rev. 10/99... -
Page 30: Operating
This mode is locked and is allowed OH0721 activated by one or more of the following functions: to pivot, but will respond SLOWLY to changes in terrain. The frame tilt functions normally in this mode. Page 28 8042/10042 Rev. 10/99... - Page 31 2. Move travel select lever to (N) Neutral for longer stops and engage the emergency brake switch. IMPORTANT: Check warning lights frequently during operation. Any abnormal indications or vehicle malfunction should be corrected as soon as possible. Page 29 8042/10042 Rev. 10/99...
- Page 32 F. Vehicle should now be properly indexed in four wheel steer mode. If the wheels are still out-of- phase, repeat this procedure one more time. Page 30 8042/10042 Rev. 10/99...
- Page 33 Figure 14 OH0080 Figure 15 OH0060 Page 31 8042/10042 Rev. 10/99...
- Page 34 Park the vehicle on level ground. Place travel select lever in (N) Neutral and engage MAXIMUM the emergency brake switch. FORK SWEEP Extend the boom about 10 feet and tilt the carriage Figure 16 OH0090 backward. Page 32 8042/10042 Rev. 10/99...
- Page 35 Raise the quick attach pin lock lever and pull out rear of the attachment and the holes in the link the pin at the bottom of the quick attach link. and the attachment should be aligned. Page 33 8042/10042 Rev. 10/99...
-
Page 36: Stabil-Trak™ System Test
• Remove any attachment from the quick attach before performing the test. • Perform the test with the boom fully retracted. DO NOT extend the boom at any time during the test. Page 34 8042/10042 Rev. 10/99... - Page 37 Contact your local Sky Trak International the boom to exactly 60°. The Stabil-TRAK light Distributor immediately to repair the system. should come ON when the boom angle is at about 40° and remain ON. Page 35 8042/10042 Rev. 10/99...
- Page 38 (F) forward position. The rear axle should remain locked, the Stabil-TRAK light should remain ON, and the front left tire should remain off the ground. Page 36 8042/10042 Rev. 10/99...
- Page 39 If any of these steps indicate that the Stabil- TRAK system is not functioning properly, contact your local Authorized Sky Trak International Distributor immediately to repair the system. Page 37 8042/10042 Rev. 10/99...
-
Page 40: Using The Capacity Chart
The boom angle indicator located on the left side of the perpendicular to the structure and leveled the boom indicates the angle of the boom as shown in the vehicle. capacity chart. Page 38 8042/10042 Rev. 10/99... - Page 41 The operator should move the vehicle closer to the structure to assure that the vehicle will not exceed the maximum limits for placing the load. Figure 18 OH0224 Page 39 8042/10042 Rev. 10/99...
- Page 42 Figure 18A Figure 18B OH0324 Page 40 8042/10042 Rev. 10/99...
- Page 43 OH0732 OH0752 Page 41 8042/10042 Rev. 10/99...
- Page 44 OH0742 Page 42 8042/10042 Rev. 10/99...
- Page 45 OH0762 Page 43 8042/10042 Rev. 10/99...
- Page 46 OH1101 Page 44 8042/10042 Rev. 10/99...
-
Page 47: Fork Ratings
INDIVIDUAL FORK RATING EQUIVALENTS 24 INCH LOAD CENTER 610 MM LOAD CENTER 1900 lbs........860 kg 3000 lbs........1360 kg 4000 lbs........1810 kg 5000 lbs........2270 kg OH1111 Page 45 8042/10042 Rev. 10/99... - Page 48 The maximum load capacity for the model 8042 is 8000 LOCATION lbs. (3630 kg) and the maximum load capacity for the STAMPED FORK model 10042 is 10,000 lbs. (4540 kg). Forks used on RATING these vehicles should have total load ratings which Ó...
-
Page 49: How To Pick, Carry & Place A Load
4. Place the travel select lever in (N) Neutral. 5. Engage the emergency brake switch. Blocking of the vehicle wheels is also recommended. 6. Level the platform in both the side to side and front to back directions before use. Page 47 8042/10042 Rev. 10/99... - Page 50 The operator compartment. Refer also to “Using the Capacity Chart.” should always alert personnel on the platform and in the work area before moving it up or down. Page 48 8042/10042 Rev. 10/99...
-
Page 51: Using Other Attachments
If the center of gravity stability. maximum pressure of the vehicle is much lower than the pressure rating of the attachment, the attachment may not work properly. Page 49 8042/10042 Rev. 10/99... -
Page 52: Shut-Off
Tow or push the vehicle at a very slow speed! Tie Down — This vehicle is equipped with tie down holes in the frame on the front and rear ends for transport tie down. Page 50 8042/10042 Rev. 10/99... -
Page 53: General Maintenance
Check cleanliness. Remove all dirt or debris, and all flammable materials before running engine. Tires Check tire pressure and hydrofill. Add air and/or hydrofill if required per "Specifications." Page 51 8042/10042 Rev. 10/99... -
Page 54: Warning Decal Locations
WARNING 3. BOOM ANGLE INDICATOR 9. SAFETY INSTRUCTIONS 4. CAPACITY CHART 5. EXPLOSIVE GASES WARNING RIGHT CONSOLE OVERLAY 6. STABILIZER TIPOVER DANGER 10. TIPOVER DANGER 7. MOVING PARTS WARNING 11. ELECTROCUTION DANGER Figure 20 OH0102 Page 52 8042/10042 Rev. 10/99... -
Page 55: Maint. Schedule And Checklist
Hydraulic Oil Level and Leaks in System Tire Pressure/Hydrofill and Wear 11A & B Drain Fuel Water Separator At First 50 Hours of Use Reference Check Change Clean Paragraph Hydraulic Oil Filter Wheel Lug Nuts Boom Chain Tension Page 53 8042/10042 Rev. 10/99... - Page 56 Boom Wear Pads Axle Oil Level Air Intake Hoses Hydraulic Cylinder Pins Drive Shaft Slip Joints Boom Pivot Pin Carriage Pivot Pin Fork Tilt Cylinder Pins Axle Pivot Pins Extend Chain Sheave Pin continued on next page Page 54 8042/10042 Rev. 10/99...
- Page 57 1,000 Hours or Annually Reference Check Change Lube Paragraph Boom Wear Pads Air Intake Hoses Fan Belt Wear Boom Chain Tension Hydraulic Cylinder Pins Drive Shaft Slip Joints Boom Pivot Pin Carriage Pivot Pin continued on next page Page 55 8042/10042 Rev. 10/99...
- Page 58 Outrigger Pins Boom Attachments Extend Chains Engine Oil and Filter Drain or Change Fuel Filters Axle Oil Transmission Oil and Filter 8B & 8C Primary Air Filter Element Hydraulic Oil and Filter Engine Coolant Fuel Pre-Filter Page 56 8042/10042 Rev. 10/99...
-
Page 59: Lubrication Points
M. Axle steer cylinder ball joints ..(8 points) NOTE: Shorten the lubrication interval on all axle and drive shaft lube points, all outrigger pins, and lower tilt, hoist, and stabilizer cylinder pins when operating in wet or muddy Figure 21 OH0310 conditions. Page 57 8042/10042 Rev. 10/99... -
Page 60: Air Cleaner And Restriction Indicator
23). Check indicator. If red band has appeared, particles to fall out. Replace elements, if re- filter must be cleaned or replaced. quired, as described in paragraph 2B. NOTE: Depress button on top of indicator to reset indicator after servicing element. Page 58 8042/10042 Rev. 10/99... - Page 61 This will prevent dirt, which could damage risks which could lead to engine damage. Adopt the the engine, from entering the induction manifold. policy that all elements should be replaced with new and not cleaned. Page 59 8042/10042 Rev. 10/99...
- Page 62 160° F (71° C). DO NOT use a light bulb to dry the filter. 6. Inspect for holes or tears by looking through the filter toward a bright light. Check for damaged gaskets or metal parts. DO NOT re-use damaged filters. Page 60 8042/10042 Rev. 10/99...
-
Page 63: Engine Cooling System
1. Level the vehicle, ground the carriage, place the the overflow bottle (50/50 mixture of ethylene travel select lever in Neutral (N), engage the glycol and water). Close and lock access door. emergency brake switch and shut off the engine. Page 61 8042/10042 Rev. 10/99... - Page 64 3. Flush system with clean water and drain again. NOTE: On vehicles equipped with a cab heater PETCOCK option, a shut off valve is installed at the engine inlet. Disconnect hose from shut off valve to drain the Figure 28 OH0261 heater. Page 62 8042/10042 Rev. 10/99...
-
Page 65: Engine Oil And Filter
Neutral (N), engage the emer- gency brake switch and shut off the engine. 10W30 Below 23° F (-5° C) 15W40 Above 23° F (-5° C) 2. Unlock and open right rear engine access door. Page 63 8042/10042 Rev. 10/99... - Page 66 Add oil to bring oil level up to the FULL mark in filter wrench may be required. the crosshatched area. Replace dipstick and oil Clean filter sealing surface. fill cap. Close and lock access door. Page 64 8042/10042 Rev. 10/99...
-
Page 67: Engine Fuel System
B. Fuel Tank (Daily Before Operation) visible. Tighten drain valve after draining. Close and lock access door. Check fuel supply daily before operation. Open fuel fill access door with key (Figure 31). Remove fill cap Page 65 8042/10042 Rev. 10/99... - Page 68 NOTE: Marginal fuel cleanliness conditions will require fuel system service more often. Loss of engine OS0590 Figure 32A power is often caused by dirty fuel filters. Page 66 8042/10042 Rev. 10/99...
- Page 69 IMPORTANT: DO NOT start the engine until the injection pump has been filled and primed as serious damage can be caused to the pump due to lack of FUEL LIFT HAND PLUNGER PUMP lubrication. OS0590 Figure 33A Page 67 8042/10042 Rev. 10/99...
- Page 70 Keep clear of spraying fuel. The pressure of the fuel in the high pressure lines is sufficient to penetrate the skin and cause serious bodily injury. Wear protective clothing and safety glasses. Figure 34 MA1870 Page 68 8042/10042 Rev. 10/99...
-
Page 71: Engine Fan Belt Check
8. Close and lock access door. 4. Inspect fan belt. Replace cracked or frayed belt. Transverse (across belt width) cracks are accept- able. Longitudinal (along belt length) cracks are not acceptable. TENSIONER BRACKET BELT Figure 35 MA1881 Page 69 8042/10042 Rev. 10/99... -
Page 72: Hydraulic Oil And Filter
ISO-46 or MIL-L-2104C oil (see table on HYDRAULIC/ FUEL TANK this page). The hydraulic oil level should be COVER CAPSCREWS within 1/2 inch of the upper mark on the sight gauge. Figure 36 OH0390 5. Install reservoir cap. Page 70 8042/10042 Rev. 10/99... - Page 73 8. Push new filter element fully onto the filter head until it seats against the washer. Re-install filter 5. Clean filter head sealing surfaces. head assembly and gasket into the tank and secure with the nuts removed earlier. Page 71 8042/10042 Rev. 10/99...
- Page 74 11. Remove air bleeder plug (Figure 37A) from the main hydraulic pump and connect an SAE #4 str. thd. o-ring connector and a hose (approx. 10 feet required) to this port to route oil to a catch con- tainer under the cab. Page 72 8042/10042 Rev. 10/99...
-
Page 75: Transmission Oil And Filter
(N) Neutral, and engage the emer- SECONDARY BUT DO NOT REMOVE, THIS CONTROL VALVE gency brake switch and shut off the engine. CONNECTION SH0070 2. Remove the transmission cover from the top of the Figure 37B frame. Page 73 8042/10042 Rev. 10/99... - Page 76 8. Check transmission level and add MIL-L-2104C completely. Transfer the oil to a container with a Oil (see table on page 73) as required following cover and label the container as used oil. Dis- procedures in paragraph 8A. Page 74 8042/10042 Rev. 10/99...
-
Page 77: Axle Oil
Level Check (250 Hour Intervals) time. 1. Level the vehicle, ground the carriage, place 7. Install cleaned plug/screen with new gasket into travel select lever in (N) Neutral, engage the converter housing. emergency brake switch and shut off engine. Page 75 8042/10042 Rev. 10/99... -
Page 78: 10. Wheel End Oil
4. Allow oil to drain completely. 5. Clean and reinstall drain plug. MAGNETIC WHEEL END DRAIN PLUG ARROW DOWN TO FILL/CHECK OIL LEVEL AXLE FILL/LEVEL AXLE DRAIN PLUG PLUG Figure 42 Figure 43 OA0432 OH0030 Page 76 8042/10042 Rev. 10/99... - Page 79 FRICTION MODIFIER BRAND PART NUMBER 5. Move the vehicle so the arrow on the wheel end *Sky Trak International 8522043 (32 oz.) Ford C8AZ19B546A (4 oz.) housing is pointing down (Figure 43). * = Recommended Oil Page 77 8042/10042 Rev. 10/99...
-
Page 80: 11. Wheels And Tires
51 psi 12 PLY (min.) (352 kPa) Mis-Matched tire sizes or mixing of tire types (Radial and Bias ply) may compromise vehicle stability and 17.5 R25, RADIAL 73 psi may result in vehicle tipover. (503 kPa) Page 78 8042/10042 Rev. 10/99... -
Page 81: Battery(S)
They are shipped in the vehicle filled with electrolyte and charged. LOCK S/N 0001-5234 Replace battery(s) that TIRE OA0453 OH1520 have cracked, melted, or VALVE Figure 44 damaged cases. Check Figure 45 terminals for corrosion. Page 79 8042/10042 Rev. 10/99... - Page 82 ° F (52 ° C)]. If spewing or gassing occurs or the ° temperature exceeds 125 F, the charging rate must be reduced or temporarily stopped to permit cooling. Page 80 8042/10042 Rev. 10/99...
-
Page 83: Fuse/Circuit Breaker Replacement
The fuses/breaker are located inside the right console (Figure 46A & 46B). Note that you will require a #T-27 TORX driver to remove the side console access panel. SHORT TERMINAL MF0710 Figure 46 Page 81 8042/10042 Rev. 10/99... - Page 84 Horn and Back-up Alarm (Optional - Cab Heater Fan) 6 amp Instrument Panel, Emergency Brake Solenoid Switch, Stabilizer Cylinder Switches 40 amp Ignition Switch Feed for entire Electrical System 20 amp (Optional - Lighting Package) OH0290 Figure 46A Page 82 8042/10042 Rev. 10/99...
- Page 85 (Optional - Cab Heater Fan) 7.5 amp Warning Lights, Park Brake (Fuse) Switch, Fuel Gauge and Hourmeter 20 amp (Optional - Lighting Package) (Fuse) 40 amp Ignition Switch Feed For Entire OH0292 (Breaker) Electrical System Figure 46B Page 83 8042/10042 Rev. 10/99...
-
Page 86: Boom Chains & Wear Pads
OF INTERMEDIATE BOOM measurement is less than 1-1/2" (38,1 mm) , the boom chains need to be adjusted. Follow proce- dures in paragraph 14B to adjust. Figure 47 OA0491 Top Boom Chain Tension Adjustment (As Required) Page 84 8042/10042 Rev. 10/99... - Page 87 (Figure 48). If the measure- Figure 48 ment is not between 4-1/2" (114,3 mm) and 5-1/2" (139,7 mm), the boom may require more exten- sive adjustment and/or repair. Contact your authorized Sky Trak distributor. Page 85 8042/10042 Rev. 10/99...
- Page 88 5" (127 mm) but greater than 4-1/2" (114,3 mm). To EXTEND CYLINDER check the 8-1/2" (216 mm) alternate dimension as OA0512 Figure 49 shown in Figure 50 the rear cover has to be removed. To adjust proceed as follows; Page 86 8042/10042 Rev. 10/99...
- Page 89 REAR OF BOOM 8-1/2" (216 mm) (ALTERNATE MEASUREMENT) INNER BOOM MEASURE FROM REAR INTERMEDIATE BOOM TO REAR OF INNER BOOM INTERMEDIATE BOOM OH1090 Figure 50 RETRACT CHAIN Figure 51 OH0252 Page 87 8042/10042 Rev. 10/99...
- Page 90 50 hour interval. The average expected life of boom pads can vary depending upon vehicle use, weight of loads, operating conditions, and Figure 52 the location of boom pads inside the boom. OH0240 Page 88 8042/10042 Rev. 10/99...
- Page 91 (15,9 MM) (6,4 MM) boom plate surfaces. This will result in premature wear of any new wear pads installed if the surfaces are not ground WEAR PAD smooth again. BOOM SPACER PLATE Figure 53 SC0030 Page 89 8042/10042 Rev. 10/99...
-
Page 92: 15. Emergency Boom Lowering
Warning particular situation. DO NOT get under a raised boom unless the boom is blocked up. Always block the boom before doing any servicing which requires the boom to be up. Page 90 8042/10042 Rev. 10/99... - Page 93 6. Place a tag on both the ignition switch and steering ing if you are uncertain about any of the following proce- dures. wheel stating that the vehicle should not be oper- ated. If you do not have a tag, tape over the ignition switch. Page 91 8042/10042 Rev. 10/99...
- Page 94 (if in the lowering line, continue with step 5) the boom must be lowered by following this procedure: Page 92 8042/10042 Rev. 10/99...
- Page 95 4 steps. ADJUSTING SCREW RETAINER NUT Figure 54 OH0210 Page 93 8042/10042 Rev. 10/99...
- Page 96 Start the engine and bleed the air level and add as necessary. Bleed the air from from the system, then recheck the oil level. The the system and then recheck the oil level. vehicle can now be put back into service. Page 94 8042/10042 Rev. 10/99...
- Page 97 EXTEND LINE Transfer the oil to a container with a cover and label the container as used oil. Dispose of the used oil at an approved recycling center. CONTROL VALVE (ROTATED FOR CLARITY) Figure 55 OH1120 Page 95 8042/10042 Rev. 10/99...
- Page 98 Start the engine and bleed the air from the system, then recheck the oil level. The vehicle can now be put back into CONTROL VALVE (ROTATED FOR CLARITY) service. Figure 56 OH1120 Page 96 8042/10042 Rev. 10/99...
-
Page 99: Specifications
Wheel End Capacity - each (rear) ....54 ozs. (1,6 ltr) Capacity - System (w/o heater) ...... 4 gals. (15,1 ltr) (see table on page 77) Capacity - Overflow Bottle ......... 3 qts. (2,8 ltr) Type of Fluid ......50/50 ethylene glycol and water Page 97 8042/10042 Rev. 10/99... -
Page 100: Tires
17.5 - 25 or R25 Size Tires ......74 psi (510 kPa) 15.5 - 25, 12 ply ......187 lbs. (85,8 kg) Calcium Chloride to 37 gals. (140 ltr) of Water (each tire) Total Hydrofill weight (each tire) ..500 lbs. (226,8 kg) Page 98 8042/10042 Rev. 10/99... -
Page 101: Engine
Weights weight of the tire and wheel assembly, including ballast Must Not Be Less Than the minimum assembly weight MODEL 8042 BASIC VEHICLE listed above. *Approximate Curb Weight ..... 23,840 lbs (10823 kg) Shipping Weight ......23,630 lbs (10719 kg) *With open cab, 13.00 - 24 hydrofilled tires and... -
Page 102: Machine Dimensions
Electrical System Machine Dimensions RATING........12 VDC Negative Ground MODEL 8042 With 13.00 - 24 Tires Length (less forks) ........221.3" (5621 mm) NUMBER & TYPE OF BATTERIES........Width ............96.4" (2448 mm) S/N 0001-5234 ........ Two - Maintenance Free Height ............. -
Page 103: Stability Tipping Limits
For safe operation, follow the instructions as provided on the preceding pages of this manual. 7% GRADE (4°) OH0130 Page 101 8042/10042 Rev. 10/99... - Page 104 Position 3 Position 2 Lateral stability "stacking" with rated load Longitudinal stability "traveling" (with frame tilted 4°) (with no more than rated load) 22% GRADE (12°) 12% GRADE (7°) OH0180 OH0140 Page 102 8042/10042 Rev. 10/99...
- Page 105 Position 4 Position 5 Lateral stability "traveling" Lateral stability "stacking" (with no load) (with no load) 50% GRADE (27°) 10% GRADE (6°) OH0121 OH0151 Page 103 8042/10042 Rev. 10/99...
- Page 106 Notes (OR, on this page, affix second copy of attachment capacity chart if supplied with attachment) Page 104 8042/10042 Rev. 10/99...
- Page 109 REPLACEMENT MANUALS If the owner/operator or safety manuals that were originally shipped with your vehicle are lost, stolen or need replacement, contact your local distributor for replacement manuals. If for any reason your distributor cannot supply the manuals you need; write, call or send a fax to the following address for ordering information.
Need help?
Do you have a question about the 8042 and is the answer not in the manual?
Questions and answers