Table of Contents
Advertisement
Quick Links
Download this manual
See also:
Quick Reference Manual
Advertisement
Table of Contents

Related Manuals for bluefin PAXs500


Summary of Contents for bluefin PAXs500
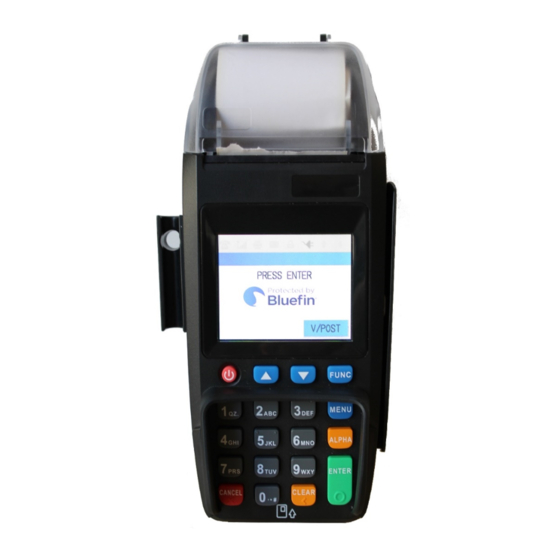
- Page 1 PAX S500 Stand-Alone User Guide PAX S500 Stand-Alone User Guide V1.0 Issued 07/26/2016 ©Bluefin Payment Systems, 2016 All Rights Reserved.
-
Page 2: Table Of Contents
Make certain transaction types are password protected ........................8 Changing password .................................... 8 Disabling/re-enabling/password protecting certain transaction types (e.g. refunds, EBT, etc.) ............9 PAX Stand-Alone User Guide July 2016 © 2016 Bluefin Payment Systems All Rights Reserved Page 2... - Page 3 Create on-screen report of all transactions ............................14 Print report showing available data storage ............................14 Printing reports of current batch ................................. 14 Transaction search ....................................15 PAX Stand-Alone User Guide July 2016 © 2016 Bluefin Payment Systems All Rights Reserved Page 3...
-
Page 4: Support
Default password is either “1” or the current date in the format of MMDDYYYY • As illustrated below, Bluefin’s PAX terminals connect to our PayConex payment gateway on the backend. Within PayConex, you can access processing history, reports, and the ability to reissue or refund transactions. -
Page 5: Processing
3) Choose if by card number or reference number 4) Enter amount 5) Press ENTER 6) Swipe or enter card number or reference number PAX Stand-Alone User Guide July 2016 © 2016 Bluefin Payment Systems All Rights Reserved Page 5... -
Page 6: Authorization
3) Press the down arrow and then press 4 for “Receipt Print” 4) Enter password and then press ENTER 5) Press 2 for “Preprint” Follow prompt to turn off or on PAX Stand-Alone User Guide July 2016 © 2016 Bluefin Payment Systems All Rights Reserved Page 6... -
Page 7: Change Receipt Font Size
“0” key then press alpha four times. EXAMPLE: To type the letter “L”, type “5” then press ALPHA three times. Press ENTER PAX Stand-Alone User Guide July 2016 © 2016 Bluefin Payment Systems All Rights Reserved Page 7... -
Page 8: Disabling Receipt Printing
7) Enter old password when prompted and press ENTER 8) Enter new password when prompted and press ENTER 9) Reenter new password when prompted and press ENTER PAX Stand-Alone User Guide July 2016 © 2016 Bluefin Payment Systems All Rights Reserved Page 8... -
Page 9: Disabling/Re-Enabling/Password Protecting Certain Transaction Types (E.g. Refunds, Ebt, Etc.)
8) Select which card types it should be used for, 1 for “ALL” is recommended 9) Select which components of AVS should be used, 3 for “Zip” is recommended PAX Stand-Alone User Guide July 2016 © 2016 Bluefin Payment Systems All Rights Reserved Page 9... -
Page 10: Enabling Cvv On Card Not Present (Cnp) Transactions
Press 1 for “Date/ Time setup” Enter the correct date (enter today’s date if already correct) Press ENTER Enter correct time in 24 hour format Press ENTER PAX Stand-Alone User Guide July 2016 © 2016 Bluefin Payment Systems All Rights Reserved Page 10... -
Page 11: Enabling Duplicate Transaction Check
5) Enter password and press ENTER 6) A report of all settings will print out Adding a clerk and server NOTE: In order to do this, must have clerk mode enabled by Bluefin 1) Press MENU 2) Press 2 for “Merchant Settings”... -
Page 12: Setting Up Automatic Batching
IMPORTANT NOTE: “Batching” in the terminal consists of printing a report and clearing the terminal but does not affect actual settlement. Actual batching is done automatically by Bluefin on the backend. If you would like to adjust your actual backend batch time to optimize settlement timing or to assist with reconciliation please contact Bluefin. -
Page 13: Reporting
Reporting IMPORTANT NOTE: Instructions below are for printing out reports from the terminal. Bluefin’s PAX terminals are connected to our PayConex online payment gateway, where much more robust reports are located. To download a PayConex gateway manual, please visit Bluefin.com/merchant-support. -
Page 14: Create On-Screen Report Of All Transactions
“ALL” or select alternate JOURNAL REPORT TOTALS ONLY transaction type 10) Press Cancel to not set as default report, or ENTER to set as default PAX Stand-Alone User Guide July 2016 © 2016 Bluefin Payment Systems All Rights Reserved Page 14... -
Page 15: Transaction Search
6) Enter search criteria as prompted and press ENTER; if more than one transaction meets the criteria use the up and down arrows to scroll between them PAX Stand-Alone User Guide July 2016 © 2016 Bluefin Payment Systems All Rights Reserved Page 15...
Need help?
Do you have a question about the PAXs500 and is the answer not in the manual?
Questions and answers