Table of Contents
Advertisement
Advertisement
Table of Contents

Related Manuals for Vivitar 685HD


Summary of Contents for Vivitar 685HD
-
Page 1: User Manual
DVR 685HD Mini Digital Sports Camcorder User Manual © 2009-2013 Sakar International, Inc. All rights reserved. Windows and the Windows logo are registered trademarks of Microsoft Corporation. All other trademarks are the property of their respective companies. -
Page 2: Table Of Contents
CONTENTS Introduction ..........................2 What’s Included ..........................3 Parts of the Camcorder ........................ 4 Initial Camcorder Setup ........................ 5 Main Camcorder Modes ....................... 9 Camcorder Technical Specifications ................... 10 Waterproof Case ......................... 11 Powering On Your Camcorder ....................12 Changing Camcorder Mode ....................... 13 Video Capture Mode ........................ -
Page 3: Introduction
This camcorder is a plug and play device. You can download the pictures and videos without the software by directly accessing the memory card from your computer. We would however recommend that you install the Vivitar Experience Image Manager software to enjoy the full Vivitar experience. -
Page 4: What's Included
5. Bicycle Mount with Built-In Lithium Battery 6. Helmet Mount 2. USB Cable 7. Helmet Band 3. AV Cable 8. Waterproof Casing 4. Vivitar Experience Installation CD NOTE: Built-in Lithium Battery included (not shown). Micro SD Card not included. -
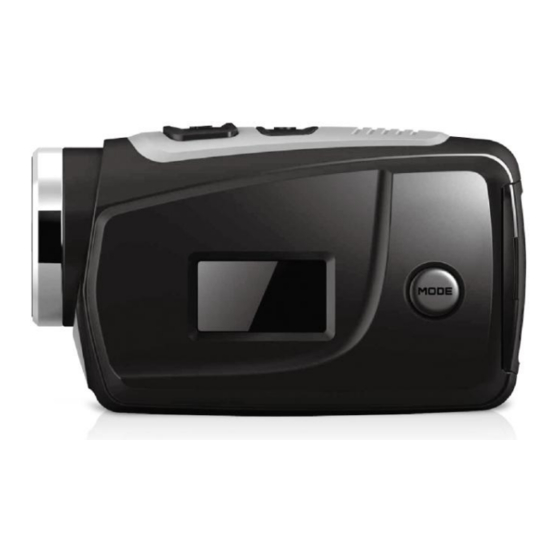
Page 5: Parts Of The Camcorder
Parts of the Camcorder 1. Monochrome LCD Display Power On/Off Button 2. MODE Button Microphone 3. Lens USB Interface 4. RESET AV Out 5. Shutter (Photo/Video) Button 10. Micro SD Memory Card Slot... -
Page 6: Initial Camcorder Setup
Initial Camcorder Setup POWERING THE CAMERA ON Battery Make sure the built-in lithium battery has been fully charged before using your camcorder. To charge the battery using the supplied USB connection cable and your computer follow these instructions: Charging Fully Charged 1. - Page 7 Battery Indicator: Battery Indicator Description The battery level is full. The battery level is half. When this icon flashes, this indicates that the battery level is low and the camcorder will then automatically turn off. Please recharge your camcorder. Micro SD Memory Card Make sure a Class 4 or higher Micro SD Memory card has been properly inserted into your camcorder.
-
Page 8: Change Camera Mode
successfully installed. 6. To remove the card, gently press on the edge of the card to release it and pull the card out. IMPORTANT: Please power the camera off before plugging in or taking out the memory card. If the card is inserted or removed while the camcorder's power is on, it may damage the card and/or any recorded data. - Page 9 Power On: Press and hold the POWER button, located on top of the camcorder, for 2 seconds to turn on the camcorder. The screen of the display is activated and the camcorder is powered on. Power Off: Press the POWER button once while the camera is idle to shut the camcorder off. NOTE: When the battery capacity drops to a low level, the battery icon will flash on the display, indicating that the camcorder requires to be recharged.
-
Page 10: Main Camcorder Modes
Main Camcorder Modes Video Capture Mode Use this mode to capture videos with your digital camcorder. To take a video, aim your camcorder as desired and press the Shutter button to start recording. A blinking video icon appears on the display screen while the recording is in progress. -
Page 11: Camcorder Technical Specifications
Camcorder Technical Specifications Image Sensor CMOS Sensor Video Resolution HI HD 1280x720 (60fps), LO VGA 640×480 (120fps) Photo Resolution HI 5MP (2592x1944 pixels), LO 1.3MP (2048x1536) File Format AVI (Video), JPEG (Photo) External Memory Class 4 Micro SD Memory card or higher, up to 32GB Monochrome LCD Display “888”... -
Page 12: Waterproof Case
Waterproof Case 1. Shutter Release 2. Power Button 3. MODE Button 4. Clamp To open the case: 1. Insert a finger at the half circle of the clamp by prying the clamp up - away from the case. 2. Before sealing the waterproof case, keep the camera housing’s rubber seal clean. Note that a single hair or grain of sand can cause a leak. -
Page 13: Powering On Your Camcorder
NOTE: Before opening the waterproof casing and putting the device in, carefully check whether the waterproof ring of the casing is flat and smooth. After placing the device into the waterproof casing and closing the cover, carefully check whether the waterproof ring is deformed due to pressure. -
Page 14: Changing Camcorder Mode
Changing Camcorder Mode THREE MAIN MODES 1. Video Capture Mode - Use this mode to capture videos with your camcorder. 2. Photo Capture Mode - Use this mode to capture photos with your camcorder. 3. Playback Mode (for photos and videos) – Connect to your camcorder to your computer or television to use this mode to view your captured photos and videos. -
Page 15: Video Capture Mode
Video Capture Mode The Video Capture Mode allows you to capture videos with your digital camcorder. After turning on your camcorder, the default mode is Video Capture Mode. TAKING A VIDEO 1. Power On: Press the Power button to power on the camcorder. 2. - Page 16 VIDEO CAPTURE MODE LCD SCREEN ICONS ICON DESCRIPTION Indicates high resolution in current Video Capture Mode. VIDEO RECORDING HI VIDEO RECORDING ICON Indicates currently in Video Capture Mode. Flashing icon means the camcorder in the process of video recording. Indicates the current level of the battery. BATTERY LEVEL MEMORY CARD Indicates a memory card has been inserted and is available.
-
Page 17: Photo Capture Mode
Photo Capture Mode The Photo Capture Mode allows you to capture photos with your digital camcorder. When you first power on the camcorder, the Video Capture Mode will be active. In order to open the Photo Capture Mode, press the MODE button twice. TAKING A PHOTO 1. - Page 18 PHOTO CAPTURE MODE LCD SCREEN ICONS ICON DESCRIPTION PHOTO CAPTURE HI Indicates high resolution in current Photo Capture Mode. PHOTO CAPTURE MODE Indicates currently in Photo Capture Mode. ICON Indicates the current level of the battery. BATTERY LEVEL MEMORY CARD Indicates a memory card has been inserted and is available.
-
Page 19: Playback Mode
Playback Mode The Playback mode allows you to review and delete photos and videos that you’ve captured with you camcorder. ENTERING THE PLAYBACK MODE: TV 1. Use the supplied AV cable to connect the camcorder to your TV. Connect the smaller, black end of the cable to the AV port of your camcorder. Connect the yellow jack to into the TV –... - Page 20 ICON DESCRIPTION Indicates the camcorder is currently in Playback Mode. PLAYBACK MODE ICON FILE QUANTITY Indicates the total amount of files captured and the number file you are currently viewing. MEMORY CARD Indicates a memory card has been inserted and is available.
- Page 21 DELETING CAPTURED IMAGES Files can be deleted while your camcorder is connected to your television or your computer. Deleting Image Files while Connected to the Television: After connecting to TV, the camera enters the Playback Mode mode. 1. In Playback Mode on the television, long press the Shutter button to enter File Deletion Mode.
-
Page 22: Computer System Requirements
Computer System Requirements To be able to download videos and photos to your computer, you will need the following minimum configuration: WINDOWS OS MICROSOFT® Windows XP with Service Pack 3, Windows Vista with Service Pack 1 or Windows 7 ... -
Page 23: Installing The Software
Installing the Software You must be connected to the Internet to install and run the Vivitar Experience Image Manager Software. 1. Insert the installation CD into your CD-ROM drive. The installation screen should automatically open. On WINDOWS OS: The Vivitar Experience Image Manager Installer window appears. If the window does not appear, open the application’s CD/DVD drive and click on... -
Page 24: Connecting The Camcorder To The Computer
On MACINTOSH OS: Click the “Quit” button when the installation is complete. Click the “Launch Vivitar Experience Image Manager” to open the application. 13. If you close the application you can run the Vivitar Experience Image Manager from the Programs (PC) or Applications (Mac) menu on your computer. -
Page 25: Getting Videos From The Camcorder To The Computer
Getting Videos from the Camcorder to the Computer The Micro SD Memory card needs to be inserted. Do not disconnect the cable during transfer. Doing so will cancel the transfer of any files on their way to your computer. 1. Select the “Get Images” button from the Main menu. 2. -
Page 26: Getting Started
Edit images using automatic and manual tools Use automatic “Geotagging” with built in Google Maps For more details on how to use the Vivitar Experience Image Manager open the Help file or click the “Take a Tour” button on the application’s Home screen. - Page 27 MACINTOSH OS 1. Use the supplied USB cable to connect your camcorder to your computer’s USB port. 2. Power on the camcorder. 3. The camcorder’s device icon appears on the desktop. 4. Click on the device icon and open the DCIM folder and the folder inside to view the media files.
-
Page 28: Camcorder Maintenance
Camcorder Maintenance Please read the information below carefully before using your camcorder for proper and safe operation, so as to use the camcorder to its fullest and maintain its performance. MEMORY CARD MAINTENANCE: For the first time of using a new memory card, or when there is unrecognized data for the camera or images with other cameras in the memory card, please make sure to firstly format the memory card. - Page 29 DEVICE MAINTENANCE: Take good care of the video camera and prevent water or sand particles from entering the video camera when it is used on the beach or near water. Please note that water, sand particles, dust or component containing salt may damage the video camera. ...
-
Page 30: Sakar Warranty Card
Sakar Warranty Card This warranty covers for the original consumer purchaser only and is not transferable. Products that fail to function properly UNDER NORMAL USAGE, due to defects in material or workmanship will be repaired at no charge for parts or labor for a period of one year from the time of purchase. -
Page 31: Technical Support
Technical Support For technical support issues please visit our website at www.vivitar.com. You can find manuals, software and FAQ’s at the website. Can’t find what you are looking for? E-mail us at support@vivitar.com and one of our technical support team members will answer your questions. - Page 32 ISSUE SOLUTION Failure of camera startup. Battery low. Recharging of the battery is required. Failure to take picture or record Memory Card Full. Please store files on your video by pressing Shutter key. computer or external drive. Trembling hand when taking the photo. Hold the camera steady with two hands, or fix the camera Blurry photo.