
Related Manuals for Aura JGSTATW2W


Summary of Contents for Aura JGSTATW2W
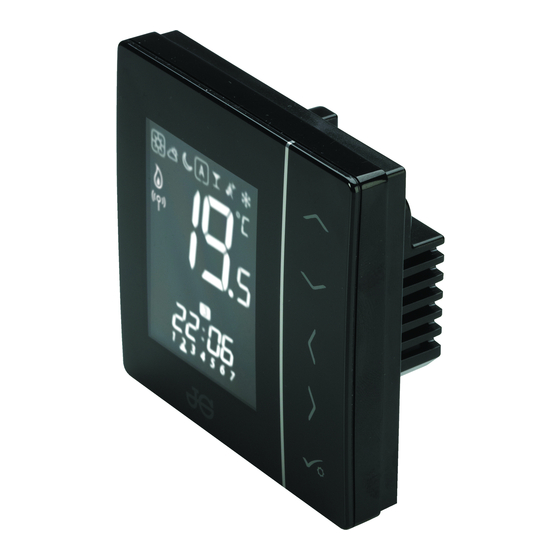
- Page 1 Wireless Thermostats 230v and Battery Operated Quick Set-up Guide For models: JGSTATW2W JGSTATW2B JGSTATW1W JGSTATW1B speedfitUFH.co.uk...
-
Page 2: Table Of Contents
Contents Box contents: 4x AAA Batteries Wireless Thermostats 230v and Battery Operated Quick Set-up Guide For models: JGSTATW2W JGSTATW2B JGSTATW1W JGSTATW1B speedfitUFH.co.uk 1 x Quick Set-up Guide Fixing screws JGSTATW2 JGSTATW1 Quick Set-up Guide: Icons used in this guide: • Box contents Safety •... -
Page 3: Introduction
European the JGCO Wireless Coordinator. The Directives: Wireless Coordinator allows communication RoHS2: 2011/65/EU with other devices in the Aura Wireless system range including wiring centre, RED: 2014/30/EU Wireless boiler receiver and Wireless TRV. Declaration of conformity available at saluslegal.com... - Page 4 Product compliance & safety information These instructions are applicable to the Aura models stated on the front cover of this Instruction Manual only. Warning. This product must be 230 AC fitted by a competent person. Installation must comply with the...
-
Page 5: Terminal Connections
Terminal connections (JGSTATW2) - 230v powered Understanding your terminal connections Power Terminals 230v AC. Rear of unit Used for supplying power to the unit. 230v supply can be sourced from the wiring centre or any convenient 3amp fused supply. VS1 BRF 23 VAC Probe / Hot Water Cylinder Terminals. - Page 6 Terminal connections (JGSTATW1) Understanding your terminal connections Rear of unit Sensor Terminals. Can be used for an external Air S1 - S2 or Floor sensor when configured as thermostat. Can also be used for Cylinder thermostat when configured for HW. speedfitUFH.co.uk...
-
Page 7: Coordinator Set-Up
To commence system installation, press and hold the button for 5 seconds. The button will start to flash red indicating that the Zigbee network is ready to accept JG Aura devices. For full Coordinator instructions please see seperate literature or go on line to speedfitUFH.co.uk... -
Page 8: Jgbr Set-Up
JGBR set-up - Wireless Boiler Receiver or Wireless Receiver The JGBR default setting is RX1 (Wireless Boiler Receiver). In this mode, the JGBR will switch on the boiler in response to a call for heat. To set as a wireless receiver, switch to RX2. The wireless receiver will be paired to just one chosen thermostat on the network. - Page 9 Programmable Room Thermostat paired with Wireless Wiring Centre Prior to pairing refer to Coordinator start up on page 8. Start up screen as shown. No action required. Press CONFIRM Press CONFIRM icon flashing to request the number of the Wiring Centre you wish to pair with (see Identifying Wiring Centre - page 9).
- Page 10 requesting group number. No action Zone number flashing. Using the needed in this instance. Press CONFIRM set the wiring centre zone you want the thermostat to control. Press CONFIRM Thermostat returns to home screen and the pairing is finished. Testing: Set thermostat to high temperature and wait for a call for heat.
- Page 11 Programmable Room Thermostat paired with Wireless TRV Prior to pairing refer to Coordinator start up on page 8. From start up screen press Press CONFIRM Screen will scroll to No action required. Press CONFIRM JGSTATW1/W2 Quick Set-up Guide...
- Page 12 Press Pairing Button on TRV(s) for 10 Next press arrow on thermostat to start pairing seconds until pairing light on the TRV starts process. Do not press Confirm as it will abort to flash. Maximum of 6 TRV’s can be paired the pairing process and user will have to start again.
- Page 13 Programmable Room Thermostat paired with Wireless Boiler Receiver (RX1) Prior to pairing refer to Coordinator start up on page 8. Note: See page 7 for setting of JGBR to RX1. Start up screen as shown. Press and hold Press CONFIRM bottom 3 buttons until next screen shown.
- Page 14 No action required. Press CONFIRM Thermostat returns to home screen. Testing: Set thermostat to high temperature and wait for a call for heat. Check the Wireless Boiler Receiver is receiving the signal and switching on and off. speedfitUFH.co.uk...
- Page 15 Programmable Room Thermostat paired with Wireless Receiver (RX2) Prior to pairing refer to Coordinator start up on page 8. Note: See page 7 for setting of JGBR to RX2. Start up screen as shown. Press and hold Press CONFIRM bottom 3 buttons until next screen shown.
- Page 16 No action required. Press CONFIRM Thermostat returns to home screen. Testing: Set thermostat to high temperature and wait for a call for heat. Check the Receiver is receiving the signal and switching on and off. If there is also a boiler receiver fitted to the network check that this is responding.
- Page 17 Hot Water Timer paired with Wiring Centre Prior to pairing refer to Coordinator start up on page 8. Start up screen as shown. Hold bottom Press to scroll to Hot Water Timer 3 buttons to scroll to screen screen Press CONFIRM Press CONFIRM...
- Page 18 No action needed. Note: Hot Water Timer will automatically join Group 1. icon flashing to request the Hot Water Timer displays home screen. number of the Wiring Centre to pair with Testing: Set timer to [ON] and check that Hot (see Identifying Wiring Centre - page 9).
- Page 19 John Guest Speedfit Limited Horton Road, West Drayton, Middlesex UB7 8JL, England. Tel: 01895 449233 Fax: 01895 420321 speedfitUFH.co.uk Technical Help Desk: 01895 425333 The above namestyles are all trademarks of John Guest International Limited. Z2105/458/0716 © John Guest International Limited 2016. All rights reserved.
Need help?
Do you have a question about the JGSTATW2W and is the answer not in the manual?
Questions and answers