
Subscribe to Our Youtube Channel
Related Manuals for Sunset Swings 422L


Summary of Contents for Sunset Swings 422L
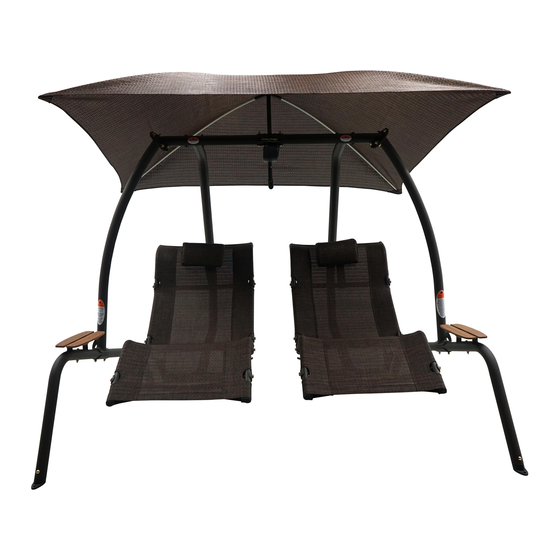
- Page 1 Sunset Swings ® By Health In Motion, LLC Assembly & Operation Manual Model 422L Dual Lounge Swing Record Serial Number Here www.sunsetswings.com 1 MARCH 2014...
- Page 2 READ! VERY IMPORTANT FOR ADULTS ONLY Ensure that the 422L swing is set up on a firm level surface. Make sure the swing has completely stopped before entering or exiting the swing. Be careful as the swing may shift while sitting down or getting up from the swing.
-
Page 3: Table Of Contents
Thank you for choosing Sunset Swings . Please read the contents of this manual thoroughly. ® The information inside will help you in many different areas. You will need to send in your customer registration card at the back of this manual to validate your warranty. You may also complete your customer registration at www.sunsetswings.com. -
Page 4: Positioning Your Swing
Positioning Your Swing The swing is designed to be installed on a firm level surface. There should be a minimum clearance of five feet in front and back, and two feet on each side of your swing. It should be placed in an area where children will not stray or walk into the path of the swing. -
Page 5: Exploded Swing Diagram
EXPLODED DIAGRAM Page 4... -
Page 6: Tool And Hardware Diagram
TOOL AND HARDWARE DIAGRAM Page 5... -
Page 7: Parts List
PARTS LIST Item# Description GM750-101-001 Bent Leg GM750-201-003 Curved Flange GM750-200-001 Left Upright Assembly GM750-200-002 Right Upright Assembly GM780-240-001 Top Beam Assembly GM780-320-001PZ Adjustable Canopy Support Assembly 0116-012-003 M12 Flat Washer 0116-010-003 M10 Flat Washer 0110-712-003 M12 Lock Nut 0110-710-003 M10 Lock Nut GM750-380-001 Wood Support Bracket... -
Page 8: Assembly Instructions
Two people are required for STEPS 1 through 6 STEP 1: Add 2 SWING FEET to each BENT LEG STEPS 2 and 3: Attach the BENT LEGS to the RIGHT and LEFT UPRIGHT ASSEMBLIES STEPS 4 and 5: Attach the TOP BEAM to the RIGHT and LEFT UPRIGHT ASSEMBLIES. Ensure that the swing mounting flanges on the TOP BEAM are facing to the back of the unit. - Page 9 STEP 7: Insert the PIVOT SHAFT through the TOP BEAM flanges and through the SWING SUPPORT ARM bearing (Repeat for both right and left sides). DO NOT tighten the TOP BEAM set screws at this time. STEP 8: Insert the M10x115 bolt and hardware through the flanges on the TOP BEAM. Tighten the hardware now.
- Page 10 STEP 10: Assemble the SEAT FRAME MOUNTING BRACKETS onto both SEAT FRAME ASSEMBLIES DO NOT TIGHTEN ANY HARDWARE Page 9...
- Page 11 STEP 11: Be sure the Velcro side of the SEAT FABRIC is facing down. Slide the SEAT FABRIC up from the bottom of the LEFT AND RIGHT BENT SEAT TUBES so it is oriented as shown. STEP 12: Attach the SEPARATOR MOUNT to the upper and lower threaded portions of the LEFT AND RIGHT BENT SEAT TUBES.
- Page 12 STEP 13: Attach the SEAT ASSEMBLY to the SEAT FRAME ASSEMBLY at the 4 middle threaded locations on the SEAT ASSEMBLY BEND SEAT TUBES. Repeat STEP 13 for both SEAT ASSEMBLIES TIGHTEN ALL HARDWARE FROM STEP 10 STEP 14: Attach the PILLOW to both SEAT ASSEMBLIES by wrapping the Velcro strap around the backside of the seat.
- Page 13 STEP 15 and 16: Attach the table WOOD SUPPORT BRACKETS to the BENT LEGS and attach the WOOD TABLE to the WOOD SUPPORT BRACKETS. Tighten the hardware now. STEP 17: Place the CANOPY RODS into the ADJUSTABLE CANOPY SUPPORT ASSEMBLY. They will just sit in the tubes until the CANOPY is put on the swing.
-
Page 14: Weekly Maintenance Information
422L Swing Weekly Maintenance Inspect and familiarize yourself with the safety warnings and other information that is posted on the decals located on the swing or in the owner’s manual. Inspect all fabric areas for tears and fabric seams for loose or damaged threads. Replace immediately if needed. -
Page 15: Safety Information
Ensure that the 422L swing is set up on a firm level surface. Make sure the 422L swing has completely stopped before entering or exiting the swing. Be careful as the swing seat may shift while sitting down or getting up from the swing. -
Page 16: Label Reference
Page 15... -
Page 17: Limited Warranty
Sunset Swings® warrants this product to the original purchaser to be free from defects in workmanship and/or materials under normal use. If, during the warranty period, a component part is defective, Sunset Swings® shall repair or replace it (at Sunset Swings® option) within a reasonable period of time. This warranty does not cover costs of removal, transportation or reinstallation.
Need help?
Do you have a question about the 422L and is the answer not in the manual?
Questions and answers