Table of Contents
Advertisement
Service Manual
"X" SERIES
18K - 24K - 208/230V
INVERTER-DRIVEN AIR
CONDITIONING UNITS
Type
INDOOR UNIT
Type
OUTDOOR UNIT
Type
CONTROLLER
PLEASE READ AND
UNDERSTAND THIS MANUAL
BEFORE USING THIS
INVERTER-DRIVEN AIR
CONDITIONING UNIT. KEEP
THIS MANUAL FOR FUTURE
REFERENCE.
Model
DHX18NWB21S
DCX18NWB21S
DHX24NWB21S
DCX24NWB21S
Model
DHX18CSB21S
DCX18CSB21S
DHX24CSB21S
DCX24CSB21S
Model
DRCPX
Advertisement
Table of Contents
Troubleshooting

Related Manuals for Johnson Controls DCX18CSB21S


Summary of Contents for Johnson Controls DCX18CSB21S
- Page 1 18K - 24K - 208/230V INVERTER-DRIVEN AIR CONDITIONING UNITS Type Model DHX18NWB21S INDOOR UNIT DCX18NWB21S DHX24NWB21S DCX24NWB21S Type Model DHX18CSB21S DCX18CSB21S OUTDOOR UNIT DHX24CSB21S DCX24CSB21S Type Model DRCPX CONTROLLER PLEASE READ AND UNDERSTAND THIS MANUAL BEFORE USING THIS INVERTER-DRIVEN AIR CONDITIONING UNIT. KEEP THIS MANUAL FOR FUTURE REFERENCE.
-
Page 2: Important Notice
Important Notice ● Johnson Controls, Inc. pursues a policy of continuing improvement in design and performance in its products. As such, Johnson Controls, Inc. reserves the right to make changes at any time without prior notice. ● Johnson Controls, Inc. cannot anticipate every possible circumstance that might involve a potential hazard. -
Page 3: Table Of Contents
Service Manual Table of Contents Safety Summary ......................i 1. Features and Technical Information ..........1 2. Specifications ......................2 2.1 Specification Sheet ......................2 2.2 Operation Characteristic Curve ..................6 2.3 Capacity Variation Ratio According to Temperature ............6 2.4 Noise Curve ........................7 2.5 Cooling and Heating Data Sheet in Rated Frequency .............7 3. -
Page 4: Important Safety Instructions
Never bypass or jump-out any safety device or switch. ● Johnson Controls, Inc. will not assume any liability for injuries or damage caused by not following steps outlined or described in this manual. Unauthorized modifications to Johnson Controls products are prohibited as they…... - Page 5 Take the following precautions to reduce the risk of property damage. ● Be careful that moisture, dust, or variant refrigerant compounds not enter the refrigerant cycle during installation work. Foreign matter could damage internal components or cause blockages. ● If air filters are required on this unit, do not operate the unit without the air filter set in place. If the air filter is not installed, dust may accumulate and breakdown may result.
- Page 6 Controls uses only refrigerants that have been approved for use in the unit’s intended home country or market. Johnson Controls distributors similarly are only authorized to provide refrigerants that have been approved for use in the countries or markets they serve. The refrigerant used in this unit is identified on the unit’s faceplate and/or in the associated manuals.
- Page 7 under pressure and never open pressurized system parts. ● Before installation is complete, make sure that the refrigerant leak test has been performed. If refrigerant gases escape into the air, turn OFF the main switch, extinguish any open flames and contact your service contractor.
- Page 8 ● Communication cabling shall be a minimum of 18-Gauge, 2-Conductor, Stranded Copper. Shielded cable must be considered for applications and routing in areas of high EMI and other sources of potentially excessive electrical noise to reduce the potential for communication errors. When shielded cabling is applied, proper bonding and termination of the cable shield is required as per Johnson Controls guidelines.
-
Page 9: Features And Technical Information
Service Manual Features and Technical Information 1. Summary Indoor Unit: DHX18NWB21S DCX18NWB21S DHX24NWB21S DCX24NWB21S Outdoor Unit: DHX18CSB21S DCX18CSB21S DHX24CSB21S DCX24CSB21S Controller: DRCPX Technical Information... -
Page 10: Specifications
Service Manual 2. Specifications 2.1 Specification Sheet DHX18NWB21S DCX18NWB21S Model DHX18CSB21S DCX18CSB21S Rated Voltage 208/230 208/230 Power Supply Rated Frequency Phases Power Supply Mode Outdoor Outdoor Cooling Capacity(Min~Max) Btu/h 18000(6800~20000) 18000(6800~20000) Heating Capacity(Min~Max) Btu/h 19800(7340~23500) Cooling Power Input(Min~Max) 1380(450~2150) 1435(450~2150) - Page 11 Service Manual Model of Outdoor Unit DCX18CSB21S DHX18CSB21S ZHUHAI LANDA COMPRESSOR ZHUHAI LANDA COMPRESSOR Compressor Manufacturer/Trademark CO,LTD. CO,LTD. Compressor Model QXA-B141zF030A QXA-B141zF030A Compressor Oil RB68EP RB68EP Compressor Type Rotary Rotary Compressor Locked Rotor Amp (L.R.A) Compressor RLA 12.08 12.08 Compressor Power Input...
- Page 12 Service Manual 1.DCX24NWB21S Model 2.DCX24CSB21S Rated Voltage 208/230 Power Supply Rated Frequency Phases Power Supply Mode Outdoor Cooling Capacity(Min~Max) Btu/h 22000(6800-29700) Heating Capacity(Min~Max) Btu/h Cooling Power Input(Min~Max) 1650(450~3000) Heating Power Input(Min~Max) Cooling Power Current 7.21 Heating Power Current Rated Input 3000 Rated Current 14.49...
- Page 13 Service Manual Model of Outdoor Unit DCX24CSB21S Compressor Manufacturer/Trademark ZHUHAI LANDA COMPRESSOR CO,LTD. Compressor Model QXAS-D23zX090 Compressor Oil RB68EP Compressor Type Rotary Compressor Locked Rotor Amp (L.R.A) Compressor RLA 14.67 Compressor Power Input 2450 Overload Protector 1NT11L-6233/HPC 115/95 /KSD115 Throttling Method Electron expansion valve Operation temp ºF...
-
Page 14: Operation Characteristic Curve
Service Manual 2.2 Operation Characteristic Curve Cooling Heating Cooling Heating Conditions Indoor:DB80°F/WB66.9°F Outdoor:DB95°F Indoor air flow:Super High Pipe length:24.6ft Conditions Indoor:DB70°F/WB60°F Outdoor:DB19.94°F/WB19.04°F Indoor air flow:Super High Pipe length:24.6ft 10 20 30 40 50 60 70 80 90 100 Compressor speed (rps) Compressor speed (rps) 2.3 Capacity Variation Ratio According to Temperature Cooling... -
Page 15: Noise Curve
Service Manual 2.4 Noise Curve Indoor side noise Outdoor side noise Heating Cooling Compressor frequency(Hz) Indoor fan motor rating speed 2.5 Cooling and Heating Data Sheet in Rated Frequency Cooling: Pressure of gas pipe Inlet and outlet pipe Rated cooling Compressor connecting indoor and temperature of heat... -
Page 16: Outline Dimension Diagram
Service Manual 3. Outline Dimension Diagram 3.1 Indoor Unit 7 13/64 Φ2 1/6 Φ2 1/6 1 1/2 1 1/2 7 1/2 5 1/2 8 7/64 7 21/64 Φ2 3/4 Φ2 3/4 1 21/32 3 7/64 Unit:inch Models 38 13/64 11 13/16 8 5/6 42 7/16 12 51/64... -
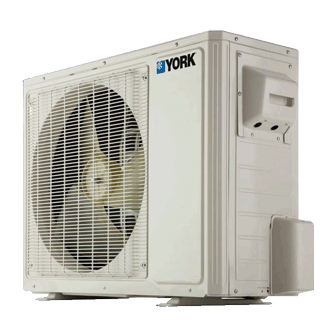
Page 17: Outdoor Unit
Service Manual 3.2 Outdoor Unit 13 13/32 15 19/32 Unit: inch 36 7/32 14 37/64 16 13/16 38 37/64 Unit:inch Technical Information... -
Page 18: Refrigerant System Diagram
Heat Accumlator Suction exchanger Compressor (evaporator) Heat exchanger Liquid pipe (condenser) side Valve Strainer Electron Capillary Strainer expansion valve COOLING HEATING Connection pipe specification: Liquid pipe:1/4"inch Gas pipe:1/2"(for 18K except DCX18CSB21S and DHX18CSB21S) Gas pipe:5/8"(for DCX24CSB21S and DHX24CSB21S Technical Information... -
Page 19: Electrical Parts
Service Manual 5. Electrical Parts 5.1 Wiring Diagram ● Description Symbol Symbol Color Symbol Symbol Color Symbol Name White Green Jumper cap Yellow Brown COMP Compressor Blue Grounding wire YEGN Yellow/Green Black Violet Orange Note: Jumper cap is used to determine fan speed and the swing angle of horizontal louver for this model. ●... - Page 20 Service Manual ● Outdoor Unit DCX18CSB21S OVERLOAD PROTECTOR WARNING Please don't touch any electronic COMP. component or terminal when the YEGN COMP machine is running ,stopping or has been powered off for less than MAGNETIC 30 minutes to prevent the risk of...
- Page 21 Service Manual DCX24CSB21S OVERLOAD PROTECTOR WARNING COMP. Please don't touch any terminal when the YEGN COMP voltage of terminal P(DC+) and N(DC-) at AP1 is higher than 30V to prevent the MAGNETIC risk of electrical shock! RING θ θ θ θ...
-
Page 22: Pcb Printed Diagram
Service Manual 5.2 PCB Printed Diagram Indoor Unit ● Top view 1 Neutral wire 2 Motor needle stand 3 Interface of temperature sensor 4 Auto button 5 Up and down swing interface Left and right swing interface(only for the mode with this function) 7 Display interface 8 Jumper cap Terminal for communication with... - Page 23 Service Manual Outdoor Unit DHX18CSB21S DCX18CSB21S ● Top view 1 Compressor interface Interface of low- 9 10 temperature cooling temperature sensor High pressure protection 4 Low pressure protection Interface of temperature sensor Overload interface of compressor Electronic expansion valve 8 Interface of DC fan...
- Page 24 Service Manual DHX24CSB21S DCXCSB21S ● Top view 1 Compressor interface 2 Compressor overload protector 3 Temperature sensor 4 Electronic expansion valve 5 Outdoor fan 6 4-way valve Communication interface with indoor unit 8 Live wire 9 Grounding wire 10 Neutral wire 11 Reactor interface 2 12 Reactor interface 1 13 2-way valve interface...
-
Page 25: Function And Control
Service Manual 6. Function and Control 6.1 Remote Controller Introduction Buttons on Remote Controller ON/OFF button MODE button FAN button SWING button TURBO button ▲/ button SLEEP button TEMP button I FEEL button LIGHT button CLOCK button TIMER ON / TIMER OFF button Description of icons on display screen Set fan speed... - Page 26 Service Manual 1. ON/OFF button Pressing this button can turn on or turn off the air conditioner. After turning on the air conditioner, operation indicator " "on indoor unit’s display is ON showing a green indicator and indoor unit will give out a sound. (The color is different for different models.) 2.
- Page 27 Service Manual 7. SLEEP button Under COOL, HEAT or DRY mode, press this button to start up sleep function. " " icon is displayed on remote controller. Press this button again to cancel sleep function and " " icon will disappear. 8.
-
Page 28: Function Introduction For Combination Buttons
Service Manual Function introduction for combination buttons 1. Energy-saving function Under cooling mode, press "TEMP" and " CLOCK" buttons simultaneously to start up or turn off energy-saving function. When energy- saving function is started up, "SE" will be shown on remote controller, and air conditioner will adjust the set temperature automatically according to factory setting to reach the best energy-saving effect. -
Page 29: Brief Description Of Modes And Functions
Service Manual 6.2 Brief Description of Modes and Functions 1.Basic function of system (1)Cooling mode (1) Under this mode, fan and swing operate at setting status. (2) During malfunction of outdoor unit or the unit is stopped because of protection, indoor unit keeps original operation status. (2)Drying mode (1) Under this mode, fan operates at low speed and swing operates at setting status. - Page 30 Service Manual (8)I feel control mode I FEEL Mode is the hand held remote taking over the sensing instead of the indoor air sensor. The indoor remote needs to be in the line of sight of the indoor unit no more than 24ft away. Remember not to put the remote near any type of heat source. (9)Compulsory defrosting function (1) Start up compulsory defrosting function Under ON status, set heating mode with remote controller and adjust the temperature to 60.8...
-
Page 31: Outdoor Units
Service Manual Outdoor Units 1. Input Parameter Compensation and Calibration (1) Check the ambient temperature compensation function Indoor ambient temperature compensation function. a. In cooling mode, the indoor ambient temperature participating in computing control = (T – ⊿ T indoor ambient temperature cooling indoor ambient temperature compensation b. - Page 32 Service Manual 3. Special Functions Defrosting Control ① Conditions for starting defrosting After the time for defrosting is judged to be satisfied, if the temperature for defrosting is satisfied after detections for continuous 3minutes, the defrosting operation will start. ② Conditions of finishing defrosting The defrosting operation can exit when any of the conditions below is satisfied: ③...
- Page 33 Service Manual 1. Starting estimation: After the compressor stopped working for 3min, if T > [T (the temperature of hysteresis is 35.6ºF )], the inner pipe frozen-preventing frequency-limited temperature machine is only allowed to start for operating, otherwise it should not be started, and should be stopped to treat according to the freeze- preventing protection: Clear the trouble instances under the mode of power turn-off / heating, and the protection times are not counted.
- Page 34 Service Manual 1. Frequency limited If [T ]≤T <[T ], you should limit the frequency raising of heating overload frequency-limited temperature inner pipe heating overload frequency reducing temperature at normal speed compressor. 2. Reducing frequency at normal speed and stopping machine: If T[ ]≤T <[T...
- Page 35 Service Manual (6)Voltage sag protection After starting the compressor, if the time of DC link Voltage sag [U ] is measured to be less than t Voltage sag protection Sagging protection voltage time, the machine should be stopped at once, hand on the voltage sag trouble, reboot automatically after 30 minutes. (7)Communication fault When you have not received any correct signal from the inner machine in 3min, the machine will stop for communication fault.
- Page 36 Service Manual (12) Start-up Failure Protection for Compressor Stop the compressor after its start-up fails, restart it after 20s if the fault doesn’t show, and if they are all failing for the successive starts three times, report it as Start-up Failure, and then restart it after 3min. When it still doesn't operate after carrying out the above process five times, it is available if press ON/OFF.
- Page 37 Service Manual 6. Electric Heating Function of Chassis (1) When Toutdoor amb.≤32ºF , the electric heating of chassis will operate; (2) When Toutdoor amb.>35.6ºF , the electric heating of chassis will stop operation; (3)When 32ºF <Toutdoor amb.≤35.6ºF, the electric heating of chassis will keep original status. 7.
-
Page 38: Wired Zone Controller
Service Manual 7. Wired Zone Controller If the product is equipped with a wired zone controller, please refer to the following descriptions of wired zone controller. 1.Displaying Part Fig1.1.1 Outline of wired zone controller 1.1 LCD Display of Wired Zone Controller Fig.1.1.2 LCD display 1.2 Description of LCD Display Description... - Page 39 Service Manual Lock function Shield functions (Button operation, temperature setting, On/Off operation,Mode setting are SHIELD disabled by the remote monitoring system.) TURBO Turbo function state Memory function (The indoor unit resumes the original setting state after power failure and MEMORY then power recovery) It blinks under on state of the unit without operation of any button SAVE...
- Page 40 Service Manual 3 Operation Instructions 3.1 On/Off Press On/Off to turn on the unit and turn it off by another press. Note: The state shown in Fig.3.1.1 indicates the “Off” state of the unit after power on. The state shown in Fig.3.1.2 indicates the “On” state of the unit after power on.
- Page 41 Service Manual • Timer off setting: Under on-state of the unit without timer setting, if Timer button is pressed, LCD will display xx. Hour,with OFF blinking. In this case, press▲ or ▼ button to adjust timer on and then press Timer to confirm. •...
- Page 42 Service Manual Timer range: 0.5-24hr. Every press of ▲or ▼ will make the set time increased or decreased by 0.5hr. If either of them is pressed continuously, the set time will increase/ decrease by 0.5hr every 0.5s. 3.6 Swing Setting Swing On: Press Function under on state of the unit to activate the swing function.
- Page 43 Service Manual 3.8 Turbo Setting Turbo function: The unit at the high fan speed can realize quick cooling or heating so that the room temperature can quickly approach the setting value. In the Cooling or Heating mode, press Function till the unit enters the Turbo setting status and then press Enter/Cancel to confirm the setting. When the Turbo function is activated, press Function to enter the Turbo setting status and then press Enter/Cancel to cancel this function.
- Page 44 Service Manual 3.9 Blow Setting Blow function: After the unit is turned off, the water in evaporator of indoor unit will be automatically evaporated to avoid mildew. In the Cooling or Dry mode, press Function till the unit enters the Blow setting status and then press Enter/Cancel to active this function. When the Blow function is activated, press Function to the Blow setting status and then press Enter/Cancel to cancel this function.
- Page 45 Service Manual Notes: (1)When the Blow function is activated, if turning off the unit by pressing On/Off or by the remote controller, the indoor fan will run at the low fan speed for 2 min, with “BLOW” displayed on the LCD. While, if the Blow function is deactivated, the indoor fan will be turned off directly.
- Page 46 Service Manual Fig.4.2 Fig.4.2 Fig.4.2 shows the installation steps of the wired controller , but there are some issues that need your attention. (1) Prior to the installation, please firstly cut off the power supply of the wire buried in the installation hole, that is, no operation is allowed with electricity during the whole installation.
- Page 47 Service Manual 5 Errors Display If there is an error occurring during the operation of the system, the error code will be displayed on the LCD, as show in Fig.5.1. If multiple errors occur at the same time, their codes will be displayed sequentially. Note: In event of any error, please turn off the unit and contact a certified technician.
-
Page 48: Maintenance
8. Maintenance 8.1 Precautions before Maintenance pacitor after power off. discharge resistance or plug of soldering iron... -
Page 49: Error Code List
8.2 Error Code List cooling, dehumidifying, except the indoor fan motor is running, others will stop to run; heating; all stop running. condenser 1.Power supply is abnormal Malfunction Off 3s of zero-cross The complete unit stops 2.Detection circuit of indoor and blink direction control mainboard is... - Page 50 Overload normal Overload normal Overload normal Cooling, dehumidifying, compressor not running, fan Complete unit Off 3s current and blink detection 13 times malfunction Off 3s Defrosting will occur in and blink heating mode.Compressor once will operate while indoor It’s the normal state (during fan will stop.
-
Page 52: Troubleshooting For Main Malfunction
8.3 Troubleshooting for Main Malfunction 1. Malfunction of Temperature Sensor F1, F2 Troubleshooting for F1,F2 malfunction the wiring terminal between the temperature sensor and the controller loosened or poorly contacted? Insert the temperature sensor tightly Is malfunction eliminated Is there short circuit due to trip - over of the parts? Make the parts upright Is malfunction... - Page 53 2. Malfunction of Blocked Protection of IDU Fan Motor H6 Start Turn the fan blades by hand under power-off condition Adjust the motor and blade Whether the fan blades assembly so that rotor can run can run smoothly? smoothly. Turn unit on to check whether the malfunction is eliminated.
- Page 54 3. Malfunction of Protection of Jumper Cap C5...
- Page 55 4. Communication Malfunction E6 Start Cut off power supply. Check if connection line of IDU and ODU and the wire inside electric box are correctly connected. Connect the line Correct connection? according to Malfunction eliminated? wiring diagram. Main board matches Match correctly with display board? Main board of Malfunction eliminated?
- Page 56 1. Key Detection Point Test9 Test3 Test4 Test2 Test1 Test5 Test8 Tset7 Test6 Test10 Test11 Test12 Test NO Test point Corresponding component condition Test 1 Between A and C 160V~265V Test 2 Between B and C 160V~265V Test 3 Between D and E DC 180V~380V Test 4 Electrolytic capacitor of power...
- Page 57 2.Capacity charging malfunction (outdoor unit malfunction) (AP1 below is control board of outdoor unit) Main detection point: Turn on the unit and wait 1 minute Use DC voltmeter to measure the voltage on the two ends of electrolytic capacitor Fault with the voltage Replace the control testing circuit on Voltage higher than 200V?
- Page 58 3.IPM protection, desynchronizing malfunction, phase current of compressor is overcurrent (AP1 below is control board of outdoor unit) Main detection point: Installation and Maintenance...
- Page 59 Energize and switch on Use AC voltmeter If the voltage Check the supply to measure the IPM protection between terminal L voltage and voltage between occurs after the and N on wiring machine has run for terminal L and N restore it to board XT is within a period of time?
- Page 60 4.Diagnosis for anti-high temperature, overload protection (AP1 below is control board of outdoor unit) Main detection point: Anti-high temperature, overload protection Normal protection, please use If the outdoor ambient temperature is it after improve the outdoor higher than 127.4 °F? ambient temperature After the unit de- energized for 20min...
- Page 61 5.Diagnosis for failure start up malfunction (AP1 below is control board of outdoor unit) Main detection point: Energize the unit and start it If the stop time is not enough and the If the stop time of compressor high and low pressure of system is not is more than 3min? balance , please start it after 3min Improve the connection situation...
- Page 62 6. Diagnosis for compressor synchronism (AP1 below is control board of outdoor unit) Main detection point: Synchronism Synchronism after energize the unit occurred during and start it operation Check if the fan Replace fan If the stop time of If the outdoor fan works terminal OFAN is capacitor C1 compressor is more than...
- Page 63 7.Diagnosis for overload and discharge malfunction (AP1 below is control board of outdoor unit) Main detection point: leaking After the unit de-energized for 20min If the overload protector SAT is well connected? Under ambient temperature, test the resistance of overload protector with ohmic Connect wire If the wiring terminal FA of electron well with wiring...
- Page 64 8.Communication malfunction (AP1 below is control board of outdoor unit) Main detection point: aged? Start If the unit is operation normal before malfunction Check connection wire of indoor and outdoor unit with circuit diagram Check built- in wiring of Connection indoor and correct? outdoor unit...
- Page 65 9. Diagnosis Process for Outdoor Communication Circuit Start Test voltage value with Test 10 position in diagram with voltage meter Number jumping Test voltage value with Test 13 position in diagram with voltage meter Number jumping Outdoor unit Test voltage malfunction value with Test 11 position in...
-
Page 66: Troubleshooting For Normal Malfunction
8.4 Troubleshooting for Normal Malfunction 1. Air conditioner doesn't start connected well. or poor connection for wiring terminals unit are correctly once improper Repair or replace controller 2. Poor cooling (heating) for air conditioning unit Light fan speed motor is set too low conditioner Add refrigerant. - Page 67 4. ODU fan motor doesn't operate Connect wires according to wiring diagram to Wrong wire connection, or poor connection diagram damaged fan capacitor. 5. Compressor doesn't operate Connect wires according to wiring diagram to Wrong wire connection, or poor connection diagram Capacity of compressor is damaged...
-
Page 68: Removal Procedures
Service Manual 9. Removal Procedures Warning: Be sure to wait for a minimum 9.1 Removal Procedures for Indoor Unit of 20 minutes after turning off all power supplies and discharge the refrigerant completely before removal. Take A1 panel for example 1. - Page 69 Service Manual Loosen the connection clasps between front case sub-assy and bottom case. Lift up the front case sub-assy and take it out. Remove the screws that are locking Swing motor the swing motor and take the motor off.
- Page 70 Service Manual Indoor tube temperature s ensor Cut off the wire binder and pull out the indoor tube temperature sensor. Screw off one grounding screw. Main Remove the wiring terminals of motor and board stepping motor. Remove the electric box assy. G rounding Remove the screws that are locking each s c rew...
- Page 71 Service Manual G roove R ear case ass y First remove the left side of evaporator from the groove on the rear case assy. Then remove the right side from the clasp on the C lasp rear case assy.
- Page 72 Service Manual...
-
Page 73: Removal Procedure Of Outdoor Unit
Service Manual 9.2 Removal Procedures for Outdoor Unit Warning: Be sure to wait for a minimum of 20 minutes after turning off all power supplies and discharge the refrigerant completely before removal. NOTE: Take heat pump for example. Steps Procedure 1. - Page 74 Service Manual Steps Procedure Remove the screws connecting the outer case with the motor support, isolation plate and chassis; lift the outer case upwards; loosen the clasps of outer case with right side plate and left side plate, and then remove the outer case. outer case 3.
- Page 75 Service Manual Steps Procedure 4. Remove axial flow blade Remove the nut securing axial flow blade and then remove the blade. axial flow fan motor support Remove the six screws securing the motor and then remove the motor. Remove the two screws connecting the motor support and chassis, and then loosen the stopper to remove the motor support.
- Page 76 Service Manual Steps Procedure 6. Remove the insulation Tear off the adhesive and then remove the insulation. insulation 7. Remove isolation plate Remove the two screws connecting the isolation plate and condenser side plate; remove the three screws connecting the isolation plate and chassis, and then remove the isolation plate.
- Page 77 Service Manual Steps Procedure 9. Remove compressor compressor Remove the three foot nuts fixing compressor and then lift the compressor upwards to remove the compressor and damping cushion. Note: Keep the ports of discharge pipe and suction pipe from foreign objects. condenser sub-assy 10.
- Page 78 Service Manual NOTE: This model doesn't have a 4-way valve assy. Steps Procedure 1. Remove big handle, valve cover and top cover Remove the screw connecting the big handle and right side plate, and then remove the big handle. Remove the screw connecting the valve cover and right side plate, and then remove the valve cover.
- Page 79 Service Manual Steps Procedure 4.Remove grille and panel Twist off the screws connecting the grille and panel, and then remove the grille. Twist off the screws connecting the panel, chassis and motor support with screwdriver, and then remove the panel. grille panel 5.Remove right side plate...
- Page 80 Service Manual Steps Procedure 7.Remove electric box electric box Twist off the screws on electric box, cut off the tieline with scissors or pliers, pull out the wiring terminal, pull it upwards to remove the electric box. Twist off the screws on electric box with a electric box screwdriver, and then remove the electric box.
- Page 81 Service Manual Steps Procedure 9.Remove motor support Twist off the tapping screws securing the motor support, pull it upwards and then remove the motor support. motor support 10.Remove isolation sheet Twist off the screws connecting isolation sheet and end plate of condenser and chassis, and then remove the isolation sheet.
- Page 82 Service Manual Steps Procedure 12.Remove gas valve and liquid valve Twist off the two bolts fixing the valve sub-assy. Unsolder the soldering joint between gas valve and air-return pipe and then remove the gas valve. (Note: When unsoldering the soldering joint, wrap the gas valve with wet cloth gas valve completely to avoid the damage to valve, and...
- Page 83 Service Manual Steps Procedure 15.Remove left side plate Twist off the screws connecting the left side plate and chassis with a screwdriver, and then remove the left side plate. left side plate 16.Remove chassis and condenser Pull it upwards to separate the chassis and condenser.
-
Page 84: Appendix
Service Manual Appendix: Appendix 1: Reference Sheet of Celsius and Fahrenheit Conversion formula for Fahrenheit degree and Celsius degree: Tf=Tcx1.8+32 Set temperature Fahrenheit Fahrenheit Fahrenheit display Fahrenheit display Fahrenheit display Fahrenheit Celsius (℃) Celsius (℃) Celsius (℃) temperature temperature temperature (℉)... -
Page 85: Appendix 3: Pipe Expanding Method
Service Manual Appendix 3: Pipe Flaring Method Pipe Note: Improper pipe flaring is the main cause of refrigerant leakage.Please Pipe cutter expand the pipe according to the following steps: Leaning Uneven Burr A:Cut the pipe ● Confirm the pipe length according to the distance of indoor unit and outdoor unit. ●... -
Page 86: Appendix 4: List Of Resistance For Temperature Sensor
Service Manual Appendix 4: List of Resistance for Temperature Sensor Resistance Table of Ambient Temperature Sensor for Indoor and Outdoor Units(15K) Temp.( Resistance(kΩ) Temp.( Resistance(kΩ) Temp.( Resistance(kΩ) Temp.( Resistance(kΩ) -2.2 138.1 18.75 138.2 3.848 208.4 1.071 -0.4 128.6 69.8 17.93 3.711 210.2 1.039... - Page 87 Service Manual Resistance Table of Tube Temperature Sensors for Indoor and Outdoor (20K) Temp.( Resistance(kΩ) Temp.( Resistance(kΩ) Temp.( Resistance(kΩ) Temp.( Resistance(kΩ) -2.2 181.4 25.01 138.2 5.13 208.4 1.427 -0.4 171.4 69.8 23.9 4.948 210.2 1.386 162.1 71.6 22.85 141.8 4.773 1.346 153.3 73.4...
- Page 88 Service Manual Resistance Table of Discharge Temperature Sensor for Outdoor(50K) Temp.( Resistance(kΩ) Temp.( Resistance(kΩ) Temp.( Resistance(kΩ) Temp.( Resistance(kΩ) -20.2 853.5 120.2 18.34 190.4 4.754 -18.4 799.8 51.8 93.42 17.65 192.2 4.609 -16.6 53.6 89.07 123.8 16.99 4.469 -14.8 703.8 55.4 84.95 125.6 16.36...
- Page 90 Product improvement, specifications and appearance in this manual are subject to change without prior notice. LIT - 12012193 © Johnson Controls, Inc. USA...
Need help?
Do you have a question about the DCX18CSB21S and is the answer not in the manual?
Questions and answers