Advertisement
Quick Links
WARNINGS
• Be sure to install and assemble the copyboard as instructed in this manual. Improper installation or assembly
could lead to injury.
• At least two people should hold the copyboard when installing and removing it.
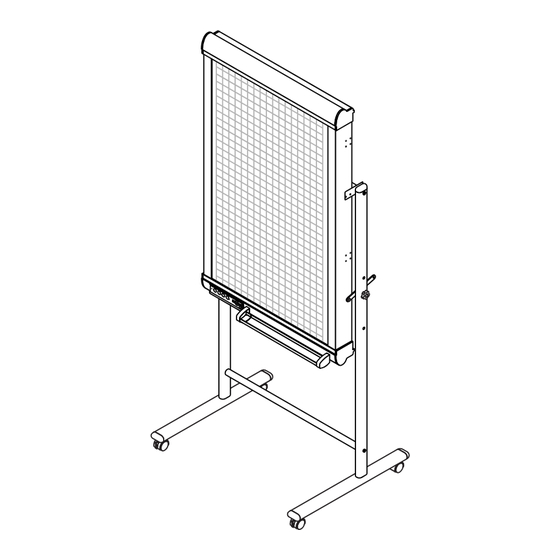
This dedicated stand for the M-5 Copyboard allows the Copyboard to be set up in the horizontal or vertical orientation.
Please assemble the stand in the orientation that suits the purpose.
Note that the parts supplied with the Copyboard will also be used in the assembly.
Assembling the stand and mounting the copyboard horizontally
Parts included in the copyboard package: Marker tray (1 pc), side covers (2 pcs), M4 x 8 marker tray installation
screws (3 pcs, screws removed when unpacking), 8 copyboard mount screws (M4 x 12)
List of parts included in the stand kit (parts used for horizontal installation)
Feet (with casters) : 2, Frames : 2, Foot washers : 2, Foot fixing screws (M8 x 50) : 4, Spring washers : 4,
Extension frames : 2, Caps : 6, Fixing knobs (with hexagon cap nuts) : 2, Crossbars : 2,
Hexagonal socket head screws : 4, Flat washers : 4, Upper brackets (left and right) : 2, Lower brackets : 2,
Hexagonal wrench (M8) : 1, Hexagonal wrench (M5) : 1
bAssembly and installation flow
Assembling
the stand
[horizontal orientation]
Mounting
the marker tray
on the copyboard
Stand Assembly Manual
Mounting
the brackets
on the copyboard
1
(Model M-5-T)
[vertical orientation]
Mounting the
copyboard
onto the stand
Advertisement

Related Manuals for Plus M-5-T

Summary of Contents for Plus M-5-T
- Page 1 (Model M-5-T) Stand Assembly Manual WARNINGS • Be sure to install and assemble the copyboard as instructed in this manual. Improper installation or assembly could lead to injury. • At least two people should hold the copyboard when installing and removing it.
- Page 2 (1) Assemble the T-shaped legs (two). Spring washer Mount the foot using washers, spring wash- ers and M8 x 50 hexagonal socket head Extension frame screws. Foot washer Make sure of the orientation of the extension frame M8 x 50 hexagonal socket head screw and the frame end looking at the marks, then insert all the way.
- Page 3 (4) Mount the upper and lower brackets using M4 x 12 screws. • The left and right upper brackets are different. Be sure to mount them on the proper side. • Both the lower brackets have the same form, but mount them in the opposite directions so that each is facing outwards.
- Page 4 Assembling the stand and mounting the copyboard vertically Parts included in the copyboard package: 6 copyboard mount screws (M4 x 12) List of parts included in the stand kit (parts used for vertical installation) Feet (with casters) : 2, Frames : 2, Foot washers : 2, Foot fixing screws (M8 x 50) : 4, Spring washers : 4, Caps : 6, Fixing knobs (with hexagon cap nuts) : 2, Crossbars : 2, Hexagonal socket head screws : 4, Flat washers : 4, Upper brackets (left and right) : 2, Lower brackets : 2, Hexagonal wrench (M8) : 1, Hexagonal wrench (M5) : 1, Short marker tray:1, Side covers: 2...
- Page 5 (3) Mount the upper and lower brackets using M4 x 12 screws. • The left and right upper brackets are different. Upper bracket Be sure to mount them on the proper side. M4 x 12 screws M4 x 12 screws Lower bracket (4) Hook the left and right upper brack- ets of the Copyboard onto the up-...
- Page 6 (6) Vertical Image Setting. The Copyboard is set for horizontal position when shipped from the factory. Please set for vertical position using the following procedure. Preparation: 1. Connect the AC power adapter to the Copyboard and the power outlet. See the User's Manual for information about the con- nection method.
Need help?
Do you have a question about the M-5-T and is the answer not in the manual?
Questions and answers