Sony LSPX-P1 Manual
Portable ultra short throw projector
Hide thumbs
Also See for LSPX-P1:
- Reference manual (250 pages) ,
- Startup manual (110 pages) ,
- Startup manual (6 pages)
Table of Contents
Advertisement
Quick Links
Download this manual
See also:
Reference Manual
Portable Ultra Short Throw Projector
Before first use
Checking the package contents [1]
Location of controls
Location of controls (Portable Ultra Short Throw Projector) [2]
Location of controls (Wireless unit) [3]
About the indicators [4]
The home screen of the special application [5]
Preparing
Projector install location [6]
Preparing the power
Charging the projector [7]
Battery duration of the projector [8]
Connect the Wireless unit to a wall outlet [9]
Turning the power on/off
Turning the projector on/off [10]
Placing the projector in standby status [11]
LSPX-P1
Advertisement
Table of Contents

Related Manuals for Sony LSPX-P1


Summary of Contents for Sony LSPX-P1
- Page 1 LSPX-P1 Portable Ultra Short Throw Projector Before first use Checking the package contents [1] Location of controls Location of controls (Portable Ultra Short Throw Projector) [2] Location of controls (Wireless unit) [3] About the indicators [4] The home screen of the special application [5]...
-
Page 2: Table Of Contents
Installing the special application and performing the initial settings [12] Connecting another device to the Wireless unit Connecting an HDMI device or TV [13] Connecting the IR Blaster [14] How to use the special application The home screen of the special application [15] Updating the software [16] Projecting the poster Projecting the clock [17]... - Page 3 Using the mirroring function to project the smartphone’s screen [22] Projecting photos/movies from a device on the home network Projecting photos/movies from a device on the home network [23] Projecting images from the HDMI device connected to the Wireless unit Projecting images from the HDMI device connected to the Wireless unit [24] Settings Adjusting the volume/picture...
- Page 4 Changing the device name of the projector [33] Connecting to an access point [34] Connecting via Wi-Fi Direct [35] Checking the signal strength [36] Confirming registration when connecting a smartphone [37] Managing smartphones to be connected [38] Checking the Wi-Fi MAC address [39] Setting the language for the projector [40] Updating the software [41] Resetting to the initial settings [42]...
-
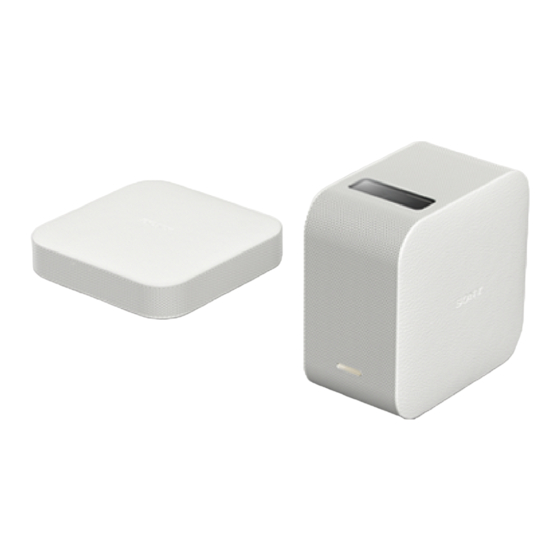
Page 5: Checking The Package
After opening the package, check that all items in the list are included in the package. If any item is missing, contact your dealer. Numbers in ( ) indicate the item quantities. Portable Ultra Short Throw Projector (LSPX-P1) (1) Wireless unit (LSPX-PT1) (1) AC adaptor VGP-AC19V77 (19.5 V / for the projector) (1) - Page 6 [2] Before first use Location of controls Location of controls (Portable Ultra Short Throw Projector) The location of controls of the projector is described below. Ventilation holes (intake/exhaust) Projection window Projects images onto a wall, table or floor. Remote control receiver Receives signals from the HDMI device’s remote control to transfer the signals to the HDMI device connected to the Wireless unit, thus allowing you to operate the HDMI device.
- Page 7 Distance sensor Measures the distance between the projector and the projection surface. RESET button Resets and restarts the projector. Charge indicator Turns on during charging. Power jack for the stand (sold separately) Supplies power to the floor stand (sold separately) when the projector is mounted on the stand. [3] Before first use Location of controls Location of controls (Wireless unit)
-
Page 8: About The
IR BLASTER connector Connect the IR Blaster (supplied) DC IN 5V jack Connect the AC adaptor LSPX-AC5V2 (supplied). PAIRING button The projector and the Wireless unit have already been paired (connection setting) at the time of purchase. When the pairing is removed, such as after maintenance, use this PAIRING button to pair them again. -
Page 9: The Home Screen Of The Special
Leave the projector at room temperature for a while, then turn in on again. Flashing three times every three seconds: The projector is malfunctioning. Consult your dealer. Charge indicator Turned off: Recharging is complete. Turned on: Charging. Wireless unit indicator Turned on in white: Connected with the projector. - Page 10 (Settings) button Displays the setting menu. (standby/power-on) button Switches between standby and power-on. Projector remaining battery life Poster button Places the projector in poster mode. Tap this button to project a poster, to use the screen mirroring function to project the smartphone’s screen, or to project photos or movies from a device on the home network.
- Page 11 About the notification screen on the smartphone When the smartphone and projector are connected, the notification of “Portable Ultra Short Throw Projector Application” is displayed in the notification screen on the smartphone. In this notification, you can switch the projector between standby and power-on, and adjust the volume. Flick down from the top edge of the smartphone’s screen to open the notification screen.
-
Page 12: Projector Install
Volume adjustment button Hint When two or more projectors are registered to the special application, the device name currently connected is displayed on the home screen. The notification screen may vary depending on the smartphone. [6] Preparing Projector install location In addition to a wall, the projector can project photos and movies onto a table or floor. -
Page 13: Charging The
Hint When the projector is lifted up and moved, the projection light is dimmed to prevent it entering the eye. [7] Preparing Preparing the power Charging the projector A lithium-ion rechargeable battery is incorporated into the projector. When the remaining battery life becomes low, the power indicator flashes in red. -
Page 14: Connect The Wireless Unit To A Wall
Firmly insert the plug of the power cord into the wall outlet. When charging starts, the charge indicator (a) turns on in amber. When charging is complete, the charge indicator turns off. Hint It takes about four hours to fully charge a flat battery. The charge indicator may turn on to check the remaining battery life even when the battery is fully charged. - Page 15 Connect the power cord (supplied) to the AC adaptor (5 V) for the Wireless unit (supplied). Connect the AC adaptor to the DC IN 5V jack of the Wireless unit. Firmly insert the plug of the power cord into the wall outlet. When the power plug is inserted into the wall outlet, the Wireless unit turns on and the white indicator (a) turns on.
-
Page 16: Placing The Projector In Standby
To turn on Press and hold the power button (a). The projector is turned on, and the power indicator (b) turns on in white. To turn off Press and hold the power button (a). The projector is turned off, and the power indicator (b) turns off. To place the projector in standby status, lightly press the power button (a). -
Page 17: Installing The Special Application And Performing The Initial
Projector body: Press the power button (a) lightly. “Portable Ultra Short Throw Projector Application”: Tap the (power-on) button (c) on the home screen. The power indicator (b) remains lit in white when the projector is in standby status. Resuming from standby status Resume operation either from the projector or the smartphone. -
Page 18: Connecting An Hdmi Device Or
Download and install “Portable Ultra Short Throw Projector Application” from Google Play store or App Store. http://www.sony.net/lspx-p1/store/ After the installation is complete, start “Portable Ultra Short Throw Projector Application.” Follow the on-screen instructions to perform the initial settings of “Portable Ultra Short Throw Projector Application.”... -
Page 19: Connecting The Ir
Connect the Wireless unit’s HDMI IN connector and the HDMI device’s HDMI OUT connector with an HDMI cable (sold separately). To also display images from the HDMI device onto a TV screen, connect the Wireless unit’s HDMI OUT connector and the TV’s HDMI IN connector with an HDMI cable (sold separately). - Page 20 [14] Preparing Connecting another device to the Wireless unit Connecting the IR Blaster By connecting the Wireless unit and an HDMI device with the IR Blaster (supplied), you can operate the HDMI device by aiming its remote control at the projector. This is useful when the projector and HDMI device are placed at distant locations.
-
Page 21: The Home Screen Of The Special
Aim the HDMI device’s remote control at the projector’s remote control receiver (a), then operate the remote control. If the HDMI device does not respond, change the direction of the IR Blaster. After checking the IR Blaster works correctly, secure it with the double-sided adhesive sheet (supplied). - Page 22 (Settings) button Displays the setting menu. (standby/power-on) button Switches between standby and power-on. Projector remaining battery life Poster button Places the projector in poster mode. Tap this button to project a poster, to use the screen mirroring function to project the smartphone’s screen, or to project photos or movies from a device on the home network.
- Page 23 About the notification screen on the smartphone When the smartphone and projector are connected, the notification of “Portable Ultra Short Throw Projector Application” is displayed in the notification screen on the smartphone. In this notification, you can switch the projector between standby and power-on, and adjust the volume. Flick down from the top edge of the smartphone’s screen to open the notification screen.
-
Page 24: Updating The
Volume adjustment button Hint When two or more projectors are registered to the special application, the device name currently connected is displayed on the home screen. The notification screen may vary depending on the smartphone. [16] How to use the special application Updating the software The software of the projector and the Wireless unit can be updated via the Internet. -
Page 25: Projecting The
Hint Connect the projector to an access point (wireless router) to update. It is recommended that you connect the smartphone via Wi-Fi to perform an update because the file size may be large. are displayed when [Update notifications] in [Update] is enabled. It is enabled by default. Enable [Auto-retrieve updates] in [Update] to download the software automatically. -
Page 26: Projecting Weather
[18] Projecting the poster Projecting weather information In poster mode, you can project weather information of the current location. The weather information is updated every 1 or 2 hours. Connect the smartphone and projector to the same access point (wireless router) before using this function. -
Page 27: Projecting A
Projecting a slideshow In poster mode, you can project a slideshow. In addition to choosing one from prepared genres, you can use photos stored in the smartphone to project in a slideshow. Connect the smartphone and projector to the same access point (wireless router) before using this function. -
Page 28: Setting The Photo Change
In the my slideshow screen, tap the (Background music) button. Then, tap [Add] to select tracks to set as background music. You can select multiple tracks to be played back in the order of selection. After selecting music, tap the button at the top left of the screen to return to the thumbnail screen, then tap [Build Slideshow]. - Page 29 Set the display time. [21] Projecting a smartphone’s photo/movie Projecting a smartphone’s photo/movie You can project a photo or movie stored in a smartphone using the special application. Connect the smartphone and projector to the same access point (wireless router) before using this function.
-
Page 30: Using The Mirroring Function To Project The Smartphone's
Hint Tap the (control panel) button to adjust the volume, brightness, etc. [22] Using the mirroring function to project the smartphone’s screen Using the mirroring function to project the smartphone’s screen When your smartphone supports Miracast, you can directly project the smartphone’s screen. No access point (wireless router) connection is needed. -
Page 31: Projecting Photos/Movies From A Device On The Home
Operate the smartphone to project the screen. [23] Projecting photos/movies from a device on the home network Projecting photos/movies from a device on the home network By using the home network function, you can project photos and movies stored in a device (such as a Blu-ray Disc™... -
Page 32: Projecting Images From The Hdmi Device Connected To The Wireless
Hint The maximum still image size for projecting with the home network function is 32 mega pixels (8,192 × 4,096 pixels) for JPG, and 3 mega pixels (2,048 × 1,024 pixels) for PNG/GIF. [24] Projecting images from the HDMI device connected to the Wireless unit Projecting images from the HDMI device connected to the Wireless unit You can project images stored in an HDMI device. -
Page 33: Adjusting The
Hint Connecting the IR Blaster (supplied) allows you to operate the HDMI device by aiming its remote control at the projector. This is useful when the projector and HDMI device are placed at distant locations. [25] Settings Adjusting the volume/picture Adjusting the volume You can adjust the volume of the projector. -
Page 34: Adjusting The Focus
Start (Portable Ultra Short Throw Projector Application) on the smartphone. Tap the (control panel) button. Use the slide bar of [Brightness] to adjust. Automatically adjust the brightness according to ambient lighting Tap [Auto]. While using with a battery, [Auto] is disabled. [27] Settings Adjusting the volume/picture Adjusting the focus... -
Page 35: Keystone
Note The auto focus function uses the range sensor on the rear of the projector to measure the distance to the projection surface and adjusts the focus. In the following conditions, the range sensor may not be able to measure the distance correctly and the focus may not be adjusted: There is an obstruction between the projector and the projection surface The projector is placed on a stand or the like. -
Page 36: Rotating The Projected
Start (Portable Ultra Short Throw Projector Application) on the smartphone. Tap the (control panel) button. Use the slide bar or buttons of [Keystone correction] to adjust. When the lengths of the left edge and right edge of the projected image differ Change the projector’s location or orientation to project perpendicularly. - Page 37 Tap the button or button. Tap the button to rotate the projected image 180 degrees. Tap the button to return to the original orientation. To rotate the projected image automatically Tap [Auto]. [30] Settings Setting auto on/standby You can place the projector in standby mode at a specified time or when a smartphone is detected. Start (Portable Ultra Short Throw Projector Application) on the smartphone.
-
Page 38: Adjusting The Picture
is switched between enabled/disabled. [On at a specified time] At the specified time, the projector resumes from standby status and projects the image. When you tap [On at a specified time], the setting screen appears. Tap the switch to enable the setting, then specify the time. - Page 39 Tap [Picture]. Select the item to be adjusted. Setting items [Preset 1] This option is suited to projecting onto a white wall, table or floor. [Preset 2], [Preset 3] This option is suited to projecting onto a yellowish wall, table or floor. Select the desired color tone. [Custom 1], [Custom 2] By default, [Custom 1] is adjusted to a brightness-oriented setting, and [Custom 2] is adjusted to be suited to natural images.
-
Page 40: Changing The Device Name Of The
Tap the [xLOUD] switch to change between enabled and disabled. [33] Settings Configuring the network settings Changing the device name of the projector You can change the projector’s name displayed on the home network. “LSPXP1” is set at the time of purchase. -
Page 41: Connecting To An Access
[34] Settings Configuring the network settings Connecting to an access point A connection between the projector and access point (wireless router) is needed in the following situations. Connect the smartphone and projector to the same access point (wireless router). When projecting photos or movies in the smartphone. When operating the poster. - Page 42 Tap [Network]. Tap [Wi-Fi]. Tap [Connect] to connect to the access point. If the access point requires password input, tap [Password] to enter the password. If the access point supports the WPS (Wi-Fi Protected Setup™) function, tap [Connect using Wi-Fi Protected Setup™], select the connection method, then follow the on-screen instructions. To connect to an access point you have connected in the past On the Wi-Fi screen, tap the button, then tap [Network history] to view access points you have...
-
Page 43: Connecting Via Wi-Fi
Connecting via Wi-Fi Direct You can directly connect this unit and a smartphone (Wi-Fi Direct) without using an access point (wireless router). Note When [Wi-Fi Direct] is enabled, screen mirroring of the smartphone’s screen is not available. Also, [Wi-Fi Direct] is disabled when establishing a connection with an HDMI device. When [Wi-Fi Direct] is enabled, the smartphone establishes a peer-to-peer connection with the projector, therefore it is unable to establish a Wi-Fi connection with an access point (wireless router). -
Page 44: Checking The Signal
[36] Settings Configuring the network settings Checking the signal strength You can check the signal strength of the wireless LAN connection between the projector and Wireless unit/access point (wireless router), and the signal strength of the Bluetooth connection between the projector and smartphone. Start (Portable Ultra Short Throw Projector Application) on the smartphone. -
Page 45: Managing Smartphones To Be
[37] Settings Configuring the network settings Confirming registration when connecting a smartphone When an unregistered smartphone accesses the projector, you can have a confirmation screen displayed to restrict the automatic registration. Start (Portable Ultra Short Throw Projector Application) on the smartphone. Tap the (Settings) button. -
Page 46: Checking The Wi-Fi Mac
Start (Portable Ultra Short Throw Projector Application) on the smartphone. Tap the (Settings) button. Tap [Network]. Tap [Smartphones added]. Tap the device to be changed. Select [Allow] or [Deny ]. To delete the registration, tap [Delete smartphone]. Note Even when the registration has been deleted, the deleted device will be registered to the access device list if the device accesses the projector. - Page 47 Start (Portable Ultra Short Throw Projector Application) on the smartphone. (Settings). Tap [Network]. Check [Wi-Fi MAC address]. [40] Settings Setting the language for the projector The projector’s messages are displayed in the same language as “Portable Ultra Short Throw Projector Application” at the time of purchase. Before setting, connect the smartphone and projector to the same access point (wireless router).
-
Page 48: Updating The Software
[41] Settings Updating the software The software of the projector and the Wireless unit can be updated via the Internet. When a new version of software is available, appears on the top right of the special application’s home screen appears at the [Update] item of the setting menu. Press and hold the power button of the projector to turn it on. -
Page 49: Deleting Contents Stored In The
is connected to the Internet via Wi-Fi, a new version of software will be downloaded to it. You can reduce the time for the update. The setting is enabled by default. [42] Settings Resetting to the initial settings You can reset the special application to the initial settings. A reset does not affect slideshows and background music transferred to the projector. -
Page 50: Checking The Projector To Be Operated Using The Special
Tap the (Settings) button. Tap [Reinitialize]. Tap [Reinitialize content], then follow the on-screen instructions to perform the initialization. [44] Settings Checking the projector to be operated using the special application When you have two or more projectors, you can register additional projectors and select the device to be operated. -
Page 51: Pairing The Projector And Wireless Unit
Registering an additional projector Tap the (add) button, then follow the on-screen instructions to register. Changing the projector to be operated Tap the desired projector. [45] Settings Pairing the projector and Wireless unit again The projector and Wireless unit have already been paired at the time of purchase. When the pairing is removed such as after maintenance, pair them again. - Page 52 Follow the on-screen instructions to pair again. About the indicator display during pairing During pairing, the indicator on the front panel of the Wireless unit flashes as follows: Flashing in white twice every 1.5 seconds: Attempting to pair with the projector. Flashing in red: Failed to pair.
- Page 53 immediately stop using the unit. Do not continue viewing the projected screen for a long time. Continuously viewing the projected screen for a long time may cause eye strain. If you feel any discomfort or pain, immediately stop using the unit and have a rest. If the discomfort or pain persists after taking a rest, consult a doctor.
- Page 54 On light source maintenance This unit uses a laser, therefore special caution and facilities are necessary for the inspection and maintenance of light source components. Be sure to consult qualified Sony personnel. On projector Although this unit is manufactured using very high precision technology, there may be some permanent black or white pixels on the projected screen.
- Page 55 If the unit or AC adaptor becomes unusually hot, it may malfunction. Immediately turn the unit off and unplug the AC adaptor from the wall outlet, then consult qualified Sony personnel. Do not continue touching the unit in operation or the AC adaptor for a long time. Prolonged...
- Page 56 Notes on wireless LAN Sony is not liable for any loss or damage caused by loss or theft of the unit resulting in unauthorized accesses to or abuse of the equipment which is incorporated into the unit.
-
Page 57: Specifications
Do not touch the projection window with bare hands. [48] Precautions/specifications Specifications Portable Ultra Short Throw Projector (LSPX-P1) Projector Projection system SXRD three primary colors LCD shutter projection system Display device 0.37 inch SXRD ×... - Page 58 Available operating time Approx. 2 hours Charging time Approx. 4 hours Audio Speakers Approx. 25 mm diameter × 2 (monaural) bass reflex system Amplifier 2 W × 2 W monaural (4 ohms) xLOUD compatible Wireless communication Wireless LAN IEEE 802.11a/b/g/n (2.4 GHz band, 5 GHz band), MIMO compatible Bluetooth Bluetooth 4.0 (Bluetooth Low Energy) General...
- Page 59 Depending on the material of the projection surface and the projector’s location, the auto focus function may not work correctly. In such cases, adjust the focus manually. This operation time is when [Picture] is set to [Preset 1], the volume is set to approximately 80% and a movie is played.
- Page 60 The BLUETOOTH SMART word mark and logos are registered trademarks owned by Bluetooth SIG, Inc. and any use of such marks by Sony Corporation is under license. Wi-Fi, Wi-Fi Direct, Miracast, and Wi-Fi Protected Setup are trademarks or registered trademarks of Wi-Fi Alliance.
- Page 61 (Only as for projector) [51] Precautions/specifications About licenses MPEG-2 Video ANY USE OF THIS PRODUCT IN ANY MANNER OTHER THAN PERSONAL USE THAT COMPLIES WITH THE MPEG-2 STANDARD FOR ENCODING VIDEO INFORMATION FOR PACKAGED MEDIA IS EXPRESSLY PROHIBITED WITHOUT A LICENSE UNDER APPLICABLE PATENTS IN THE MPEG-2 PATENT PORTFOLIO, WHICH LICENSE IS AVAILABLE FROM MPEG LA, L.L.C., 6312 S.
- Page 62 PERSONAL ACTIVITY AND/OR WAS OBTAINED FROM A VIDEO PROVIDER LICENSED TO PROVIDE AVC VIDEO. NO LICENSE IS GRANTED OR SHALL BE IMPLIED FOR ANY OTHER USE. ADDITIONAL INFORMATION MAY BE OBTAINED FROM MPEG LA, L.L.C. SEE HTTP://WWW.MPEGLA.COM THIS PRODUCT IS LICENSED UNDER THE AVC PATENT PORTFOLIO LICENSE. SUCH LICENSE EXTENDS TO THIS PRODUCT ONLY AND ONLY TO THE EXTENT OF OTHER NOTICES WHICH MAY BE INCLUDED HEREIN.
- Page 63 projector is turned on. After a while, the color will become correct. [53] Troubleshooting/frequently asked questions Frequently asked questions The projected image is distorted. When the lengths of top edge and bottom edge of the projected image differ, tap the (control panel) button on “Portable Ultra Short Throw Projector Application,”...
- Page 64 This unit uses direct laser, therefore a speckled pattern (intense grains on projected images) may appear; this is not a malfunction. This phenomenon can be relieved to some extent by making the room brighter and projecting on a non-glossy, matte surface. [56] Troubleshooting/frequently asked questions Frequently asked questions The focus cannot be adjusted...
- Page 65 picture quality is poor. Depending on the signal strength and the location of the projector and Wireless unit, images from the HDMI devices may not be projected properly. Change the location and orientation of the projector and Wireless unit. Make sure that there are no obstructions blocking the radio wave between the projector and Wireless unit, and make sure that the projector and Wireless unit are not placed too far away from each other.
- Page 66 The antenna is incorporated around in the illustration. [60] Troubleshooting/frequently asked questions Frequently asked questions Cannot operate with the special application. The projector uses wireless LAN and Bluetooth communication, therefore the communication range may become short depending on the environment such as an obstruction between the projector and Wireless unit (or your smartphone), signal strength, and wall material.
- Page 67 focus lens. Install the special application “Portable Ultra Short Throw Projector Application” to a smartphone to operate this unit. It allows you to project and enjoy images of an HDMI device connected to the supplied Wireless unit. Just place the unit near a wall to project images of 22 to 80 inches at point-blank range. In addition to walls, this unit can project 22-inch images on a table or floor.
Need help?
Do you have a question about the LSPX-P1 and is the answer not in the manual?
Questions and answers