Table of Contents
Advertisement
Advertisement
Table of Contents

Related Manuals for Vizio SB3821-D6


Summary of Contents for Vizio SB3821-D6
- Page 1 QUICK START GUIDE Model: SB3821-D6...
-
Page 2: Important Safety Instructions
IMPORTANT SAFETY INSTRUCTIONS our nit is designed and manufactured to operate within defined design limits and misuse may result in electric shock or fire. To prevent your nit from eing damaged the following rules should e o served for its installation use and maintenance. lease read the following safety instructions efore operating your nit. - Page 3 e posure to loud noises ears may ecome accustomed to the sound level which may result in permanent damage to hearing without any noticea le discomfort. • hen connected to a power outlet power is always owing into your nit. To totally disconnect power unplug the power cord. •...
-
Page 4: Table Of Contents
Smartphone or Ta let ....................22 etting started with oogle ast .....................23 How to Cast Content ......................23 etting started with the VIZIO Smart ast pp ................24 ccount Setup..........................24 Selecting a Smart ast device ....................25 reating an udio roup ......................26 luetooth airing ..........................27... -
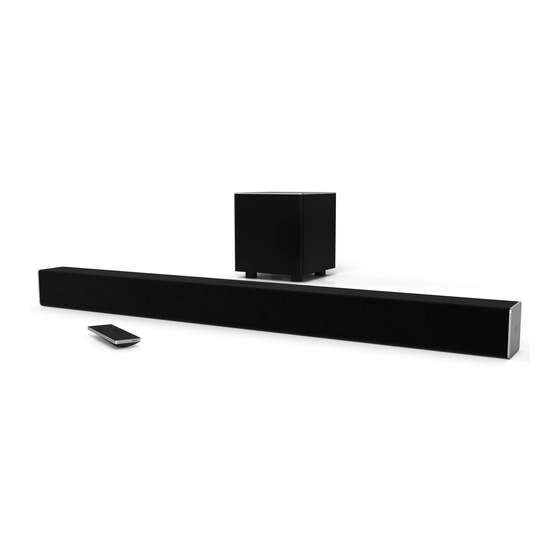
Page 5: Package Contents
Remote Control Sound Bar with atteries Stereo oa ial udio Digital Optical ower a les . mm udio a le Cable Cable QUICK START GUIDE Model: SB3821-D6 ount Template ount rackets uick Start uide Mount Screws Sound ar English - 5... - Page 6 English - 6...
-
Page 7: Elcome To Vizio Smart Ast
VIZIO Sound ar - from anywhere in your home. It works over... -
Page 8: Controls & Connections
CONTROLS & CONNECTIONS CONTROLS & CONNECTIONS Back of Sound Bar Ethernet Power Port thernet In English - 8... - Page 9 USB* S In nalog udio In Stereo OPTICAL nalog udio In Stereo . mm igital Optical udio In DIGITAL oa ial In Supports . V file format play ack only. English - 9...
- Page 10 Bluetooth Input old to pair. luetooth airing for more information. Volume Increase or decrease the loudness of the audio. Input ress to change the audio source. Power ress to turn sound ar on or off. Top of Sound Bar English - 10...
- Page 11 Back of Subwoofer Pairing Button LED Indicator Power Switch Power Port English - 11...
-
Page 12: Irst-Time Setup
FIRST-TIME SETUP CHOOSE ONE CABLE GOOD Back of Sound Bar BETTER DIGITAL OPTICAL DIGITAL COAXIAL 3.5MM TO 3.5MM TO CABLE CABLE RCA CABLE RCA CABLE † † GOOD BETTER BETTER GOOD ot all TVs have the audio outputs shown a ove. To con- nect the Sound ar directly to your other devices lu- ay AND CONNECT... - Page 13 Connect the power cable to the sound bar AC IN as shown. lug the power ca le into an electrical outlet. English - 13...
- Page 14 Back of Subwoofer Connect the power cable to the Subwoofer AC IN as shown. lug the power ca le into an electrical outlet. lip the ower Switch into the On position. English - 14...
- Page 15 or the est surround sound e perience position the Sound ar as shown. The Sound ar should e close to ear level. The Su woofer should e placed in a corner of the room. Subwoofer Sound Bar is centered below the TV.
- Page 16 Insert the included atteries and gently sliding it away from the remote. slide the attery cover ack into place. hen needed VIZIO recommends replacing the atteries that came with this remote with two new uracell alkaline atteries. Turn your TV on the sound ar will automatically turn on and egin searching for an active input.
-
Page 17: Using The Remote
USING THE REMOTE Input ress to change the input source Bluetooth Switches to luetooth mode. ong Power press puts sound bar in bluetooth ress to turn on or off. pairing mode. Enter/Play/Pause Volume +/- ress to increase and decrease ress to select an option. ress to play or pause. -
Page 18: Sing Our Ta Let Or Smartphone As A Emote
To use your smartphone or ta let as your VIZIO SmartCast Remote: • ownload the VIZIO Smart ast app on your... -
Page 19: Inimum Ecommended E Uirements
† iOS* • iOS . or later • evices supported i hone i ad The VIZIO Smart ast app is availa le for download from the oogle Store and pple pp Store. Su ect to change To use the luetooth functionality you must have ndroid . -
Page 20: Indicators
The Sound ar will e discovera le for minutes. ou can now search for the Sound ar VIZIO hen searching for device Bluetooth using your luetooth evice. The sound ar will power down if no... - Page 21 Function ehavior Description TruSurround On ress the TSHD utton to ena le disa le TS TruSurround. TruSurround ena led On all inputs will produce virtual surround sound. On Off disa led Off all sources will play ack in stereo. TruSurround Off to toggle etween two preset e uali er ress the EQ button ovie...
-
Page 22: Airing Our Smartphone Or Ta Let
PAIRING YOUR SMARTPHONE OR TABLET To pair your smartphone or ta let with your VIZIO Smart ast Sound ar for the first time . Install the VIZIO Smart ast app. . aunch the VIZIO Smart ast app on your smartphone or tablet and press the Power utton on your Smar ast Sound ar. -
Page 23: Etting Started With Oogle Ast
GETTING STARTED WITH GOOGLE CAST™ oogle ast allows you to wirelessly send or cast music from your smartphone or ta let to your Smart ast Sound ar. How to cast content To cast music to your sound ar . Open any ast-ena led app. Visit g.co cast audioapps for a list of compati le apps. . -
Page 24: Etting Started With The Vizio Smart Ast Pp
GETTING STARTED WITH THE VIZIO SMARTCAST APP The VIZIO Smart ast app lets you wirelessly cast your favorite music to your VIZIO Smart ast Sound System. The app allows you to search for content and control cast play ack across your favorite music apps. -
Page 25: Selecting A Smart Ast Device
Selecting a SmartCast device ou can pair your smartphone or ta let with multiple Smart ast devices allowing you to seamlessly access and cast your content wherever you are. To select a different Smart ast device . On the ome screen of the Vi io Smart ast app tap This Device to reveal a list of availa le devices. . -
Page 26: Reating An Udio Roup
VIZIO Smart ast pp. To create an audio group Install and open the oogle hromecast app. -
Page 27: Luetooth Airing
Once the device is paired the Indicators will stop ashing. ou can now search for the sound ar VIZIO S using your luetooth device. or more information refer to the user documentation that came with the device. -
Page 28: Using Bluetooth Mode
USING BLUETOOTH MODE our sound ar supports music streaming from smartphones ta lets and computers with luetooth capa ility. evice compati ility will vary see your device s documentation for more information. Once you have paired your source device to the sound ar as long as you stay within range of the sound ar your device should remain paired. -
Page 29: Dvanced Setup
ADVANCED SETUP Back of Sound Bar DIGITAL COAXIAL 3.5MM TO DIGITAL OPTICAL 3.5MM TO CABLE RCA CABLE CABLE RCA CABLE S Thum rive etwork edia layer Supports . V file format ame onsole Ta let layer aptop play ack only. English - 29... -
Page 30: Connecting A Subwoofer
CONNECTING A SUBWOOFER Su woofer already paired with the Sound y VIZIO. owever Su woofer need re-linked the Sound Bar if there is no sound coming from the Su woofer. hat does pairing mean airing means to wirelessly connect. Buttons are located on... -
Page 31: Using Button Combinations
Note This will erase all settings and preferences that you have set. na le disa le the use of a VIZIO TV remote control to power on and ad ust the volume of the sound ar. To ena le disa le... -
Page 32: All- Ounting The Sound Ar
WALL-MOUNTING THE SOUND BAR all- ount Screw oles Back of Sound Bar Insert the two wall-mount screws into the wall-mount screw holes and then tighten them with a hillips screwdriver. lace the included wall mounting template against the wall under your TV. ark the two racket holes using a pencil. - Page 33 e sure your screws are attached to wood studs drywall anchors for drywall or concrete anchors for rick concrete walls . Screws for attaching the rackets to the wall are not included. hoose the screw type and length appropriate to your home s construction.
- Page 34 Why register? Customized Support Get assistance quickly with your information on hand. News and Offers Take advantage of the latest news and special offers from VIZIO. Safety and Satisfaction Stay up-to-date with important product updates and notifications. English - 34...
-
Page 35: Need Help
ward- inning ustomer are t our onvenience. NEED HELP? o to support.vi io.com Find help with: New product setup • • Connecting your devices • Technical problems • Product updates and more Live chat support available You can also contact our popular support team at: Phone: (877) 698-4946 (toll-free) -
Page 36: Elp Trou Leshooting
HELP & TROUBLESHOOTING ress the POWER utton on the remote control or on the top of your Sound ar. • There is no power. • nsure the power cord is securely connected. • lug a different device into the electrical outlet to verify that the outlet is working correctly. Increase the volume. -
Page 37: Limited Warranty
VIZIO’s Responsibilities If VIZIO determines that a product is covered y this warranty VIZIO will at its option repair or replace it or refund the purchase price to you. There will e no English - 37... - Page 38 If you feel VIZIO has not met its o ligations under this warranty you may attempt to resolve the issue informally with VIZIO. If you are una le to resolve the issue informally and wish to file a formal claim against VIZIO and if you are a resident of the nited States you must su mit your claim to inding ar itration according to the procedures descri ed elow unless an e ception applies.
- Page 39 General o employee or agent of VIZIO may modify this warranty. If any term of this warranty other than the class action waiver is found to e unenforcea le that term will e severed from this warranty and all other terms will remain in effect. If the class action waiver is found to e unenforcea le then the entire section titled...
- Page 40 SB3821-D6 Sound Bar: One . ull ange river for ach hannel for left for right re uency esponse System subwoofer: One . Su woofer river Voltage Inputs One Stereo One . mm Stereo udio Compliances: cT Vus lass oa ial...
-
Page 41: Egal Ompliance
LEGAL & COMPLIANCE FCC Class B Radio Interference Statement This e uipment has een tested and found to comply with the limits for a lass digital device pursuant to art of the ules. These limits are designed to provide reasona le protection against harmful interference in a residential installation. This e uipment generates uses and can radiate radio fre uency energy and if not installed and used in accordance with the instructions may cause harmful interference to radio communications. - Page 42 The applications and content of the applications pictured herein or descri ed in accompanying documentation may only e availa le in certain countries or languages may re uire additional fees or su scription charges and may e su ect to future updates modifications or discontinuation without notice. VIZIO has no control over third party applications or content and assumes no responsi ility for the availa ility or interruption of such applications or content.
- Page 43 Image s used under license from Shutterstock.com This uick Start uide may not e copied in whole or in part without the written permission of VIZIO Inc. VIZIO Inc. has made reasona le efforts to ensure the accuracy of the information provided herein.
- Page 44 © 2016 VIZIO INC. ALL RIGHTS RESERVED. 160405AD-US-NC...
Need help?
Do you have a question about the SB3821-D6 and is the answer not in the manual?
Questions and answers