Table of Contents
Advertisement
Quick Links
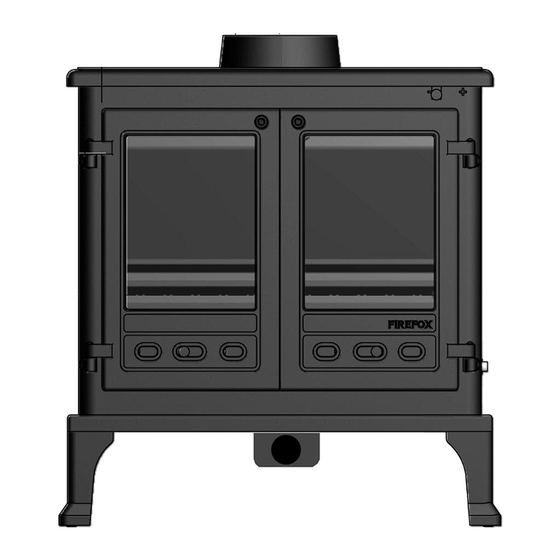
Firefox 12B (Boiler Model)
CE V.11
Multi-fuel central heating stove
Installation & operating instructions. To be left with user.
This appliance must be installed by a competent person and must
comply with national building regulations and local by-laws. Unless the
installer is qualified to approve the installation, then approval must be
sought from your local building control officer. It is an offence under UK
law not to comply with this advice. After installation the appliance should
be ready for use and instruction as to use and control given.
Advertisement
Table of Contents

Related Manuals for Firefox 12B


Summary of Contents for Firefox 12B
- Page 1 Firefox 12B (Boiler Model) CE V.11 Multi-fuel central heating stove Installation & operating instructions. To be left with user. This appliance must be installed by a competent person and must comply with national building regulations and local by-laws. Unless the installer is qualified to approve the installation, then approval must be sought from your local building control officer.
-
Page 2: Technical Specification
Please read carefully the manufacturers will not accept responsibility for any fault due to incorrect installation. The Firefox 12B is supplied as standard with a thermostatically controlled air supply at the rear of the stove. The stove legs require fitting to accommodate the thermostat controls. - Page 3 Assembly Instructions – Parts List 1 FFX12003 Stove Top 21 FFX022B Knob Set (2 pcs) 2 FFX12002 Stove Base 22 FFX12005R Grate Rocker Bar (not shown) 3 FFX12004L Stove Door Left Hand 24 FFX12014 Ash Pan (not shown) 4 FFX12004R Stove Door Right Hand 25 FFX12021 Air Slide Guide Plate (4 pcs)
-
Page 4: Installation Instructions
Installation Instructions This appliance has been extensively tested for safety and efficiency. Do not attempt to modify it. Always use genuine parts as recommended by your supplier. Failure to adhere to this advice could invalidate your guarantee. This appliance must be installed in compliance with current building regulations, local authority by-laws and European and National standards. - Page 5 Installation Instructions Continued Flue draught Water Gauge- Minimum 1.2mm / Maximum 2.5mm The flue draught should be checked under high output. A flue stabiliser should be fitted if it exceeds the maximum draught. If the flue draught is too low then the reason for this should be investigated.
- Page 6 Installation Instructions Continued Clearances The Firefox 12B can be recessed into an inglenook or fireplace but must have a permanent free air gap of at least 150mm to the sides and top, and a minimum of 100mm at the rear. This allows access for cleaning and maintenance and free passage of air for the thermostatically controlled air vent.
-
Page 7: Boiler System
Boiler System The design and installation of the heating system will be unique to each application. A qualified plumbing and heating engineer must be responsible for all calculations, design and installation. The manufacturers cannot be held responsible for any losses due to incorrect specifications of the heating system. The stove must NOT be connected to a sealed heating system or unvented HW cylinder. - Page 8 Typical Installation for Integral Boiler...
- Page 9 Commissioning On completion of installation check that all cements have hardened. A small fire can then be lit; check there is full evacuation of smoke and fumes up the chimney. Ensure that the customer is instructed on the use of the appliance as well as recommended fuels.
- Page 10 Operating Instructions Door handle The door handle along with the mitten provided are operating tools. It is not advisable to leave the door handle connected to the door as high temperatures will be created in the handle and could cause harm if handled. Always remove the handle using the mitten provided.
- Page 11 Operating Instructions Lighting The Stove ...Continued First load the fire with starting fuel i.e. paper, dry kindling timber and/or fire lighters in the mode chosen, either wood or coal. Light the fire at the base leaving all air controls open. Allow the fuel to reach a steady glow and build the fire up gradually.
-
Page 12: General Maintenance
Safety Notes FIRES CAN BE DANGEROUS Always use a fire guard in the presence of children,the elderly of the infirm. Inform all persons the dangers of high temperatures during operation of appliance including the stove pipe. Use operating tools provided. DO NOT OVER FIRE it is possible to fire the stove beyond its design capacity. - Page 13 Trouble Shooting POOR HEAT OUTPUT A) Stove too small for a room. Seek advise from a Qualified Heating Engineer as to (KW) output required for room size as a guideline the volume of the room in cubic feet divided by 500 i.e. room 15’x15’x8’ would require 3.6kw approx. B) Chimney and/or flue pipe restricted, room ventilation restricted.
-
Page 14: Installation Diagrams
Installation Diagrams Typical Top Flue Installation using steel closure plate incorporating clean out door for chimney sweeping. - Page 15 Installation Diagrams Typical Rear Flue Installation with clean out door.
- Page 16 Installation Diagrams Typical Installation For Inglenook Fireplaces Inglenook fireplaces can have very large bore chimneys. Check with your installer – you may need stainless steel flexible liner for solid fuel fitting.
- Page 18 Installation Diagrams Typical Installation Into In Filled Masonry Fireplaces...
-
Page 19: Appliance Commissioning Checklist
Appliance Commissioning Checklist IMPORTANT Please complete and leave with the customer upon installation completion. - Page 20 Installer Name......................Company Name......................Address..................................................Telephone number....................Date installed......................Stove model/description..................Serial number......................Is the flue system correct for the appliance Flue swept for soundness test complete Smoke test completed on installed appliance Spillage test complete Use of appliance and operation of controls explained Instruction book handed to customer...
Need help?
Do you have a question about the 12B and is the answer not in the manual?
Questions and answers