Table of Contents
Advertisement
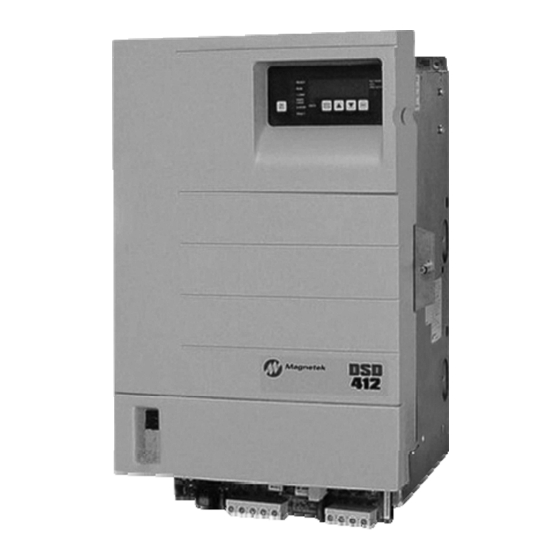
DSD 412
DSD 412 DC Elevator Drive
Technical Manual
To properly use the product, read this manual thoroughly and retain for easy reference, inspection,
and maintenance. Ensure that the end user receives this manual.
CS00407 rev 11
© Magnetek Elevator 2016
U39 / U40 97SA407x-0010 Rv16
U13 / U14 97SA404x-0008 Rv08
Advertisement
Table of Contents

Related Manuals for Magnetek DSD 412

Summary of Contents for Magnetek DSD 412
- Page 1 DSD 412 DSD 412 DC Elevator Drive Technical Manual To properly use the product, read this manual thoroughly and retain for easy reference, inspection, and maintenance. Ensure that the end user receives this manual. CS00407 rev 11 © Magnetek Elevator 2016...
- Page 2 WARRANTY OF MECHANTIBILITY OR OF FITNESS FOR A PARTICULAR PURPOSE AND BUYER HEREBY WAIVES ANY AND ALL CLAIMS THEREFORE. Limitations Of Liability IN NO EVENT SHALL MAGNETEK BE LIABLE FOR LOSS OF PROFIT, INDIRECT, CONSEQUENTIAL OR INCIDENTAL DAMAGES WHETHER ARISING OUT OF WARRANTY, BREACH OF CONTRACT OR TORT.
-
Page 3: Table Of Contents
Software Operating Features ......................12 Power Conversion Unit ........................17 Description ............................17 Hardware Descriptions ........................17 DSD 412 Power Supply PCB (A4) ....................17 Armature Interface PCB (A2) ......................17 SCR's .............................. 18 Field Interface PCB (A3) ......................... 18 Cell snubber PCB (A5) ........................ - Page 4 Self Tune Function .......................... 37 Power Conversion Diagnostics ....................... 39 Drive Setup & Adjustments ..................41 Motor Field Current Control ......................41 Analog Velocity Follower ......................... 41 Internal Preset Speed & Profile Generator ..................41 Serial Link Follower ......................... 41 Armature Voltage Feedback ......................
- Page 5 Quick Reference for Setup Parameters FNCT. # DESCRIPTION UNIT RANGE DEFAULT SITE SETTING CURRENT LIMIT. 0 - 300 USE SELF- TUNE LOGIC 0 - 1 0=OFF VALUES RTD. ARMATURE AMPS 2.0 - 1250.0 50.0 ARMATURE OHMS OHMS 0.001 - 5.000 0.100 ARMATURE 0.0010 -1.000...
- Page 6 Quick Reference for Setup Parameters FNCT. # DESCRIPTION UNIT RANGE DEFAULT SITE SETTING STIFFNESS 0.2 - 9.9 WEAK FIELD CURRENT 0.20 - 40.00 40.00 FULL FIELD CURRENT 0.20 - 40.00 1.90 MOTOR FIELD L/R 0.10 - 10.00 0.54 RTD. FIELD VOLTS DC 50 - 525 STANDBY FIELD AMPS 10 - 100...
- Page 7 Quick Reference for Setup Parameters FNCT. # DESCRIPTION UNIT RANGE DEFAULT SITE SETTING BRAKE AUTO STOP ON LOGIC 0 - 1 0=OFF ANALOG OUT 0 BIAS -1.00 - +1.00 0.00 ANALOG OUT 1 BIAS -1.00 - +1.00 0.00 ANALOG OUT 0 SELECT 0 - 8 TB1(45) ANALOG OUT 1 SELECT...
- Page 8 Quick Reference for Setup Parameters FNCT. # DESCRIPTION UNIT RANGE DEFAULT SITE SETTING SPEED ERROR DETECT 0.0 – 5.0 TIME SPEED ERROR 0.0 – 15.0 THRESHOLD ARB MODE 0 – 2 0 (OFF) ARB BANDWIDTH 1.0 – 15.0 ARB DAMPING 0.01 –20.00 2.00 ARB SPD THRESHOLD...
- Page 9 Quick Reference for Setup Parameters FNCT. # DESCRIPTION UNIT RANGE DEFAULT SITE SETTING DECEL #2 % S 0.1 – 100.0 25.0 ACCEL #3 TIME 1.00 – 15.00 5.00 DECEL #3 TIME 1.00 – 15.00 5.00 ACCEL #3 % S 0.1 – 100.0 25.0 DECEL #3 % S 0.1 –...
- Page 10 Read-Out and Control Parameters FNCT. # DESCRIPTION UNIT FNCT. # DESCRIPTION UNIT PCU - VERSION CAR SPEED PCU - RELEASE MOTOR RPM SPEED REF MONTH PRE-TORQ SIGNL YEAR CEMF VOLTS BETA “P” MOTOR ARM V VERSION “SA” MOTOR ARM I DCU -RELEASE MOTOR FIELD I CUSTOMER ID...
- Page 11 Common Fault References FAULT # DESCRIPTION FAULT # DESCRIPTION SOFTWARE OVERSPEED TRIP COMPATABILITY FAULT TACH/ENCODER LOSS Prot CORRUPTED NV RAM DATA REVERSE TACH/ENCODER PCU LOOP FAULT 117/118 SERIAL COM FAULT PCU IST FAULT MOTOR OVERLOAD POWER SUPPLY FAULT EXCESSIVE FIELD LINE SYNC FAILURE CURRENT CONTACTOR FAULT...
- Page 12 Common Fault References FAULT # DESCRIPTION FAULT # DESCRIPTION RATED ARM. I. SETTING CALC ARML IS UNDER ERROR RANGE DURING SELFTUNE. VOLTAGE FEEDBACK AND RATED FIELD I. SETTING BUS VOLTAGE DOESN’T ERROR MATCH DURING SELFTUNE ESTOP CONTACT WAS FIELD PCB SENSE FAULT OPENED DURING SELF TUNE LOW READ BACK VOLTAGE...
-
Page 13: Introduction
Introduction Drive Ratings and Specifications Introduction The DSD 412 Elevator Drive is designed for connection to a three wire ungrounded power Drive Description system, or a four wire grounded or ungrounded The DSD 412 Drive is a complete digital power system. -
Page 14: Software Operating Features
Introduction Speed Error above/below X threshold for Y Software Operating Features seconds. The DSD 412 is configured by software to Drive Standby Power Reduction operate geared and gearless elevators and lifts. User selectable analog diagnostic trace outputs The SA407 Drive Control software contains... - Page 15 SCR GATING POWER SUPPLY FIELD CURR. SAFETY MOTOR & SIGNAL CHAIN TRANSFORMER LOW VOLTAGE THERMOSTATS POWER SIGNAL SENSING E-STOP LOOP SENSE PICK-UP RELAY LOOP CONTACTOR CONTACTOR CONTACTOR CONTROL PILOT RELAY HEAT SINK COOLING FAN Figure 1: DSD 412 Block Diagram A...
- Page 16 DRIVE CONTROL UNIT MICROPROCESSOR NV-RAM, RAM IN-OUT DRIVE CONTROL PCB & EPROMS DRIVERS RS-232 OR RS-422 SERIAL PORT LOCAL CONTROL I / O CONTROL SIGNAL WIRING OPTIONAL SERIAL LINK TO CAR CONTROLLER OPTIONAL PCDU PROGRAMMER Figure 2: DSD 412 Block Diagram B...
- Page 17 Introduction GROUND INPUT POWER LUGS AC LINES FUSES F1-3 ARMATURE FUSE F4 SNUBBER ARMATURE CURRENT TRANSDUCER A2TB5 CUBE I.D. BRIDGE SCR'S THERMISTOR Q7, FIELD ARMATURE INTERFACE DC OUTPUT AC INPUT FIELD FOR FIELD SUPPLY SUPPLY Figure 3: Component Layout Front View...
- Page 18 Introduction POWER SUPPLY COVER POWER SUPPLY A4 TB3 A1 MAIN CONTROL Figure 4: Component Layout Right Side View...
-
Page 19: Power Conversion Unit
Three input power line fuses are provided. A utility mains voltage to that required to operate DC Bus fuse protects the motor armature DSD 412 efficiently with the needs of the DC circuit. A thermistor (and thermostat on some hoist motor. 115VAC control power from a... -
Page 20: Scr's
Introduction while power is on. Non Volatile Random SCR's Access Memory (NVRAM) maintains drive The drive uses different selections of doubler control parameters for the DCU when the packs or individual “hockey puck” SCRs power is off. Two EPROM’s (Electrically according to the horsepower ranges specified Programmable Read Only Memory) devices, below:... - Page 21 Introduction data, and the four push buttons (DATA/FCTN, Status LEDs › [UP], › [DOWN], and ENTER) are used to Located to the right of the RESET button is a operate the SCDU. The functions and vertical strip of six light emitting diodes (LEDs): capabilities of the SCDU are explained in READY —...
-
Page 22: Precautionary Statements
Precautionary Statements How To Contact Magnetek In addition to notes, the following types of For additional information contact any precautionary statements appear in this Magnetek Representative or contact the DSD manual. 412 Elevator Technical Support Staff at: Magnetek Elevator Products IMPORTANT... -
Page 23: Pre-Installation Considerations
Encoder Selection A quality encoder is recommended for use with Receipt of Shipment the DSD 412 controller for speed feedback. The All equipment is tested against defect at the encoder should be a two channel, quadrature, factory. Any damages or shortages evident... -
Page 24: Coupling
The Magnetek recommendation for mounting Encoder Wiring the encoder used for motor speed feedback is Wiring between the encoder and the DSD 412 to direct connect it to the motor shaft, usually drive should be shielded cable with 3 twisted to the end opposite the drive end. -
Page 25: Electrical Hook Up
Step 2 above with the A grounding wire should be provided directly application requirements. from the grounding terminal on the DSD 412 To determine if the application exceeds the drive chassis to the common grounding stud. A grounding wire should be provided directly... -
Page 26: Drive Start Up
Installation number representing the fault. See Drive Start up section describing standard control/display Refer to the recommended connections shown unit operation for more detailed information in the connection diagrams. Attach a voltmeter about fault reporting and clearing on page across the 115VAC source for the control power supply, at A4TB3-1 &... -
Page 27: Interconnect Drawings
Interconnect Drawings Interconnect Drawings 3-PH DRIVE ISOLATION TRANSFORMER AS REQ'D TB1(82) +24VDC TB1(78) SEE TABLE 5: RATED MOTOR FIELD CURRENT RANGE Figure 6: Power Signal Wiring... - Page 28 Interconnect Drawings INPUT/OUTPUT DRIVE OK/ NO CONNECTIONS USING FAULTS RELAY ANALOG INTERFACE, ENERGIZED WHEN NO MODEL NUMBER FAULTS ARE 53STXXXX-3X00. PRESENT. ALARM RELAY, MAY BE ENERGIZED OR DE-ENERGIZED ON ALARMS. SEE TECH MANUAL, FUNCTION #182 PROGRAMMABLE FUNCTION OUTPUTS. REFER TO F#183 - J2 RJ-12 CONNECTION RS232 (PCDU...
- Page 29 Interconnect Drawings DRIVE OK/ NO FAULTS RELAY ENERGIZED WHEN NO FAULTS ARE PRESENT. ALARM RELAY, MAY BE ENERGIZED OR DE-ENERGIZED ON ALARMS. SEE TECH MANUAL, FUNCTION #182 PROGRAMMABLE FUNCTION OUTPUTS. REFER TO F#183 - J1 DB9 CONNECTION RS422 DATA FLOW Figure 8: Typical Serial Signal Wiring...
- Page 30 Interconnect Drawings NOTES: 1. ITEMS NOT SUPPLIED BY MAGNETEK ARE INDICATED WITH AN ASTERISK ( * ) OR (**). 2. THE DC MOTOR CONNECTIONS SHOWN IS FOR CCW ROTATION FACING THE COMMUTATOR END. TO REVERSE ROTATION, INTERCHANGE A1 AND A2 AT THE MOTOR.
- Page 31 Interconnect Drawings 1N4002 DSD 412 MAIN PCB 115 VAC CONTROL POWER K3x, 24VDC BRAKE (BRAKE PICK) PICK COMM 57 or 80 BRAKE LIFT K6x, 24VDC (LIFT & HOLD) +24 VDC RELAY COILS 24VDC LESS THAN 100 MA BRAKE VAC SUPPLY SOURCE...
- Page 32 Interconnect Drawings +24V +24V USING DIODES (1N4003) PROGRESSIVELY TO YIELD PROGRESSIVE INPUTS SCANNED RELAY LOGIC WITH SINGLE RELAY CLOSURES ALTERNATE METHODS TO ACHIEVE PROGRESSIVE SPEED SELECT LOGIC Figure 12: Speed Select Logic Input Wiring See detailed descriptions on pages 51 and 69.
-
Page 33: Standard Control/Display Unit Operation
The SCDU display dependent operational set points and perform is arranged in a similar manner to the physical diagnostics for the Magnetek DSD Elevator placement of the 3 line fuses in the power Drive. The SCDU is located in the upper right cube. -
Page 34: After Power-Up
Standard Control/Display Operation This ‘P-UP’ display will remain on the SCDU Changing Parameter Functions SCDU functions are used to modify and/or until a key is pressed or a fault occurs. display setup points that the drive needs for After Power-Up operation. -
Page 35: Viewing Monitor Functions
Standard Control/Display Operation Viewing Monitor Functions Items that would typically fall into this category are Speed Feedback, Armature Current and Armature Voltage. To view one of these values, it must have been previously programmed in the drive. The The SCDU display will increment from ‘10.6’ to following steps show how to display a given ‘11.0’... - Page 36 Standard Control/Display Operation 3) Use the ▲ and ▼ keys to select the error powered down or reset. Whether or not the code entry in the Disposition List that is about drive stops or continues to run is dependent on to be changed/viewed.
-
Page 37: Fault Display/Clear
Standard Control/Display Operation Pressing the ▼ key once more will change 2) Press the DATA/FCTN key to enter the display to: " " Data level for this function. The green LED is now lit to indicate that the fault codes currently in the Fault List are being displayed. -
Page 38: Non-Volatile Ram Access
Standard Control/Display Operation This list is held in battery-backed-up RAM perform transfers between the NVRAM (NVRAM), so it is retained when power is lost. parameter list and the active parameter list. Each time an error condition occurs, and if its Function # 994 is used to perform the transfer entry in the Disposition List is set to allow of data between the NVRAM and active... -
Page 39: Load Default Function
Self Tune Function the drive is operating erratically and it is The DSD 412 Elevator drive has a built-in suspected that one or more parameters were current regulator SELF TUNING Function # improperly set. - Page 40 Standard Control/Display Operation parameter’s 4, 6, and 51) are used if this item to the "OFF" position, and press the is set to “OFF”. DATA/FCTN key again. The SCDU will jump to step #3 when the NVRAM PROTECTION NOTE: switch is in the correct position upon entering Armature current is circulated through the this function.
-
Page 41: Power Conversion Diagnostics
Standard Control/Display Operation 6) After completion of SELF-TUNE, enable 2) Press the DATA/FCTN key to enter the Function # 2. (Unless using manual entry) "Data" level for Function # 998. The green LED is now lit to indicate that this function is Power Conversion Diagnostics currently being accessed. - Page 42 Standard Control/Display Operation Remove power from the drive to replace the SCR(s) that are shorted, and repeat this test until the SCDU displays the 'PASS' message. If the PCU detected one or more open SCR/doubler packs, the SCDU displays the fault code for an open SCR/doubler pack Press the DATA/FCTN key to exit the PCU (F912):...
-
Page 43: Drive Setup & Adjustments
S-Curve Current Ramp-Down, Function #85 acceleration profile to transition between When the DSD 412 drive is told to cease speed selections. Either of three separately operation by removal of the Run logic adjustable ramp times may be selected. The... -
Page 44: Electronic Motor Over-Load
Drive Setup & Adjustments event of a severe drive fault, there will be no The internal velocity reference will always timed delay for current ramp-down. start at zero. 2. Once Start is confirmed, the Brake Lift and Electronic Motor Over-Load Brake Pick lines will both become active. -
Page 45: Speed Regulator Adjustment/E-Reg
Drive Setup & Adjustments Speed Regulator Adjustment/E-Reg Primary adjustments for E-Reg are: The Magnetek DSD 412 drive uses a High & Low Speed Bandwidth – #39 & 40 proprietary velocity regulator called E-Reg. Sets the desired drive response from Speed This is a double speed loop encoder feedback Reference changes to motor speed. - Page 46 Drive Setup & Adjustments RATED SPEED Velocity Reference Speed Feedback with Per-Unit Inertia (#41) set too low, Velocity Overshoot ZERO TIME ACCEL TIME SPEED E-Reg Velocity Tracking with Per-Unit Inertia Setting TOO LOW, Velocity Over-Shoot Figure 14: E-REG Tracking Profiles (2) RATED SPEED Velocity Reference...
-
Page 47: Field Regulator Set-Up
DSD 412 local display. The objective is or current limiting. If Field Current is set too to have the car speed accelerate right up to... - Page 48 / estimate the additional effect of passenger armature current reference signal, can be payload. Save this setting using the DSD 412 effective to suppress the response of the DSD function #994.
- Page 49 Drive Setup & Adjustments Motor Overload Start – Stop Timing Motor armature current is sensed and A typical elevator run sequence is shown in mathematically integrated over time to detect Figure 17. A descriptive explanation is given potential over heating caused by a dragging below.
- Page 50 Drive Setup & Adjustments Engaged logic indicator (Output function Stop Sequence 1. Select leveling or zero speed reference – ‘C’) off, and ramp armature current down Will cause start of deceleration to new to zero in time set by function #85. Drive target speed.
- Page 51 Drive Setup & Adjustments SAFETY MUST REMAIN VALID DURING ENTIRE RUN CHAIN DRIVE & FIELD ENABLE HARDWARE LPR / CONTACTOR CONTACTOR SPEED SPEED DIRECTION AS REQ'D DURING RUN & RAMP ZERO CMDS SPEED ENGAGED ZERO SPEED FIELD FULL MOTOR WEAKENING IF REQ'D FIELD CURRENT...
- Page 52 Stopping Distance The internal S-Curve velocity generator of the result in a faster flight time since less time is Magnetek DSD 412 drive is digital in nature spent at leveling speed. A second set of and is therefore very repeatable. The...
- Page 53 Drive Setup & Adjustments Example: (With #150=On) Pre-set # none Zero Speed select Leveling Speed 1 Floor Run Speed Multi-floor Run Speed Inspection Speed (could also be speed 4, 5, or 6) NOTE: Always set all other unused pre-set speeds to zero. Table 6: Binary Input Control Example: (With #150 = Off, &...
- Page 54 Figure 7: Typical Analog Signal to cause the drive to run. Wiring. Be sure that the cable shield is connected only at the drive end. Avoiding Analog Signal Ground Noise MAGNETEK DSD-412 CONTROLLER DC DRIVE Twisted & Shielded...
- Page 55 It is the responsibility of the host to insure that this byte contains the new non-zero keystroke data for only one 15 MS transmission period. If this is not done, the DSD 412 will act as if a given key is being 'held down' instead of being pressed and released.
- Page 56 PCDU. The host may ignore bytes in these fields if they are set to 00h meaning that the DSD 412 has no data to display at this time. A full PCDU display is 2 rows of 16 characters.
- Page 57 (#110 set to 2 or 3) set Magnetek drive. It uses a double integrator #133, ARB Speed Threshold to 10.0%. (type 2) regulator when operating at zero...
- Page 58 Drive Setup & Adjustments observed at #611 on the local display shift lag. This can and will interfere with or a separate DC clamp-on ammeter, the operation of E-Reg and ARB. Tune if available. the notch filter to the resonant frequency d) Set the brake and turn the drive OFF and adjust notch depth to the smallest via normal commands.
- Page 59 Elevators often sit idle for many hours during a correct at the time of starting the elevator 24-hour day. Even though the DSD 412 drive drive, as may occur during elevator re- can be set up to reduce motor field current to a...
- Page 60 Drive Setup & Adjustments The DSPR feature is programmable by then energize/re-energize to turn 3-phase selection of output option P on relay K4. See power ON. Setting DSPR delay at #88 to zero table 4.2.3. The time delay before power is will not change that part of the operation.
-
Page 61: Adjustment Function Descriptions
Drive Setup & Adjustments Adjustment Function Descriptions Fnct # Description Units Range Default Extended Description Sets the positive and negative current limit for the drive. Set as a percent of Rated Armature Amps Current Limit 0 - 300 (Function # 3). Selects the source of critical numeric value adjustments for tuning the motor armature current regulator. - Page 62 Drive Setup & Adjustments Fnct # Description Units Range Default Extended Description Sets the motor speed at rated elevator contract speed. The motor RPM X Encoder PPR X Encoder/Motor Ratio is what will actually be speed regulated. May be used to compensate for minor Motor RPM 50.0 –...
- Page 63 Drive Setup & Adjustments Fnct # Description Units Range Default Extended Description Maximum acceleration rate for the elevator when an external analog or serial link speed reference is used. This function provides a slew rate limit in the event of noise or other discontinuity on the External externally supplied reference signal.
- Page 64 Drive Setup & Adjustments Fnct # Description Units Range Default Extended Description This setting affects the proportional gain and Phase Margin of the regulator. Increasing this setting will make the regulator more responsive to correct mechanical load speed variances, but can cause it to amplify unwanted mechanical disturbances.
- Page 65 Drive Setup & Adjustments Fnct # Description Units Range Default Extended Description Sets the speed threshold where the At-Low-Speed indicator will turn ON and OFF. This can be used to indicate when the elevator is moving below the door pre-opening speed. See programmable Low Speed output function F or M at functions 183 through 0.1 –...
- Page 66 Drive Setup & Adjustments Fnct # Description Units Range Default Extended Description Multiplies the available pre-torque reference signal for calibration adjustment. If this is set to 1.0, a +/- 10V analog signal or full-scale serial link signal will cause 1 per unit (rated) armature current pre-torque level.
- Page 67 Drive Setup & Adjustments Fnct # Description Units Range Default Extended Description Sets the specific analog output signal to be observed at TB1-46 and TP44. Selections are: 0 = Calculated CEMF 1 = Raw Speed Command 2 = Ramped Speed command 3 = Encoder Feedback 4 = Armature Current Reference Analog...
- Page 68 Drive Setup & Adjustments Fnct # Description Units Range Default Extended Description Selects the source of the gain switch control to be from local or serial link commands. If an analog reference velocity or pre-set speed selects are Serial Gain used, set this value to 0, off.
- Page 69 Drive Setup & Adjustments Fnct # Description Units Range Default Extended Description Setting this value to 0, off, enables the Armature Voltage Feedback Mode to operate. This parameter must be set to 1 for normal operation of Encoder the drive. When in this mode the encoder Feedback Logic 0(Off) –...
- Page 70 Drive Setup & Adjustments Fnct # Description Units Range Default Extended Description Sets the time sensitivity of the Speed- Error-is-Low detector. This is a useful indicator to tell when/if the drive is following the velocity reference properly. Exceeding the set limits of this detector does not Speed Error 0.0 –...
- Page 71 Drive Setup & Adjustments Fnct # Description Units Range Default Extended Description Determines the method for selecting pre-set speeds from external relay logic applied to A1TB1- 11, 12, 52, 53 and 54 Binary Speed Selects S4 S3 S2 S1 S0 SPD # ADJ #nn ZERO NONE...
- Page 72 Drive Setup & Adjustments Fnct # Description Units Range Default Extended Description These function values specify the elevator car speed for each individual pre-set speed setting. The units must agree with that set for Rated Car Speed in Function #17. [If feet per minute is used at Function #17, then the units for Function #151through 157 shall also be feet per minute.] No value for Function #151through 157 should be...
- Page 73 Drive Setup & Adjustments Fnct # Description Units Range Default Extended Description The percent of time that will be spent in the controlled jerk or S-portion of the timed ramp curve during ramped acceleration #2. A percent S of 0.1% corresponds to almost all-linear acceleration. Acceleration 0.1 –...
- Page 74 Range Default Extended Description Alarms are classified as non-critical faults detected by the DSD 412 that pose no immediate need to stop operation. The Alarm output relay K2 (on the Drive Control PCB, A1) is reserved for non-critical fault indications. It has a normally open contact wired to A1TB1-38 and 39).
- Page 75 Drive Setup & Adjustments Fnct # Description Units Range Default Extended Description Setting Desc. Extended Description Relay K3 is picked during normal operating conditions with N.O. contact closed. Relay K3 drops and contact opens if measured motor field current ever exceeds 125% of Rated Field current, Function #50.
- Page 76 Drive Setup & Adjustments Fnct # Description Units Range Default Extended Description Controls the depth of the notch filter used for a rope resonance counter-measure. When set to zero, the Notch Depth 0 – 10 filter is not active. Increase the setting toward 10 as required to suppress system resonance.
- Page 77 Drive Setup & Adjustments CONTROLLED DECEL JERK OR ‘S’ PORTION CONTROLLED ACCEL JERK OR ‘S’ PORTION LINEAR ACCEL REGION LINEAR DECEL REGION CONTROLLED DECEL CONTROLLED ACCEL JERK OR ‘S’ JERK OR ‘S’ Figure 20: S-Curve Accel/Decel Cycle #174, #175, #180 =0.1% FULL SPEED ZERO SPEED ACCEL TIME...
-
Page 78: Display Monitor Functions
Drive Setup & Adjustments Display Monitor Functions Fnct # Description Units Extended Description Measured velocity of the elevator. Units are as set in Car Speed function 17. Measured elevator motor RPM. Motor Speed Reference velocity after accel/decel rate control Dictated Speed conditioning. - Page 79 075, 100, 125 Cube I.D. 040, 050, 060 075, 100, 125 Table 13: Cube I.D. Number *** This number should agree with the DSD 412 drive data nameplate. FIELD CURRENT RANGE (2 - 200HP) Indicates actual SW1 setting #689 SW1...
-
Page 80: Miscellaneous Functions
Drive Setup & Adjustments Miscellaneous Functions FNCT. # DESCRIPTION REFERENCE PAGES CLEAR ERRORS LIST VIEW FAULT LIST VIEW ERROR LIST FAULT/ERROR ACTIONS See Error Reporting on page 33. TRACE MONITOR See Input – Output Signal VERIFY I/O Verification on page 89. CLEAR NVRAM See Non-Volatile Ram Access SAVE/RECALL FUNCTION... -
Page 81: Drive Faults
406 = 10% LOW LINE ALARM The following Faults are custom to the SA407 407 = EXCESSIVE DCU CEMF ALARM Generation 2 DSD 412 software. 408 = EXCESSIVE PCU CEMF FAULT 409 = UNEXPECTED PCU RESET 410 = SPEED ERROR FAULT... -
Page 82: Troubleshooting
Malfunction of motor field power circuit. Check module A3. LOOP CONTACTOR FAULT— The Loop Contactor auxiliary contact does not pick up or drop out within the designated time as requested by the DSD 412 drive. See #102. – Causes: ... - Page 83 SOFTWARE COMPATABILITY FAULT --- Indicates that the PCU (U13, U14) Version and or Revision won’t operate with the DCU (U39, U40) installed in the drive. Contact Magnetek MISC FAULTS - Problem with either hardware or software on the Drive Control 13-17, 21-26, PCB. See list at Section 4.5.
- Page 84 The AC input power has dropped below 80% of the Nominal AC Line Voltage #9 for 3 consecutive cycles or lower than 50% for one cycle. When this occurs, the Severe Fault flag is set and the DSD 412 current reference is forced to zero. This fault will shutdown the Drive.
- Page 85 Loss of power or incorrect phasing to Field Rectifier. DCU FAILURE FAULT (DSD 412 Power down is required.) The update of the Dual Port RAM from the Drive Control Unit (DCU) is unreliable. This requires the replacement of the Drive Control PCB, A1. This fault will shutdown the drive.
- Page 86 Drive Faults ERROR/FAULT PROBABLE CAUSE/ — CORRECTIVE ACTION CODE PARAMETER SETUP FAULT (DSD power down is required.) One of the following parameters is not within the range of the chassis hardware. Rated Volts #7 or #9 Rated Current #3 or #50 Corrective action: Enter correct parameter data, save to NVRAM.
- Page 87 Control PCB is properly grounded. This fault is usually caused by electrical noise causing the DSD 412 microprocessor to malfunction. If this occurs when the car is stationary, the car controller can quickly reset it. An elevator passenger doesn’t see any effect.
- Page 88 Drive Faults ERROR/FAULT PROBABLE CAUSE/ — CORRECTIVE ACTION CODE Motor field current does not increase to near rated amperes within 6 seconds. Verify motor field current with an independent clamp-on DC ammeter. Probable causes: Motor field not connected. Not enough voltage available to achieve rated field current.
- Page 89 Drive Faults ERROR/FAULT PROBABLE CAUSE/ — CORRECTIVE ACTION CODE Low read-back volts from motor armature circuit. Probable Causes: Missing or reversed wires to armature voltage feedback at A2TB5-1 & A2TB5-2. Component problem – Feedback voltage divider ratio does not match that identified in Cube ID PCB.
- Page 90 Remember to SAVE the data when parameters are changed. See Page 36. Return NV-Protect switch to ON when parameter data changes are completed. Magnetek recommends replacing U56 every 8 years. DRIVE DISPLAY Control power applied before 3-phase armature supply. Short...
-
Page 91: Input - Output Signal Verification
The Control Display Unit (CDU) function #981 may be used to directly read and track the status of logic input and output signals at DSD 412 drive terminals. This is an easy way to verify the integrity of input and output logic signals to the drive. Refer to specific connection diagrams for your application to confirm the definition of how each signal is being used. - Page 92 Input – Output Signal Verification I N P U T L O G I C D A T A B I T S SERIAL SERIAL E-STOP THRMST SERIAL SERIAL TB1(53) TB1(12) TB1(54) PRE - FAULT TB3(6) TB3(8) FIELD TORQUE RESET ENABLE LPR AUX TB1(7)
-
Page 93: Maintenance
Periodically check air filters on enclosure Defective or questionable printed circuit boards should be returned to MagneTek, for repair doors, if applicable; clean if dirty, replace as and test. The printed circuit board should be necessary. - Page 94 Provides power supply and board sensing connections to the DSD401 Signal Interface 10-Pin Header PCB, A3. [This cable is the same as that used to connect the standard DSD 412 field Interface PCB.] Provides control and feedback signal 40-Pin Header...
- Page 95 Maintenance U13 U14 NV RAM PROTECT SWITCH ONLY ONE PRESENT AT A TIME Figure 25: Connector and E-prom Locations...
- Page 96 Maintenance TP19-21 TP40 TP40 Follow Follow Common +24V +24V +24V TP9-12 -15V A-D Scan SOpen TP16 +24V E Scan TP40 Follow TP15 Thst TP17 F Scan +15V Open ABCDE TP14 Scan Time TP40 TP13 TP23 Follow WDOG TP24 Common TP25 TP43 Common MAI2...
- Page 97 Maintenance TEST POINT FUNCTION DESCRIPTION +24V SUPPLY +24V SUPPLY +15V SUPPLY +15V SUPPLY -15V SUPPLY -15V SUPPLY +5V SUPPLY +5V SUPPLY EMERGENCY STOP OPEN HI = EMERGENCY STOP IS OPEN THERMOSTAT OPEN HI = THERMOSTAT IS OPEN LOW PWR SUPPLY WARN HI = LOW 115VAC TO PWR SUPPLY COMMON COMMON...
- Page 98 Maintenance TEST POINT FUNCTION DESCRIPTION TP35 -10V REFERENCE OUTPUT -10V REF OUTPUT AT TB1-29 TP36 +10V REFERENCE OUTPUT +10V REF OUTPUT AT TB1-28 TP37 ARMATURE CURRENT 3V @ 1 PU (Use Shielded Probe to avoid noise FEEDBACK pick-up. Noise will cause erratic Drive operation) See TP39.
-
Page 99: Drive Control Pcb Replacement
PCB using the same hardware in reverse electrically conductive joint compound to all order. Re-attach the J12 cable. contacting surfaces. Magnetek recommends 5. Mount the new Drive Control PCB into the using Joint-Al-Z compound for all bolted power cube by reversing procedure in electrical power connections. -
Page 100: Testing And Replacement Of Power Semiconductors And Snubber Components
3. Wipe the mounting surface clean. Use a Field Control Module and PCB new thermal mounting pad or a thin Components of the DSD 412 for control of coating of thermal grease on the bottom of motor field consist of the A3 PCB and the replacement module. -
Page 101: Repair Of The 195Amp Assembly
(–) DC bus bar and the negative The layout of basic component parts of the probe to each of the three AC bus bars. 100-195ADC DSD 412. Figure 3: Component Again, all readings should be infinity. Layout Front View 3. -
Page 102: Repair Of The 300Amp Assembly
Repair of the 300Amp Assembly 8. Now tighten the mounting hardware for Magnetek recommends having an entire 300 any replaced SCR modules: Tighten each amp drive chassis available as a spare part in screw equally and alternately, ¼ turn at a order to get a faulty unit back in operation as time. - Page 103 Maintenance requires the aid of alignment jigs, proper tools Again, all readings should be greater than and considerable patience for proper success. 300 K-ohms. Whole drives or SCR Power Bridge 3. Reverse the multi-meter probes and repeat assemblies may be returned to the factory for the above two steps.
- Page 104 Maintenance 2. To Reinstall a completely assembled SCR d. Ensure that the Armature Voltage Power Bridge, follow all of the above steps Feedback leads at TB5 are re- in reverse order...and: connected with the original polarity. a. Use a thin coating of Joint-Al-Z e.
- Page 105 Maintenance of the way for access to the upper bus h. Replace the Signal Interface PCB. bolt by the current transducer. Plug in J31 and J15. Place the upper bus bar over the fuse Replace fuse F4. Be sure to use the mounting stud.
-
Page 106: Appendix
Appendix – Drive Ratings Appendix Drive Ratings for Elevator Applications Rated Input Rated Input AC Rated Output DC Model Number Voltage Current Current 53ST015-xxxx 53ST030-xxxx 53ST060-xxxx 53ST125-xxxx < 53ST200-xxxx 53ST300-xxxx 53ST400-xxxx 53ST600-xxxx 1036 1270 53ST800-xxxx 53SX200-xxxx 53SX300-xxxx 53SX400-xxxx 53SX600-xxxx 1036 1270 53SX800-xxxx Table 22: Drive Ratings for Elevator Applications... -
Page 107: Power Loss
Appendix – Power Loss Appendix Power Loss Model Number Power Loss (Watts) Power Loss (BTU/hour) 53ST060-xxxx 1365 53ST125-xxxx 2201 53ST200-xxxx 1082 3693... -
Page 108: Wire Terminal Specs
Appendix – Wire Terminal Specs Appendix Wire Terminal Specs Power Terminal Wire Sizes Torque Torque Wire Size* 275 in-lb 05P00204-0278 6AWG – 350MCM Table 23: Wire Specs for Power Terminals Ground Wire Sizes Torque Wire Size** 14 – 10 AWG 35 inlb 40 inlb 8 AWG... -
Page 109: Spare Parts
Appendix – Spare Parts Appendix Spare Parts DSD 412 Reference Quantity Description Magnetek Part or kit Number Rating Designator Per Drive LA05P00016-0048 100A LA05P00016-0048 195A LA05P00016-0012 300A LA05P00016-0008 F1-F3 LA05P00017-0227 (50A,700V) F1-F3 LA05P00017-0155 (70A,700V) AC Line Fuse 100A F1-F3 LA05P00017-0166 (150A,700V) - Page 110 Appendix – Spare Parts DSD 412 Reference Quantity Description Magnetek Part or kit Number Rating Designator Per Drive A2J28 46S03577-1015 A2J28 46S03577-1030 (note 2) A2J28 46S03577-2030 (note 2) 100A A2J28 46S03577-1060 Cube ID PCB 195A A2J28 46S03577-1125 300A A2J19 46S03577-1200 (note 2)
- Page 111 Appendix – Spare Parts Easy parameter adjustments PCDU Hand-held Service / with 2-line Adjustment Tool, use only numeric read- 46S03281-0010 Optional with the 46S02975-0403 out with English version control PCB. labels, direct entry numeric keypad. 2-gram packet. Joint-Al-Z Electric Joint Use at all bus 05P00100-0060 Compound...
-
Page 112: Packing Instructions
Appendix – Packing Instructions Appendix Packing Instructions When receiving a drive from Magnetek: 1. Open Carton and remove the OSB panel located on top of the drive. 2. Remove Foam from carton 3. Lift drive out of box, grip ONLY sheet metal chassis. -
Page 113: Outline Drawings
Appendix – Outline Drawings Appendix Outline Drawings Figure 30: Drive Chassis Outline, DSD 412, 100 Amp... - Page 114 Appendix – Outline Drawings Figure 31: Drive Chassis Outline, DSD 412, 195 Amp...
- Page 115 Appendix – Outline Drawings Figure 32: Drive Chassis Outline, DSD 412, 300 Amp...
- Page 116 Appendix – Layout Drawings Figure 33: Layout, DSD 412, 100 Amp...
- Page 117 Appendix – Layout Drawings Figure 34: Layout, DSD 412, 195 Amp...
- Page 118 Appendix – Layout Drawings Figure 35: Layout, DSD 412, 300 Amp...
-
Page 119: Index
Index 3 Second Loop Fault parameter ....65 DCU Errors ........... 79 Decel Rate Latch parameter ......67 Deceleration %S parameters ......71 Deceleration Time parameters ..... 70 Abnormal Display Conditions ......24 Dictated Speed Reference monitor function . 76 AC Input Voltage Requirement &... - Page 120 Low Speed Threshold parameter ....63 PreTorque Bias parameter ......67 Pre-Torque Enable parameter ...... 67 PreTorque Input monitor function ....76 Magnetek - How to Contact ......20 Pre-Torque Multiplier parameter ....64 Measure Field L/R Time Constant monitor Protective Features ........11 function ............
- Page 121 SCDU Description ......... 31 Status LED Descriptions ....... 19 SCDU Error Display ........35 Stop Sequence ..........48 SCDU Error Reporting ........33 Stopping Distance ......... 50 SCDU Fault Display/Clear ......35 SCDU Monitor Functions ....... 33 SCDU Parameter/Function Changes .... 32 Tach Rate Gain ..........
- Page 124 DSD 412 DC Elevator Drive Data subject to change without notice. DSD is a trademark of Magnetek, Inc. Magnetek Elevator Products Magnetek Elevator Products - Europe N50 W13775 Overview Drive Unit 3, Bedford Business Centre Mile Road Menomonee Falls, Wisconsin 53051...
Need help?
Do you have a question about the DSD 412 and is the answer not in the manual?
Questions and answers
Having issues with magnates did 412 drive getting f900 faults working on micro flight ultra 2000 any solutions would be appreciated