
Related Manuals for Siemens HB55MB550B


Summary of Contents for Siemens HB55MB550B
- Page 1 Double oven HB55MB550B [en] Instruction manual ........2...
-
Page 2: Table Of Contents
Produktinfo Heating up the oven ................7 Cleaning accessories.................7 Additional information on products, accessories, replacement parts and services can be found at www.siemens-home.com Setting the oven................8 and in the online shop www.siemens-eshop.com Switching on the oven................8 Switching off the oven................8 Rapid heating ..................8... -
Page 3: Safety Precautions
ã=Safety precautions Please read this instruction manual Hot accessories and ovenware carefully. Please keep the instruction Risk of burns! and installation manuals in a safe Never remove ovenware or accessories from the cooking compartment without an oven cloth or oven gloves. place. -
Page 4: Your New Oven
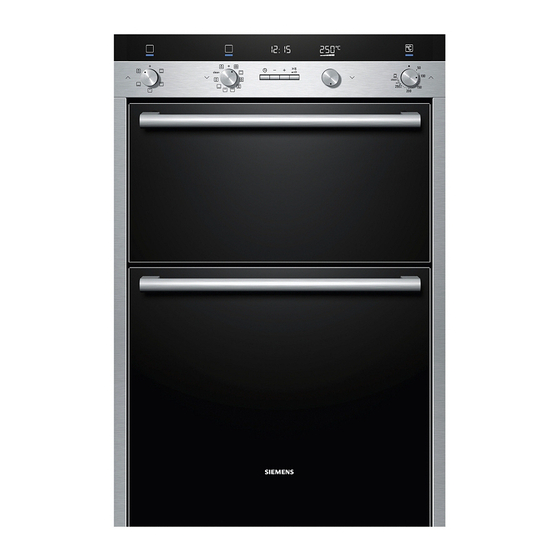
Your new oven Here you will learn about your new oven. The control panel and the individual operating controls are explained. You will find information on the cooking compartment and the accessories. Control panel Here is an overview of the control panel. The display never shows all of the symbols at the same time. -
Page 5: Temperature Selector
Setting Setting Meaning Cleaning system For automatic cleaning of the 1, 2, 3 Grill settings The grill settings for the Grill, specially coated parts in the small area and Grill, large cooking compartment. area. The oven heats up until the dirt on Level 1 = low the highly porous surface Level 2 = medium... -
Page 6: Cooking Compartment
Cooking compartment Ç Top oven The accessories can be inserted into the oven at 2 different The oven light is located in the cooking compartment. A cooling levels. fan protects the oven from overheating. Oven light During operation, the oven light in the cooking compartment is on. -
Page 7: Before Using For The First Time
Optional accessories HZ number Pizza tray HZ317000 Ideal for pizza, frozen products or large, round cakes. You can use the pizza tray instead of the universal pan. Place the tray on the wire rack and look at the specifications in the tables. Enamel baking tray with non-stick coating HZ331010 Cakes and biscuits can be removed from the baking tray more... -
Page 8: Setting The Oven
Setting the oven There are various ways in which you can set your oven. Here The main oven begins to heat up. we will explain how you can select the desired type of heating Changing the settings and temperature or grill setting. You can select the oven cooking time and end time for your dish. -
Page 9: Cooking Time
Cooking time End time You can set a cooking time for your dish in the main oven. You can delay the time at which you wish your dish to be ready. Æ When the cooking time has elapsed, the oven switches itself off main oven starts automatically and finishes at the Æ... -
Page 10: Clock
Use the button to set the clock. Checking the time settings If several time-setting options are set, the relevant symbols are After a few seconds, the time that has been set is adopted. illuminated on the display. The time-setting options symbol is in the foreground and preceded by the arrow. -
Page 11: Automatic Switch-Off
Automatic switch-off The automatic switch-off function is Æ main oven has an automatic switch-off function. activated. If you do not change the settings on your appliance for several hours, the automatic switch-off function will be activated. The A signal sounds. F8 appears in the display. The oven stops oven stops heating. -
Page 12: Care And Cleaning
Care and cleaning With good care and cleaning, your oven will remain clean and Cleaning the self-cleaning surfaces in the cooking fully-functioning for a long time to come. Here we will explain compartment how to maintain and clean your oven correctly. The back wall, ceiling and side walls of the cooking compartment are coated with a highly porous ceramic layer. -
Page 13: Detaching And Attaching The Oven Door
Fold back both locking levers (figure C). Close the oven The rails fit both the left and right sides. The kinked section door. must always be at the bottom. & Detaching and attaching the oven door For cleaning purposes and to remove the door panels, you can detach the oven door. -
Page 14: Troubleshooting
Æ Ç Clean the intermediate panel on the main oven Clean the intermediate panel on the top oven Unscrew the retainers on the left and right (Fig. C). Press the retainer on the intermediate panel on one side and unlatch it, using a spatula for instance (Fig. C). Unfold the retainers on the left and right. -
Page 15: Replacing The Oven Light Bulb
Replacing the oven light bulb Problem Possible cause Remedy/information Replace faulty oven light bulbs. The oven does The oven is in Switch off the circuit not heat up. A demonstration breaker in the fuse box and Spare bulbs can be obtained from the after-sales service or mode. -
Page 16: Energy And Environment Tips
Energy and environment tips Here you can find tips on how to save energy when baking and For longer cooking times, you can switch the oven off ■ roasting and how to dispose of your appliance properly. 10 minutes before the end of the cooking time and use the residual heat to finish cooking. - Page 17 Æ Main oven Food Dish Shelf Type of Temperature Time position heating in °C in minutes Victoria sandwich Wire rack + 2 x Ø 20 cm tins 170-180 20-25 Wire rack + 2 x Ø 20 cm tins 160-180 20-25 Light fruit cake Wire rack + high Ø...
-
Page 18: Baking Tips
Food Dish Shelf Type of Temperature Time position heating in °C in minutes Meringues, 2 levels Universal pan + wire rack with baking tray 80-90 100-150 Jacket potatoes, 2 levels 2 wire racks 170-180 60-75 (White) Bread, 2 levels 2 wire racks + loaf tins (2 x 900 g or 4 x 180-190 35-40 450 g) -
Page 19: Meat, Poultry, Fish
Meat, poultry, fish Roasting The information in the table applies to food placed in a cold Ovenware oven and for meat taken directly from the refrigerator. The universal pan with insert wire rack is suitable for large The joints of meat should weigh between 500 g and 2 kg. roasts. - Page 20 Food Dish Shelf Type of Temperature Time, min. per position heating in °C 500 g + add. time Complete meal With beef Wire rack + universal pan with 160, then 200 weight of meat wire insert (yorkshire (see table pudding) above) + 15-25 for yorkshire pudding...
- Page 21 Food Dish Shelf Type of Grill setting Time position heating in minutes Pork Steaks, height 1-2 cm Wire rack + universal pan 1. side 6-7, 2. side 6-7 Chops, height 2-3 cm Wire rack + universal pan 1. side 10-12, 2.
-
Page 22: Tips For Roasting And Grilling
Food Dish Shelf Type of Grill setting Time position heating in minutes Fish Whole trout Wire rack + 25-30 300 g each universal pan Fillets Wire rack + 15-20 150 g each universal pan * Preheat for 3 minutes ** Turn frequently Tips for roasting and grilling The table does not contain information Select the next lowest weight from the instructions and extend the time. -
Page 23: Special Dishes
Food Dish Shelf Type of Temperature Time position heating in °C in minutes Hash browns (fried potatoes) Universal pan 200-220 15-25 Universal pan 200-210 15-20 Potato wedges Universal pan 190-200 20-25 Universal pan 190-200 20-25 Baked goods, frozen Rolls, baguettes Universal pan 180-200 10-20... -
Page 24: Defrost
Upper oven Meal Cookware Level Type of Temperature Cooking heating time Yoghurt Cups or screw-top jars Place on the cooking Preheat to 100 °C 15 mins compartment floor approx. Switch on the oven 8 hrs light Defrost Take frozen food out of its packaging and place in suitable ovenware on the wire rack. -
Page 25: Test Dishes
Test dishes These tables have been produced for test institutes to facilitate Whirls: baking trays that are placed in the oven at the same the inspection and testing of the various appliances. time will not necessarily be ready at the same time. In accordance with EN 50304/EN 60350 (2009) and IEC German apple pie on 2 levels: place dark springform cake tins 60350. - Page 28 *9000540901* 9000540901 Siemens-Electrogeräte GmbH Carl-Wery-Straße 34 81739 München 910119 DEUTSCHLAND...
Need help?
Do you have a question about the HB55MB550B and is the answer not in the manual?
Questions and answers