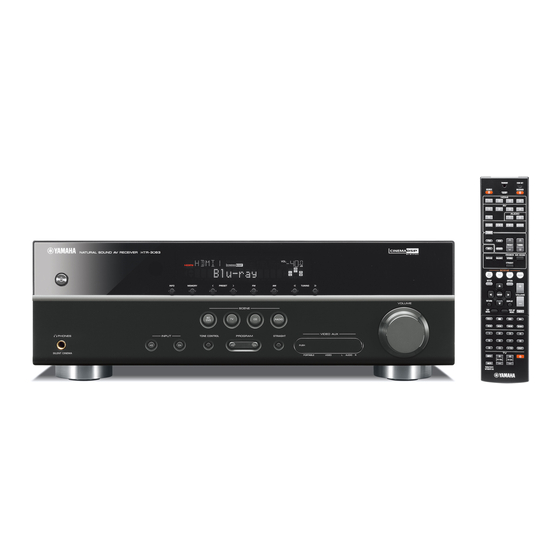
Yamaha HTR-3065 Setup Manual
Hide thumbs
Also See for HTR-3065:
- Owner's manual (83 pages) ,
- Easy setup manual (8 pages) ,
- Service manual (115 pages)

Subscribe to Our Youtube Channel
Related Manuals for Yamaha HTR-3065


Summary of Contents for Yamaha HTR-3065
- Page 1 English Français AV Receiver/Ampli-tuner audio-vidéo Easy Setup Guide Manuel de configuration rapide...
- Page 2 PDF versions of this guide and “Owner’s Manual” can be downloaded from the • HDMI cable (x2) following website. • Audio pin cable (x1) http://download.yamaha.com/ • Digital optical cable (x1) (not required if your TV supports ARC [Audio Return Channel])
-
Page 3: Placing Speakers
Placing speakers Set up the speakers in the room using the following diagram as a reference. For information on other speaker systems, refer to “Owner’s Manual”. 10° to 30° 10° to 30° 1 Front speaker (L) 2 Front speaker (R) 3 Center speaker 4 Surround speaker (L) 5 Surround speaker (R) -
Page 4: Connecting Speakers/Subwoofer
Connecting speakers/subwoofer Using a banana plug • (U.S.A. and Canada models only) Connect the front speakers (1/2) (U.S.A., Canada, Australia and General models only) Under its default settings, the unit is configured for 8-ohm to the FRONT (//\) terminals. speakers. When connecting 6-ohm speakers, set the unit’s a Tighten the speaker terminal. - Page 5 Connect the center speaker (3) to the Connect the surround speakers Connect the subwoofer (9) to the CENTER terminal. (4/5) to the SURROUND (//\) SUBWOOFER jack. terminals. The unit (rear) The unit (rear) The unit (rear) SPEAKERS SPEAKERS SPEAKERS FRONT FRONT FRONT SURROUND...
-
Page 6: Connecting External Devices
Connecting external devices Before connecting the power cable (General model only) Make sure you set the switch position of VOLTAGE SELECTOR according to your local voltage. Voltages are AC 110-120/220-240 V, 50/60 Hz. Audio out (optical) HDMI in HDMI out BD/DVD player OPTICAL HDMI... -
Page 7: Optimizing The Speaker Settings Automatically (Ypao)
Connect the YPAO microphone to the YPAO MIC jack on the front panel. The Yamaha Parametric room Acoustic Optimizer (YPAO) function detects speaker connections, measures the The following screen appears. distances from them to your listening position(s), and then automatically optimizes the speaker settings, such as volume balance and acoustic parameters, to suit your room. - Page 8 If “W-1:Out of Phase” appears • If any error message (such as E-1) or warning message (such as W-2) appears, see “Error messages” or “Warning Follow the procedure below to check the speaker messages” in “Owner’s Manual”. connections. • If the warning message “W-1:Out of Phase” appears, see “If Depending on the type of speakers or room “W-1:Out of Phase”...
-
Page 9: Playing Back A Bd/Dvd
Playing back a BD/DVD Many more features! Now let’s play back a BD/DVD. The unit has various other functions. Press HDMI 1 to select “HDMI 1” as the We recommend playing back multichannel audio Please refer to “Owner’s Manual” on the supplied input source. - Page 10 Pour télécharger ce guide ainsi que le « Mode d’emploi » au format PDF, rendez-vous sur le site Web • Câble optique numérique (x1) (inutile si votre téléviseur prend en charge la fonction ARC suivant : [Audio Return Channel http://download.yamaha.com/...
-
Page 11: Installation Des Enceintes
Installation des enceintes Installez les enceintes dans la pièce en vous reportant au diagramme suivant. Pour obtenir des informations sur les autres systèmes d’enceinte, consultez le « Mode d’emploi ». 10° à 30° 10° à 30° 1 Enceinte avant (G) 2 Enceinte avant (D) 3 Enceinte centrale 4 Enceinte Surround (G) - Page 12 Raccordement des enceintes/du caisson de graves Utilisation d’une fiche banane • (Modèles pour les États-Unis et le Canada uniquement) Raccordez les enceintes avant (1/ (Modèles pour les États-Unis, le Canada, l’Australie et L’unité est configurée pour des enceintes 8 ohms par défaut. 2) aux bornes FRONT (//\).
- Page 13 Raccordez l’enceinte centrale (3) Raccordez les enceintes d’ambiance Raccordez le caisson de graves (9) à la borne CENTER. (4/5) aux bornes à la prise SUBWOOFER. SURROUND (//\). L’unité (arrière) L’unité (arrière) L’unité (arrière) SPEAKERS SPEAKERS SPEAKERS FRONT FRONT FRONT SURROUND CENTER SURROUND CENTER...
- Page 14 Raccordement des appareils externes Avant de raccorder le câble d’alimentation (modèle standard uniquement) Vérifiez que vous sélectionnez la position de permutation de VOLTAGE SELECTOR en fonction de la tension locale. Les Téléviseur tensions sont CA 110-120/220-240 V, 50/60 Hz. Sortie audio (optique) Entrée HDMI Sortie HDMI...
- Page 15 (YPAO) L’écran suivant apparaît. La fonction Yamaha Parametric room Acoustic Optimizer (YPAO) permet de détecter les raccordements des enceintes et A u t o S e t u p de mesurer la distance entre ces dernières et la position d’écoute. Elle optimise ensuite automatiquement les réglages des...
- Page 16 Si le message « W-1:Out of Phase » apparaît • Si un message d’erreur (par exemple E-1) ou d’avertissement (par exemple W-2) apparaît, reportez-vous aux sections Suivez la procédure ci-dessous pour vérifier les « Messages d’erreur » ou « Messages d’avertissement » du raccordements de l’enceinte.
- Page 17 Lecture d’un disque BD/DVD Encore plus de Voyons maintenant comment lire un disque BD/DVD. Appuyez sur HDMI 1 pour sélectionner Pour sentir les effets d’ambiance sonore produits par fonctions ! « HDMI 1 » comme source d’entrée. l’unité, nous vous recommandons de lire les disques avec le système audio multivoies (5.1 voies et plus).
- Page 18 © 2012 Yamaha Corporation Printed in China ZA51230...
Need help?
Do you have a question about the HTR-3065 and is the answer not in the manual?
Questions and answers