Yamaha RX-V377 Owner's Manual
Hide thumbs
Also See for RX-V377:
- Service manual (122 pages) ,
- Owner's manual (97 pages) ,
- Easy setup manual (2 pages)

Related Manuals for Yamaha RX-V377


Summary of Contents for Yamaha RX-V377
- Page 1 AV Receiver Owner’s Manual Read the supplied booklet “Safety Brochure” before using the unit. English...
-
Page 2: Table Of Contents
CONTENTS Accessories ............4 9 Optimizing the speaker settings automatically (YPAO) . - Page 3 Yamaha technologies ........
-
Page 4: Accessories
Accessories Operating range of the remote control Check that the following accessories are supplied with the product. • Point the remote control at the remote control sensor on the unit and remain within the operating range shown below. Remote control ... -
Page 5: Features
FEATURES What you can do with the unit . p.41 • High-quality sound from iPod via Supports 2- to 5.1-channel speaker system. digital connection Allows you to enjoy your favorite acoustic spaces in various styles. . p.45 • Playback of music stored on USB . -
Page 6: Full Of Useful Functions
Full of useful functions! Useful tips The combination of video/audio input jacks does not ❑ Connecting various devices (p.20) ❑ Creating high-realistic sound fields (p.33) match an external device... A number of HDMI jacks and various input/output jacks CINEMA DSP allows you to create a natural and realistic Use “Audio In”... -
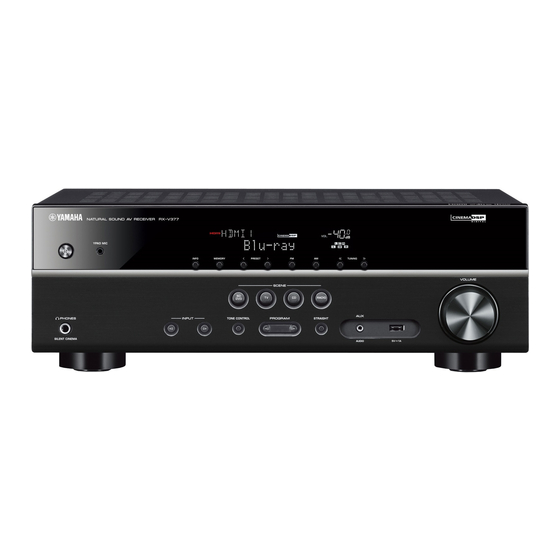
Page 7: Part Names And Functions
Part names and functions Front panel YPAO MIC INFO MEMORY PRESET TUNING VOLUME SCENE RADIO PHONES INPUT TONE CONTROL PROGRAM STRAIGHT SILENT CINEMA AUDIO z (power) key TUNING keys PROGRAM keys Turns on/off (standby) the unit. Select the radio frequency (p.37). Select a sound program or a surround decoder (p.32). -
Page 8: Front Display (Indicators)
Front display (indicators) CHARGE ENHANCER STEREO TUNED SLEEP MUTE VOL. SP IMP.••8 MIN ADAPTIVE DRC > HDMI SLEEP Speaker indicators Lights up when HDMI signals are being input or output. Lights up when the sleep timer is on. Indicate speaker terminals from which signals are output. Front speaker (L) MUTE Front speaker (R) -
Page 9: Rear Panel
DC OUT jack For outputting video/audio to a recording device (such as a VOLTAGE SELECTOR For supplying power to a Yamaha AV accessory. For details VCR) (p.24). (Taiwan and General models only) on connections, refer to the instruction manual of the AV AUDIO jacks accessory. -
Page 10: Remote Control
(sleep timer). Press • The playback devices must support HDMI Control. However, repeatedly to set the time (120 min, 90 min, 60 min, 30 min, Yamaha does not assure the operation of all HDMI Control- compatible devices. off). -
Page 11: Preparations
PREPARATIONS General setup procedure Placing speakers (p.12) Select the speaker layout for the number of speakers that you are using and place them in your room. Connecting speakers (p.15) Connect the speakers to the unit. Connecting a TV (p.18) Connect a TV to the unit. Connecting playback devices (p.20) Connect video devices (such as BD/DVD players) and audio devices (such as CD players) to the unit. -
Page 12: Placing Speakers
1 2 3 4 5 6 7 8 9 Placing speakers Select the speaker layout for the number of speakers that you are using and place the speakers and subwoofer in your room. This section describes the representative speaker layout examples. -
Page 13: Channel System
1 2 3 4 5 6 7 8 9 5.1-channel system 4.1-channel system 10° to 30° 10° to 30° 10° to 30° 10° to 30° 5.1-channel system (Virtual CINEMA FRONT) 3.1-channel system • To utilize this configuration, set "Virtual CINEMA FRONT" (p.55) in the "Setup" menu to "On". •... - Page 14 1 2 3 4 5 6 7 8 9 ■ 2.1-channel system Setting the speaker impedance (U.S.A. and Canada models only) Under its default settings, the unit is configured for 8-ohm speakers. When connecting 6-ohm speakers, set the speaker impedance to “6 Ω MIN”. Before connecting speakers, connect the power cable to an AC wall outlet.
-
Page 15: Connecting Speakers
1 2 3 4 5 6 7 8 9 Connecting speakers ■ Connect the speakers placed in your room to the unit. 5.1-channel system Connecting speaker cables The following diagrams provide connections for a Speaker cables have two wires. One is for connecting 5.1-channel system as an example. -
Page 16: Connecting The Subwoofer
1 2 3 4 5 6 7 8 9 (Connecting center/surround speakers) a Remove approximately 10 mm (3/8”) of insulation from the ends of the speaker cable, and twist the bare wires of the cable firmly together. b Press down the tab. c Insert the bare wires of the cable into the hole in the terminal. -
Page 17: Input/Output Jacks And Cables
Input/output jacks and cables ■ ❑ VIDEO jacks ❑ AUDIO jacks Video/audio jacks Transmit analog video signals. Use a video pin cable. (Stereo L/R jacks) ❑ HDMI jacks Transmit analog stereo audio signals. Use a stereo pin Video pin cable Transmit digital video and digital sound through a single cable (RCA cable). -
Page 18: Connecting A Tv
1 2 3 4 5 6 7 8 9 Connecting a TV ■ Connect a TV to the unit so that video input to the unit can be output to the TV. You can Component / composite video connection also enjoy playback of TV audio on the unit. When connecting any video device with a component video cable, connect the TV to To maximize the performance of the unit, we recommend connecting a TV with an HDMI the MONITOR OUT (COMPONENT VIDEO) jacks. - Page 19 1 2 3 4 5 6 7 8 9 ❑ VIDEO (composite video) connection (with a video pin cable) Video input The unit (rear) MONITOR OUT (VIDEO) jack (composite video) VIDEO (BD/DVD) HDMI OUT HDMI 1 HDMI 2 HDMI 3 HDMI 4 DC OUT COMPONENT...
-
Page 20: Connecting Playback Devices
1 2 3 4 5 6 7 8 9 Connecting playback devices ■ The unit is equipped with a variety of input jacks including HDMI input jacks to allow Component video connection you to connect different types of playback devices. For information on how to connect Connect a video device to the unit with a component video cable and an audio cable an iPod or a USB storage device, see the following pages. -
Page 21: Changing The Combination Of Video/Audio Input Jacks
1 2 3 4 5 6 7 8 9 ■ ■ Composite video connection Changing the combination of video/audio input jacks Connect a video device to the unit with a video pin cable and an audio cable (digital If the combination of video/audio input jacks available on the unit does not match your coaxial or stereo pin cable). -
Page 22: Connecting Audio Devices (Such As Cd Players)
1 2 3 4 5 6 7 8 9 Connecting audio devices (such as CD players) After connecting external devices (such as a TV and playback devices) and power cable of the unit, turn on the unit. Connect audio devices such as CD players and MD players to the unit. Depending on the audio output jacks available on your audio device, choose one of the following Press AV 2 to select “AV 2”... -
Page 23: Connecting To The Jack On The Front Panel
1 2 3 4 5 6 7 8 9 Connecting to the jack on the front panel Connecting the FM/AM antennas Use the AUX jack on the front panel to temporarily connect devices such as portable Connect the supplied FM/AM antennas to the unit. audio players to the unit. -
Page 24: Connecting Recording Devices
1 2 3 4 5 6 7 8 9 Connecting recording devices Connecting the power cable You can connect video/audio recording devices to the AV OUT jacks. The jacks output Before connecting the power cable (Taiwan and General models only) analog video/audio signals selected as the input. -
Page 25: Selecting An On-Screen Menu Language
1 2 3 4 5 6 7 8 9 Selecting an on-screen menu language TRANSMIT TRANSMIT RECEIVER RECEIVER z RECEIVER z SLEEP SLEEP Select the desired on-screen menu language from English, HDMI HDMI To exit from the menu, press SETUP. Japanese, French, German, Spanish, Russian, Italian and Chinese. -
Page 26: Optimizing The Speaker Settings Automatically (Ypao)
RECEIVER RECEIVER z RECEIVER z SLEEP SLEEP The Yamaha Parametric room Acoustic Optimizer (YPAO) function HDMI HDMI Place the YPAO microphone at your listening detects speaker connections, measures the distances from them to your listening position(s), and then automatically optimizes the... - Page 27 1 2 3 4 5 6 7 8 9 TRANSMIT TRANSMIT To start the measurement, use the cursor keys to To save the measurement results, use the cursor RECEIVER RECEIVER select “Start” and press SETUP. keys (e/r) to select “SAVE” and press ENTER. SLEEP SLEEP HDMI...
-
Page 28: Error Messages
Exit YPAO, and turn off and on the unit. If this error occurs Procedure to handle errors E-10:Internal Err. An internal error has occurred. repeatedly, contact the nearest authorized Yamaha dealer or (E-10:INTERNAL) service center. Check the content of error message and press ENTER. -
Page 29: Warning Messages
1 2 3 4 5 6 7 8 9 Warning messages If a warning message is displayed after the measurement, you can still save the measurement results by following on-screen instructions. However, we recommend you perform YPAO again in order to use the unit with the optimal speaker settings. Warning message Cause Remedy... -
Page 30: Playback
PLAYBACK TRANSMIT TRANSMIT RECEIVER RECEIVER SLEEP SLEEP HDMI Basic playback procedure Input Input selection keys selection Switching information on the front display keys Turn on the external devices (such as a TV or BD/ AUDIO DVD player) connected to the unit. TUNER TUNER Press INFO. -
Page 31: Selecting The Input Source And Favorite Settings With One Touch
Selecting the input source and favorite settings with one touch (SCENE) TRANSMIT TRANSMIT RECEIVER RECEIVER SLEEP SLEEP The SCENE function allows you to select the assigned input source, Configuring scene assignments HDMI HDMI sound program, and Compressed Music Enhancer on/off with just one touch. -
Page 32: Selecting The Sound Mode
Selecting the sound mode TRANSMIT TRANSMIT RECEIVER RECEIVER SLEEP SLEEP The unit is equipped with a variety of sound programs and HDMI HDMI surround decoders that allow you to enjoy playback sources with • You can also switch the sound programs and surround decoder by pressing your favorite sound mode (such as sound field effect or stereo PROGRAM on the front panel. -
Page 33: Enjoying Sound Field Effects (Cinema Dsp)
You’ll never get tired listening for long periods. The unit is equipped with a variety of sound programs that utilize Yamaha’s original DSP technology (CINEMA DSP). It allows you to easily create sound fields like actual movie This program reproduces monaural video sources, such as classic movies, in an atmosphere of a good old movie theater. -
Page 34: Virtual Cinema Dsp
■ ■ Sound programs suitable for music/stereo playback Enjoying sound field effects without surround speakers (MUSIC) (Virtual CINEMA DSP) The following sound programs are optimized for listening to music sources. If you select one of the sound programs (except 2ch Stereo and 5ch Stereo) when no surround speakers are connected, the unit automatically creates the surround sound You can also select stereo playback. -
Page 35: Enjoying Unprocessed Playback
■ Enjoying unprocessed playback Enjoying unprocessed multichannel TRANSMIT TRANSMIT sounds (surround decoder) RECEIVER RECEIVER SLEEP SLEEP You can play back input sources without any sound field effect HDMI HDMI The surround decoder enables unprocessed multichannel processing. playback from 2-channel sources. When a multichannel source is input, it works the same way as the straight decode mode. -
Page 36: Enhancing The Bass (Extra Bass)
Enhancing the bass (Extra Bass) Enjoying compressed music with enhanced TRANSMIT TRANSMIT sound (Compressed Music Enhancer) RECEIVER RECEIVER SLEEP SLEEP Extra Bass allows you to enjoy enhanced bass sounds, regardless HDMI HDMI of the size of the front speakers and the presence or absence of the subwoofer. -
Page 37: Listening To Fm/Am Radio
Listening to FM/AM radio TRANSMIT TRANSMIT RECEIVER RECEIVER SLEEP SLEEP You can tune into a radio station by specifying its frequency or Selecting a frequency for reception HDMI HDMI selecting from registered radio stations. Press FM or AM to select a band. •... -
Page 38: Registering Favorite Radio Stations (Presets)
Registering favorite radio stations (presets) When the Auto Preset process finishes, “FINISH” appears and the TRANSMIT TRANSMIT “Option” menu closes automatically. RECEIVER RECEIVER SLEEP SLEEP You can register up to 40 radio stations as presets. Once you have CHARGE ENHANCER STEREO TUNED SLEEP MUTE HDMI... - Page 39 ■ ■ Selecting a preset station Clearing preset stations TRANSMIT TRANSMIT Tune into a registered radio station by selecting its preset number. Clear radio stations registered to the preset numbers. RECEIVER RECEIVER SLEEP SLEEP HDMI HDMI Press FM or AM to select “TUNER” as the input Press FM or AM to select “TUNER”...
-
Page 40: Radio Data System Tuning
Radio Data System tuning TRANSMIT TRANSMIT • “Program Service”, “Program Type”, “Radio Text”, and “Clock Time” are not RECEIVER RECEIVER SLEEP SLEEP (U.K. and Europe models only) displayed if the radio station does not provide the Radio Data System HDMI HDMI service. -
Page 41: Playing Back Ipod Music
Playing back iPod music TRANSMIT TRANSMIT RECEIVER RECEIVER SLEEP SLEEP You can play back iPod music on the unit using a USB cable Playback of iPod content HDMI HDMI supplied with the iPod. Follow the procedure below to operate the iPod contents and start playback. - Page 42 ■ Browse screen TRANSMIT TRANSMIT Use the cursor keys to select an item and press RECEIVER RECEIVER ENTER. SLEEP SLEEP HDMI HDMI If a song is selected, playback starts and the playback i P o d M u s i c screen is displayed.
-
Page 43: Playback Screen
■ ■ Playback screen Operating the iPod itself or remote control TRANSMIT TRANSMIT (simple play) RECEIVER RECEIVER SLEEP SLEEP HDMI HDMI i P o d Press MODE to switch to the simple play mode. N o w P l a y i n g The TV menu screen turns off and iPod operations are A r t i s t N a m e A l b u m T i t l e... - Page 44 ■ Repeat/shuffle settings TRANSMIT TRANSMIT You can configure the repeat/shuffle settings of your iPod. RECEIVER RECEIVER SLEEP SLEEP HDMI HDMI • During simple play, configure the repeat/shuffle settings directly on your iPod or press MODE to display the TV menu screen and then follow the procedure below. AUDIO AUDIO When “USB”...
-
Page 45: Playing Back Music Stored On A Usb Storage Device
Playing back music stored on a USB storage device TRANSMIT TRANSMIT RECEIVER RECEIVER SLEEP SLEEP You can play back music files stored on a USB storage device on Playback of USB storage device contents HDMI HDMI the unit. Follow the procedure below to operate the USB storage device contents and start playback. - Page 46 ■ Browse screen TRANSMIT TRANSMIT Use the cursor keys to select an item and press RECEIVER RECEIVER ENTER. SLEEP SLEEP HDMI HDMI U S B If a song is selected, playback starts and the playback T o p screen is displayed. B l u e s C l a s s i c a l E l e c t r o n i c a...
- Page 47 ■ ■ Playback screen Repeat/random settings TRANSMIT TRANSMIT You can configure the repeat/random settings for playback of USB RECEIVER RECEIVER SLEEP SLEEP storage device contents. HDMI HDMI U S B N o w P l a y i n g When “USB”...
-
Page 48: Configuring Playback Settings For Different Playback Sources
Configuring playback settings for different playback sources (Option menu) You can configure separate playback settings for different playback sources. This Option menu items menu is available on the front panel (or on the TV screen), allowing you to easily configure settings during playback. Press OPTION. - Page 49 ■ ❑ Enhancer (Enhancer) Tone Control (Tone Control) Enables/disables Compressed Music Enhancer (p.36). Adjusts the high-frequency range (Treble) and low-frequency range (Bass) of sounds. Choices Treble (Treble), Bass (Bass) • This setting is applied separately to each input source. Setting range •...
- Page 50 ■ ■ Lipsync (Lipsync) Audio In (Audio In) Enables/disables the adjustment configured in “Lipsync” (p.59) in the “Setup” menu. Combines the video jack of the selected input source (HDMI 1–4 or AV 1–5) with an audio jack of others. For example, use this function in the following cases. •...
-
Page 51: Configurations
CONFIGURATIONS Configuring various functions (Setup menu) You can configure the unit’s various function with the menu displayed on the TV screen. Use the cursor keys (e/r) to select a setting and press ENTER. To exit from the menu, press SETUP. •... -
Page 52: Setup Menu Items
Setup menu items Menu Item Function Page Subwoofer Selects whether or not a subwoofer is connected. Front Selects the size of the front speakers. Center Selects whether or not a center speaker is connected and its size. Surround Selects whether or not surround speakers are connected and their size. Configuration Crossover Sets the lower limit of the low-frequency component that can be output from speakers whose size is set to “Small”. - Page 53 Menu Item Function Page Auto Power Standby Set the amount of time for the auto-standby function. ECO Mode Enables/disables the eco mode (power saving mode). Input Rename Changes the input source name displayed on the front display. Function Dimmer Adjusts the brightness of the front display. Memory Guard Prevents accidental changes to the settings.
-
Page 54: Speaker
Speaker Configures the speaker settings manually. Center Selects whether or not a center speaker is connected and its size. • Default settings are underlined. Settings ■ Configuration Select this option for small speakers. Small The subwoofer or front speakers will produce center channel Configures the output characteristics of the speakers. - Page 55 ■ Distance Subwoofer Phase Sets the distance between each speaker and listening position so that sounds from the Sets the phase of the subwoofer. When the bass sound is lacking or unclear, speakers reach the listening position at the same time. First, select the unit of distance switch the subwoofer phase.
- Page 56 ■ Manual equalizer adjustment Set “EQ Select” to “GEQ”. Use the cursor keys (q/w) to select “Channel” and the cursor keys (e/r) to select the desired speaker channel. Use the cursor keys (q/w) to select the desired band (frequency) and the cursor keys (e/r) to adjust the gain.
-
Page 57: Hdmi
HDMI Configures the HDMI settings. TV Audio Input Selects an audio input jack of the unit to be used for TV audio input when “HDMI • Default settings are underlined. Control” is set to “On”. The unit’s input source automatically switches to TV audio when the TV input is switched to its built-in tuner. - Page 58 SCENE Enables/disable SCENE link playback when “HDMI Control” is set to “On”. When SCENE link playback is enabled, HDMI Control-compatible devices connected to the unit via HDMI automatically works as follows, with a scene selection. • TV: turning on and displaying video from the playback device •...
-
Page 59: Sound
Sound Configures the audio output settings. Center Image Adjusts the center orientation level (broadening effect) of the front sound field. • Default settings are underlined. Higher to strengthen the center orientation level (less broadening effect) and lower to weaken (more broadening effect). This setting is effective when “Neo:6 Music” is ■... - Page 60 ■ Volume Configures the volume settings. Scale Switches the scale of the volume display. Settings Displays the volume in the “dB” unit. 0-97 Displays the volume in the numeric value (0.5 to 97.0). Dynamic Range Selects the dynamic range adjustment method for bitstream audio (Dolby Digital and DTS signals) playback.
-
Page 61: Auto Power Standby
Configures the power supply settings. • Default settings are underlined. ■ Auto Power Standby Set the amount of time for the auto-standby function. Settings Does not set the unit to standby mode automatically. Sets the unit to standby mode when you have not operated the unit 20 minutes and the unit has not detected any input signal for the specified time. -
Page 62: Function
Function ■ Configures the functions that make the unit easier to use. Dimmer Adjusts the brightness of the front display. • Default settings are underlined. Setting range -4 to 0 (higher to brighten) ■ Input Rename Changes the input source name displayed on the front display. •... -
Page 63: Language
Language Select an on-screen menu language. • Default settings are underlined. Settings English English 日本語 Japanese French Français German Deutsch Spanish Español Russian Italian Italiano Chinese • Japanese and Chinese characters used in content information (such as song titles) cannot be displayed. -
Page 64: Configuring The System Settings (Advanced Setup Menu)
Configuring the system settings (ADVANCED SETUP menu) Configure the system settings of the unit while viewing the front display. ADVANCED SETUP menu items Set the unit to standby mode. While holding down STRAIGHT on the front panel, press z (power). •... -
Page 65: Selecting The Remote Control Id (Remote Id)
Switch the video signal type of HDMI output so that it matches to the format of your TV. ID1). When using multiple Yamaha AV receivers, you can set each remote control with a Since the unit automatically selects the video signal type so that it matches to the TV, it unique remote control ID for its corresponding receiver. -
Page 66: Updating The Firmware (Update)
Updating the firmware (UPDATE) CHARGE ENHANCER STEREO TUNED SLEEP MUTE VOL. UPDATE•••••USB ADAPTIVE DRC VIRTUAL New firmware that provides additional features or product improvements will be released as needed. Updates can be downloaded from our website. For details, refer to the information supplied with updates. ■... -
Page 67: Appendix
When using multiple Yamaha products, the remote control may work on another the “Option” menu (p.49). Yamaha product or another remote control may work on the unit. If this happens, register different remote control IDs for the devices that you want to control with each remote control (p.65). -
Page 68: Troubleshooting
The power does not turn on. consecutively. nearest Yamaha dealer or service center to request repair. Hold down z (power) on the front panel for more than 10 seconds to reboot the The internal microcomputer has frozen, due to an external electric The power does not turn off. -
Page 69: Audio
Audio Problem Cause Remedy Another input source is selected. Select an appropriate input source with the input selection keys. Some digital audio formats cannot be played back on the unit. To check the audio No sound. Signals that the unit cannot reproduce are being input. format of the input signal, use “Signal Info”... -
Page 70: Video
Problem Cause Remedy Only the front speakers work on multichannel The playback device is set to output 2-channel audio (such as To check it, use “Signal Info” in the “Option” menu (p.50). If necessary, change audio. PCM) only. the digital audio output setting on the playback device. The unit is too close to another digital or radio frequency device. -
Page 71: Fm/Am Radio
FM/AM radio Problem Cause Remedy There is multi-path interference. Adjust the FM antenna height or orientation, or place it in a different location. Press MODE to select monaural FM radio reception (p.37). FM radio reception is weak or noisy. Your area is too far from the FM station transmitter. Use an outdoor FM antenna. -
Page 72: Error Indications On The Front Display
Turn off the iPod and then turn it on again. Internal Error An internal error has occurred. Contact the nearest authorized Yamaha dealer or service center. No content There are no playable files in the selected folder. Select a folder that contains files supported by the unit. -
Page 73: Glossary
Glossary Audio information DTS-HD Master Audio DTS-HD Master Audio is an advanced lossless audio format developed to offer a high-definition home theater experience with the quality of the studio master by DTS, Inc. DTS-HD Master Audio can carry up to ■... -
Page 74: Yamaha Technologies
Based on a wealth of actually measured data, CINEMA DSP, LFE (Low Frequency Effects) 0.1 channel Yamaha’s original DSP technology provides the audiovisual experience of a movie theater in your own home. This channel reproduces low-frequency bass signals and has a frequency range from 20 Hz to 120 Hz. This... -
Page 75: Supported Devices And File Formats
Supported devices and file formats Video signal flow Video signals input from a video device to the unit are output to a TV as shown below. ■ Supported devices Video device The unit ❑ USB devices • This unit supports USB mass storage class devices (e.g., flash memories or portable audio players) using FAT16 or FAT32 format. -
Page 76: Information On Hdmi
To use HDMI Control, you need to perform the following HDMI Control link setup after Information on HDMI connecting the TV and playback devices. For details on settings and operating your TV, refer to the instruction manual for the TV. HDMI Control HDMI Control allows you to operate external devices via HDMI. -
Page 77: Audio Return Channel (Arc)
f If you made a digital optical cable connection between the TV and the unit, use the Audio Return Channel (ARC) cursor keys (q/w) to select "TV Audio Input" and the cursor keys (e/r) to select "AV 1". ARC allows you to input TV audio to the unit with the HDMI cable which transmits video g Press SETUP. -
Page 78: Hdmi Signal Compatibility
HDMI signal compatibility Audio signals Audio signal type Audio signal format Compatible media (example) 2ch Linear PCM 2ch, 32 to 192 kHz, 16/20/24 bit CD, DVD-Video, DVD-Audio DVD-Audio, BD (Blu-ray disc), Multichannel Linear PCM 8ch, 32 to 192 kHz, 16/20/24 bit HD DVD 2 to 5.1ch, 2.8224 MHz, 1 bit SACD... -
Page 79: Reference Diagram (Rear Panel)
Reference diagram (rear panel) 0.5A ANTENNA (BD/DVD) HDMI OUT HDMI 1 HDMI 2 HDMI 3 HDMI 4 DC OUT COMPONENT VIDEO SPEAKERS FRONT SURROUND CENTER COMPONENT MONITOR OUT VIDEO MONITOR OUT VIDEO OPTICAL COAXIAL COAXIAL SUBWOOFER ( TV ) (CD) PRE OUT •... -
Page 80: Trademarks
Trademarks Manufactured under license from Dolby Laboratories. Dolby, “SILENT CINEMA” is a trademark of Yamaha Corporation. Pro Logic and the double-D symbol are trademarks of Dolby Laboratories. Manufactured under license under U.S. Patent Nos: 5,956,674; 5,974,380; 6,226,616; 6,487,535; 7,212,872; 7,333,929; 7,392,195;... -
Page 81: Specifications
Specifications Input jacks • Video Format (Repeater Mode) Compatible Decoding Formats - VGA • Analog Audio • Decoding Format - 480i/60 Hz Audio x 4 (AV 4–5, AUDIO, AUX [Mini Jack]) - Dolby TrueHD, Dolby Digital Plus - 576i/50 Hz - Dolby Digital •... - Page 82 • Dynamic Power (1-channel driven) (IHF) • Filter Characteristics AM section [U.S.A. and Canada models] (fc=40/60/80/90/100/110/120/160/200 Hz) • Tuning Range Front L/R (8/6/4/2 Ω) ........110/130/160/180 W H.P.F. (Front, Center, Surround)........ 12 dB/oct. [U.S.A. and Canada models]....530 kHz to 1710 kHz [Other models] L.P.F.
-
Page 83: Index
Index Symbols Banana plug DSP Parameter (Sound, Setup menu) Basic playback operation DSP Program (front display information) Lock icon (o) BASS (sound mode) DSP/Surround (Option menu) Numerics Bass (Tone Control, Option menu) DTS Neo:6 (surround decoder) 2.1-channel system Bitrate (Signal Info, Option menu) Dynamic Range (Volume, Setup menu) 2ch Stereo (sound program) Bitstream... - Page 84 HDMI Control (HDMI, Setup menu) Muting Sampling (Signal Info, Option menu) HDMI OUT (TV) (Audio Output, Setup menu) Scale (Volume, Setup menu) HDMI signal compatibility SCENE (HDMI, Setup menu) No content (error indication) Headphones Scene configuration No Front SP (YPAO error message) High definition audio SCENE function No MIC (YPAO error message)
- Page 85 YPAO (Yamaha Parametric room Acoustic Optimizer) Test Tone (Speaker, Setup menu) YPAO error message The Bottom Line (sound program) YPAO microphone The Roxy Theatre (sound program) YPAO warning message Tone Control (Option menu) TP (Traffic Program) Traffic information (Radio Data System)
- Page 86 © 2014 Yamaha Corporation YG023A0/EN...
- Page 87 Audio pin cable The unit Câble de broche audio L’unité © 2014 Yamaha Corporation Printed in China ZJ91500-1 UCAB This document explains how to set up a 5.1-channel system and play back surround sound from a BD/DVD on the unit.
- Page 88 The Yamaha Parametric room Acoustic Optimizer (YPAO) function detects speaker connections, measures the distances from them to your listening position(s), and La fonction Yamaha Parametric room Acoustic Optimizer (YPAO) permet de détecter les raccordements des enceintes et de mesurer la distance entre ces then automatically optimizes the speaker settings, such as volume balance and acoustic parameters, to suit your room.
Need help?
Do you have a question about the RX-V377 and is the answer not in the manual?
Questions and answers