GE DVM7195 Owner's Manual
Hide thumbs
Also See for DVM7195:
- Owner's manual (60 pages) ,
- Use and care manual (60 pages) ,
- Installation instructions manual (48 pages)
Table of Contents
Advertisement
Available languages
Available languages
. . . . . . . .2-7
Operating Instructions
Oven Features . . . . . . . . . . . . . . . 8-11
Time Features . . . . . . . . . . . . . . .12-16
Sensor Features . . . . . . . . . . . . .17-18
Other Features . . . . . . . . . . . . . .19-20
Microwave Terms . . . . . . . . . . . . . . 21
. . . . . .22-24
Things That Are Normal . . . . . . . . 25
Consumer Support
Warranty . . . . . . . . . . . . . . . . . . . . . . 27
Consumer Support . . . . . .Back Cover
Write the model and serial
numbers here:
Model # __________________
Serial # ___________________
You can find them on a label inside the
oven.
. . . . . . 25
Owner's Manual
DVM7195
49-40767 04-16 GE
Advertisement
Chapters
Table of Contents

Related Manuals for GE DVM7195


Summary of Contents for GE DVM7195
-
Page 1: Table Of Contents
Warranty ..... . 27 Consumer Support ..Back Cover Write the model and serial numbers here: Model # __________________ Serial # ___________________ You can find them on a label inside the oven. 49-40767 04-16 GE... -
Page 2: Safety Instructions
IMPORTANT SAFETY INSTRUCTIONS. READ ALL INSTRUCTIONS BEFORE USING. SAFETY INFORMATION This is the safety alert symbol. This symbol alerts you to potential hazards that can kill or hurt you and others. All safety messages will follow the safety alert symbol and the word “DANGER”, “WARNING”, or “CAUTION”. These words are defined as: DANGER Indicates a hazardous situation which, if not avoided, will result in death or serious injury. -
Page 3: Safety Instructions
IMPORTANT SAFETY INSTRUCTIONS. READ ALL INSTRUCTIONS BEFORE USING. OPERATING AND CLEANING (Continued) SUPERHEATED WATER overheated beyond the boiling point without appearing to be boiling. Visible bubbling or boiling when the and should not be heated in this microwave oven. container is removed from the microwave oven is not always present. -
Page 4: Important Safety Instructions
IMPORTANT SAFETY INSTRUCTIONS. READ ALL INSTRUCTIONS BEFORE USING. PRECAUTIONS TO AVOID POSSIBLE EXPOSURE TO EXCESSIVE MICROWAVE ENERGY properly and that there is no damage to the: • Do Not Attempt to operate this oven with the door open since open-door operation can result in harmful (1) door (bent) exposure to microwave energy. - Page 5 INSTRUCCIONES IMPORTANTES DE SEGURIDAD. LEA PRIMERO TODA LAS INSTRUCCIONES. INFORMACIÓN DE SEGURIDAD palabra “PELIGRO”, “ADVERTENCIA” o “PRECAUCIÓN”. Estas palabras se definen como: resultará en la muerte o en lesiones graves. PELIGRO puede resultar en la muerte o en lesiones graves. ADVERTENCIA puede resultar en lesiones menores o moderadas.
- Page 6 INSTRUCCIONES IMPORTANTES DE SEGURIDAD. LEA PRIMERO TODA LAS INSTRUCCIONES. AGUA SOBRECALENTADA FUNCIONAMIENTO Y LIMPIEZA (Continúa) sellados – por ejemplo: tarros de vidrio cerrados – pueden explotar y por esto no se deben calentar en el horno microondas. o hervor cuando el envase es retirado del horno microondas. ESTO PODRÍA PROVOCAR QUE LÍQUIDOS MUY CALIENTES DE PRONTO HIERVAN CUANDO SE MUEVA EL ENVASE O CUANDO con papel de aluminio.
- Page 7 INSTRUCCIONES IMPORTANTES DE SEGURIDAD. LEA PRIMERO TODA LAS INSTRUCCIONES. PRECAUCIONES PARA EVITAR POSIBLE EXPOSICIÓN A UNA EXCESIVA ENERGÍA DE MICROONDAS. (a) No Intente operar este horno con la puerta abierta ya (c) No Use el horno si está dañado. Es especialmente microondas dañina.
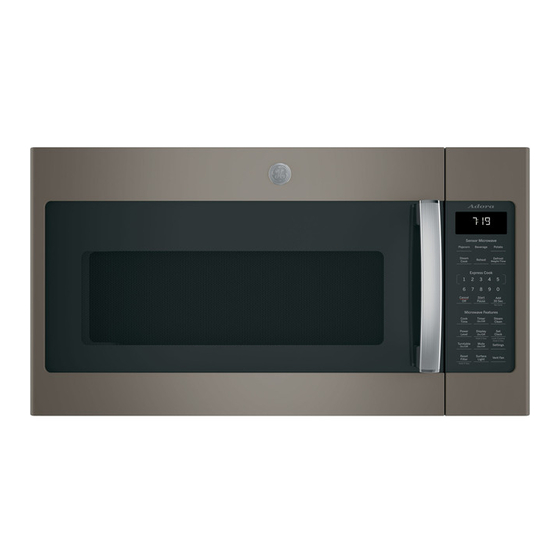
- Page 8 About the features of your microwave oven. Throughout this manual, features and appearance may vary from your model. 1000 Watts Features of the Oven 1 Door Handle. Pull to open the door. The door must 6 Cooktop Light. be securely latched for the microwave to operate. 7 Grease Filter .
-
Page 9: Optional Accessories
JX81J (sales number) vented to the outside. WB02X1124 (service number) 15” Cabinet Installation Kit JX15BUMPBB - Black JX15BUMPWW - White For use when installing with 15” depth cabinets. Available at extra cost from your GE supplier, or see the GE Service numbers. -
Page 10: Time Features
About the features of your microwave oven. You can microwave by time or with the sensor features. Not all features on all models. Cooking Controls Check the Convenience Guide before you begin. Time Features Press Enter Cook Time Amount of cooking time Express Cook Starts Immediately! Add 30 Sec... - Page 11 Changing the Power Level Cook Time The power level may be entered or changed Rest periods (when the microwave energy cycles immediately after entering the feature time for Power Level Cook Time, Time Defrost, Add 30 Sec or Express heat to the inside of the food. An example of this Cook.
- Page 12 About the time features. Cook Time I Cook Time II Cook Time Allows you to microwave for any time up to 99 Lets you change power levels automatically minutes and 99 seconds. during cooking. Here’s how to do it: Power level 10 (high) is automatically set, but 1.
-
Page 13: Express Cook
Express Cook This is a quick way to set cooking time for 1 –5 minutes. Press one of the Express Cook pads (from 1 to 5) for 1 to 5 minutes of cooking at power level 10. For example, press the 2 pad for 2 minutes of cooking time. The power level can be changed as time is counting down. - Page 14 About the time features. Weight Defrost Conversion Guide Defrost Weight/Time The Defrost Weight/Time feature gives you If the weight of food is stated in pounds and two ways to defrost food. ounces, the ounces must be converted to tenths (.1) of a pound. Press Defrost Weight/Time once for weight defrost or twice for Time Defrost.
- Page 15 Time Defrost allows you to defrost for a Defrosting Tips Defrost selected length of time. See the Defrosting Weight/Time • Foods frozen in paper or plastic can be Guide for suggested times. (Weight Defrost is defrosted in the package. Closed packages explained in the Auto Feature section.) should be slit, pierced or vented AFTER 1.
- Page 16 About the time features. Defrosting Guide Food Time Comments Breads, Cakes Bread, buns or rolls (1 piece) 1 min. Sweet rolls (approx. 12 oz.) 3 to 5 min. Rearrange after half of time. Fish and Seafood Fillets, frozen (1 lb.) 6 to 8 min.
- Page 17 About the sensor features. Humidity Sensor What happens when using the Sensor Feature: The Sensor Features detect the increasing • The proper containers and covers are humidity released during cooking. The oven essential for best sensor cooking. Covered automatically adjusts the cooking time to •...
- Page 18 About the sensor features. To use the Reheat feature: Reheat The Reheat feature reheats single servings After removing food from the oven, stir, if of previously cooked foods or a plate of possible, to even out the temperature. If leftovers. the food is not hot enough, use Cook Time to reheat for more time.
-
Page 19: Other Features
About other features. Cooking Complete Reminder To remind you that you have food in the oven, the oven will display “Food is Ready” and beep once a minute until you either open the oven door or press Cancel/Off. Set Clock Child Lock-Out Press to enter the time of day or to check the You may lock the control panel to prevent the... - Page 20 About other features. Vent Fan Vent Fan The vent fan removes steam and other vapors Press Vent Fan once for boost fan speed, from surface cooking. twice for high fan speed, a third time for low fan speed or forth time to turn the fan off. Surface Light Surface Press to turn the surface light on or off.
-
Page 21: Microwave Terms
Microwave terms. Arcing Arcing is the microwave term for sparks in the • Metal such as twist-ties, poultry pins, gold- oven. Arcing is caused by: rimmed dishes. • Metal or foil touching the side of the oven. • Recycled paper towels containing small metal pieces. -
Page 22: Care And Cleaning
Care and cleaning of the microwave oven. Helpful Hints An occasional thorough wiping with a solution of baking soda and water keeps the inside fresh. Be sure the power is off before cleaning any part of this oven. How to Clean the Inside Walls, Floor, Inside Window, Metal and Plastic Parts on the Door Popcorn Beverage... -
Page 23: Replacing The Light Bulb
Be sure the bulb is cool before removing. halogen bulb. Order WB08X10051 from your Break the adhesive seal by gently GE supplier. unscrewing the bulb. To replace the cooktop light/nite light, first Screw in the new bulb, then raise the light Remove screw. -
Page 24: Charcoal Filter
The charcoal filter should be replaced when it is be replaced. Order Part No. JX81H from your noticeably dirty or discolored (usually after 6 to GE supplier. 12 months, depending on usage). See “Optional If the model is not vented to the outside, the... -
Page 25: Troubleshooting Tips
Troubleshooting Tips. Problem Possible Cause What to Do Oven will not start A fuse in your home may be Replace fuse or reset circuit breaker blown or the circuit breaker tripped. Power surge. Unplug the microwave oven, then plug it back in. Plug not fully inserted wall Make sure the 3-prong plug on the into oven is outlet. - Page 26 Notes.
-
Page 27: Warranty
This warranty is extended to the original purchaser and any succeeding owner for products purchased for home use within the USA. If the product is located in an area where service by a GE Authorized Servicer is not available, you may be responsible for a trip charge or you may be required to bring the product to an Authorized GE Service Location for service. -
Page 28: Consumer Support
Contact Us GEAppliances.com If you are not satisfied with the service you receive from GE, contact us on our Website with all the details including your phone number, or write to: General Manager, Customer Relations... - Page 29 Warranty ..... . 27 Escriba los números de modelo y de serie aquí: Nº de Modelo ______________ Nº de Serie ________________ Los encontrará en una etiqueta dentro del horno. 49-40767 04-16 GE...
- Page 30 INSTRUCCIONES IMPORTANTES DE SEGURIDAD. LEA PRIMERO TODA LAS INSTRUCCIONES. INFORMACIÓN DE SEGURIDAD resultará PELIGRO puede ADVERTENCIA puede resultar en lesiones menores o moderadas. PRECAUCIÓN Por su seguridad, la información contenida en este manual debe seguirse para minimizar el ADVERTENCIA riesgo de incendio, explosión, descarga eléctrica, exposición a energía microondas. PARA REDUCIR EL RIESGO DE INCNDIOS EN LA CAVIDAD DEL HORNO PRECAUCIONES PARA EVITAR UNA POSIBLE EXPOSICIÓN A UNA...
- Page 31 INSTRUCCIONES IMPORTANTES DE SEGURIDAD. LEA PRIMERO TODA LAS INSTRUCCIONES. AGUA SOBRECALENTADA FUNCIONAMIENTO Y LIMPIEZA (Continúa) sobrecalentar más allá de su punto de hervor sin que parezca microondas. o hervor cuando el envase es retirado del horno microondas. ESTO PODRÍA PROVOCAR QUE LÍQUIDOS MUY CALIENTES DE PRONTO HIERVAN CUANDO SE MUEVA EL ENVASE O CUANDO con papel de aluminio.
-
Page 32: Instrucciones De Seguridad
INSTRUCCIONES IMPORTANTES DE SEGURIDAD. LEA PRIMERO TODA LAS INSTRUCCIONES. PRECAUCIONES PARA EVITAR POSIBLE EXPOSICIÓN A UNA EXCESIVA ENERGÍA DE MICROONDAS. (a) No Intente operar este horno con la puerta abierta ya que (c) No Use el horno si está dañado. Es especialmente importante que la puerta del horno se cierre correctamente ( b) No Sitúe la puerta ni permita que se acumule suciedad o residuos... - Page 33 Acerca de las funciones de su horno microondas Es posible que las funciones y apariencias varíen con relación a su modelo a lo largo del manual. 1000 Watts Funciones del Horno 1. Manija de la Puerta. 6. Luz de la Placa de Cocción. 7.
- Page 34 WB02X1124 (número del servicio técnico) Kit de Instalación del Gabinete de 15” JX15BUMPBB - Negro JX15BUMPWW - Blanco Disponible por un costo adicional a través de su proveedor de GE Appliances, o consulte los números del Servicio de GE Appliances.
- Page 35 Acerca de las funciones de su horno microondas. Puede usar el horno microondas por tiempo o con funciones sensor. No todos los modelos cuentan con todas las funciones. Controles de Cocción Consulte la Guía de Acciones Convenientes antes de comenzar. Funciones del Temporizador Presionar Presentar...
- Page 36 Acerca de las funciones de su horno microondas. Puede usar el horno microondas por tiempo o con funciones sensor. No todos los modelos cuentan con todas las funciones. Cómo Modificar el Nivel de Potencia Cook Time Power Level para Time Cook (Tiempo de Cocción), Time Defrost (Tiempo de Descongelación), Add 30 Sec (Agregar 30 Segundos) o Express Cook (Cocción tendencia a hervir, tales como papas en...
- Page 37 Acerca de las funciones del temporizador. Tiempo de Cocción I Tiempo de Cocción II Cook Time Le permite cocinar en el horno microondas por cualquier tiempo hasta 99 minutos y 99 Start Pause 1. Presione Cook Time (Tiempo de Cocción). Nivel de Potencia.
- Page 38 Acerca de las funciones del temporizador. Agregar 30 segundos Puede usar esta función de dos formas: Mi Ciclo Add 30 Sec (Agregar 30 Segundos) My Cycle (Mi Ciclo). Settings (Configuraciones) y seleccione My Cycle (Mi Ciclo). Settings (Configuraciones) Cocción al Vapor Cantidad de Primera Secunda...
- Page 39 Acerca de las funciones del temporizador Guía de Conversión Descongelación por Peso Defrost Weight/Time Si el peso de la comida se expresa el libras y onzas, las onzas se deberán convertir a décimas (.1) comidas. Onzas Libras Presione Defrost Weight/Time 1–2 Start (Descongelar por Peso/ Tiempo) una vez...
- Page 40 Acerca de las funciones del temporizador Time Defrost Consejos para la Descongelación Defrost Weight/Time tiempo seleccionado. Consulte los tiempos Los paquetes cerrados se deberán cortar, envases de plástico se deberán descubrir en 1. Presione Defrost Weight/ Time (Descongelación por Peso/ Tiempo) dos veces.
- Page 41 Guía de Descongelación Comida Tiempo Comentarios Panes, Tortas Pescado y Mariscos Fruta Carne separe los trozos con un cuchillo de mesa. Espere hasta que se complete tiempo, desenvuelva y dé vuelta el pollo. Cubra las partes calientes con por la cavidad hasta que se puedan quitar los menudos.
- Page 42 Acerca de las funciones del Sensor. Sensor de Humedad • Es esencial contar con envases y detectan la humedad creciente liberada Cubierto sensor. • Siempre utilice envases de uso seguro en el horno microondas y cubra los mismos con tapas o envoltorios de plástico ventilados.
- Page 43 Para usar la función Reheat (Recalentar): Reheat Luego de retirar la comida del horno, calentar porciones individuales de comidas revuelva, si es posible, para emparejar cocinadas previamente o un plato con la temperatura. Si la comida no se restos de comida. calentó...
- Page 44 Acerca de otras funciones. Recordatorio de Cocción Completa Cancel/ Off Configuración del Reloj Bloqueo para Niños Clock Puede bloquear el panel de control para microondas. Lock Control Hold 3 Sec 1. Presione Set Clock (Configurar Reloj). accidental o sea usado por niños. Para bloquear o desbloquear los controles, 3.
-
Page 45: Vent Fan
Ventilador El ventilador elimina el vapor y otros vapores para activarlo en velocidad alta, tres veces Vent Fan Presione Vent Fan una vez para utilizar la Luz de la Superficie Surface Presione Surface Light (Luz de la Superficie) Light horno. una vez para activar la luz brillante, dos veces para activar la luz nocturna o una tercera vez nocturna. -
Page 46: Términos Del Microondas
Términos del Microondas. Arco Arco eléctrico es el término que se usa • Metales, tales como precintos, pinchos de ave, Eléctrico para definir la producción de chispas en el o platos con rebordes dorados. horno microondas. Los arcos eléctricos son •... -
Page 47: Cuidado Y Limpieza
Cuidado y limpieza del horno microondas. Consejos Útiles Desenchufe el cable antes de limpiar cualquier parte del horno. Cómo Limpiar el Interior Paredes, Piso, Ventana Interior, Partes Metálicas y Plásticas de la Puerta Popcorn Beverage Microwave Express Warm Power Auto Level Cook Convection... - Page 48 Reemplace por lámparas halógenas de 120 de retirar la misma. Rompa el sello adhesivo voltios y 40 watts (máximo). Ordene la pieza WB08X10051 a su proveedor de GE. Remove screw. tapa de la luz y vuelva a colocar el tornillo.
- Page 49 El filtro de carbón no puede ser limpiado. cuando esté notoriamente sucio o Debe ser reemplazado. Ordene la Pieza Nº JX81H a su proveedor de GE Appliances. 6 y 12 meses, dependiendo del uso de la retirar el humo y los olores.
-
Page 50: Consejos Para Solucionar Problemas
Consejos para Solucionar Problemas. Problema Causa Posible Qué Hacer El horno no se inicia Es posible que un fusible de su hogar se haya quemado o que el disyuntor se haya desconectado. Pico de tensión. El enchufe no está totalmente insertado en el tomacorriente. - Page 51 EE.UU. Si el producto se encuentra en un área donde no se encuentra disponible el servicio técnico de un Proveedor de Servicios de GE Appliances Autorizado, usted será responsable por el costo de un viaje o se podrá requerir que traiga el producto a una Ubicación del Servicio Técnico de GE Appliances Autorizado para recibir el servicio.
-
Page 52: Soporte Al Cliente
Soporte al Cliente. Sitio Web de GE Appliances GEAppliances.com ¿Desea realizar una consulta o necesita ayuda con su electrodoméstico? ¡Intente a través del Sitio Web de GE mucho más… Estudio de Diseño de la Vida Real GEAppliances.com GE Appliances apoya el concepto de Diseño Universal – productos, servicios y ambientes que pueden ser usados por personas de todas las edades, tamaños y capacidades.
Need help?
Do you have a question about the DVM7195 and is the answer not in the manual?
Questions and answers
need help turning off the lock on adora microwave #DVM7195SF1SSH
To turn off the lock feature on the GE Adora microwave DVM7195SF1SSH, press and hold the "Set Clock" button for about 3 seconds.
This answer is automatically generated