Table of Contents
Advertisement
IMPORTANT SAFEGUARDS
When using your camera, the specific cautionary notices in the owner's manual should
always be observed and complied with, as well as basic precautions, including the
following:
1. Read and understand all instructions.
2. Close supervision is necessary when the camera is
used by or near children. Do not leave the camera
unattended while in use.
3. Do not operate the camera if it has been dropped or damaged - until it has been
examined by an authorized Minolta service facility.
4. To protect against electrical shock hazards, do not immerse the camera in water or
other liquids while the camera's back cover is open. Also do not open the back cover
while in or under the water, or while the camera is wet.
5. To reduce the risk of electric shock, do not disassemble this camera, but take it to an
authorized Minolta service facility when some service or repair work is required.
Incorrect reassembly can cause electric shock when the camera is subsequently used.
This manual created and owned by www.butkus.org/chinon and should only be located
there.
SAVE THESE INSTRUCTIONS
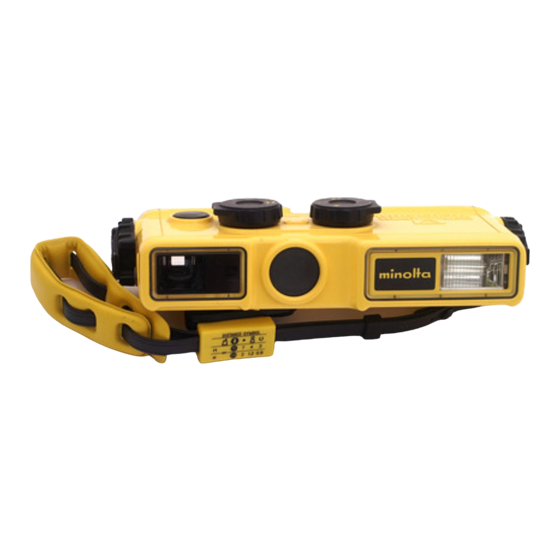
2 Your new Minolta Weathermatic-A is the ideal do-anything, go-anywhere
photographic traveling companion. It is just as at home in a backpack on top of a
mountain or skiing down one as it is at the beach or around the pool.
Its rugged watertight construction and 110 format conveniences, such as drop-in
cartridge film loading, built-in electronic flash, and compact size makes taking quality
photos simple and easy in even the most adverse conditions.
Advertisement
Table of Contents

Related Manuals for Minolta Weathermatic-A


Summary of Contents for Minolta Weathermatic-A
- Page 1 5. To reduce the risk of electric shock, do not disassemble this camera, but take it to an authorized Minolta service facility when some service or repair work is required. Incorrect reassembly can cause electric shock when the camera is subsequently used.
-
Page 2: Table Of Contents
PREPARATION AND BASICS 16 Opening and closing the back cover Installing the battery Checking the battery Loading and advancing film Viewfinder Focusing TAKING PICTURES (WITH EXISTING LIGHT) FLASH PICTURES UNLOADING THE FILM USING YOUR WEATHERMATIC-A IN VARIOUS WEATHER DITIONS AND PICTURE TAKING... -
Page 3: Names Of Parts
SITUATIONS On or near the water At the beach In rain, mist or fog In snow and cold weather TAKING PICTURES UNDERWATER . Focusing Tips for taking pictures underwater... ACCESSORIES Sportsfinder MAINTENANCE OF O- RING TECHNICAL DETAILS TROUBLE-SHOOTING GUIDE CARE AND STORAGE This manual created and owned by www.butkus.org/ chinon and should only be... -
Page 4: Summary Of Operation
12 SUMMARY OF OPERATION 1. Make sure camera is completely clean and dry. 2. Lift back-cover release tabs, twist backcover release knobs and open back cover (p. 181. This manual created and owned by www.butkus.org/chinon and should only be located there. -
Page 5: Preparation And Basics
Opening and closing the back cover IMPORTANT INSTRUCTIONS FOR PROPER USE OF THIS CAMERA The back cover of your Weathermatic-A is equipped with an O-ring that forms a watertight seal when the cover is properly fitted to the camera body. This enables the camera to be used under conditions (such as rain, snow, and in or underwater) where use of conventional cameras is either not recommended or impossible. -
Page 6: Installing The Battery
from the back-cover connector strap or remove it completely for cleaning by disengaging the strap from the pin on the back cover. Be sure never to crease or twist the connector strap. ONCE THE BACK COVER IS OPEN THE CAMERA IS NO LONGER WATERTIGHT AND MAY BE DAMAGED IF WATER OR SAND ENTERS THE CAMERA. -
Page 7: Checking The Battery
1. With the back cover open, lift the battery-chamber cover as shown. The battery can be installed or replaced at any time without damage to loaded film. 2. Insert a battery as specified with the plus end out as indicated inside the chamber, then close and latch the cover. - Page 8 3. Close the film-chamber cover and push in on it until it clicks shut. 2. Insert the film cartridge into the camera. 4. Close and latch the camera's water-tight back cover as described on page 22. 5. Use your right thumb to operate the film advance lever repeatedly until it locks ( about three full strokes).
-
Page 9: Viewfinder
36 Viewfinder Looking into the eyepiece of your Weathermatic-A you will see a bright frame with focus-symbol settings above it. What you see inside this frame is the approximate subject area at the three farther focus-knob settings. - Page 10 Set the knob so that the index is opposite the mountain symbol for scenic pictures at distances of about 5.3m (17-1/2 ft.) or more from the camera at the cloud symbol; 3.5m (11 ft.) or more at the sun symbol. At this distance, the part of a standing adult from about head to ankles can be seen in the finder bright frame with the camera held horizontally.
- Page 11 For head-to-hips pictures of people (at 2m or 7 ft.), set the knob so the index is opposite the dot. The symbol focuses the lens for 1.2m (4 ft.), at which you can see from the top of the head to about mid-chest in the finder. At the symbol that looks a "*"...
-
Page 12: Taking Pictures
TAKING PICTURES (WITH EXISTING LIGHT) 1. Make sure the lens-cover glass clean and dry and film is fully advanced. 2. Set focus for the proper camera-to-sub ject distance. 3. Hold the camera horizontally or vertically in a comfortable way so that it is steadied against your face and will not move when you take a picture. -
Page 13: Flash Pictures
NOTE • It is important to always be sure the camera's lens-cover glass is clean and dry be fore taking pictures. Water droplets on it will cause picture blur and spots caused by water drying on the glass will reduce picture contrast. For information about taking pictures in or near the water, see p. -
Page 14: Unloading The Film
Then remove the back cover as indicated on p. 16, open the filmchamber cover and remove the cartridge. This manual created and owned by www.butkus.org/chinon and should only be located there. USING YOUR WEATHERMATIC-A IN VARIOUS WEATHER CONDITIONS AND PICTURE TAKING SITUATIONS... -
Page 15: On Or Near The Water
78. In rain, mist or fog When using your Weathermatic-A where moisture in the form or rain, mist or fog is present, make sure the lens-cover glass is clean and dry as water droplets on it will cause image blur and spots caused by water drying its surface may reduce picture con- trast. -
Page 16: Taking Pictures
This also applies to carrying extra cartridges of film. When entering a warm building from the cold, allow your Weathermatic-A to warm up to room temperature and wipe it completely dry before opening the back cover to change the film or battery. -
Page 17: Accessories
64% of what will actually appear on the film. 78 MAINTENANCE OF O-RING Your Weathermatic-A's ability to resist the elements and stay watertight depends on the condition of the back cover's 0-ring. With proper care, it should be serviceable for approximately one year. -
Page 18: Technical Details
Type: All-weather, watertight pocket camera using No. 110 film cartridges, with built- in electronic flash Lens: Minolta 26mm f/3.5, 4 coated glass elements in 3 groups; Angle of view: 45° (34 ° under water) Focusing: 90cm (3 ft.) to infinity by continuous control knob with 5 distance symbols, 1 with click stop Shutter: Metal-blade, before-the-lens mechanical type, fixed 1/200 sec. -
Page 19: Trouble-Shooting
Number of flashes*: Approx. 180 with fresh alkaline-manganese cell, approx. 90 with nickel-cadmium cell * As determined by Minolta's standard testing method. Actual performance will depend on type, brand, manufacturer's lot, age of batteries, and ambient temperature. Film advance: Thumb-actuated lever; 52°... - Page 20 • If the Sportsfinder was used, was • If operation is not as you think it should be, carefully restudy the applicable in- structions or consult an authorized Minolta service representative.
-
Page 21: Ring
• Never lubricate body parts. • Never subject your camera to shock, high heat or harmful chemicals or gasses. • Never put your camera on a hot surface such as sand, or keep it in the glove compartment or any other place in a motor vehicle or else where in which it may be subject to relatively high temperatures.
Need help?
Do you have a question about the Weathermatic-A and is the answer not in the manual?
Questions and answers