Advertisement
Table of Contents
Paragraphs
Installation .................. 1-12 ..... 1-18
Check/Test/Start ............ 13 ... 19-24
ADDENDUM - Field-Installed
Accessories ............................ 24-28
Index .................................... Page
Belt Tension ........................................ 18
Blower Rotation ............................. 18
Blower Speed Adjustment ................. 18
Clearances ............................................. 4
Installation Codes ................................. 2
Computer Control (Field) ................... 1 5
Control Locations ................................ 1 9
Control Wiring .................................... 10
Convenience Outlet (Option) ............ 11
General Description ............................. 1
Dimensions ............................................ 4
Dirty Filter Switch (Option) ............... 1 1
Discharge Sensor (Option) ................. 1 3
Discharge Temperature
Low Limit (Freezestat Option) ....... 1 6
Disconnect Switch ............................... 1 0
Door Switch (Option) ......................... 1 3
Ductwork Sizing and Installation ..... 10
Electrical Supply and Connections .... 9
Filter Cabinets (Option) ................ 5, 24
Firestat (Option) .................................. 1 4
Gas Piping and Pressures ................... 16
HAZARD INTENSITY LEVELS ...... 3
Maintenance
............... See Form O-DV/RDF/ADF
Makeup Air ............................................ 9
Manifold Pressure ............................... 1 6
Motor Loads ....................................... 18
Mounting ............................................... 6
Operation
............... See Form O-DV/RDF/ADF
Outside Air Cutoff (Option) ............... 1 3
Outside Air Hoods (Option) ......... 5, 24
Photohelic Pressure Switch (Opt) ...... 1 5
Potentiometer (Option) ....................... 1 4
Recirculation (Option) ......................... 2
Remote Console (Option) .................. 11
Replacement Parts
.... See Form 740 or P-DVRDF/ADF
Rigging .................................................. 6
Roof Curb ............................................. 7
Pressure Null Switch (Option) .......... 14
Service ...... See Form O-DV/RDF/ADF
Smoke Detector (Option) ................... 1 6
Technical Data ...................................... 3
Uncrating ............................................... 3
Warranty ........................................... 3
C E R T I F I E D
®
WARNING: The use and storage of gasoline or other flammable
Pages
vapors and liquids in the vicinity of this appliance is hazardous.
If you smell gas:
1. Open windows.
2. Don't touch electrical switches.
3. Extinguish any open flame.
4. Immediately call your gas supplier.
WARNING: Improper installation, adjustment, alteration,
service, or maintenance can cause property damage, injury or
death. Read the installation, operation, and maintenance
instructions thoroughly before installing or servicing this
equipment.
WARNING: Gas-fired appliances are not designed for use in
hazardous atmospheres containing flammable vapors or
combustible dust, or atmospheres containing chlorinated or
halogenated hydrocarbons. See Hazard Levels, page 2.
WARNING: On makeup air heaters which also recirculate room
air, outside ventilation air must be provided in accordance with
the information shown on the heater nameplate.
Recirculation of room air may be hazardous in the presence of:
(a) Flammable solids, liquids, and gases;
(b) Explosive materials; or
(c) Substances which may become toxic when exposed to heat.
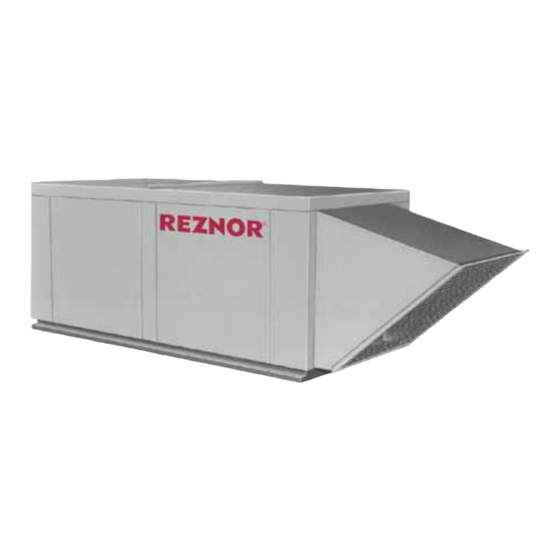
General Description
The information in this manual applies to Reznor
fired makeup air heating systems. The typical system consists of a direct-fired,
natural gas-fueled burner, and a draw-through blower housed in a weatherized
cabinet. The system may be installed either indoors or outdoors.
This direct-fired makeup air system provides tempered makeup air. Makeup
air is defined as air that enters a building or area due to negative pressure
created by an air exhaust load in excess of the volume of entering air. This
system warms the outside air and monitors the volume and temperature of the
makeup air added to the building. The system may be used to provide ventila-
tion in whole building or in spot applications. In whole building applications,
adding controlled makeup air will cause less infiltration of dust and dirt; will
eliminate continuous backdraft in chimneys and vents; and will reduce space
heating fuel costs.
Indoor or Outdoor, Gas, Direct-Fired
Makeup Air/Heating Systems
(Specifications subject to change without notice.)
Installation Form RZ-NA I-RDF
Obsoletes Form RZ-NA 440 (Version B)
Applies to:
Reznor
FOR YOUR SAFETY
Form I-RDF, P/N 148384 (Rev 1), Page 1
Model RDF Series 3
®
®
Model RDF Series 3 direct-
Advertisement
Table of Contents

Subscribe to Our Youtube Channel
Summary of Contents for Reznor RDF 1-20-3
- Page 1 Photohelic Pressure Switch (Opt) ..1 5 Potentiometer (Option) ....... 1 4 ® The information in this manual applies to Reznor Model RDF Series 3 direct- Recirculation (Option) ......2 fired makeup air heating systems. The typical system consists of a direct-fired, Remote Console (Option) ....
- Page 2 This system is available with various air control options to meet a wide range General of application requirements. Depending on the air control option ordered, the Description supply air volume may be varied or the outside air may be supplemented with up to 75% building air (recirculation) for increased energy savings.
-
Page 3: Technical Data
Hazard Intensity HAZARD INTENSITY LEVELS Levels Apply to 1. DANGER: Failure to comply will result in severe personal Warnings injury or death and/or property damage. throughout this 2. WARNING: Failure to comply could result in severe personal Manual injury or death and/or property damage. 3. -
Page 4: Accessories
Be sure that all shipped-separate accessories for the installation are available. 4. Uncrating/ Other shipped-separate accessories could include a roof curb, a remote con- Preparation sole, an outside air hood, a disconnect switch, and/or an indoor filter cabinet. (cont'd) 5. Clearances - Clearance to combustibles is defined as the minimum distance from the heater to a surface or object that is necessary to ensure that a surface temperature of All Sizes... - Page 5 Dimensions (inches) Model Sizes 1-20-3, 1-40-3, 37-1/8 44-3/16 84-13/16 45-1/2 24-1/2 10-1/2 5-7/16 14-9/32 15-5/8 21-29/32 19-1/8 1-50-3, 1-65-3 2-80-3, 2-120-3 48-11/16 68-1/4 84-13/16 69-1/2 16-1/4 5-5/16 10-15/16 15-1/2 27-9/32 27-7/32 135-3/4 61-5/8 82-9/16 132-9/16 83-1/8 64-9/16 19-1/16 5-5/32 13-13/32 21-5/8 37-3/32 3-180-3, 3-260-3 Model Sizes...
- Page 6 All cabinets are furnished with a curb cap and four lifting lugs for attaching 7. Rigging rigging. To prevent damage to the cabinet, use spreader bars with the rigging chains. 8. Location and Mounting the system is the responsibility of the installer. Verify that the sup- porting structure has sufficient load-carrying capacity to support the weight.
-
Page 7: Roof Curb
FIGURE 4 - Cross Support Mounting Requirements Field Field Supplied Supplied Duct Duct 4 x 4 Treated Lumber = support location Mounting on a CAUTION: Before installing curb, recheck to be sure that the correct curb has been ordered. Be sure that the curb selected Roof Curb matches the unit ordered. - Page 8 8. Mounting Components in Roof Curb Option CJ3 Roof Curb Frame and Internal Ductwork Dividers (See FIGURE 5) (cont'd) Qty Description Item 2 Curb Front and Back Assemblies Mounting on a Roof 2 Curb Side Assemblies 4 Full Width Curb Dividers -- two (2) for bottom discharge supply Curb (cont'd) air duct opening and two (2) for optional return air duct opening 2 Cross Dividers for Bottom Discharge Supply Air Opening...
- Page 9 prevent water leakage into the curb area due to blown rain and capillary action. Also place the foam sealant tape on the perimeter of the top surface of the duct opening(s), being sure to make good butt joints at corners. If install- ing ductwork from the top, it is recommended that tape be put on again after the ductwork is "dropped in", sealing below and above the duct flanges.
- Page 10 Always introduce fresh makeup air so that it moves across the greatest dis- 9. Distribution of tance within the room or building before reaching an exhauster. Makeup Air Proper sizing of warm air ductwork is necessary to ensure a satisfactory heat- ing installation.
-
Page 11: Control Wiring
trical Code Part 1-C.S.A. Standard C22.1. When attaching the disconnect switch CAUTION: If any of the to the heater, use hardware with "teeth" to provide electrical grounding. The original wire must be "teeth" should face the disconnect switch, scratching off the painted surface. replaced, the replace- Attach the disconnect tightly against the heater cabinet. -
Page 12: Dimensions
10. Electrical Supply, Connections and Controls (cont'd) FIGURE 10 - Remote Console Dimensions FIGURE 10 - Technical Data of the Remote Console (Variations depend on options selected; consult custom wiring diagram for controls and to determine wiring required.) Control Qty of Temperature Potentiometer Dimensions - inches (mm) Locations of Knockout Switch Lights* Selector**... - Page 13 clockwise until the filter light is energized or the screw is bottomed out. At that point, adjust the set screw three full turns counterclockwise or until the screw is top ended. At that setpoint, the filter light will be activated at approximately 50% filter blockage.
- Page 14 Door Switch (cont'd) 10. Electrical interlock the system when an outside overhead door reaches approximately Controls 80% of full open travel. The switch will de-energize the system when the over- (cont'd) head door closes approximately 20%. Follow the installation instructions in the door switch option package and the wiring diagram.
- Page 15 Adjustment of the Switch - The "high" actuation point of the null switch is FIGURE 18 - Pressure Null indicated on a calibrated scale secured to the transparent range screw enclo- Switch included in Air sure. Building pressure is set by turning the adjustment screw. The "low" ac- tuation point is set by adjusting the span on the null by turning the span adjust- Control Options AR20 and ment screw.
- Page 16 10. Electrical Controls (cont'd) Optional Photoelectric Duct Smoke Detector FIGURE 21 - Duct Smoke If the system has an optional photoelectric air duct smoke detector, the control Detector (cover removed) is shipped separately for field installation. The sensor must be field-mounted in the discharge duct and electrically connected in the blower section electrical box.
- Page 17 These direct-fired makeup air systems are designed to operate on a natural gas Supply Pressure supply differential pressure range of a minimum of 4.3-5.0" w.c. plus the mani- Requirement by fold pressure drop. Maximum supply pressure depends on specific unit firing rate and manifold selection;...
- Page 18 High gas pressure switches included in the gas train monitor gas pressure 11. Gas Piping downstream from the safety valves. If the gas pressure at this point on a sys- tem equipped with a high gas pressure switch (standard with Manifolds BM 78, 79, 80, and 81 or Option BP2 with other manifolds) exceeds the setpoint, Pressures the switch will open the electrical circuit to the burner, stopping all gas flow.
- Page 19 CAUTION: This chart Blower Motor Full Load Amps (open motors) Motor HP 115V/1 230V/1 208V/3 230V/3 460V/3 575V/3 lists full load amp requirement of standard 13.8 motor and standard 16.0 controls. Optional 10.0 5.75 controls will increase 10.6 amp requirement. Add 16.8 15.2 motor amps and control...
-
Page 20: Disconnect Switch 1
o 1. Check to be sure that all field-installed accessories are installed. 13. Check-Test o 2. Check all field-installed wiring. Start (cont'd) o 3. Check all ductwork for obstructions; open all diffusers. o 4. Turn the three-position switch or optional summer/off/winter remote Before Startup console switch to OFF position. - Page 21 oConnect a "U"-tube manometer to the main burner pressure tap. oCheck status lights (check at each step in the Startup procedure.) Diagnostic Turn ON disconnect switch. Lights "Circuit Control Power" light is lit. Turn OFF disconnect switch. oTurn the disconnect switch ON and the blower service switch to TEST position.
-
Page 22: Manifold Pressure 1
13. Check-Test Start (cont'd) Startup (cont'd) ring will result in .233" change in pitch diameter. To increase ring will result in .233" change in pitch diameter. To blower speed, decrease diameter. CAUTION: Do not adjust decrease blower speed, increase diameter. CAUTION: Do sheaves in either direction to the point where moveable and not adjust sheaves in either direction to the point where stationary flanges are in contact. - Page 23 oCheck output of pilot flame signal. Use microampmeter; reading should be .5 or greater. oTo check lockout feature of the pilot ignition system, turn pilot manual shutoff valve OFF. Pilot should lockout after two trials for ignition. To reset unit, open the valve and cycle the main disconnect switch. oTurn OFF the manual gas valve.
-
Page 24: Mounting
13. Check-Test recommended that the tempered makeup air entering the building be tested at its point of discharge from the heating unit. The table below Start (cont'd) shows limits for various substances including carbon monoxide. Certified, portable detector tubes may be used; follow the manufacturer's After Startup (cont'd) instructions. -
Page 25: Form I-Rdf, P/N 148384 (Rev 1)
Weights and Filter Sizes Fltr AS6, AW3 AS7, AW6 Model Sizes lbs kg lbs kg lbs kg lbs kg lbs kg Filter Size 12x35x1 12x35x2 225 102 250 113 270 122 100 45 120 54 1-20, 1-40, 1-50, 1-65 12x35x1 12x35x2 141 350 159 380 172 150 68 180 82... - Page 26 Field Installed Outside Air Hood or Filter Section (cont'd) Assembly and 1. Screened Air Inlet Hoods with Filters (Options AS6 and AS7 for Sizes 3-180, 3-260) - Build filter racks and cabinet section; follow all Steps. Installation Instruc- Screened Air Inlet Hood without Filters (Option AS2 for Sizes 3-180, 3- tions for Item 2 on 260) - Build cabinet section;...
- Page 27 2. Assemble and Install Support Legs Step 1E - Attach Cabinet Step 2A - Sub-assemble Section Bottom Support Legs Parts Required - Subassembly from Step Parts Required - Six support leg 1D; cabinet section bottom; and six 1/2" sheetmetal screws. halves and six 5/8"...
- Page 28 (800) 695-1901; www.RezSpec.com ©2003 Thomas & Betts Corporation, All rights reserved. Printed in the U.S.A. MANUFACTURER OF HEATING, COOLING, AND VENTILATING SYSTEMS ® Trademark Note: Reznor is registered in the United States and other countries. Page 28 8/03 POD Form I-RDF...
Need help?
Do you have a question about the RDF 1-20-3 and is the answer not in the manual?
Questions and answers