Summary of Contents for Cisco WAP361
-
Page 1: Quick Start Guide
Quick Start Guide Cisco WAP361 Wireless-AC/N Dual Radio Wall Plate Access Point with PoE... -
Page 2: Before You Begin
-PoE Supplied by UL Listed I.T.E. This guide provides the general layout of the Cisco WAP361, describe how to deploy the Cisco WAP361 in your network, and describe how to configure the Cisco WAP361. For additional information, see www.cisco.com/go/300_wap_resources. -
Page 3: Cisco Wap361 Features
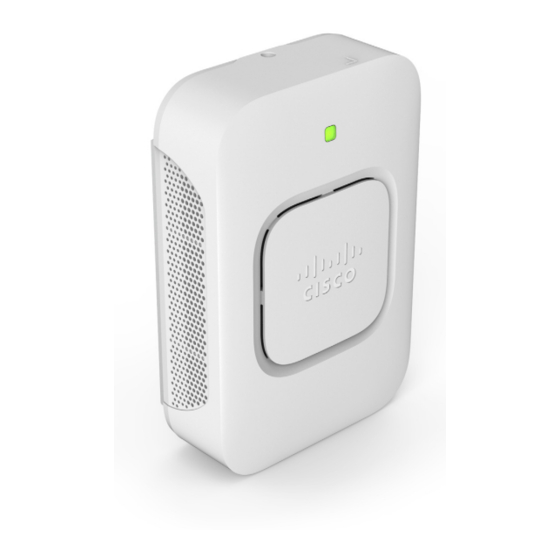
Cisco WAP361 Features Front Panel The front panel of the Cisco WAP361 consists of one system LED. For full descriptions of the colors of the lights and their indications, see “Verifying the Hardware Installation”. Back Panel RESET—See “Rebooting the Cisco WAP361 or Resetting to Factory Defaults”... -
Page 4: Mounting The Cisco Wap361
If you are using a Cisco RV series router, the default range for the DHCP assigned address is from 192.168.1.100 to 192.168.1.254. Any device connecting to the same LAN will be assigned an IP address in this range. Mounting the Cisco WAP361 •... - Page 5 To ensure a safe and secure installation, make sure you are AUTION using adequate screws and mount the access point using no less than two screws. Figure 1 Mounting Bracket Dimensions Cisco WAP361 Quick Start Guide...
- Page 6 (at opposite corners of the bracket), and use appropriate anchors as required. The pilot hole size varies according to the material, and its thickness, you are fastening. Cisco recommends that you test the material to determine the ideal hole size for your mounting application.
- Page 7 (see Figure 2). The security screw is provided in the Mounting Kit. Figure 4 Security Screw Dimensions All dimensions in millimeters (mm). Cisco WAP361 Quick Start Guide...
-
Page 8: Connecting The Cisco Wap361
Connecting the Cisco WAP361 You can perform the initial configuration using either a wired or wireless connection. The default configuration of the Cisco WAP361 has the Wi-Fi radio turned on. To connect the Cisco WAP361 to the wired network: Connect the Ethernet cable to the Ethernet port of a switch, a router, or a PC. -
Page 9: Verifying The Hardware Installation
No Ethernet link. LAN0-4 Solid Green Gigabit Ethernet link is active. Solid Amber Fast Ethernet link is active. Flashing Transmitting or receiving data. If you need help resolving a problem, visit the Cisco Support Community at www.cisco.com/go/smallbizsupport. Cisco WAP361 Quick Start Guide... -
Page 10: Getting Started With The Configuration
Getting Started with the Configuration To configure the Cisco WAP361, follow these steps to access the the web- based Configuration Utility and then the Setup Wizard from your computer: Connect the Cisco WAP361 to the same network (IP subnet) as your computer. -
Page 11: Suggested Next Steps
Cisco WAP361 by using ping. To use ping on a computer running Windows: Verify that the Cisco WAP361 is powered on and the lights if they do not indicate the appropriate links. Locate the Cisco WAP361’s IP address. While there are different ways to locate the IP address, this procedure uses Cisco FindIT. - Page 12 Verify the connected switch has auto-negotiation enabled. The Cisco WAP361 and the switch need the same negotiation parameters set. Bad Image After a new firmware installation, if the POWER light is solid red, which indicates that the device fails to boot with both firmware images, contact system support;...
-
Page 13: Rebooting The Cisco Wap361 Or Resetting To Factory Defaults
Factory Defaults To reboot your Cisco WAP361: • If the Cisco WAP361 uses a power adapter, with the power on, use the POWER button to reboot the device. The POWER button only functions when the Cisco WAP361 uses a power adapter. -
Page 14: Where To Go From Here
Resources Phone Support Contacts www.cisco.com/en/US/support/ tsd_cisco_small_business _support_center_contacts.html Cisco Firmware www.cisco.com/go/smallbizfirmware Downloads Select a link to download firmware for Cisco products. No login is required. Cisco Open Source www.cisco.com/go/ Requests smallbiz_opensource_request Cisco Partner Central www.cisco.com/web/partners/sell/smb (Partner Login Required) Product Documentation Cisco WAP361 www.cisco.com/go/300_wap_resources... - Page 15 Cisco WAP361 Quick Start Guide...
- Page 16 Cisco and the Cisco logo are trademarks or registered trademarks of Cisco and/or its affiliates in the U.S. and other countries. To view a list of Cisco trademarks, go to this URL: www.cisco.com/go/trademarks. Third-party trademarks mentioned are the property of their respective owners.


Need help?
Do you have a question about the WAP361 and is the answer not in the manual?
Questions and answers