Table of Contents
Advertisement
Quick Links
Advertisement
Table of Contents

Summary of Contents for adept technology Lynx Platform
- Page 1 Adept Lynx Platform User's Guide...
- Page 3 Adept Lynx Platform User's Guide 11970-000 Rev D January, 2015 5960 Inglewood Drive • Pleasanton, CA 94588 • USA • Phone 925.245.3400 • Fax 925.960.0452 Revierstraße 5 44379 Dortmund Germany • Phone +49.231.75.89.40 • Fax +49.231.75.89.450 Block 5000 Ang Mo Kio Avenue 5 • #05-12 Techplace II • Singapore 569870 • Phone +65.6755 2258 • Fax +65.6755 0598...
- Page 4 Copyright Notice The information contained herein is the property of Adept Technology, Inc., and shall not be reproduced in whole or in part without prior written approval of Adept Technology, Inc. The information herein is subject to change without notice and should not be construed as a com- mitment by Adept Technology, Inc.
-
Page 5: Table Of Contents
2.2 Before Unpacking the Platform 2.3 Unpacking Battery Lynx Platform 2.4 Repacking for Relocation 2.5 Operating Environment 2.6 Installing a Lynx System Installing the Battery Attaching the Payload Structure and Options Adept Lynx Platform User's Guide, Rev D Page 5 of 126... - Page 6 Chapter 6: Operation 6.1 Operating Environment 6.2 Typical Operation 6.3 Power and Charging Battery Indicators and Controls Docking Station Manually Charging the Battery Balancing the Battery 6.4 Operator Panel Screen Adept Lynx Platform User's Guide, Rev D Page 6 of 126...
- Page 7 Docking Station AC Power Fuse Docking Station Internal Fuse Rear Sonar Units Front Sonar Units Sonar Controllers Light Discs Operator Panel Wheels and Tires Drive Assemblies Front or Rear Casters Safety Scanning Laser Adept Lynx Platform User's Guide, Rev D Page 7 of 126...
- Page 8 Table of Contents Lynx Core E-Stop and Safety Laser Commissioning 8.7 Spare Parts List Chapter 9: Technical Specifications 9.1 Dimension Drawings 9.2 Platform Specifications 9.3 Docking Station Specifications Adept Lynx Platform User's Guide, Rev D Page 8 of 126...
-
Page 9: Chapter 1: Introduction
Payload Structure: Anything you attach to the Lynx platform. This could be as simple as a box for holding parts or documents that you want transported, or as complicated as a robotic arm that will be used to pick up parts to transport. -
Page 10: Body And Drive
Chapter 1: Introduction For most applications, you will want to customize the Lynx platform with a payload structure, attached to the top of the platform, to hold, carry, or handle your parts, samples, or documents. Refer to Payload Structures on page 43 for guidelines on designing a payload structure. -
Page 11: Optional Components And Attachments (Partial List)
Ethernet (wireless preferred) 100 megabytes of available hard-disk storage Software Overview A fair amount of software is involved in setting up and running an Adept Lynx platform. The platform comes with the following software: Mobile Software Suite The Mobile Software suite includes all of the software used for the Lynx platform, with the exception of the SetNetGo OS. - Page 12 The MARCOS firmware computes and reports the plat- form’s odometry (X, Y, and heading) and a variety of other low-level operating conditions to ARAM. Adept Lynx Platform User's Guide, Rev D Page 12 of 126...
-
Page 13: Setnetgo
MobileEyes. SetNetGo The SetNetGo OS runs on the Lynx platform core. It is usually accessed through the SetNetGo interface in the MobilePlanner software. It can also be accessed through the maintenance Eth- ernet port or, when enabled, wirelesly over the network. It is used for the original wireless Eth- ernet configuration of the platform, and to perform systems diagnostics, such as retrieving log files. -
Page 14: Dangers, Warnings, Cautions, And Notes
Read the installation and operation instructions, as well as the Adept Robot Safety Guide, before using the equipment. Do not ride on the Lynx platform. Do not exceed the maximum weight limit. Limit operation to a 1:12 slope. Adept Lynx Platform User's Guide, Rev D... -
Page 15: What To Do In An Emergency
1.6 Additional Safety Information Adept provides other sources for more safety information: Manufacturer's Declaration of Conformity (MDOC) This lists all standards with which the Lynx platform complies. See Manufacturer's Declar- ation on page 15. Adept Robot Safety Guide Adept Robot Safety Guide provides detailed information on safety for Adept robots. -
Page 16: How Can I Get Help
Related Manuals This manual covers the installation, setup, operation, and maintenance of a Lynx platform. There are additional manuals that cover configuring the platform. See the following table. These manuals are available on the software media delivered with your system, and on the online Adept Document Library. - Page 17 Covers Lynx peripherals, such as the Lynx Touchscreen, Peripherals Guide Call/Door boxes, and Acuity Localization options. How to Get Help Covers general information for getting information on Adept Resource Guide products. Gives WEEE information. Adept Lynx Platform User's Guide, Rev D Page 17 of 126...
-
Page 18: Adept Document Library
If the Lynx platform has not been set up on a wireless network, a local area network will have to be set up on a separate PC, and configured to talk to the Lynx platform over a TCP/IP port. The IP address should be set to: 1.2.3.5. The Subnet Mask should be 255.255.255.0. - Page 19 SetNetGo. Otherwise, open a web browser and enter the URL: https://1.2.3.4: You will be requested to confirm security certificates. Regardless of how you accessed SetNetGo, you should now have a window similar to the fol- lowing: Adept Lynx Platform User's Guide, Rev D Page 19 of 126...
- Page 20 1. From the SetNetGo screen, select: System > Debug Info This will display the “Download debug info” button. 2. Click Download debug info. 3. Save the downloaded file, and attach it to your support request. Adept Lynx Platform User's Guide, Rev D Page 20 of 126...
-
Page 21: Chapter 2: Setup
NOTE: If you purchased spare batteries, this section applies to them, also. The battery is shipped in a separate container, not inside the Lynx platform. Its crate with pal- let measures 457 x 279 x 406 mm (18 x 11 x 16 in.), and weighs 27 kg (60 lb). -
Page 22: Unpacking
The Adept Lynx platform and battery come packed in wooden crates. They are mounted on pallets, with wooden covers. See the following figures. Battery The battery is shipped separately from the Lynx platform. Locate the crate that contains the bat- tery before continuing. Refer to the following figure. Figure 2-1. Battery Shipping Crate 1. -
Page 23: Lynx Platform
4. Lift and slide off the crate cover to reveal the crate, pallet, and contents. 5. Unscrew both eyebolts that screw down through the front and rear braces and into the chassis support board. There is one at each end of the Lynx platform. Board... - Page 24 Remove the top board. 9. Place the front of the crate cover in front of the Lynx platform, to serve as a ramp. Two holes in one end of the ramp go over hanger bolts that stick up from the crate base.
-
Page 25: Repacking For Relocation
Improper packaging for shipment will void your warranty. The platform must always be shipped in an upright orientation. 2.5 Operating Environment The Adept Lynx platform is designed to operate in an environment that is wheelchair access- ible. Care must be taken to avoid: glass doors and walls... - Page 26 2. Unlatch and open the battery compartment door, at the back of the platform. The battery compartment door is capable of being locked. You may need to unlock it. Adept Lynx Platform User's Guide, Rev D Page 26 of 126...
- Page 27 3. Lift and slide the new battery into the platform body. The battery weighs 20 kg (44 lbs). There are recesses at the front and the back of the battery, to aid in lifting it. Adept Lynx Platform User's Guide, Rev D Page 27 of 126...
- Page 28 4. Attach the battery power and data cables to the connectors at the rear of the battery. 5. Close the battery compartment door to secure the battery in place. Adept Lynx Platform User's Guide, Rev D Page 28 of 126...
-
Page 29: Attaching The Payload Structure And Options
NOTE: For all of the following settings, work with your IT group to verify the cor- rect IP, radio, and security settings. Adept Lynx Platform User's Guide, Rev D Page 29 of 126... - Page 30 Chapter 2: Setup The following applies to the wireless Ethernet supported by the Adept Lynx platform. Access the SetNetGo OS through the MobilePlanner software: MobilePlanner > SetNetGo > Networking NOTE: It is also possible to connect directly to the SetNetGo OS on a platform through a web browser.
-
Page 31: Installing The Docking Station
The docking station sits on the floor. It can be attached to a wall with the wall bracket, attached directly to the floor with screws through its base, or can sit stand-alone on the floor Adept Lynx Platform User's Guide, Rev D Page 31 of 126... - Page 32 The top of the docking station foot is spring-loaded, and lifts off of the bottom of the foot slightly to accommodate variations in the floor surface. The weight of the Lynx platform will push the top of the foot down.
- Page 33 2. Screw the two shoulder bolts, each with a washer, into the rear of the docking station. The shoulder bolts are M5 x 4, stainless steel. Their locations are shown in the fol- lowing figure. Tighten to 9 N-m (80 in-lb). Adept Lynx Platform User's Guide, Rev D Page 33 of 126...
- Page 34 It will be in the crate with the plat- form, right behind the docking station. Attaching the Floor Plate Refer to the following figures. Adept Lynx Platform User's Guide, Rev D Page 34 of 126...
- Page 35 Figure 2-10. Underside of Docking Station Foot, Showing Screw Locations NOTE: These are the three locations for the M4 x 12 flat-head screws. Two are already in place, and need to be removed before attaching the plate. Adept Lynx Platform User's Guide, Rev D Page 35 of 126...
- Page 36 Chapter 2: Setup Figure 2-11. Docking Station, Mounted on Floor Plate 406 [16.0] 495 [19.5] Units are mm [in.] Figure 2-12. Docking Station Floor Plate Dimensions Adept Lynx Platform User's Guide, Rev D Page 36 of 126...
- Page 37 Figure 2-13. Docking Station Contact Adjusting Pull-Knob Adept Lynx Platform User's Guide, Rev D Page 37 of 126...
-
Page 39: Chapter 3: Getting Started
IT support can set up your wireless without needing the MobilePlanner license. The Adept Lynx platform navigates using a map, generated with the MobilePlanner software. The operation of this software, as well as the downloading of the resultant map to the plat- ®... -
Page 40: Follow Mode
Goal Button Figure 3-1. Joystick The joystick plugs into the left side of the Lynx platform, under the small access panel at the upper right corner of the platform. (The Maintenance Ethernet port is also there.) The access panel is held in place with a push-push latch, and retained by a lanyard. See Figure 8-1. -
Page 41: Maintenance Ethernet Connection
DNS or gateway settings are needed. The Maintenance Ethernet plugs into the left side of the Lynx platform, under the small access panel at the upper right corner of the platform. (The joystick port is also there.) The access panel is held in place with a push-push latch, and retained by a lanyard. - Page 42 NOTE: It is a good idea to have the automated docking station installed prior to cre- ating the map scan. Its distinctive diagonal face will be useful in locating and set- ting it up in the map. Adept Lynx Platform User's Guide, Rev D Page 42 of 126...
-
Page 43: Chapter 4: Payload Structures
AIV needs to be considered. This is par- ticularly important if you intend to equip the Lynx platform with a robot arm, which would be lifting items off-center from the Lynx platform. -
Page 44: Payload Bay Access
1500 W*hr/169 W = 8.87 hr of estimated run-time. Payload Bay Access The area between the Lynx platform and your payload structure is the payload bay. You will occasionally need to access the Lynx platform and the connectors in the payload bay. This is where you can access all of the platform power and I/O connectors. -
Page 45: Dimensions
Take care to keep all of the payload structure higher than the top of the Lynx platform. If any of the platform's sensors get blocked, it won't be able to function normally. This is critical in the case of the safety scanning laser. - Page 46 You should try to keep your CG as close to the center of these fig- ures as possible. In the following three figures, light blue represents the payload structure, while dark (Adept) blue represents the Adept Lynx Platform. Adept Lynx Platform User's Guide, Rev D Page 46 of 126...
- Page 47 Chapter 4: Payload Structures 10 kg Figure 4-3. Center of Gravity Graphs, 10 kg 30 kg Figure 4-4. Center of Gravity Graphs, 30 kg Adept Lynx Platform User's Guide, Rev D Page 47 of 126...
-
Page 48: Connections Between Platform And Payload Structure
60 kg Figure 4-5. Center of Gravity Graphs, 60 kg 4.2 Connections Between Platform and Payload Structure The Lynx platform provides a variety of I/O and power connections, which you can use to make your AIV more effective. Operator Panel The Operator screen, E-Stop, Brake-release, ON, and OFF can be "moved"... -
Page 49: Option Connections
Connectivity on page 51. Option Connections The platform provides connectors for a user-supplied payload bumper and additional sonar units that can be placed on the payload structure. Adept Lynx Platform User's Guide, Rev D Page 49 of 126... -
Page 51: Chapter 5: Connectivity
Joystick port, and the Maintenance Ethernet port, which are located under a small access panel on the left side of the Lynx platform, in the upper-right corner. Both of these ports have a second, connected port inside the payload bay. See Figure 8-1. -
Page 52: Lynx Core Front, Upper
500 mA. May be used with loads connected to VBAT, AUX_20V, _12V, or _5V. You must stay within the allowed current capacity of the VBAT or AUX power supplies. Adept Lynx Platform User's Guide, Rev D Page 52 of 126... - Page 53 0 – 30 V Range, R = ~3.9 kΩ INPUT_3.3 Input_3.3 0 – 30 V Range, R = ~3.9 kΩ INPUT_3.4 Input_3.4 0 – 30 V Range, R = ~3.9 kΩ Adept Lynx Platform User's Guide, Rev D Page 53 of 126...
- Page 54 VBAT @ 0.5 A Max (shared with light pole) VBAT_IO_OUT3 VBAT @ 0.5 A Max VBAT_IO_OUT2 VBAT @ 0.5 A Max VBAT_IO_OUT1 VBAT @ 0.5 A Max 41, 42, 43, 44 Adept Lynx Platform User's Guide, Rev D Page 54 of 126...
- Page 55 = +24 VDC I ≤ 6 mA NOTE: The input current specifications are provided for reference. Voltage sources are typically used to drive the inputs. Figure 5-3. Typical Digital Input Wiring Example Adept Lynx Platform User's Guide, Rev D Page 55 of 126...
- Page 56 0 – 10 V Range, R = ~35 kΩ ANALOG_IN5 0 – 30 V Range, R = ~110 kΩ ANALOG_IN6 0 – 30 V Range, R = ~110 kΩ Adept Lynx Platform User's Guide, Rev D Page 56 of 126...
- Page 57 USB_1_and_2_Power 5 V @ 1 A (shared with USB port 2) RS232_VERT1_RXD RS232_VERT2_RXD RS232_FOOT_RXD 5V_SW3 USB_3_Power 5 V @ 1 A (shared with USB port 3) SW_20V_FOOT Foot_Laser_Power 20 V @ 150 mA Adept Lynx Platform User's Guide, Rev D Page 57 of 126...
-
Page 58: Lynx Core Rear, Upper
Mini-Fit 2 x 7 Pins for user-supplied brake release release Pins for user-supplied ON button; same function as Operator Panel ON Pins for user-supplied OFF button; same function as Operator Panel OFF Adept Lynx Platform User's Guide, Rev D Page 58 of 126... - Page 59 Optional sonar (4 emitter/receiver pairs) for payload structure Power Connections The Lynx platform provides conditioned 5, 12, and 20 VDC, and raw (battery) 22 - 30 VDC power to the platform’s and accessory electronics, including the onboard Lynx core and safety scanning laser LIDAR (Light Detection And Ranging).
- Page 60 Short 4 & 11 to close ESTOP_USR_1 ESTOP_USR_2L Short 5 & 12 to close ESTOP_USR_2 ESTOP_OUT_1L Pins 6 & 13 short when ESTOP_CH1 is closed ESTOP_OUT_2L Pins 7 & 14 short when ESTOP_CH2 is closed Adept Lynx Platform User's Guide, Rev D Page 60 of 126...
- Page 61 NOTE: An E-Stop jumper or a user-supplied E-Stop button needs to be attached to the E-STOP port on the User Interface connector for the platform to function. The jumper is provided as part number 12730-000L. An E-Stop button would be user- supplied. Adept Lynx Platform User's Guide, Rev D Page 61 of 126...
- Page 62 Chapter 5: Connectivity Figure 5-7. E-Stop Chain Diagram Adept Lynx Platform User's Guide, Rev D Page 62 of 126...
- Page 63 Software Notes 1, 2, 3 AUX_5V_OUT Aux_5V 5 V @ 1 A max AUX_12V_OUT Aux_12V 12 V @ 1 A max AUX_20V_OUT Aux_20V 20 V @ 1 A max Adept Lynx Platform User's Guide, Rev D Page 63 of 126...
- Page 64 Analog X input JOY_YAXIS Analog Y input JOY_SPEED Analog SPEED input JOY_GOAL Goal Button Input JOY_EN_1H Enable channel 1 JOY_EN_2L Enable channel 2 No Connection 5 V @ 100 mA Adept Lynx Platform User's Guide, Rev D Page 64 of 126...
- Page 65 NOTE: Sonar 1 is part of the Internal Lynx Core connections. Designation Pin No. Hardware Software Notes 1, 4, 8 No Connection RS422_SNR_RX+ RS422_SNR_TX+ Connections to Adept Sonar Module # = 1 or 2 RS422_SNR_RX- RS422_SNR_TX- SW_12V_SNR Sonar_#_Power Adept Lynx Platform User's Guide, Rev D Page 65 of 126...
-
Page 66: Internal Lynx Core Connections
Connection to Adept Sonar Module RS-422 (Front bumper and rear sonar sensors) Charge Contacts Mini-Fit Sr., 2-pin Debug RS-232 DB9M Reserved USB x 3 USB Type A Reserved LIDAR HDB26M Safety Scanning Laser Adept Lynx Platform User's Guide, Rev D Page 66 of 126... -
Page 67: Lynx Internal Data Pinouts
CANH_A CAN Communication differential pair 8, 9 SW_12V_WHEEL WheelLight_Power 12 V @ 1 A Max (switched in SW) NOTE: Sonar 1 is covered at the end of Core, Upper Rear. Adept Lynx Platform User's Guide, Rev D Page 67 of 126... - Page 68 STANDBY No Connection 10, 18 SW_20V_LIDAR Main_Laser_Power Connections to Adept-Supplied LIDAR 11 thru 17 GND RS422_LIDAR_TX+ RS422_LIDAR_TX- IN_A1 IN_A2 IN_B1 IN_B2 IN_C1 IN_C2 Pin 10 + 18: Current < 600 mA Adept Lynx Platform User's Guide, Rev D Page 68 of 126...
-
Page 69: Lynx Internal Power Pinouts
BUMPER_L2H Left, Channel 2, High BUMPER_L1H Left, Channel 1, High Speakers ® Connector type Mini-Fit 2 x 2 Speakers Pin No. Designation Notes RIGHT+ Right Speaker RIGHT- LEFT+ Left Speaker LEFT- Adept Lynx Platform User's Guide, Rev D Page 69 of 126... - Page 70 Chapter 5: Connectivity Batt Comm. ® Connector type Mini-Fit 3 x 2 Battery control Pin No. Designation Notes RS232_BATT_RXD RS232_BATT_TXD Connections to the Adept-Supplied Battery FBAT_ALWAYS START_BUTTON OFF_BUTTON Adept Lynx Platform User's Guide, Rev D Page 70 of 126...
-
Page 71: Chapter 6: Operation
6.1 Operating Environment The Adept Lynx platform is designed to operate in an environment that is wheelchair access- ible. Care must be taken to avoid: glass doors and walls... -
Page 72: Power And Charging
The Lynx battery is sealed. It supplies ample power for the motors, electronics, and accessories. The platform ships separately from the battery. The battery is shipped fully-charged. You should have installed the battery in the platform in Install the battery in the Lynx platform. on page 24. -
Page 73: Docking Station
If the AIV is powered off, it will turn on automatically when it is pushed onto the docking sta- tion. An AIV cannot be turned off while on the docking station. Adept Lynx Platform User's Guide, Rev D Page 73 of 126... - Page 74 Figure 6-2. Docking Station Indicators, Controls, and Connections The docking station has a power switch and two LEDs: blue indicates that power is available. yellow indicates that a charge is in progress. Adept Lynx Platform User's Guide, Rev D Page 74 of 126...
-
Page 75: Manually Charging The Battery
Balancing the Battery The Adept Lynx battery is composed of multiple cells, which need to stay balanced in order to maintain maximum run-time. There are three ways for managing battery balancing: Adept Lynx Platform User's Guide, Rev D Page 75 of 126... -
Page 76: Operator Panel
The Operator panel comprises a screen, an E-Stop button, ON and OFF buttons, a brake-release button, and a keyswitch. The panel will typically be mounted on the payload structure, so that Adept Lynx Platform User's Guide, Rev D Page 76 of 126... -
Page 77: Screen
NOTE: Tapping lightly on the screen will turn on the backlight, in case it has timed out. Default/Sample Screen Contents The first screen, during boot-up, will be the following: Figure 6-3. Initial Boot Screen Adept Lynx Platform User's Guide, Rev D Page 77 of 126... -
Page 78: E-Stop
Chapter 6: Operation Once the Lynx platform is booted, you will see the main screen: Figure 6-4. Fields of the Main Screen Up to six messages will be displayed in the main screen, in order of importance. Only one fault at a time will be displayed. -
Page 79: On Button
6.5 Other Controls and Indicators When sold by itself, the Lynx platform does not come with a beacon or light tower. These would need to be user-supplied. Adept-supplied Lynx-based AIVs often include a beacon. The Lynx core has a Light Pole port that supports the beacon behavior described here. - Page 80 Turn Signal with Warning (doesn't prevent driving, such as low battery) Same as Turn Signals, but both the blue rotating arc and blinking segment are orange. The moving arc and the blinking segment have independent timing. Adept Lynx Platform User's Guide, Rev D Page 80 of 126...
- Page 81 Chapter 6: Operation Driving Slowly, Safety Inactive Under 300 mm/sec, the Lynx platform stops safety checking. The pattern is essentially the same as driving, except the background blinks orange. The moving arc and the blinking seg- ment have independent timing.
- Page 82 In the following table: Blink indicates that a disc or light is on for a period, then off for a period. Pulse indicates a 0.25 Hz fade on and off. Adept Lynx Platform User's Guide, Rev D Page 82 of 126...
-
Page 83: Joystick
Half-circles Joystick The joystick plugs into the left side of the Lynx platform, under the small access panel at the upper-right corner of the platform. See Location of Parts on the Platform on page 91. This is Adept Lynx Platform User's Guide, Rev D... - Page 84 The Adept Lynx platform slows to a stop when you release the trigger. To stop more quickly, continue to squeeze the trigger and pull or push the drive button to its limit in the opposite dir- ection of the platform’s travel.
-
Page 85: Maintenance Ethernet
Chapter 6: Operation Maintenance Ethernet The Maintenance Ethernet port is on the left side of the Lynx platform, under the small access panel at the upper-right corner of the platform. This is internally connected to the Ethernet port located on the rear side of the Lynx core in the payload bay. -
Page 86: Sonar
Sonar Rear-Facing The Adept Lynx platform’s two rear-facing sonar pairs are for obstacle-sensing while backing up. The range is up to 5 m (16 ft), though the typical accurate range is only up to 2 m (10 ft). Each pair consists of one emitter and one receiver. The sonar emitters and receivers are identical physically, but the platform uses them differently. - Page 87 AP-based (“managed”) SSID of “Wireless Network”, unsecured. Consult with your network systems administrator before modifying these network details through the SetNetGo OS. The User LAN port is set to IP address 10.10.10.10. ® Refer to the Adept Motivity User's Guide. Adept Lynx Platform User's Guide, Rev D Page 87 of 126...
-
Page 89: Chapter 7: Options
Chapter 7: Options The Lynx platform is available with a number of options to enhance its performance and abil- ities. Adept Lynx Enterprise Manager 1100, for multi-AIV coordination This is a network appliance that runs the Mobile Software suite. It is covered in the Adept Lynx Enterprise Manager 1100 User's Guide. - Page 90 This is a full-color touch-sensitive screen for displaying information to the Operator, as well as receiving input from the Operator. It is covered in detail in the Adept Lynx Plat- form Peripherals Guide. Adept Lynx Platform User's Guide, Rev D Page 90 of 126...
-
Page 91: Chapter 8: Maintenance
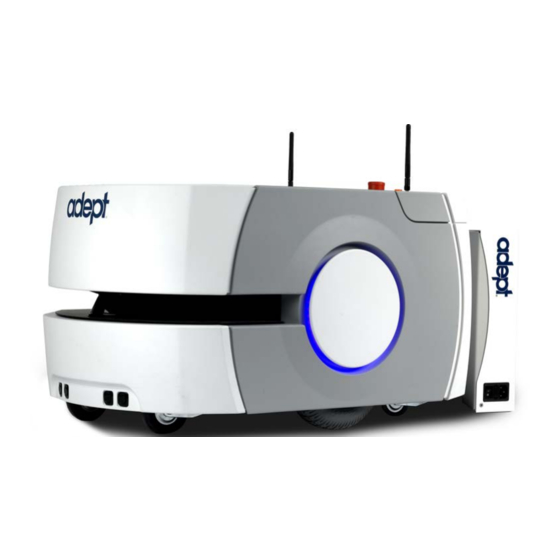
Sonar Safety Battery Scanning Light Disc Access Laser Door Bumper Front Sonar Front Caster x2 Drive Wheel x2 Rear Caster x2 Figure 8-1. Location of Parts on the Platform Adept Lynx Platform User's Guide, Rev D Page 91 of 126... -
Page 92: Safety Aspects While Performing Maintenance
8.2 Periodic Maintenance Schedule The drive motors and gearbox are sealed and permanently lubricated, so they do not require periodic maintenance. Cleaning The following table gives a summary of cleaning procedures for the Adept Lynx Platform. Table 8-1. Cleaning Item Period... -
Page 93: Tires
The rear cover has an additional brace for support, the bumper cover uses screws and magnets, and the access panel uses a push-push latch. Adept Lynx Platform User's Guide, Rev D Page 93 of 126... -
Page 94: Cover Removal
1. Pull the bottom of the cover away from the platform chassis. This is easiest if you grip it with two hands, toward the center. 2. Lower the cover down, so its top tab clears the rear outer cover. Adept Lynx Platform User's Guide, Rev D Page 94 of 126... - Page 95 1. Pull the top of the cover away from the chassis a few inches. The cover will pivot on the metal brace at its bottom edge. 2. Pull the four sonar wires, with their connectors, out of the chassis holes. Adept Lynx Platform User's Guide, Rev D Page 95 of 126...
- Page 96 Figure 8-2. Sonar Leads, with Connectors Still in Chassis 3. Unscrew all four sonar connectors. Ensure that both sides of all connectors are labeled, and match. If not, label them. Figure 8-3. Sonar Connectors, with Connectors Exposed Adept Lynx Platform User's Guide, Rev D Page 96 of 126...
-
Page 97: Cover Installation
5. Tuck the connectors into the four holes in the chassis, until just an inch of sonar lead is sticking out. 6. Tilt the top of the cover up to meet the chassis. Adept Lynx Platform User's Guide, Rev D Page 97 of 126... - Page 98 Access Panel 1. Slide the panel to the right, so its tab goes under the left side cover. The panel is attached with a lanyard, to prevent getting lost. Adept Lynx Platform User's Guide, Rev D Page 98 of 126...
-
Page 99: Battery Replacement
This is easiest if you grip it with two hands, toward the center. b. Lower the cover down, so its top tab clears the rear outer cover. 2. Unlatch and open the battery compartment door, at the back of the platform. Adept Lynx Platform User's Guide, Rev D Page 99 of 126... - Page 100 2. Unlatch and open the battery compartment door, at the back of the platform. The battery compartment door is capable of being locked. You may need to unlock it. Adept Lynx Platform User's Guide, Rev D Page 100 of 126...
- Page 101 3. Lift and slide the new battery into the platform body. The battery weighs 20 kg (44 lbs). There are recesses at the front and the back of the battery, to aid in lifting it. Adept Lynx Platform User's Guide, Rev D Page 101 of 126...
- Page 102 4. Attach the battery power and data cables to the connectors at the rear of the battery. 5. Close the battery compartment door to secure the battery in place. Adept Lynx Platform User's Guide, Rev D Page 102 of 126...
-
Page 103: Replacing Non-Periodic Parts
The roller is held to the docking station with a shoulder bolt. 1. Remove the shoulder bolt from the center of the roller. Retain the shoulder bolt. 2. Remove the roller and bearing from the docking station. Adept Lynx Platform User's Guide, Rev D Page 103 of 126... -
Page 104: Docking Station Ac Power Fuse
Symptoms: When the docking station is switched on, the blue power light does not come on. (Verify that the unit is plugged into AC power.) WARNING: Unplug power from the docking station before starting. Remove the power cord at the charger. Adept Lynx Platform User's Guide, Rev D Page 104 of 126... -
Page 105: Docking Station Internal Fuse
The docking station cover is NOT interlocked. Remove the power cord at the charger. 1. Remove the ten screws from the back cover of the docking station. Two of these are on the sides, near the bottom. Adept Lynx Platform User's Guide, Rev D Page 105 of 126... -
Page 106: Rear Sonar Units
4. Press the new sonar unit through the hole in the rear outer cover, from the outside. 5. Connect the sonar cable to the new sonar unit's lead. 6. Reinstall the rear covers. Adept Lynx Platform User's Guide, Rev D Page 106 of 126... -
Page 107: Front Sonar Units
Plug the eight sonar unit cables into the new controller. Ensure that the cable labels match the controller labels. f. Plug the cable from the Lynx core into the new controller. Adept Lynx Platform User's Guide, Rev D Page 107 of 126... -
Page 108: Light Discs
The PCA is keyed so that it can only be installed in one orientation. 5. Reinstall the side cover, connecting the cable to the new light disc PCA. Adept Lynx Platform User's Guide, Rev D Page 108 of 126... -
Page 109: Operator Panel
10 mm (Ø0.24 x 0.4 in.) pin into the hole on the rear side of the assembly (there is a hole on each side). This will keep the springs compressed (the wheel will be in the up Adept Lynx Platform User's Guide, Rev D Page 109 of 126... - Page 110 4. Remove the pin or screw you used to hold the wheel in the up position. 5. Put the side cover next to the platform, and attach the light disc cable to the light disc PCA. 6. Reinstall the side cover. Adept Lynx Platform User's Guide, Rev D Page 110 of 126...
-
Page 111: Drive Assemblies
Remove the three nuts and four screws (and their washers) holding the drive assembly to the platform. Retain these nuts, screws, and washers for attaching the new drive assembly. Adept Lynx Platform User's Guide, Rev D Page 111 of 126... - Page 112 NOTE: Make sure that the pin is short enough so that you can pull it out after the assembly is in place. 2. Connect the motor cable to the new drive assembly. Adept Lynx Platform User's Guide, Rev D Page 112 of 126...
-
Page 113: Front Or Rear Casters
7. Lay the body of the platform on its side, exposing the casters. 8. Remove the four screws and washers holding the caster to the platform. Retain these screws and washers for attaching the new caster. Adept Lynx Platform User's Guide, Rev D Page 113 of 126... -
Page 114: Safety Scanning Laser
2. Unscrew the four screws holding the black plate on top of the laser. Retain the four screws for reassembly. You will use this top cap on the new laser. Do not unplug it from the platform chassis. Adept Lynx Platform User's Guide, Rev D Page 114 of 126... - Page 115 Chapter 8: Maintenance Figure 8-18. Safety Scanning Laser Adept Lynx Platform User's Guide, Rev D Page 115 of 126...
-
Page 116: Lynx Core
5. Disconnect all of the cables that are attached to the top portion of the Lynx core. Refer to Payload Bay Connections on page 51. 6. Remove the core mounting bracket from around the Lynx core. Adept Lynx Platform User's Guide, Rev D Page 116 of 126... - Page 117 15. Reconnect all of the cables to the top portion of the Lynx core. Refer to Payload Bay Connections on page 51. 16. Reconnect the battery power and data cables to the battery. Adept Lynx Platform User's Guide, Rev D Page 117 of 126...
-
Page 118: E-Stop And Safety Laser Commissioning
1. From the MobilePlanner software, select: Main Menu > Robot > Safety Commissioning 2. Follow the on-screen instructions to complete the test. You can print a certificate after successful completion of the commissioning. Adept Lynx Platform User's Guide, Rev D Page 118 of 126... -
Page 119: Spare Parts List
Push Button, Green, Panel Mount, Round 12411-000 Push Button, Red, Panel Mount, Round 12412-000 Push Button, Yellow, Panel Mount, Round 12413-000 Switch, Keylock, 2 Keypull Positions, 90° (contains HMI key) Adept Lynx Platform User's Guide, Rev D Page 119 of 126... - Page 120 Casters, Shock Absorbing (x 4) 11210-000 Wheel and Tire assembly Miscellaneous 12330-000 Speaker, 3.5 in., 80 W 12312-000 Micro Switch, Positive Opening Contacts (Front Bumper x 4) 12730-000L Jumper, User ESTOP Adept Lynx Platform User's Guide, Rev D Page 120 of 126...
-
Page 121: Chapter 9: Technical Specifications
Chapter 9: Technical Specifications 9.1 Dimension Drawings 27.4 15.0 19.6 Units are in mm [in.] Figure 9-1. Adept Lynx Platform Top, Side, and Front Dimensions Adept Lynx Platform User's Guide, Rev D Page 121 of 126... -
Page 122: Platform Specifications
Cleanroom rating Fed Class 100, ISO Class 5 NOTE: Fed Class 10 (ISO Class 4) is attainable in many cases. Contact Adept. Drive Train Drive wheels 2 grey non-marking foam-filled rubber Adept Lynx Platform User's Guide, Rev D Page 122 of 126... - Page 123 PLd Safety per ISO-13849 Sonar 2 at rear of platform, 2 M range (Each sonar is one emitter and 2 at front of platform, in bumper, 2 M range Adept Lynx Platform User's Guide, Rev D Page 123 of 126...
-
Page 124: Docking Station Specifications
8.2 kg (18 lbs) Mounting Wall bracket, directly to floor, or on floor with floor plate Indicators Power on - blue Charging - yellow Connector For out-of-platform battery charging Adept Lynx Platform User's Guide, Rev D Page 124 of 126... - Page 126 5960 Inglew ood D riv e Pleasanton, C A 94588 P/N: 11970-000 Rev D 925 · 245 · 3400...
Need help?
Do you have a question about the Lynx Platform and is the answer not in the manual?
Questions and answers