Olympus Camedia C-8080 User Manual
Wide zoom
Hide thumbs
Also See for Camedia C-8080:
- Quick start manual (345 pages) ,
- Reference manual (263 pages) ,
- Basic manual (188 pages)
Table of Contents
Advertisement
Advertisement
Table of Contents

Related Manuals for Olympus Camedia C-8080


Summary of Contents for Olympus Camedia C-8080
- Page 1 basic_e_d4155_6.fm Page 1 Tuesday, December 9, 2003 7:08 PM DIGITAL CAMERA APPAREIL PHOTO NUMÉRIQUE DIGITALKAMERA CÁMARA DIGITAL C-8080 Wide Zoom BASIC MANUAL MANUEL DE BASE EINFACHE ANLEITUNG ENGLISH ..2 MANUAL BÁSICO FRANÇAIS..48 DEUTSCH ..94 ESPAÑOL ..140...
-
Page 2: Table Of Contents
basic_e_d4155_6.fm Page 2 Monday, December 8, 2003 10:02 AM CONTENTS GETTING STARTED ........4 MENU FUNCTIONS . - Page 3 Declaration of Conformity Model Number : C-8080 Wide Zoom RM-2 (Remote control) Trade Name : OLYMPUS Responsible Party : Olympus America Inc. Address : 2 Corporate Center Drive, Melville, New York 11747-3157 U.S.A. Telephone Number :1-631-844-5000 Tested To Comply With FCC Standards FOR HOME OR OFFICE USE This device complies with Part 15 of the FCC rules.
-
Page 4: Getting Started
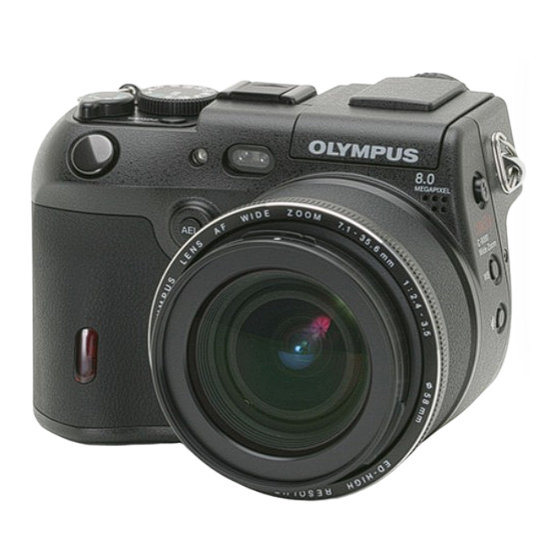
basic_e_d4155_6.fm Page 4 Monday, December 8, 2003 10:02 AM GETTING STARTED NAMES OF PARTS Camera Shutter button AF illuminator AF sensor Flash Microphone AEL button (AEL) Lens Remote control receiver Self-timer/Remote control lamp Self-timer/Remote control button (Y/<) Erase button (S) Viewfinder Control dial QUICK VIEW button... - Page 5 basic_e_d4155_6.fm Page 5 Monday, December 8, 2003 10:02 AM Hot shoe Power switch Mode dial Zoom lever (WG/TU) Custom button (z) Strap eyelet * Diopter adjustment ring * The metal clip of the strap eyelet is not shown in detail in the illustrations in this manual.
-
Page 6: Viewfinder And Monitor Indications
basic_e_d4155_6.fm Page 6 Monday, December 8, 2003 10:02 AM VIEWFINDER AND MONITOR INDICATIONS Shooting mode F5.6 F5.6 1/ 1/200 3264*2448 3264*2448 1/200 1/200 F5.6 F5.6 Still picture 04:00 04:00 04:00 Movie Item Indication P, A, S, M, s, N, m, L, J, I 1 Shooting mode 2 Shutter speed 15"... - Page 7 basic_e_d4155_6.fm Page 7 Monday, December 8, 2003 10:02 AM Item Indication !, # , $, # SLOW1, H SLOW1, #SLOW2 10 Flash mode w –2.0 to +2.0 11 Flash intensity control o, i, j, k, 7 12 Sequential shooting mode 13 Self-timer Remote control <...
- Page 8 basic_e_d4155_6.fm Page 8 Monday, December 8, 2003 10:02 AM Playback mode INFO setting allows you to select how much information to display on the screen. Screens with the information display set to ON are shown below. 3264*2448 3264*2448 F5.6 F5.6 1/200 1/200 0.0 '04.04.1...
-
Page 9: Memory Gauge
basic_e_d4155_6.fm Page 9 Monday, December 8, 2003 10:02 AM Memory gauge The memory gauge lights up when you take a still Battery check indication picture. While the gauge is lit, the camera is storing the F5.6 F5.6 1/ 1/200 picture on the card. The memory gauge indication changes as shown below depending on the shooting status. -
Page 10: Attaching The Strap
basic_e_d4155_6.fm Page 10 Monday, December 8, 2003 10:02 AM ATTACHING THE STRAP CHARGING THE BATTERY This camera uses one BLM-1 lithium ion battery. Other batteries cannot be used. The battery is not fully charged at the time of purchase. Before using the camera, charge the battery using the BCM-2 charger. -
Page 11: Loading The Battery
basic_e_d4155_6.fm Page 11 Monday, December 8, 2003 10:02 AM • Meaning of the charge lamp indications: Lights red : Charging Charge lamp Lights green : Charging is completed Blinks red : Charging failure • The battery charges in approximately 5 hours. The charging time may differ according to the amount of power left in the battery. -
Page 12: Inserting A Card
basic_e_d4155_6.fm Page 12 Monday, December 8, 2003 10:02 AM INSERTING A CARD “Card” in this manual refers to the xD-Picture Card, CompactFlash and Microdrive. The camera uses the card to record pictures. The xD-Picture Card can be used simultaneously with CompactFlash or Microdrive. -
Page 13: Switching Cards
basic_e_d4155_6.fm Page 13 Monday, December 8, 2003 10:02 AM CompactFlash/Microdrive • Set the eject button in the upright position. • Press the eject button gently all the way in. The card will be ejected a short way. • Take hold of the card and pull it out. •... - Page 14 basic_e_d4155_6.fm Page 14 Monday, December 8, 2003 10:02 AM TURNING THE POWER ON/OFF Press the catch on the lens cap in the direction of the arrow and remove the lens cap. Turn the mode dial until the mode you want to use is aligned with the red line.
-
Page 15: Changing The Angle Of The Monitor
basic_e_d4155_6.fm Page 15 Monday, December 8, 2003 10:02 AM CHANGING THE ANGLE OF THE MONITOR You can change the angle of the monitor. This is useful for taking low-angle shots where the viewfinder or monitor is hard to see. Take hold of the monitor as shown in the illustration and pull it out. -
Page 16: Setting The Date And Time
basic_e_d4155_6.fm Page 16 Monday, December 8, 2003 10:02 AM SETTING THE DATE AND TIME Set the mode dial to C and turn the camera on. • MODE MENU is displayed. Press ac to select the SETUP tab, then press d Press ac to select X, then press d. -
Page 17: Menu Functions
basic_e_d4155_6.fm Page 17 Monday, December 8, 2003 10:02 AM MENU FUNCTIONS USING THE MENUS AND TABS There are two types of menu: the top menu which is the first screen that appears on the monitor when you turn on the camera and press e, and the MODE MENU which categorizes settings into tabs. -
Page 18: How To Use The Menus
basic_e_d4155_6.fm Page 18 Monday, December 8, 2003 10:02 AM How to use the menus Press e to display the top menu, then press d. Press ac to select a tab, then press d. Press ac to select the item you want to set, then press d. Press ac to select a setting. - Page 19 basic_e_d4155_6.fm Page 19 Monday, December 8, 2003 10:02 AM Playback mode Runs through all saved pictures one after another. MOVIE PLAY MOVIE PLAYBACK Plays back movies. INDEX Creates an indexed view of a movie in 9 frames. EDIT Edits a movie. Displays guidelines on the image.
-
Page 20: Mode Menus
basic_e_d4155_6.fm Page 20 Monday, December 8, 2003 10:02 AM Mode menus The MODE MENU functions are divided into tabs. Press ac to select a tab and display the associated menu items. These instructions are only for quick reference. For more details on the functions described here, refer to the “Reference Manual”... - Page 21 basic_e_d4155_6.fm Page 21 Monday, December 8, 2003 10:02 AM PICTURE tab Sets the appropriate white balance according to the light source. Also adjusts and saves the white balance. Sets the image quality and resolution. Still pictures : RAW, TIFF, SHQ, HQ, SQ1, SQ2 Movies : SHQ, HQ, SQ Lets you take pictures suited to the situation and the desired effect...
- Page 22 basic_e_d4155_6.fm Page 22 Monday, December 8, 2003 10:02 AM Playback mode (q) RAW DAtA EDIt EDIT tab CARD tab E tab COPY (for still pictures) EDIT tab Sets the image quality, white balance, etc. of pictures taken in RAW DATA EDIT RAW data format and saves them as new files.
- Page 23 basic_e_d4155_6.fm Page 23 Monday, December 8, 2003 10:02 AM C mode The functions assigned to the E tab in both shooting and playback ALL RESEt E tab modes can also be set from the E REC VIEW tab in C mode. SETUP tab BEEP SHUttER SOUND...
-
Page 24: Mode Dial And Direct Button Functions
basic_e_d4155_6.fm Page 24 Tuesday, December 9, 2003 12:53 PM MODE DIAL AND DIRECT BUTTON FUNCTIONS Mode dial The shooting mode includes modes where the optimal settings for the situation are automatically selected, and modes where you can select the settings best suited to the shooting conditions and the effect you wish to achieve. - Page 25 basic_e_d4155_6.fm Page 25 Monday, December 8, 2003 10:02 AM Aperture priority shooting Allows you to set the aperture manually. The camera sets the shutter speed automatically. Turn the control dial to set the aperture value. Turn to the left to decrease the aperture value (F number). Turn to the right to increase the aperture value (F number).
- Page 26 basic_e_d4155_6.fm Page 26 Monday, December 8, 2003 10:02 AM Situation-related modes Night Scene shooting Suitable for shooting pictures in the evening or at night. The camera sets a slower shutter speed than is used in normal shooting. For example, if you take a picture of a street at night in P mode, the lack of brightness will result in a dark picture with only dots of light.
-
Page 27: Direct Buttons
basic_e_d4155_6.fm Page 27 Monday, December 8, 2003 10:02 AM Direct buttons The direct buttons have different functions in the shooting mode and in the playback mode. Turning the control dial while holding down the direct button allows you to select menu options or change the values for the different functions. -
Page 28: Direct Button Functions
basic_e_d4155_6.fm Page 28 Monday, December 8, 2003 10:02 AM Direct button functions Holding down one or two direct buttons and turning the control dial allows you to make settings for each function. Control dial Shooting mode F (exposure compensation) button Changes the exposure compensation value. - Page 29 basic_e_d4155_6.fm Page 29 Monday, December 8, 2003 10:02 AM WB (white balance) button Selects a white balance setting from AUTO, PRESET 1, PRESET 2, CUSTOM and V (one-touch). K (record mode) button Sets the image quality and resolution. Still pictures : RAW, TIFF, SHQ, HQ, SQ1, SQ2 Movies : SHQ, HQ, SQ z (custom) button...
-
Page 30: Shooting Basics
basic_e_d4155_6.fm Page 30 Monday, December 8, 2003 10:02 AM SHOOTING BASICS TAKING STILL PICTURES You can take still pictures using either the viewfinder or the monitor. Set the mode dial to P A S M r m l j or i and turn the camera on. -
Page 31: If Correct Focus Cannot Be Obtained (Focus Lock)
basic_e_d4155_6.fm Page 31 Monday, December 8, 2003 10:02 AM IF CORRECT FOCUS CANNOT BE OBTAINED (FOCUS LOCK) When the subject you want to focus on is not in the center of the frame and you cannot position the AF target mark on it, you can focus the camera on another point at roughly the same distance (focus lock) and take the picture as explained below. -
Page 32: Zooming In On A Subject (Optical Zoom)
basic_e_d4155_6.fm Page 32 Monday, December 8, 2003 10:02 AM Press the shutter button again to stop recording. • When the remaining recording time has been used up, recording stops automatically. • When there is space in the card memory, the remaining recording time is displayed, and the camera is ready to shoot the next movie. -
Page 33: Using The Self-Timer
basic_e_d4155_6.fm Page 33 Monday, December 8, 2003 10:02 AM TIPS Flash working range W (max.): Approx. 0.8 – 5.8 m (2.6 – 19 ft.) T (max.): Approx. 0.2 – 4.0 m (0.7 – 13.1 ft.) Auto-flash (No indication) The flash fires automatically in low light or backlight conditions. Red-eye reduction flash ( The red-eye reduction flash mode reduces red eye effect by emitting pre-flashes before firing the regular flash. -
Page 34: Advanced Shooting
basic_e_d4155_6.fm Page 34 Tuesday, December 9, 2003 12:53 PM ADVANCED SHOOTING SEQUENTIAL SHOOTING There are 4 sequential shooting modes: high speed sequential shooting, sequential shooting, AF sequential shooting and auto bracketing. Except for auto bracketing, the exposure and white balance are locked at the first frame. Sequential shooting cannot be performed when the record mode is set to TIFF. -
Page 35: Macro Mode Shooting
basic_e_d4155_6.fm Page 35 Monday, December 8, 2003 10:02 AM AE LOCK This function is suitable for situations when optimal exposure is difficult to achieve, such as when there is excessive contrast between the subject and the surroundings. gMODE DIAL AND DIRECT BUTTON FUNCTIONS - Direct buttons MACRO MODE SHOOTING The macro mode allows you to shoot at a distance of 20 cm to 80 cm (0.7 ft. -
Page 36: Playback
basic_e_d4155_6.fm Page 36 Monday, December 8, 2003 10:02 AM PLAYBACK VIEWING STILL PICTURES Set the mode dial to q (playback mode) and turn the camera on. • The last picture taken is displayed. (Single-frame playback) • Shooting information is displayed for about 3 seconds. You can change how much information is displayed on the screen. -
Page 37: En Viewing Movies
basic_e_d4155_6.fm Page 37 Monday, December 8, 2003 10:02 AM Index display This function lets you show several pictures at the same time on the monitor. It is useful for quickly finding the picture you want to view. The number of pictures shown can be 4, 9 or 16. - Page 38 basic_e_d4155_6.fm Page 38 Monday, December 8, 2003 10:02 AM Press e. • The MOVIE PLAYBACK menu is displayed. PLAYBACK Plays back the entire movie again. FRAME BY FRAME Plays back the movie manually one frame at a time. CAPTURE Cuts one frame from the movie and saves it as a still picture.
-
Page 39: Protecting Pictures
basic_e_d4155_6.fm Page 39 Monday, December 8, 2003 10:02 AM PROTECTING PICTURES You are recommended to protect important pictures to avoid accidentally erasing them. Protected pictures cannot be erased by the single-frame/all-frame erase function. Set the mode dial to q and turn the camera on. •... -
Page 40: Formatting (Card Setup)
FORMATTING (CARD SETUP) This function lets you format a card. Formatting prepares cards to receive data. Before using non-Olympus cards or cards which have been formatted on a PC, you must format them with this camera. • All data stored on the card, including protected pictures, is erased when the card is formatted. -
Page 41: Playback On Tv
basic_e_d4155_6.fm Page 41 Monday, December 8, 2003 10:02 AM PLAYBACK ON TV Use the AV cable provided with the camera to play back recorded images on your TV. Both still pictures and movies can be played back. Make sure that the TV and camera are turned off. Connect the A/V OUT jack on the camera to the video input terminal on the TV using the AV cable. -
Page 42: Print Reservation/Direct Print
basic_e_d4155_6.fm Page 42 Monday, December 8, 2003 10:02 AM PRINT RESERVATION/DIRECT PRINT PRINT RESERVATION DPOF is short for Digital Print Order Format. DPOF is the format used to record automatic print information from digital cameras. If a card containing print reservation data is taken to a photo lab or a print shop that supports the DPOF format, the pictures can be printed according to the DPOF reservations. -
Page 43: Downloading Pictures To A Computer
basic_e_d4155_6.fm Page 43 Monday, December 8, 2003 10:02 AM DOWNLOADING PICTURES TO A COMPUTER By connecting the camera to a computer with the provided USB cable, images on a card can be transferred to the computer. Some OS’s (operating systems) may need a special setup before connecting to the camera for the first time. - Page 44 * Certain card readers may not be • Windows XP compatible with Mac OS X. • Mac OS 9/X Check the Olympus website for the most up-to-date compatibility information. Does your computer have a built-in PC card slot? Use the optional PC card adapter.
-
Page 45: Error Codes
basic_e_d4155_6.fm Page 45 Monday, December 8, 2003 10:02 AM ERROR CODES Monitor Possible cause Corrective action indication The card is not inserted, Insert a card or insert a different or it cannot be recognized. card. If the problem persists, format the NO CARD card. -
Page 46: Specifications
Image pickup device : 1/1.8" CCD solid-state image pickup, 8,310,000 pixels Lens : Olympus lens 7.1 mm to 35.6 mm, f2.4 to f3.5, 14 elements in 5 groups (equivalent to 28 mm to 140 mm lens on 35 mm camera) - Page 47 –20°C to 60°C (–4°F to 140°F) (storage) Humidity : 30% to 90% (operation)/10% to 90% (storage) Power supply : Only an Olympus BLM-1 lithium-ion battery AC adapter specified by Olympus (optional) Dimensions : 124 mm (W) × 84.5 mm (H) × 99 mm (D) (4.9"...
Need help?
Do you have a question about the Camedia C-8080 and is the answer not in the manual?
Questions and answers