Table of Contents

Subscribe to Our Youtube Channel
Related Manuals for GSS DRS 550 HDMI


Summary of Contents for GSS DRS 550 HDMI
- Page 1 Grundig SAT Syst ms Digital Satellite Receiver DRS 550 HDMI Phone: +49 (0) 911 / 703 8877 Grundig SAT Systems GmbH Fax: +49 (0) 911 / 703 9210 Beuthener Strasse 43 e-mail: info@gss.tv D-90471 Nuremberg Internet: http://www.gss.tv...
-
Page 2: Table Of Contents
Contents Introduction........................5 Meaning of the icons used .................5 General information ......................5 Packing contents ....................5 Accessories for satellite receivers ................5 Receiving digital satellite channels ..............5 Special facilities of your satellite receiver .............6 Features of your satellite receiver ................6 Environmental note ....................7 Important note on safety and set up .................. - Page 3 8.1.4 Displaying subtitles ................20 8.1.5 Selecting history depth ................ 21 8.1.6 Setting the power up mode ..............21 8.1.7 Reading messages ................21 8.1.8 Exiting the menu function, switching back to the previous menu, saving settings ..................22 PVR settings ....................22 Sound/picture settings ..................23 8.3.1 Adapting the satellite receiver to the television set ........23...
- Page 4 12 Parental control ......................53 12.1 Setting the access rights ...................53 12.2 Locking channels.....................54 12.2.1 Unlocking channels ................54 12.3 Changing the PIN code ...................55 13 Receiving encrypted satellite channels ................56 13.1 Reception of channels with subprograms ............57 14 Sleep timer ........................57 15 Reading messages ......................
-
Page 5: Introduction
GSS Grundig SAT Systems GmbH: ”http://www.gss.tv”. Accessories for satellite receivers You can find out more about the extensive GSS range of accessories for satellite receiv- ers at your specialist dealer or at the website of GSS Grundig SAT Systems GmbH: ”http://www.gss.tv.”... -
Page 6: Special Facilities Of Your Satellite Receiver
To help you with the choice and settings for satellite channels, a selection of TV and radio stations have been preprogrammed for this device. New channels, which are not yet featured in the channel list on your satellite receiver, can be found using the channel search. -
Page 7: Environmental Note
• Analogue video outlet via Cinch sockets • Optical digital audio output Environmental note If you do not intend to use the satellite receiver for some time (e.g. at night), we recom- mend that you use the button to switch to stand-by. To disconnect the satellite receiver from the mains supply, we recommend switching this off using the mains switch at the back of the device. -
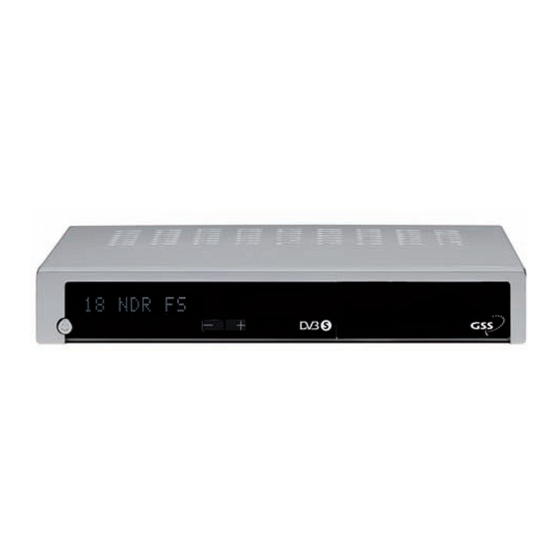
Page 8: Your Satellite Receiver In Overview
Your satellite receiver in overview Front view Stand-by button with operating indicator Display Channel selection buttons “ – ”/“ + ” Cover for the Common Interface slot View from behind SAT-IF input: Antenna socket for the satellite antenna SAT-IF loop-through output: Antenna socket for connecting an additional SAT receiver SCART socket (RECORDER):... -
Page 9: The Remote Control
The remote control 4.3.1 Inserting batteries in the remote control • Open the battery compartment (1) and remove the cover (2). • Insert batteries (2 x 1.5 V e.g. UM-3 or AA type). Observe the polarity marked in the battery compartment base. •... -
Page 10: Control Elements On The Remote Control
4.3.2 Control elements on the remote control Switches to stand-by, and from stand-by to the channel last selected. 0 … 9 Select channels. Switches the sound to mute and on again. TV/R Switches between the lists of favourites and PQRS WXYZ the TV and radio channel lists. -
Page 11: Connecting A Satellite Receiver
Connecting a satellite receiver Connecting the satellite antenna • Connect antenna cable of the satellite antenna to the con- nector of the satellite receiver (screw connection, F- connector). —> On the connector ( loop-through output), you can connect an additional satellite receiver. Conditions of reception do however depend on the settings (page 29) of the first satellite receiver. -
Page 12: Connecting A Hard Disc/Storage Device
Connecting a hard disc/ storage device • Connect the USB port of the satellite receiver to the USB port of the hard disc using a standard USB cable. —> You can also connect a PC or a USB stick to this socket. -
Page 13: Starting Up The Satellite Receiver
Starting up the satellite receiver Your satellite receiver has been set at the factory for operation on universal LNBs in Germany, immediately after it is switched on. After switching on the satellite receiver we recommend adapting it to your personal requirements. If you wish to operate the satellite receiver on a Unicable receiver system, you must set this as described in chapter 8.5, page 29, before adapting it to your personal requirements. -
Page 14: General Menu Information
General menu information – This satellite receiver features a comprehensive, user- Main Menu friendly menu system. The menus are displayed on the Settings List Manager television screen. Program Guide Personal Planner – The satellite receiver responds to many functions that you Parental Lock can select on the remote control with informative menus Common Interface... -
Page 15: Basic Functions
Basic functions Setting the volume You cannot adjust the volume in menu mode. Any changes to volume refer to the output level of the sound signals from the satellite receiver. ◀ ▶ • Use the buttons to set the individual volume. —>... -
Page 16: Selecting Channels From The Radio And Tv Channel Lists
This channel is encrypted. Reminder Recording • By pressing the (yellow) or the (green) button you scroll through the EPG data of the station. • Use the (red) button to transfer the selected show to the personal planner list as a recording. -
Page 17: Selecting Channels From The Channel List
Selecting channels from the channel list • Select the desired channel list by pressing the OK button. ▼ ▲ ◀ ▶ • Use to select a channel and press OK to open. —> To switch over the channel list use the TV/R button. —>... -
Page 18: Zapping Function
▼ ▲ • Select the channel using 0 … 9/OK or whose teletext pages you wish to view. • To display teletext: press TXT. —> After a few seconds, teletext page 100 appears on the screen. ▼ ▲ • Enter the three-digit number of the text page using 0 … 9 or using to scroll text pages up/down. -
Page 19: The "Settings" Menu
The “Settings“ menu This menu allows you to set your satellite receiver to local conditions and personal requirements. • Press the MENU button. Main Menu —> The “Main Menu” appears with the active line Settings List Manager “Settings”. Program Guide Personal Planner Parental Lock Common Interface... -
Page 20: Setting The Pop-Up Timeout
8.1.2 Setting the Pop-up timeout When you select a channel, channel information is displayed. This menu allows you to set the duration of the screen display. ▼ ▲ buttons to activate “Pop-up Timeout” and • Use the User Preferences press OK to confirm. Menu Language English ▼... -
Page 21: Selecting History Depth
8.1.5 Selecting history depth This menu allows you to decide between how many of the previously viewed channels you wish to switch back and forth (zapping function). ▼ ▲ • Use the buttons to activate the “History depth” line User Preferences and press OK to confirm. -
Page 22: Exiting The Menu Function, Switching Back To The Previous Menu, Saving Settings
8.1.8 Exiting the menu function, switching back to the previous menu, saving settings • To exit the menu function, press the “MENU” button. • To return to the previous menu, press the Z button or using ▼ ▲ buttons activate the “Exit” line and confirm using OK. -
Page 23: Sound/Picture Settings
▼ ▲ • Use the buttons to select the line “Number of Timeshift files“ and confirm using OK. • In the selection menu which appears, set the desired number of time shift files (” 1 ” or ”No limit”) and confirm using OK. - Page 24 • In the menu “Audio/Video Settings” select the line “AR HD” Audio/Video Settings ▼ ▲ using the buttons and confirm using OK. TV Resolution 1920 x 1080i TV SCART • In the selection menu which appears select screen format VCR SCART CVBS ▼...
- Page 25 —> For the settings “RGB” and “YUV” the television set must be prepared accordingly and if necessary a corresponding standard adapter be used. • Confirm the setting using OK. Adapting the picture format to the screen format on the television set This menu allows you to convert the picture provided by your satellite receiver to the screen format of your television set.
-
Page 26: Output Signal On The Scart Slot "Recorder
8.3.2 Output signal on the SCART slot ”RECORDER“ This menu allows you to set the type of output signal on the SCART slot “RECORDER”. • In the menu “Audio/Video Settings” select the line “VCR Audio/Video Settings ▼ ▲ SCART” using the buttons and confirm using OK. -
Page 27: Setting The Time And Date
Setting the time and date This menu allows you to set the following parameters for the time and date: System time Date Local time Time zone Daylight saving changeover Next to the menu line all the relevant, current settings can be viewed. The lettering in non-active lines is displayed in grey. -
Page 28: Setting The Date
8.4.2 Setting the date ▼ ▲ • In the menu “Time/Date” use the buttons to acti- Time / Date vate the line “Date” and confirm using OK. Automatic Time Update Date 15|. Aug. 2008 —> In the related setting display, a cursor appears next Local Time 09 : 25 Time zone... -
Page 29: Setting Daylight Saving Time
8.4.5 Setting daylight saving time This menu allows you to set whether the changeover to daylight savings is done manu- ally or automatically. ▼ ▲ • In the menu “Time/Date” use the buttons to activate Time / Date the line “Automatic daylight saving time” and confirm Automatic Time Update Date 15. -
Page 30: Selecting The Lnb Type
8.5.1 Selecting the LNB type This menu allows you to select the LNB type of your satellite reception system. Use the setting “Universal” for conventional LNBs (factory default). The setting “ Unicable LNB” is necessary when the satellite receiver is to be connected directly to a Unicable-LNB. -
Page 31: Selecting The Oscillator Frequencies
To delete satellites from the selection list: ▼ ▲ • In the selection menu, use the buttons to select the satellite to be deleted and delete by pressing the (red) button. 8.5.3 Selecting the oscillator frequencies These menus allow you to select the oscillator frequencies (LOF) of the LNB used. These are usually printed on the LNB or can be found in the respective documentation. -
Page 32: Setting Diseqc
8.5.5 Setting DiSEqC The satellite receiver can be operated on cascadable DiSEqC switches. In the menus “Primary DiSEqC” and “Primary DiSEqC Input” you can set the DiSEqC type and the input allocation for each DiSEqC switch. ▼ ▲ • In the menu “Antenna Settings” use to select the Antenna Settings line “Primary DiSEqC”... -
Page 33: Settings For Unicable-Lnb/Unicable Multi-Switch
▼ ▲ • In the selection menu, use to select the lower oscil- lator frequency of the LNB and confirm using OK. ▼ ▲ to select “LOF High Band” and confirm using • Use ▼ ▲ • In the selection menu, use to select the higher oscil- lator frequency of the LNB and confirm using OK. -
Page 34: Signal Quality And Signal Strength
• In the menu “Antenna Settings” activate the line “Channel ▼ ▲ ID” using and confirm using OK. ▼ ▲ • In the selection menu which appears use to select the desired or allocated IF channel and confirm using —> The IF channel which must be selected for the set frequency can be found in the documentation for the Unicable-LNB or Unicable multi-switch used. - Page 35 —> The menu “Satellite Search” appears with the active Satellite Search line “Scan mode”. Scan mode Complete Channels Next to the menu line all the relevant, current set- Satellite 19,2°E ASTRA 1F,G,H,KR,L tings can be viewed. • Confirm line “Scan mode” using OK. ▼...
-
Page 36: Manual Channel Search
8.6.2 Manual Channel Search If a channel is not located by the automatic channel search, you can look for it directly using the manual channel search. To do so, enter all the parameters of the channel you are looking for. The current transponder data can be found in the broadcasters’ teletext service, in an up-to-date satellite trade magazine or in the internet. - Page 37 8.6.2.4 Setting the symbol rate ▼ ▲ • Select the line “Symbol Rate” using the buttons and confirm using OK. —> In the related settings display, a cursor appears next to the symbol rate which has been set. • Use the (red) button to delete an existing entry by pressing repeatedly and use the 0 …...
-
Page 38: Factory Defaults
8.6.2.7 Channel selection ▼ ▲ • Use the to activate the line “Channels” and confirm using OK. ▼ ▲ • In the submenu which appears, use the buttons to activate “All” or “FTA”: “All”: Both encrypted and unencrypted channels are scanned. “FTA”: Only unencrypted channels are scanned. - Page 39 ▼ ▲ • In the menu “Settings” (“Einstellungen“) use the but- Factory Defaults tons to activate the line “Factory Defaults” (“Werksein- Factory Defaults Settings only stellungen“) and confirm using OK. Exit —> The menu “Factory Defaults” (“Werkseinstellungen“) appears with the active line “Factory Defaults” (“Werkseinstellungen“).
-
Page 40: Resetting User Preferences
8.7.2 Resetting user preferences This menu point allows you to reset settings implemented by the user back to the factory defaults. The channel lists are not affected. ▼ ▲ • In the menu “Factory Defaults” use the buttons to activate the line “Settings only” and confirm using OK. —>... - Page 41 For this type of software update, it is necessary to load the current software for the satellite receiver from the internet using a PC. This can be found in the internet on the website “http://www.gss.tv”. • Copy software from the PC to the USB stick.
-
Page 42: Editing The Channel Lists
—> The channel lists can also be edited using a PC via the USB interface. The soft- ware required to do this and the appropriate instructions can be found in the internet on the website “http://www.gss.tv”. • Press the MENU button. -
Page 43: Deleting Channels
▼ ▲ ◀ ▶ • Use the buttons to activate the channel in front of which the selected channel or channels should be inserted. (blue) button “Move Here” insert the • By pressing the marked channels. 9.1.2 Deleting channels • In the menu “Main TV List” or “Main Radio List” use the ▼... -
Page 44: Editing Favourite Lists
Editing favourite lists 9.2.1 Adding, renaming and removing favourite lists This menu allows you to add up to 5 new favourite lists, to rename and, if required, delete them. Do not delete the preprogrammed list “My Favourite”! To guarantee the full functionality of the satellite receiver, we recommend storing channels in the favourite list “My Favourite”... -
Page 45: Adding Channels To The Favourite List
Deleting favourite lists ▼ ▲ • Use the buttons to select the line to be deleted and press the (red) button. ◀ ▶ • In the menu which appears use the buttons to acti- vate “Yes” to confirm and “No” to cancel and press OK. —>... -
Page 46: Editing Channels In The Favourite List
9.2.3 Editing channels in the favourite list This menu allows you to shift, delete, lock/unlock and sort channels in the selected favourite list. (yellow) button “Toggle Right/Left” to change • Use the Main TV List My Favorite from the “Main TV List” or “Main Radio List” to the 1-2-3.tv 1-2-3.tv 2M Maroc... -
Page 47: Program Guide
Program Guide The Program Guide menu, also called Electronic Program Guide (EPG), offers infor- mation on channels currently set, such as channel position, title, start and end of the show, and a brief description as well as details on the encryption system. It addition- ally contains the current time, the current date and the date of the list selected. - Page 48 • By pressing and holding the OK button the event will be removed from the personal planner list. • Use the i button to display detailed information about the program. If a text banner appears in the window ▼ ▲ displayed, scroll the text using the buttons.
-
Page 49: Personal Planner
Personal Planner This menu allows you to preset switch-on and switch-off data, which your satellite receiver should allow for when automatically switching on for a program. You can also save program data in the personal planner, which you wish to be reminded of or which you wish to record using a storage device (e.g. - Page 50 —> “Reminder”: Before the start of the program a display appears on the screen in which you can confirm or cancel switching over to the event. —> “Record”: The planner event is being recorded (page 59). ▼ ▲ • Select the line “Favourite List” using the buttons and confirm using OK.
- Page 51 —> Alternatively, you can use the (red) button to delete the digits left of the cursor and use the 0 … 9 buttons to enter the digits of the date. ◀ ▶ The cursor can be controlled using the buttons. ▼...
-
Page 52: Changing A Planner Event
• To save the entries in the menu “New Planner Event” (green) “Save & Exit” button. press the • To cancel the menu “New Planner Event” press the (red) “Cancel” button. 11.2 Changing a planner event ▼ ▲ ◀ ▶ •... -
Page 53: Parental Control
Parental control This menu allows you to block access to the menus “Settings” and “List Manager” using a PIN code, as well as lock channels. (Default setting for the PIN code: ”1 1 1 1”, see chapter “Changing the PIN code”, page 55). -
Page 54: Locking Channels
12.2 Locking channels • Use the MENU button to display the menu “Main Menu”. ▼ ▲ buttons to activate the line “List Manager” • Use the and confirm using OK. • Activate line “Main TV List” or “Main Radio List” and con- firm using OK. -
Page 55: Changing The Pin Code
• Confirm line “Set Access Rights Level” using OK. ▲ • In the selection menu which appears use the button to select the line “Access All”. • Press the OK button. • Enter four-digit PIN code using 0 … 9. •... -
Page 56: Receiving Encrypted Satellite Channels
Receiving encrypted satellite channels This satellite receiver is equipped with two CI slots ( Common Interface). It allows you to connect a CA module for various encryption systems and broadcasting networks. Encrypted channels can only be decoded with a CA module suitable for the encryption system and the corresponding Smart card. -
Page 57: Reception Of Channels With Subprograms
13.1 Reception of channels with subprograms If the symbol at the left appears in the channel information, displayed when changing channels or pressing the i button, this indicates that subprograms are available. • Press the i button to display channel information. —>... -
Page 58: Reading Messages
Reading messages This menu allows you to display messages collected via the reception satellite. Such messages could e.g. inform you of software updates. • Press the MENU button. —> The “Main Menu” appears with the active line “Settings”. ▼ ▲ •... -
Page 59: Recording Programs
Recording programs 17.1 Preparations 17.1.1 Connecting a storage device A hard disc as well as a USB stick can be connected to the USB port. The storage devices must be formatted to FAT32. • Connect the storage device as per chapter 5.3, page 12. 17.1.2 Formatting storage devices In case the storage device to be used does not comply with the required data format, you can format this accordingly. -
Page 60: Time-Shift Recording
Ending the recording • To end the recording press the Stop button. • In the menu which appears “Stop Recording” using the ◀ ▶ buttons activate “Yes” to confirm and “No” to cancel and confirm using OK. Ending the recording automatically The recording data is filed in the menu “Personal Planner”. -
Page 61: Timer Recording
17.3 Timer recording 17.3.1 Automatic setting Data is transferred from the EPG for the automatic timer setting (chapter Electronic program guide, page 18). —> This description also applies to radio programs. • Press the EPG button. —> A list of the current program and the upcoming programs is displayed. -
Page 62: Playback Functions
Playback functions You have the following playback options: – “Time shift” (see chapter Time shift recording, page 60) – Playback of saved programs while another program is being recorded (Video/ Video library) – Interference-free freeze frame – Fast forward and rewind at 5 speeds with picture Playback of recordings from the “Video/Video library”... -
Page 63: Editing The Video Library
Editing the video library You can only edit the video library if recording and playback are not active. 19.1 Renaming recordings You can rename recordings e.g. if the name has been used twice or to change their titles. For this purpose the numbers 1 … 0 on the remote control are assigned to groups of letters. -
Page 64: Information
If a malfunction should nevertheless occur, please consult your specialist dealer or contact the point of sale where you purchased the device. Therefore always keep your sales receipt. Warranty claims cannot be made directly to GSS Grundig SAT Systems GmbH! - 64 - - 64 -... -
Page 65: Troubleshooting
20.3 Troubleshooting Please consult the following information first in the event of an fault. If you are unable to rectify the fault using the information given here, please contact your local dealer or service specialist. Never under any circumstances attempt to repair the satellite receiver yourself. -
Page 66: Index
Index Sound/picture settings ..23 Soundtrack....17,19 Accessories ....... 5 Large picture ....62 SPDIF ......12 Aspect ratio ....24,25 List of subprograms ..57 Start Guard Time ..... 22 Automatic setting ....61 LNB ......... 31 Storage device .... 12,59 Local time ...... - Page 67 - 67 -...
- Page 68 Alterations reserved. Technical data subject to change. © by GSS GmbH 19092008...
Need help?
Do you have a question about the DRS 550 HDMI and is the answer not in the manual?
Questions and answers