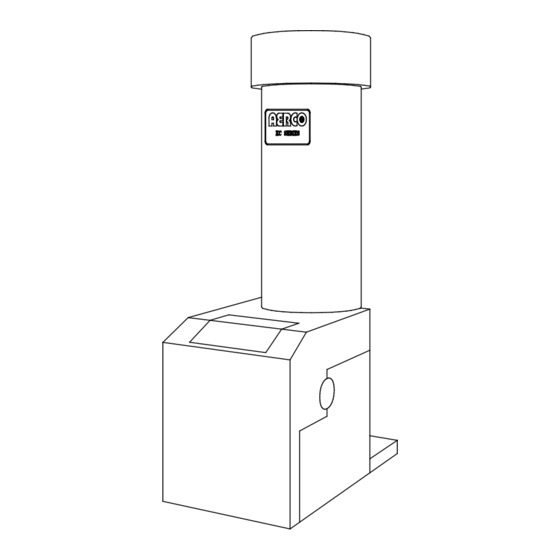
Aerco KC Series Installation, Operation & Maintenance Instructions Manual
Gas fired low nox boiler system
Hide thumbs
Also See for KC Series:
- User manual (118 pages) ,
- Operation and maintenance manual (107 pages) ,
- Installation, operation & maintenance instructions manual (84 pages)
Table of Contents
Advertisement
Quick Links
Instruction
GF-109LN
No.
AERCO INTERNATIONAL, Inc., Northvale, New Jersey, 07647 USA
Installation, Operation
& Maintenance Instructions
KC Series
Gas Fired
Low NOx
Boiler System
Natural Gas and Propane Fired,
Condensing and Forced Draft Hot Water Boiler
970,000 BTU/HR Input (Natural Gas)
1,000,000 BTU/HR Input (Propane)
Applicable to Serial Numbers G-10-1324 and above
Patent No. 4,852,524
REVISED JUNE 24, 2010
Advertisement
Table of Contents
Troubleshooting

Related Manuals for Aerco KC Series


Summary of Contents for Aerco KC Series
-
Page 1: Maintenance Instructions
Instruction GF-109LN AERCO INTERNATIONAL, Inc., Northvale, New Jersey, 07647 USA Installation, Operation & Maintenance Instructions KC Series Gas Fired Low NOx Boiler System Natural Gas and Propane Fired, Condensing and Forced Draft Hot Water Boiler 970,000 BTU/HR Input (Natural Gas) - Page 2 The information contained in this operation and maintenance manual is subject to change without notice from AERCO International, Inc. AERCO makes no warranty of any kind with respect to this material, including but not limited to implied warranties of merchantability and fitness for a particular application.
-
Page 3: Table Of Contents
CONTENTS GF-109LN - THE AERCO KC1000 GAS FIRED LOW NOx BOILER Operating & Maintenance Instructions FOREWARD SECTION 1 – SAFETY PRECAUTIONS Para. Subject Page Para. Subject Page Warnings & Cautions Prolonged Shutdown Emergency Shutdown SECTION 2 – INSTALLATION PROCEDURES Para. - Page 4 CONTENTS SECTION 6 – SAFETY DEVICE TESTING PROCEDURES Para. Subject Page Para. Subject Page Testing of Safety Devices Air Flow Fault Test Low Gas Pressure Fault Test SSOV Proof of Closure Switch High Gas Pressure Fault Test 6.10 Purge Switch Open During Low Water Level Fault Test Purge Water Temperature Fault Test...
-
Page 5: Section 5 – Mode Of Operation
The AERCO KC Low NOx Boiler is a true industry advance that meets the needs of today's energy and environmental concerns. Designed for application in any closed loop hydronic system, the load tracking capability relates energy input directly to fluctuating system loads through a 11:1 modulating turndown ratio. -
Page 7: Warnings & Cautions
SEALED TO PREVENT LEAKAGE addition to all the requirements included in this OF COMBUSTION PRODUCTS INTO AERCO Instruction Manual, the installation of LIVING SPACES. units MUST conform with local building codes, or, in the absence of local codes, ANSI Z223.1 WARNING! (National Fuel Gas Code Publication No. -
Page 8: Emergency Shutdown
If there is an emergency, turn off the electrical power supply to the AERCO boiler and close the manual gas valve located upstream the unit. The installer must identify the emergency shut-off device. -
Page 9: Safety Precautions
SAFETY PRECAUTIONS Extracted Information From 248 CMR 5.08 (2) – Continued a. In the event that the side wall horizontally vented gas fueled equipment is installed in a crawl space or an attic, the hard wired carbon monoxide detector with alarm and battery back-up may be installed on the next adjacent floor level. -
Page 11: Receiving The Unit
INSTALLATION SECTION 2 - INSTALLATION PROCEDURES 2.1. RECEIVING THE UNIT unit and are packed separately within the unit’s packing container Each KC1000 Boiler is shipped as a single • crated unit. The crated shipping weight of the Spare Spark Ignitor •... -
Page 12: Installation
Figure 2.1. Combination Mode units in the proper physical The minimum clearance dimensions, required by location. AERCO, are listed below. Local building codes may require additional clearance and take precedence Minimum clearances required: Sides 24"... - Page 13 INSTALLATION run to a suitable discharge location. The drain valve provided should be installed on the right hand side of the unit towards the bottom of the shell. The valve should be pointed in the down position, (see Fig. 2.4). 2.3.4 TEMPERATURE/PRESSURE INDICATOR The unit is supplied with one of two styles of...
-
Page 14: Gas Supply Piping
Condensate Drain System Location 2.4. GAS SUPPLY PIPING 2.3.5 CONDENSATE PIPING The AERCO Gas Fired Equipment Gas Compo- The KC Boiler is designed to condense. There- nents and Supply Design Guide (GF-1030) must fore, the installation site must include suitable be consulted before any gas piping is designed provisions for condensate drainage or collection. - Page 15 INSTALLATION The location of the 1-1/4" inlet gas connection is Natural Gas: on the right side of the unit as shown in The maximum static inlet pressure to the unit Figure 2.7. must be no more than 14” W.C. Minimum gas pressure is 8.8”...
-
Page 16: Electrical Supply
KC1000 unit. A means for disconnecting AC 2.5 ELECTRICAL SUPPLY power from the unit (such as a service switch) The AERCO Gas Fired Equipment Electrical must be installed near the unit for normal opera- Power Wiring Guide, (GF-1060), must be tion and maintenance. - Page 17 (see paragraphs 2.7.9 and 2.7.10). 2.6.2 INDOOR/OUTDOOR RESET MODE This mode of operation increases supply water temperature as outdoor temperatures decrease. An outside air temperature sensor (AERCO PN 122790) is required. The sensor MUST BE wired to the I/O Box wiring terminals (see Fig.
- Page 18 Polarity must be maintained and the shield devices to be connected to the I/O Box terminals must be connected only at the AERCO BMS. shown in Figure 2.11 are described in the The boiler end of the shield must be left floating.
- Page 19 The exhaust sensor should be a All of the supplied signals must be floating normally open type switch (such as AERCO Part (ungrounded) signals. Connections between the No. 123463) that closes (trips) at 500 source and the Boiler’s I/O Box must be made...
- Page 20 Suitable, U/L approved, positive pressure, allow the unit to fire. water-tight vent materials specified in AERCO’s GF-1050, must be used for safety and 2.7.9.1 REMOTE INTERLOCK IN UL certification. Because the unit is capable of The remote interlock circuit (REMOTE INTL’K...
- Page 21 FILTERING DURING CONSTRUCTION Damper for operation with Direct Vent/ Sealed Combustion. The Cold Air Damper When the AERCO KC1000 Boiler is used to is also required when the unit is installed provide heat temporarily during ongoing building in an area where the combustion air construction, drywall dust, sawdust and similar supply temperature can drop below 55°F.
-
Page 23: Introduction
CONTROL PANEL OPERATING PROCEDURES SECTION 3 - CONTROL PANEL OPERATING PROCEDURES 3.1. INTRODUCTION WARNING: The information in this Section provides a guide DO NOT ATTEMPT TO DRY FIRE THE to the operation of the KC1000 Boiler using the BOILER. STARTING THE UNIT WITHOUT Control Panel mounted on the front of the unit. -
Page 24: Section 8 – Troubleshooting
CONTROL PANEL OPERATING PROCEDURES Table 3-1. Operating Controls, Indicators and Displays ITEM CONTROL, INDICATOR OR DISPLAY FUNCTION LED Status Indicators Four Status LEDs indicate the current operating status as follows: Lights when RS-232 communication is occurring COMM Lights when the unit is being controlled using the front panel MANUAL keypad. -
Page 25: Control Panel Menus
CONTROL PANEL OPERATING PROCEDURES Table 3-1. Operating Controls, Indicators and Displays - Continued ITEM CONTROL, INDICATOR OR DISPLAY FUNCTION ▲ (Up) Arrow When in one of the main menu categories (Figure 3-2), pressing this key will select the displayed menu category. If (Cont.) the CHANGE key was pressed and the menu item is flashing, pressing the ▲... -
Page 26: Operating Menu
CONTROL PANEL OPERATING PROCEDURES 3. Continue pressing the MENU key until the desired menu is displayed. NOTE: 4. With the desired menu displayed, press the following paragraphs provide brief ▲ or ▼ arrow key. The first option in the descriptions of the options contained in each selected menu will be displayed. - Page 27 CONTROL PANEL OPERATING PROCEDURES NOTE The Outdoor Temp display item shown with an asterisk in Table 3-2 will not be displayed unless the Outdoor Sensor function has been enabled in the Configuration Menu (Table 3-4). Table 3-2. Operating Menu Available Choices or Limits Menu Item Display Minimum Maximum...
- Page 28 CONTROL PANEL OPERATING PROCEDURES 3.6. CONFIGURATION MENU NOTE: The Configuration Menu shown in Table 3-4 The Configuration Menu settings shown in permits adjustment of the Internal Setpoint Table 3-4 are Factory-Set in accordance (Setpt) temperature regardless of whether the valid password has been entered. Setpt is with the requirements specified for each required for operation in the Constant Setpoint...
- Page 29 CONTROL PANEL OPERATING PROCEDURES Table 3-4. Configuration Menu - Continued Available Choices or Limits Menu Item Display Minimum Maximum Default Setpt Lo Limit 40°F Setpt Hi Limit 60°F Setpt Hi Limit Setpt Lo Limit 220°F 200°F Temp Hi Limit 40°F 240°F 210°F Max Valve Position...
- Page 30 CONTROL PANEL OPERATING PROCEDURES 3.8. START SEQUENCE 3. With all required safety switches closed, a When the Control Box ON/OFF switch is set to purge cycle will be initiated and the following the ON position, it checks all pre-purge safety events will occur: switches to ensure they are closed.
- Page 31 CONTROL PANEL OPERATING PROCEDURES DIAL STEPPER (DETAIL “A”) MOTOR AIR/FUEL VALVE BLOWER PROOF SWITCH TO FRAME HARNESS Figure 3-5. Blower Proof Switch DETAIL "A" 5. Upon completion of the purge cycle, the Control Box initiates an ignition cycle and the following events occur: Figure 3-6.
- Page 32 CONTROL PANEL OPERATING PROCEDURES Table 3-6. Relationship Between Air/Fuel Valve Position and Energy Input of a Unit Running on Natural Gas Air/Fuel Valve Position Energy Input Boiler Energy Input (% Open) (BTU/Hr) (% of Full Capacity) 50,000 (Stop Level) 89,000 191,000 311.000 460,000...
-
Page 33: Initial Startup Requirements
5. 7/16" open end wrench and small adjustable the initial unit start-up. wrenches. An AERCO Gas Fired Startup Sheet included 6. Tube of silicone adhesive with each KC-1000 must be completed for each unit for warranty validation and a copy must be 4.2.2 INSTALLING THE SUPPLY GAS... -
Page 34: Natural Gas Combustion
INITIAL START-UP IMPORTANT The unit is shipped from the factory set up for either natural gas or propane, as specified by the Style No. on the Sales Order. If desired, the unit can be easily switched from one fuel type to the other using regulator... - Page 35 100% valve * NOx readings corrected to 3% oxygen. position, it will be necessary to stop calibration and contact the local AERCO representative in 13. If the measured oxygen level is not within your area. Running the unit on insufficient gas the range listed in Table 1, remove the pressure will void the warranty.
- Page 36 INITIAL START-UP 15. Replace the regulator cap and cap gasket 22. If the optional Cold Air Damper (P/N 99026) and wait for the analyzer reading to settle. is installed, compare the measured oxygen level with the levels in Table 3. If the Cold Air 16.
- Page 37 INITIAL START-UP 30. Record all readings on the AERCO start-up sheet provided with each unit. Proceed to paragraph when natural combustion calibration procedures completed. IMPORTANT The unit is shipped from the factory set up for either natural gas or propane, as specified by the Style No.
- Page 38 100°F 5.7% <100 ppm and contact the local AERCO representative in your area. Running the unit on insufficient gas * NOx readings corrected to 3% oxygen. pressure will void the warranty 12. If the measured oxygen level, CO and NOx emissions are within the ranges shown in Table 4, no adjustment is necessary.
- Page 39 CO and NOx readings do not * NOx readings corrected to 3% oxygen. exceed the values shown. No adjustment should be necessary. Contact AERCO if the Table 6A oxygen, CO or NOx levels are not within the Combustion Oxygen Levels for a 100% specified ranges.
- Page 40 Tables 4, 5 and 6 (or 6A). DO NOT adjust the upper switch which has been factory preset. Adjust the lower switch 28. Record all readings on the AERCO start-up between 20°F to 40°F higher than the sheet provided with each unit. Proceed to maximum header temperature the unit may paragraph 4.5 when all propane combustion...
- Page 41 INITIAL START-UP Figure 4.5 Over Temperature Limit Switch Location...
- Page 43 MODE OF OPERATION SECTION 5 - MODE OF OPERATION is expected. The sensor must be shielded from 5.1 INTRODUCTION the sun's direct rays, as well as from direct following paragraphs provide detailed impingement by the elements. If a cover or descriptions of the six different modes of shield is used, it must allow free air circulation.
- Page 44 AERCO representative be NOTE: contacted. For a complete listing of factory defaults and descriptions of temperature related If a voltage, rather than current signal is used to functions, see Appendices A and E.
- Page 45 4-20 mA/1-5 Vdc preset with settings that work well in most applications. It is suggested that an AERCO 0-20 mA/0-5 Vdc representative be contacted, prior to changing any temperature related function settings. For...
- Page 46 (BMS) MODE 5.6.2 BMS SETUP AND STARTUP NOTE This mode of operation is factory preset and the BMS Model 168 can utilize either pulse AERCO BMS controls the firing rate. There are width modulation (PWM) RS485 no setup instructions for each individual unit.
-
Page 47: Combination Control System
When the boiler is switched to BMS mode, the mode of operation. When the combo units switch AERCO BMS controls the firing rate. There are over to space heating, their mode of operation no setup requirements to the boiler(s) in this changes to the BMS mode. -
Page 49: Section 6 – Safety Device Testing Procedures
SAFETY DEVICE TESTING SECTION 6-SAFETY DEVICE TESTING PROCEDURES 6. Open the gas supply to the unit and press 6.1 TESTING OF SAFETY DEVICES the CLEAR button on the Control Box. Periodic testing of all controls and safety devices is required to insure that they are operating as 7. -
Page 50: Safety Device Testing
SAFETY DEVICE TESTING low water cutoff. Press the CLEAR button to reset the FAULT LED and clear the error message. 11. Set the ON/OFF switch to the ON position. The unit is now ready for operation. 6.5 WATER TEMPERATURE FAULT TEST 1. - Page 51 SAFETY DEVICE TESTING 6.6 INTERLOCK TESTS The unit is equipped with two interlock circuits 6.7 FLAME FAULT TEST called the Remote Interlock and the Delayed 1. Place the ON/OFF switch in the OFF Interlock. Terminal connections for these circuits position. are located in the I/O Box and are labeled REMOTE INTL’K IN and DELAYED INTL’K IN.
- Page 52 SAFETY DEVICE TESTING 6.8 AIR FLOW FAULT TEST 6.9 SSOV PROOF OF CLOSURE SWITCH 1. Start the unit in manual mode and set the fire rate between 25% and 30%. 1. Set the unit’s ON/OFF switch to the OFF position. Place the unit in manual mode and 2.
- Page 53 SAFETY DEVICE TESTING 6.10 PURGE SWITCH OPEN DURING 6.11 IGNITION SWITCH OPEN DURING PURGE IGNITION 1. Set the unit’s ON/OFF switch to the OFF 1. Set the unit’s ON/OFF switch to the OFF position. Place the unit in manual mode and position.
- Page 54 SAFETY DEVICE TESTING 6.12 SAFETY PRESSURE RELIEF VALVE TEST Test the unit’s Safety Pressure Relief Valve in accordance with ASME Boiler and Pressure Vessel Code, Section VI.
- Page 55 MAINTENANCE SECTION 7 - MAINTENANCE 1. Set the ON/OFF switch on the control panel 7.1 MAINTENANCE SCHEDULE to the OFF position and disconnect AC The unit requires regular routine maintenance to power from the unit. keep up efficiency and reliability. For best operation and life of the unit, the routine maintenance procedures listed in Table 1 should 2.
- Page 56 MAINTENANCE chloride and sulfur levels that vary significantly 7.3 FLAME DETECTOR from application to application. The flame detector assembly (124837) is located in the body of the burner (Figure 7.1). The flame The following replacement parts will be required detector may be HOT. Allow the unit to cool for reassembly after inspection: sufficiently before removing the flame detector.
- Page 57 MAINTENANCE 7. Loosen the 1/4” NPT union on the low NOx staged ignition assembly (Figure 7.3). 8. Disconnect the staged ignition assembly 1/8” elbow from the 3” long NPT nipple at the bottom of the burner shell. Figure 7.4 Exhaust Sensor Connector Location 16.
- Page 58 MAINTENANCE 19. Using 11/16” wrench, loosen compression fittings on the feedback tube NOTE: between the air/fuel valve and the differential The combustion chamber liner should be pressure regulator. Remove the feedback installed prior to reinstalling the exhaust tube (Figure 7.7). manifold 20.
- Page 59 MAINTENANCE 2-1 /2 INCH PLUG Figure 7.10 Heat Exchanger 2 ½ Inch Inspection Plug Figure 7.9 Location Heat Exchanger Supply and Return Locations 7.8 Condensate Drain Assembly KC Boilers contain a condensate drain cup (Figure 2.6) which should be inspected and cleaned annually to ensure proper operation.
-
Page 61: Section 9 – Rs232 Communication
Refer to Section 9 of this manual for detailed RS232 6. If the fault cannot be corrected using the communication set-up and procedures. information provided in the Troubleshooting Tables, please contact your local AERCO Representative. -
Page 62: Troubleshooting
TROUBLESHOOTING TABLE 8-1. BOILER TROUBLESHOOTING FAULT INDICATION PROBABLE CAUSES CORRECTIVE ACTION AIRFLOW FAULT 1. Blower stopped running due to thermal 1. Check combustion blower for signs of excessive heat or high DURING IGNITION or current overload current drain that may trip thermal or current overload devices. 2. - Page 63 TROUBLESHOOTING TABLE 8-1. BOILER TROUBLESHOOTING – Continued FAULT INDICATION PROBABLE CAUSES CORRECTIVE ACTION DELAYED 1. Delayed Interlock Jumper not 1. Check for a jumper properly installed across the delayed INTERLOCK OPEN installed or removed. interlock terminals in the I/O box. 2.
- Page 64 TROUBLESHOOTING TABLE 8-1. BOILER TROUBLESHOOTING – Continued FAULT INDICATION PROBABLE CAUSES CORRECTIVE ACTION FLAME LOSS 1. Worn Flame Detector or cracked 1. Remove and inspect the Flame Detector for signs of wear or DURING RUN ceramic. cracked ceramic. Replace if necessary. 2.
- Page 65 TROUBLESHOOTING TABLE 8-1. BOILER TROUBLESHOOTING – Continued FAULT INDICATION PROBABLE CAUSES CORRECTIVE ACTION HIGH WATER TEMP 1. Faulty Water temperature switch. 1. Test the temperature switch to insure it trips at its actual water SWITCH OPEN temperature setting. 2. Incorrect PID settings. 2.
- Page 66 TROUBLESHOOTING TABLE 8-1. BOILER TROUBLESHOOTING – Continued FAULT INDICATION PROBABLE CAUSES CORRECTIVE ACTION IGN SWTCH CLOSED 1. Air/Fuel Valve not rotating 1. Start the unit. The Air/Fuel Valve should rotate to the purge DURING PURGE (open) position. If the valve does not rotate at all or does not rotate fully open, check the Air/Fuel Valve calibration.
- Page 67 TROUBLESHOOTING TABLE 8-1. BOILER TROUBLESHOOTING – Continued FAULT INDICATION PROBABLE CAUSES CORRECTIVE ACTION 1. Check hot and neutral in AC Power Box to ensure they are not LINE VOLTAGE 1. Line and Neutral switched in AC reversed OUT OF PHASE Power Box.
- Page 68 TROUBLESHOOTING TABLE 8-1. BOILER TROUBLESHOOTING – Continued FAULT INDICATION PROBABLE CAUSES CORRECTIVE ACTION continued 5. Defective IGST Board 5. Check “Heartbeat” LED DS1 and verify it is blinking ON & OFF every second. If not, replace IGST Board. PRG SWTCH OPEN 1.
- Page 69 TROUBLESHOOTING TABLE 8-1. BOILER TROUBLESHOOTING – Continued FAULT INDICATION PROBABLE CAUSES CORRECTIVE ACTION (continued) 2. Defective Flame Detecto 2. Replace Flame Detector. SSOV FAULT See SSOV SWITCH OPEN DURING PURGE SSOV FAULT 1. SSOV switch closed for 15 seconds 1. Replace or adjust microswitch in SSOV actuator. If fault DURING RUN during run.
- Page 71 Enter. the Operating, Setup, Configuration and 4. “Welcome to Aerco” will appear in the laptop Tuning Menus. (The Calibration and or “dumb terminal” display with a listing of Diagnostic Menus should only be used the following available entry choices: by Factory-Trained service personnel).
- Page 72 RS232 COMMUNICATION (c) Menu changes will be stored in non- within the C-More Control Panel. Events such volatile memory. as power-up, ignition and turn-off are time stamped. Data logged while the unit is running 9. To redisplay the menu and view the option are run-length encoded.
- Page 73 RS232 COMMUNICATION Table 9-1. Sample Fault Log Display Fault Message Cycle Date Time Direct Drive Signal Fault 1/10/02 8:42am Low Gas Pressure 7/04/01 5:29pm Loss of Power 1/01/01 11:50am Table 9-2. Sample Operation Time Log Display Status Fire Rate Flame Run Length Date Time...
- Page 75 APPENDIX A BOILER MENU ITEM DESCRIPTIONS MENU LEVEL & OPTION DESCRIPTION OPERATING MENU Active Setpoint This is the setpoint temperature to which the control is operating when operating in the Constant Setpoint, Remote Setpoint or Outdoor Reset Mode. When in the Constant Setpoint Mode, this value is equal to the Internal Setpoint setting in the Configuration Menu.
- Page 76 APPENDIX A BOILER MENU ITEM DESCRIPTIONS - Continued MENU LEVEL & OPTION DESCRIPTION SETUP MENU Password Allows password to be entered. Once the valid password (159) is entered, options in the Setup, Configuration and Tuning Menus can be modified. Language English Only Time Displays time from 12:00am to 11:59pm.
- Page 77 APPENDIX A BOILER MENU ITEM DESCRIPTIONS - Continued MENU LEVEL & OPTION DESCRIPTION Reset Ratio Permits setting of Reset Ratio when operating boiler in the Outdoor Reset Mode. Reset Ratio is adjustable from 0.1 to 9.9. Default is 1.2. Outdoor Sensor Allows outdoor sensor function to be enabled or disabled.
- Page 78 APPENDIX A BOILER MENU ITEM DESCRIPTIONS - Continued MENU LEVEL & OPTION DESCRIPTION Setpt Limiting Allows Setpoint Limiting to be enabled or disabled. Default is disabled. Setpt Limit Band If Setpoint Limiting is enabled, this menu item allows the Setpt Limit Band to be set from 0°F to 10°F. Default is 5°F.
- Page 79 APPENDIX B STARTUP, STATUS AND FAULT MESSAGES STARTUP AND STATUS MESSAGES MESSAGE DESCRIPTION DISABLED Displayed if ON/OFF switch is set to OFF. The display also HH:MM pm MM/DD/YY shows the time and date that the unit was disabled. STANDBY Displayed when ON/OFF switch is in the ON position, but there is no demand for heat.
- Page 80 APPENDIX B FAULT MESSAGES FAULT MESSAGE FAULT DESCRIPTION HIGH WATER TEMP The High Water Temperature Limit Switch is open. SWITCH OPEN LOW WATER The Water Level Control board is indicating low water level. LEVEL LOW GAS The Low Gas Pressure Limit Switch is open. PRESSURE HIGH GAS The High Gas Pressure Limit Switch is open.
- Page 81 APPENDIX B FAULT MESSAGES - Continued FAULT MESSAGE FAULT DESCRIPTION RESIDUAL The Flame signal was seen for more than 60 seconds during FLAME standby. HEAT DEMAND The Heat Demand Relays on the Ignition board failed to FAILURE activate when commanded. A communication fault has occurred between the PMC board IGN BOARD COMM FAULT...
- Page 83 APPENDIX C Temperature Sensor Resistance Chart (Balco)
- Page 85 APPENDIX D INDOOR/OUTDOOR RESET RATIO CHARTS Header Temperature for a Building Reference Temperature of 50F RESET RATIO Temp -10F -15F -20F Header Temperature for a Building Reference Temperatrure of 60F RESET RATIO Temp -10F -15F -20F...
- Page 86 APPENDIX D Header Temperature for a Building Reference Temperature of 65F RESET RATIO Temp Header Temperature for a Building Reference Temperature of 70F RESET RATIO Temp -10F -15F -20F...
- Page 87 APPENDIX D Header Temperature for a Building Reference Temperature of 75F RESET RATIO Temp -10F -15F Header Temperature for a Building Reference Temperature of 80F RESET RATIO Temp -10F...
- Page 88 APPENDIX D Header Temperature for a Building Reference Temperature of 90F RESET RATIO Temp...
- Page 89 APPENDIX E BOILER DEFAULT SETTINGS MENU & OPTION FACTORY DEFAULT Setup Menu Password Language English Unit of Temp Fahrenheit Comm Address Baud Rate 9600 Configuration Menu Internal Setpt 130°F Unit Type KC Boiler LN Unit Size 1.0 MBTU Fuel Type Natural Gas Boiler Mode Constant Setpoint...
- Page 90 APPENDIX E BOILER DEFAULT SETTINGS - Continued MENU & OPTION FACTORY DEFAULT Configuration Menu --Continued Network Timeout 30 seconds Hi DB Setpt En Demand Offset Deadband High Deadband Low Tuning Menu Prop Band 70°F Integral Gain 1.00 Derivative Time 0.0 min...
- Page 91 APPENDIX F...
- Page 92 APPENDIX F...
- Page 93 APPENDIX F...
- Page 94 124867 STAGED IGNITION ASSEMBLY 124870 SOLENOID VALVE HARNESS OTHER PARTS ITEM PART NO. DESCRIPTION BURNER & AIR/FUEL VALVE O-RING GP-122406 AERCO INTERNATIONAL, INC. NORTHVALE, NJ 07647 LOW NOX KC1000 WATER BOILER PARTS LIST 022505 PL-A-145 DWN.BY DATE SCALE (SH. 1 OF 2) APPD.
- Page 95 APPENDIX F CPLG. W/PLUG SIGHT PORT AERCO INTERNATIONAL, INC. NORTHVALE, NJ 07647 LOW NOX KC1000 WATER BOILER PARTS LIST DWN.BY DATE 022505 PL-A-145 SCALE (SH. 2 OF 2) APPD. DATE...
- Page 96 APPENDIX F...
- Page 97 APPENDIX F DO NOT CUT WIRES ITEM NO. QTY. PART NO. DESCRIPTION 124866 SOLENOID VALVE, 1/4" NPT 122712 1/2" NPT, FLEX, GAS HOSE, 12" LONG 123314 ELBOW, 1/4" NPT 9-43 REDUCER BUSHING, 1/2" TO 1/4" NPT 124933 UNION, 1/4" NPT 124934 1/4"...
- Page 99 APPENDIX G...
- Page 100 APPENDIX G...
- Page 101 APPENDIX G...
- Page 103 APPENDIX H...
- Page 104 APPENDIX H...
- Page 105 APPENDIX I KC1000 CONTROL PANEL EXPLODED VIEW...
- Page 106 APPENDIX I KC1000 CONTROL PANEL REAR VIEW...
- Page 107 APPENDIX J KC1000 LOW NOx DUAL-FUEL SWITCH-OVER INSTRUCTIONS The KC1000 Low NOx Boiler is shipped from the factory configured for either natural gas or propane operation, as specified on the Sales Order. However, if required, the unit’s operating configuration can be easily switched from natural gas to propane (or vice-versa) by performing a simple change to the spring contained in the unit’s differential regulator.
- Page 109 APPENDIX K RECOMMENDED SPARE PARTS LISTS NOTE Refer to the Parts List llustrations in Appendix F for the locations of the recommended and optional spare parts listed in the following Tables. Table K-1. Recommended Emergency Spare Parts DESCRIPTION PART NUMBER 120 VAC Single-Phase Blower 124935 Siemens SSOV Actuator - Used on:...
-
Page 111: Warranties
AERCO not later than 14 days after the event giving rise to such claim. Any claims relating to this product shall be limited to the sale price of the product at the time of sale. The sale of the product is specifically conditioned upon acceptance of these terms. - Page 112 AERCO shall accept no responsibility if such item has been improperly installed, operated, or maintained or if the buyer has permitted any unauthorized modification, adjustment, and/or repairs to the item. The use of replacement parts not manufactured or sold by AERCO will void any warranty, express or limited.
Need help?
Do you have a question about the KC Series and is the answer not in the manual?
Questions and answers