Table of Contents
Advertisement
Quick Links
Advertisement
Table of Contents

Related Manuals for VMI Artesia AP-100


Summary of Contents for VMI Artesia AP-100
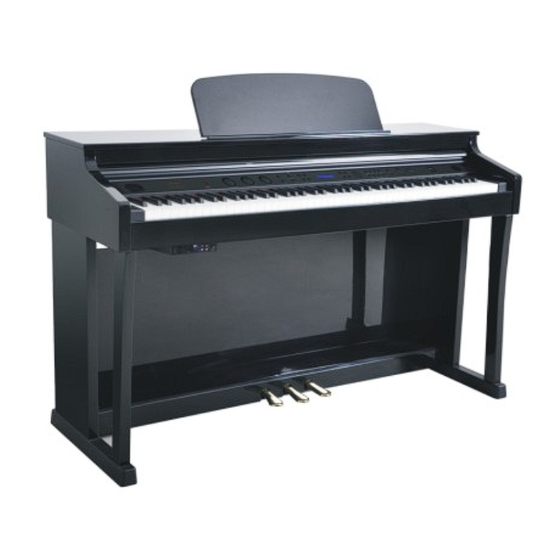
- Page 1 AP-100 Owner s Manual irgin usical nstruments...
-
Page 3: Safety Precautions
Precaution Thank you for purchasing this digital instrument. For correct use, please read the manual carefully and keep it for future reference. please read the manual carefully and keep it for future reference. Safety Precautions CAUTION RISK OF ELECTRIC SHOCK DO NOT OPEN The lightning flash with arrowhead symbol within an equilateral triangle is intended to alert the user to the presence of uninsulated “dangerous voltage”... - Page 4 Thank you for choosing the Digital Piano Your digital piano is a high quality digital piano featuring an 88 note hammer action, touch sensitive keyboard and the most advanced PCM tone generation technology that ,combined, will provide you with a rich performing and playing experience. You can also record your own performances to play along to.
-
Page 5: Table Of Contents
Contents 16. Master Tune PANEL CONTROL … … … … … … … … … 2 17. Loadmem THE CONNECTOR BOX … … … … … … 3 18. Savemem 1. Headphones … … … … … … … … … … 3 19. -
Page 6: Panel Control
Panel Control... -
Page 7: The Connector Box
THE CONNECT piano features connection which allows connect external audio equipment, computer, other MIDI equipment headphones. The following describes each option in more detail. 1.Headphones Two sets of standard stereo headphones can be plugged in here for private practice or late-night playing. -
Page 8: Usb Midi/Usb Audio
4. USB-MIDI/USB AUDIO This product allows the transfer of MIDI information over USB to a computer. Because your piano is USB Class Compliant, there is no need to install a driver to enable it to work with your computer. Simply just plug it in and the OS will do the rest. The piano will work with all standard MIDI based computer software. -
Page 9: Panel Controls
PANEL CONTROLS DEMO METRONOME REVERB LAYER FUNCTION + / YES POWER /STANDBY DUET TEMPO EFFECTS SPLIT ENTER - / NO VOLUME BASS TREBLE 1. Power/Standby Turn the power on by pressing the [POWER/STANDBY] switch, the panel LCD display will light. POWER/ STANDBY Auto Standby... -
Page 10: Lcd Display
a.Use [+/YES] / [-/NO]Buttons: Press [DEMO] button, Use [+/YES] / [-/NO] buttons to select the song you want to play. The [DEMO] and voice buttons will flash . + / YES DEMO - / NO b.Voice Select Button: Press the [DEMO] button, then press the desired Voice Select button. -
Page 11: Voice & Function
VOICE & FUNCTION 1. Voice Selecting A Voice Your instrument has 14 built-in quick select voices, which include several pianos as well as other instruments. These digitally-sampled musical instrument sounds may be selected one at a time. GRAND PIANO E.PIANO 1 VIBES ROCK ORGAN BRIGHT PIANO... -
Page 12: Layer Mode
Save User Voice In user mode, press the appropriate voice select button again to save user voice. Press [VARIATION/USER] button again to exit. 2. Layer Mode In Layer mode two voices may be played simultaneously, each at selected volumes. To enter Layer mode: Press [LAYER] button and the indicator is flashing, then press the voice button or use [+ / YES] / [- / NO] button... - Page 13 3. Split Mode Split Mode allows the keyboard divided into two sections that different voices may be played with the left and right hands. The volume may be independently adjusted for each voice, the Split Point (the highest note played with the left hand) may be adjusted and the Split Voice may be changed as desired.
-
Page 14: Duet
Change the Main (right hand) voice When the Split indicator is lit, then press the voice select button to select the Main voice. GRAND PIANO E.PIANO 1 VIBES ROCK ORGAN BRIGHT PIANO E.PIANO 2 FM EP CHURCH ORGAN HARPSICHORD STRINGS UPRIGHT BASS VARIATION N.GUITAR... -
Page 15: Effects
This will be very helpful when the instrument is used by two players at the same time and they will be able to play the same piano sound in the same octave. Press [ DUET ] button again to exit the DUET mode. 5. -
Page 16: Tempo
7. Metronome Metronome is a convenient feature for practice, and it can also provide a solid rhythmic guide when recording. Press [METRONOME] button can turn off or turn on the Metronome effect. When Metronome is turned on, hold [METRONOME] button for 2 seconds, use [+ / YES] / [- / NO] button or [DATA WHEEL] knob to select Metronome volume (00-127) . -
Page 17: Function
FUNCTION Press [FUNCTION] button to enter the function menu and use [+/YES] [-/NO] buttons or [DATA WHEEL] knob to select the function. Press [ENTER] button to confirm. Use [+/YES] [-/NO] buttons or [DATA WHEEL] knob to set the parameter. The option and the parameters are as the follows: 1. -
Page 18: Reverb Level
FUNCTION Then use [+/YES] / [-/NO] or [DATA WHEEL] knob to set the parameter (Default: CHORUS3). The LCD will indicate these parameters as shown below: C.TYPE : CHORUS1 C.TYPE : CHORUS2 C.TYPE : CHORUS3 C.TYPE : CHORUS4 C.TYPE:FEEDBACK C.TYPE:FLANGER C.TYPE:SHTDELAY C.TYPE :... -
Page 19: Metro Type
FUNCTION Then use [+/YES] / [-/NO] button or [DATA WHEEL] knob to adjust the CHORUS level. Range: 00-127 (Default: 50). Press [+/YES] & [-/NO] buttons simultaneously to restore the default value. 5. Metro Type Press [FUNCTION] button to enter the function menu and use [+/YES] [-/NO] buttons or [DATA WHEEL] knob to select [METROTYPE?]. -
Page 20: Main Volume
7. Main Volume Press [FUNCTION] button to enter the function menu and use [+/YES] [-/NO] buttons or [DATA WHEEL] knob to select [MAINVOL?]. Press [ENTER] button into the option, the LCD will display: MAINVOL: 100. FUNCTION Then use [+/YES] / [-/NO] buttons or [DATA WHEEL] knob to adjust the MAINVOL Range: 00-127 (Default: 100). -
Page 21: Usb Disk Song's Volume
10. USB Disk Song's Volume Press [FUNCTION] button, use [+/YES] [-/NO] button to select [USBDISKVOL?].Then use [ENTER] button into the option, then use [+/YES] / [-/NO] buttons or [DATA WHEEL] knob to adjust the USB Disk Song's Volume. Range: 00-127, Default: 127. FUNCTION 11. -
Page 22: Touch
14. Touch Press [FUNCTION] button to enter the function menu and use [+/YES] [-/NO] buttons or [DATA WHEEL] knob to select [TOUCH?]. Press [ENTER] button into the option, the LCD will display: TOUCH: NORMAL. FUNCTION Then use [+/YES] / [-/NO] button or [DATA WHEEL] knob to set the parameter as shown below: NORMAL... -
Page 23: Loadmem
FUNCTION Then use [+/YES] / [-/NO] button or [DATA WHEEL] knob to adjust the MASTERTUNE Range: -64 ~ +63 (Default: 0). Press [+/YES] & [-/NO] buttons simultaneously to restore the default value. 17. Loadmem Press [FUNCTION] button to enter the function menu and use [+/YES] [-/NO] buttons or [DATA WHEEL] knob to select [LOADMEM?]. -
Page 24: Grading
(Default: 1?). Use [ENTER] button to confirm, the LCD will display: SAVEMEM: 1DONE. FUNCTION The SAVEMEM mode will indicate these parameters as shown below: Splitstone Mainstone Layertone Tempo Tune Touch Splitpoint Mainvol Splitvol Layervol Reverb Reverb level Chorus Chorus level Transpose Metrovol Usertone 1-7... -
Page 25: Local
20.Local Press [FUNCTION] button to enter the function menu and use [+/YES] [-/NO] buttons or [DATA WHEEL] knob to select [LOCAL?]. Press [ENTER] button into the option, the LCD will display: ***LOCAL ON***. FUNCTION Then use [-/NO] button to mute the local sound .The LCD will display: ***LOCAL OFF** FUNCTION 21.Bluetooth... -
Page 26: Save
REGISTRATION MEMORY Your instrument registration memory can be used to store eight sets of voice settings that can be recalled during you playing at the touch of one single button. 1. Save Please refer to [FUNCTION] menu, see page 19. 2. -
Page 27: Delete Reg File From Usb
5. Delete REG File From USB Insert the USB Disk into the USB terminal. Use [+/YES] / [-/NO] button to select REG file you want to delete, then hold down the [PLAY/STOP] button and press the [RECORD] button . LCD shows: RECORD STOY/... -
Page 28: Song Recording
SONG RECORDING This digital piano lets you record your performances and Registration settings to a USB Disk. Each user song lets you record up to sixteen independent tracks. These include the voices for the keyboard performance. provides different ways record: Recording Melody Track Recording. -
Page 29: Multi Track Recording
2. Multi Track Recording Multi track recording provides two ways to record: A. Use Auto Track Assignment. B. Select Tracks by yourself. 2.1. Use Auto Track Assignment. 2.1.1 Insert the USB Disk Into the USB Terminal 2.1.2 Press the [RECORD] button to start recording. (The first one measures are tempo prompt only. - Page 30 DELETE RECORD STOY/ 2.2.3 Press [RECORD] button again to stop recording. Recording stop and your performance is written to the song. The song to which your performance is recorded is automatically named “xxSONG xx” (“xx” indicates the song file number.“SONGxx ” is the song's name). 2.2.4 Select Recording Track Press [TRACK] button repeatedly can select three voice mode, you can use[+/YES]/[-/NO] button to select the track (01-16,off) in...
-
Page 31: Melody Track Recording
3. Melody Track Recording 3.1 Melody Track1 Recording Hold down the [RECORD] button, and then press the [TRACK1] button, the [TRACK1]and the [RECORD] indicator flashes to indicate ready to record. You can start recording simply by playing the key board. PLAY/ STOP RECORD TRACK 1... -
Page 32: Delete Song
4. Delete Song Insert the USB Disk into the USB terminal. Use [+/YES][-/NO] buttons to select SONGxxx file you want to delete, hold down the [PLAY/STOP] button and press the [RECORD] button . RECORD STOY/ DELETE Press [+/YES] button to delete the file. Press [-/NO] button to cancel. -
Page 33: Play Along Songs
PLAY ALONG SONGS There are 55 songs built into this piano for your musical enjoyment. These songs have separate left and right-hand parts that can be turned on and off as required so you can practice the corresponding part on the piano. 1. -
Page 34: Practicing The Left Hand Of The Selected Song
TRACK 1 TRACK 2 LEFT RIGHT SONG Press [PLAY/STOP] button. indicator lights will hear the metronome “count in” the song. You will then hear the left-hand part NOTE The default status of the metronome is ON. Press the METRONOME button if you want to disable the metronome sound in the right / Left hand mode. -
Page 35: Midi Function
MIDI FUNCTION If you are an advanced MIDI user, this section will help you to access the MIDI controller capabilities of the digital piano. If you already know that you need this specialized functionality, then this section is for you. However, this information is not necessary in order to enjoy playing the piano. -
Page 36: Load Midi File
Load MIDI File Hold Down [MEMORY] button and press [RECORD] button repeatedly to select LOAD MIDI FILE?, Then press [ENTER] button, the LCD will display: LOAD OK! SAVE TO RECORD STOY/ MEMORY MULTI TRACK DELETE... -
Page 37: Appendix
APPENDIX 1. Voice List TONE TONE TONE ● ● ● P i a n o Ensemble Fx 4 (Atmosphere) Synth Strings 1 Acoustic Grand Piano Fx 5 (Brightness) Synth Strings 2 Bright Acoustic Piano Fx 6 (Goblins) Choir Aahs FM E.PIANO Fx 7 (Echoes) Voice Oohs Honky-Tonk Piano... -
Page 38: Midi Implementation Chart
2. MIDI Implementation Chart Function Transmitted Recognized Remarks Basic Default (*1) 1-16CH Channel Changed (*1) 1-16CH Mode Default Mode 3 Mode 3 Messages Altered Note 0~127 0~127 Number :True voice 0~127 Velocity Note ON O 9nH,v=1~127 O 9nH,v=1~127 Note OFF O 9nH,v=0 or 8nh O 9nH,v=0 or 8nh After Key's... -
Page 39: Factory Reset
3. Factory Reset 1). Turn off the power. POWER/ STANDBY 2). Hold down [+/YES] & [-/NO] buttons, then turn the power on, it can restore all internal settings to factory set. + / YES POWER/ STANDBY - / NO... -
Page 40: Specifications
4. Specifications Keyboards 88 Graded Hammer Keys with Touch Response Display LCD display Polyphony 64 Note Polyphonic Voices Layer, Split, User, Touch, Duet, Transpose, Tune Voice Control Sustain Pedal, Soft Pedal, Pedal Sostenuto Pedal 8 Reverb Types and Reverb Level 8 Chorus Types and Chorus Level Effect EQ Bass Fader... - Page 41 FCC STATEMENT 1. This device complies with Part 15 of the FCC Rules. Operation is subject to the following two conditions: (1) This device may not cause harmful interference. (2) This device must accept any interference received, including interference that may cause undesired operation.
- Page 43 Virgin Musical Instrument Company INC P O Box 2908 La Mesa, CA 91943 PH: 619 244-0006 E-mail: info@virginmusicalinstruments.com Virginmusicalinstrumentscompany.com...
Need help?
Do you have a question about the Artesia AP-100 and is the answer not in the manual?
Questions and answers