Advertisement
TROUBLESHOOTING (continued)
See appropriate section in manual unless directed to an authorized
Service Center.
PROBLEM
CAUSE
Grass catcher
1. Cutting height too low.
not filling
2. Lift on blade worn off.
(If so equipped)
3. Catcher not venting air.
Hard to push
1. Grass is too high or wheel
height is too low.
2. Rear of lawn mower
housing or cutting blade
dragging in grass.
3. Grass catcher too full.
4. Handle height position not
right for you.
Loss of drive
1. Belt wear.
or slowing of
2. Belt off of pulley.
drive speed
3. Drive cable worn or broken.
4. "Loose" drive control system. 4. Adjust drive control.
CORRECTION
1. Raise cutting height.
2. Replace blade.
3. Clean grass catcher.
1. Raise cutting height.
2. Raise rear of lawn mower
housing one (1) setting
higher.
3. Empty grass catcher.
4. Adjust handle height to suit.
1. Check/replace drive belt.
2. Check/reinstall drive belt.
3. Replace drive cable.
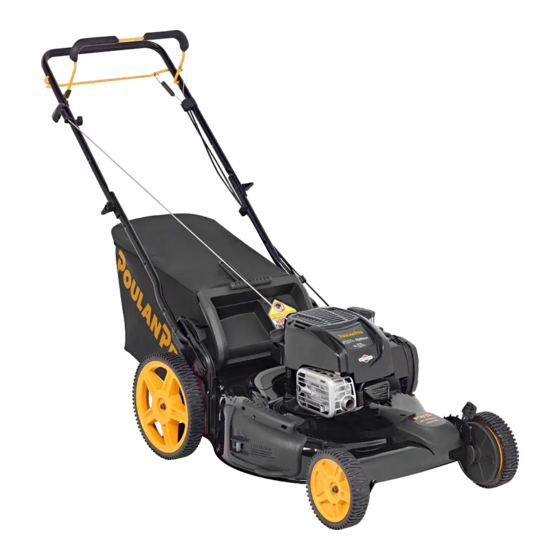
SELF-PROPELLED ROTARY
LAWN MOWER
115 58 78-27 Rev. 4
04.23.15 BY
Printed in U.S.A.
Advertisement

Related Manuals for Poulan Pro PR725Y22RHP


Summary of Contents for Poulan Pro PR725Y22RHP
- Page 1 TROUBLESHOOTING (continued) See appropriate section in manual unless directed to an authorized Service Center. PROBLEM CAUSE CORRECTION Grass catcher 1. Cutting height too low. 1. Raise cutting height. not filling 2. Lift on blade worn off. 2. Replace blade. (If so equipped) 3.
-
Page 2: Table Of Contents
TROUBLESHOOTING TABLE OF CONTENTS See appropriate section in manual unless directed to an authorized Safety Rules ....2-4 Maintenance ....22-26 Storage ......33-35 Service Center. Assembly .......5-9 Service and Troubleshooting ..35-36 Operation ....10-21 Adjustments ....27-33 PROBLEM CAUSE CORRECTION Does not start 1. Dirty air filter. 1. -
Page 3: Safety Rules
STORAGE SAFETY RULES • Do not pull mower backwards unless III. SLOPE OPERATION Operator MOWING CYLINDER absolutely nec es sary. Always look down presence POSITION Slopes are a major factor related to slip & • Remove spark plug. control bar and behind before and while moving •... - Page 4 STORAGE SAFETY RULES 3 POSITION “QUICK” V. GENERAL SERVICE Operator MOWING presence POSITION • Never run a machine inside a closed • Stop and inspect the equipment if you Handle pin control bar area. strike an object. Repair, if nec es sary, SQUEEZE before restarting.
-
Page 5: Assembly
Do I have a mulching lawn mower? SERVICE AND ADJUSTMENTS ASSEMBLY Look for the grass discharge opening on your mower. Raise the discharge deflector ENGINE 4. Remove blade bolt, lockwasher, hard- (rear door on rear discharge mowers). If CAUTION: Do not operate this lawn ened washer and blade. - Page 6 SERVICE AND ADJUSTMENTS ASSEMBLY TO REPLACE DRIVE BELT IMPORTANT: Blade bolt is grade 8 heat “QUICK RELEASE” HANDLES 3 POSITION “EZ” HANDLES treated. 1. Place new drive belt in the belt retainer (ALL OTHER MODELS) • Raise lower handle section to operating 8.
- Page 7 SERVICE AND ADJUSTMENTS ASSEMBLY • Position the blade adapter on the en- 21" (53cm) HI-VAC MODELS: INSTALL STARTER ROPE INSTALL REAR WHEELS gine crank shaft. Be sure key in adapter (MODELS EQUIPPED WITH T-KNOB) (“HIGH WHEEL ” MOWERS ONLY) Drive cable Housing and crankshaft keyway are aligned;...
- Page 8 SERVICE AND ADJUSTMENTS ASSEMBLY REAR WHEEL DRIVE MODELS: Blade adapter Crankshaft “FABRIC TOP” GRASS CATCHERS • For DOOR SLOT mounted catcher, keyway MODELS WITH IDLER ASSEMBLY: place the grass catcher frame hooks ASSEMBLE/ATTACH GRASS CATCH ER • Disconnect spark plug wire from spark into the slots of the rear door.
- Page 9 SERVICE AND ADJUSTMENTS ASSEMBLY TO REMOVE / REPLACE DRIVE BELT • Remove blade and debris shield. TO PRE PARE BATTERY HANDLE-MOUNTED KEY SWITCH • Remove belt from engine pulley on FRONT WHEEL DRIVE MODELS: (ELECTRIC START MODELS ONLY) crankshaft. Engine Harness “STANDARD”...
- Page 10 OPERATION SERVICE AND ADJUSTMENTS CAUTION: Before performing any service or adjustments: The operation of any lawn mower can result in foreign objects Use ear thrown into the eyes, which can result in severe eye damage. protec- • Release operator presence control bar. Always wear safety glasses or eye shields while operating your tors to •...
-
Page 11: Maintenance
OPERATION MAINTENANCE "QUICK-PIN" ADJUSTMENT “DUAL POINT” ADJUSTMENT CLEAN UNDER DRIVE COVER • To change cutting height, pull up on Both front wheels are adjusted by a single Clean under the drive cover at least twice Hose adjuster lever, move wheel up or down lever on the left front wheel. - Page 12 OPERATION MAINTENANCE TO CONVERT MOWER: “THREE POINT” ADJUSTMENT ENGINE IN-LINE FUEL FILTER (KOHLER or B&S (18" (45cm) HI-VAC MODELS ONLY) PRO / ENDURANCE ENGINES ONLY) Read the maintenance section of your Most mowers are shipped ready to be Both rear wheels are adjusted by a single used as a mulcher.
- Page 13 OPERATION MAINTENANCE “SIDE DISCHARGE ONLY” MOWERS MULCHER PLUG TYPE “B” BLADES WITH ROUND HOLE: 4. If you remove the pinion gears, wipe To convert to bagging or dis charg ing: • To check blade balance, drive a nail into clean with dry cloth. Re as sem ble dry. MULCHER PLATE •...
- Page 14 OPERATION MAINTENANCE “MULTI-CUT” MOWERS LAWN MOWER Crank- SIDE DISCHARGING Your lawn mower was shipped ready to be shaft Always observe safety rules when per- used as a mulcher. To convert to bagging keyway • Mulcher plate or plug (if equipped) must forming any main te nance.
- Page 15 OPERATION MAINTENANCE SIMPLE STEPS TO REMEMBER 18" (45cm) HI-VAC MODELS: BEFORE AFTER EVERY EVERY EVERY WHEN CONVERTING YOUR BEFORE Your lawn mower was shipped ready to EACH EACH 25 HOURS “MULTI-CUT” LAWN MOWER: STORAGE be used as a mulcher. To convert to rear HOURS OR SEASON HOURS...
- Page 16 OPERATION OPERATION 3. Secure rear of side discharge deflector 21" (53cm) HI-VAC MODELS: MOWING TIPS FOR MULCHING MOWERS ONLY - to lawn mower housing with knob. MULCHING MOWING TIPS Your lawn mower was shipped ready to CAUTION: Do not use de-thatcher •...
- Page 17 OPERATION OPERATION BEFORE STARTING EN GINE TO START ENGINE 3. Secure rear of discharge chute to lawn SIMPLE STEPS TO REMEMBER mower housing with knob. WHEN CONVERTING YOUR 21" HI-VAC: Read the engine manual packed with your CAUTION: The mow er blade rotates 4.
-
Page 18: Adjustments
OPERATION OPERATION “VARI-SPEED” DRIVE CONTROL OPERATOR PRESENCE CONTROL “DUAL BAIL ” DRIVE CONTROL BAR (ALL MODELS) • Self-propelling is controlled by hold- • To start forward motion, lift drive control ing the operator presence control bar bar up to handle. Your lawn mower is equipped with an op- down to the handle and pulling the drive •...
Need help?
Do you have a question about the PR725Y22RHP and is the answer not in the manual?
Questions and answers