
Related Manuals for CohuHD Costar 3430HD

Summary of Contents for CohuHD Costar 3430HD
- Page 1 3430HD IP HD Fixed Camera Installation and Operation Manual 6x-1118A 2016 CohuHD Costar...
-
Page 2: Table Of Contents
Contents PART ONE – QUICK USER QUIDE ..............................3 IMPORTANT INFORMATION ................................ 3 OVERVIEW ....................................5 ......................................5 EATURES CAMERA DIAGRAMS ................................... 6 PIG-TAIL CABLE ................................... 6 INSTALLING YOUR CAMERA ................................ 8 ........................8 HECK AMERA OMPONENTS AND NSTALLATION ONDITIONS .................................. -
Page 3: Part One - Quick User Quide
Operating Instructions Before operating the unit, please read this manual thoroughly and retain it for future reference. Thank you for purchasing our product. If there are any questions, please contact the authorized dealer. PART ONE – QUICK USER QUIDE IMPORTANT INFORMATION Legal Notice Attention: To ensure account security, please change the password after your first login. - Page 4 dirt. Do not aim the camera lens at the strong light such as sun or incandescent lamp. The strong light can cause fatal damage to the camera. Maintenance Precautions: If there is dust on the front glass surface, remove the dust gently using an oil-free brush or a rubber dust blowing ball.
-
Page 5: Overview
Overview This user guide is suitable for the following models: 3432-1000 Features Resolution: 1080P Optical Zoom: 30X Day and night automatic conversion function (ICR) Supports 3D noise reduction Video Output: IP H.264 encoding, higher compression efficiency ... -
Page 6: Camera Diagrams
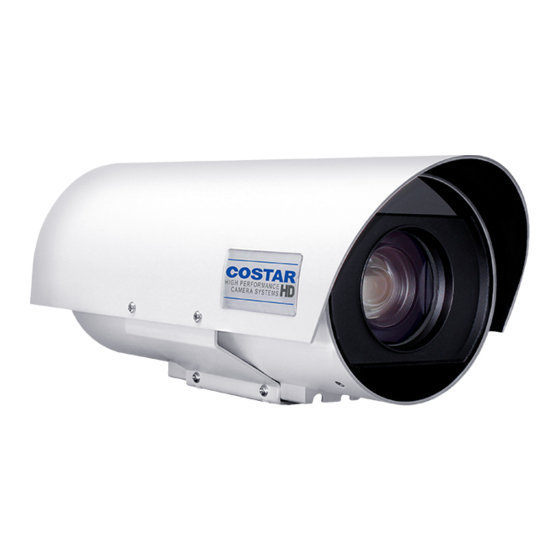
Camera Diagrams Camera 1. Sunshield Cover 2. Camera Faceplate 3. Camera Enclosure Camera Pig-Tail Cable ① Network Port ② Power Port ③ Waterproof Head... - Page 7 Cable Connection Mode 1: Power by DC Adapter Mode 2: Power by POE...
-
Page 8: Installing Your Camera
Installing Your Camera The following diagrams are for your reference only. See the actual product to mount your camera. Check Camera Components and Installation Conditions Before mounting your camera, check the device model number and included contents against the packing list to ensure components are complete. - Page 9 Power Cable Data listed in Table 2-1 is applicable to copper cables that use 12 Vdc power supply. The item Core Diameter indicates the conductor diameter. Power Loss on the Cable for Different Lengths and Different Core Diameters Core Diameter (Unit: mm) Distance (Unit: m) Power (Unit: W) 0.80...
-
Page 10: Mounting The Camera
Mounting the Camera NOTE! Tighten all the screws to hold the camera securely. Wall Mount Install the wall mount bracket. Install the screw to lock the camera tight. -
Page 11: Starting The Camera
Starting the Camera After you have mounted the camera properly, connect the camera to power. Each time the camera is powered on, it will perform a self-test to check internal functions. After the self-test is complete, you will be able to operate the camera. NOTE! ... -
Page 12: Installing The Activex
Accessing Your Camera Before you begin, please ensure: 1. The self-test is completed. 2. Your camera is operating properly and connected to the network. 3. The PC client you are using is installed with Internet Explorer 8.0 or higher. Follow the next steps: 1. -
Page 13: Dimensions
Dimensions Unit: mm... -
Page 14: Part Two - Network Camera User Manual
PART TWO - NETWORK CAMERA USER MANUAL Network Connection Before accessing a network camera (also known as IP Camera or IPC) from a PC, you need to connect the network camera to the PC directly with a network cable or via a switch or router. Network cable Use a Shielded Twisted Pair (STP) cable to connect the network interfaces of the network camera and the PC. - Page 15 Add the IP address as a trusted site http://192.168.2.150 Clear the check box...
-
Page 16: Logging Into The Web Interface
NOTE! The IP address 192.168.2.150 in this example is the default IP address. Please replace it with the actual address of your camera if it has been changed. (Optional) Modify user access control settings Before you access the camera, follow the steps to set User Account Control Settings to Never notify. Logging Into the Web Interface The default static IP address of the camera is 192.168.2.150, and the default subnet mask is 255.255.255.0. -
Page 17: Introduction To The Web Interface
NOTE! To manually load the ActiveX, type http://IP address/ActiveX/Setup.exe in the address bar and press Enter. The default password is used for your first login. To ensure account security, please change the password after your first login. You are recommended to set a strong password (no less than eight characters). The camera protects itself from illegal access by limiting the number of failed login attempts. - Page 18 Description Menu Live view window Live view toolbar PTZ control area Note: This area is available to adjust camera focus and zoom, and preset management. NOTE! The displayed live view interface, parameters displayed and value ranges may vary with models. ...
-
Page 19: Configuring Parameters
Configuring Parameters Local Settings Select Setup > Common > Local Settings. 2. Modify the settings as required. The following table describes some major parameters. Parameter Description Real Time Prior: Recommended if the network is in good condition. Fluent Prior: Recommended if you want short time lag for live video. ... -
Page 20: Network Configuration
Network Configuration TCP/IP Modify communication settings such as the IP address for the camera so that the camera can communicate with other devices. NOTE! After you have changed the IP address, you need to use the new IP address to log in. ... - Page 21 2. Select DHCP from the IP Obtain Mode drop-down list. 3. Click Save. Port 1. Click Setup > Network > PORT. 2. Configure relevant port numbers. 3. Click Save.
- Page 22 DDNS 1. Click Setup > Network > DDNS. 2. Enable DDNS Service. 3. Click Save. 1. Click Setup > Network > P2P. 2. Enable P2P. 3. Click Save. After the configuration of FTP, you will be able to upload snapshots from network cameras to the specified FTP server.
-
Page 23: Port Mapping
2. Configure relevant parameters of the sender and the recipient The following table describes some major parameters. Parameter Description When enabled, the e-mail will be sent through SSL encryption. When enabled, the e-mail will contain 3 instant snapshots as attachment according to the Attach Image Capture Interval. -
Page 24: Image Configuration
Image Configuration Image Adjustment NOTE! Clicking Default will restore all the default image settings. Setting the Scene Set image parameters to achieve the desired image effects based on live video in different scenes. Click Setup > Image > Image. The scene management page for some models is displayed as follows, you can select the desired scene in the drop-down list. - Page 25 Name of the current scene. The device provides several preset scene modes. When you select a scene, the corresponding image parameters are displayed. You can adjust image settings according to actual needs. Custom: set a scene name as needed Indoor: recommended for indoor scenes ...
-
Page 26: Image Enhancement
Image Enhancement 1. Click Setup > Image > Image and then click Image Enhancement. 2. Use the sliders to change the settings. You may also enter values directly. The following table describes some major parameters. Item Description Set the degree of brightness of images. Brightness Low brightness High brightness... - Page 27 Item Description Normal hue Other hue Contrast of boundaries of objects in an image. Sharpness Low sharpness High sharpness 2D Noise Reduce the noise of images. The function may cause image blurring. Reduction 3D Noise Reduce the noise of images. The function may cause motion blur (or ghosting in some applications). Reduction Rotation of the image.
- Page 28 Item Description 90° Clockwise 90° Anti-clockwise 3. To restore default settings in this area, click Default. Exposure 1. Click Setup > Image > Image and then click Exposure. 2. Set the parameters as required. The following table describes some major parameters. Parameter Description Exposure...
- Page 29 Shutter is used to control the light that comes into the lens. A fast shutter speed is ideal for scenes in quick motion. A slow shutter speed is ideal for scenes that change slowly. Note: Shutter (s) You can set a shutter speed when Exposure Mode is set to Manual or Shutter Priority. ...
- Page 30 Smart Illumination NOTE! This function may vary with models, please see actual Web interface for details. 1. Click Setup > Image > Image and then click Smart Illumination. 2. Select the correct IR control mode and set the parameters. The following table describes some major parameters.
- Page 31 Parameter Description Auto Focus: The camera focuses automatically according to the current light condition. Manual Focus: Manually adjust camera focus as required. Focus Mode One-Click Focus: The camera is triggered to focus once when rotating, zooming or going ...
-
Page 32: Osd Setting
2. Enable the defog function and then select a level for the scene. Level 5 achieves the maximum defog effects, and level 1 achieves the minimum. Defog Off Defog On 3. To restore the default settings, click Default. OSD Setting On Screen Display (OSD) is the text displayed on the screen with video images and may include time and other customized contents. - Page 33 2. Select the position and content of the OSD. Position: Click the desired box in the Live View area. After the cursor shape is changed, click and hold the button to move the box to the desired position. To set the position precisely, use the X and Y coordinates under Overlay Area.
-
Page 34: Privacy Mask
Privacy Mask On certain occasions, you may need to set a mask area on the camera image to protect privacy, for example, the keyboard of an ATM machine. When PTZ changes its position or zooms, the Privacy Mask will be adjusted accordingly to protect the area all along. - Page 35 After enabling the sub or third stream, modify the parameters as required. The parameters for the sub and third stream have the same meanings as that for the main stream. 1. Click Setup > Video > Video. 2. Modify the settings as required. The following table describes some major parameters. Parameter Description H.264: The new generation compression standard for digital video.
-
Page 36: Media Stream Configuration
Media Stream Configuration Media Stream You can display the established media streams from a camera. You may also set the camera so it transmits code streams by the UDP or TCP protocol to a specified IP address and port number. The settings can be saved and take effect after the camera is restarted. -
Page 37: (Future) Alarm Configuration
Set the multicast address (224.0.0.0 to 239.255.255.255) and port number (0 to 65535). Click Save. Alarm Configuration You can schedule alarm reporting and set actions that can be triggered by other devices so that alarms and the triggered actions can be handled in time. Alarm reporting can be scheduled for motion detection alarm, temperature alarm, alarm input, alarm output, tampering detection alarm, and audio detection alarm. - Page 38 1. In the Detection Area area, click to add a new detection area. To delete a detection area, click 2. Click and drag the mouse to set a detection area. 3. Set the detection sensitivity, object size, and history for the camera to decide whether to report a motion detection alarm.
- Page 39 If the same alarm is triggered within the set time, the alarm will not be cleared until the suppress alarm time expires. Then the same alarm can be reported again. 5. Set actions to be triggered by motion detection alarm and the plan. The following table describes the major alarm-triggered actions and how to set a plan.
- Page 40 Configuring Temperature Detection Alarm After the upper and lower temperature limits are set, the camera reports an alarm when the set temperature limit is reached. A PTZ camera may go to a preset and output an alarm when a temperature alarm is reported. NOTE! This function is not supported by some models, please see the actual model for details.
- Page 41 disable audio detection, clear the Enable check box. The following table describes some major parameters. Parameter Description Rise Above: An alarm is reported when the rise of volume exceeds the difference. Falls Below: An alarm is reported when the fall of volume exceeds the difference. Detection ...
- Page 42 Configuring Alarm Input The camera can receive alarm information from a third-party device. To use this function, you need to configure the following information for alarm input first: port, alarm name, alarm type (normally open or normally closed) and alarm reporting time. NOTE! This function is not supported by some models, please see the actual model for details.
- Page 43 NOTE! This function is not supported by some models, please see the actual model for details. 1. Click Setup > Events > Alarm Output. 2. Select the alarm and set the alarm name. 3. Set the status to Normally Open (default setting) and set the alarm duration. 4.
-
Page 44: (Future) Memory Card Storage
Memory Card Storage NOTE! This function is not supported by some models, and may vary with models, please see the actual model for details. Edge storage is recommended when the camera operates in stand-alone mode. When the camera is ... - Page 45 2. Select Enable Plan (disable edge storage), and then set the periods during which the camera records video to the memory card. 3. Click Save. NOTE! Planned storage is not effective when manual storage and planned storage are both enabled. ...
- Page 46 Disable edge storage 1. Click Setup > Storage > Storage. 2. Set Edge Storage to Disable (which disables manual storage), and set video capacity. 3. Click Save.
-
Page 47: System Maintenance
System Maintenance NOTE! This function is not supported by some models, please see the actual model for details. Security User Management There are two types of users in the system: Administrator: referred to as “admin” in this manual. The default name of the administrator is admin, ... - Page 48 set RTSP authentication on the Web interface. 1. Click Setup > System > Security > RTSP Authentication. 2. Select an authentication mode (basic/digest) and then click Save. Registration Information You can set to hide the vendor information of the network camera on the Web interface. 1.
- Page 49 Setting the DST 1. Click Setup > Common > Time, and then click the DST tab. 2. Select Enable DST, set the start time, end time, and DST bias. 3. Click Save. Serial Port Mode Configuration The RS485 serial port is used for data exchange with the third-party device. Serial port settings on the camera should be consistent with that of the connected third-party device.
- Page 50 Restarting the System 1. Click Setup > System > Maintenance. 2. Under Device Restart, click Restart. The device will restart after you confirm the operation. You may also enable auto-restart by selecting Enable Auto Restart and setting a time for auto-start. The device will restart at the set time.
-
Page 51: Live View
objects, it is recommended that the minimum focus distance is set shorter than the distance between the objects and lens, for example, if the minimum focus distance is 3m, then the objects within 3m from lens will be out of focus. NOTE! This function is only supported by the devices with auto-focus, please see the actual model for details. -
Page 52: Viewing Certain Area Of Images
Take a snapshot of the current image displayed on the PC. Note: The path for saving snapshots are set in System Configuration. Start/stop local recording. Note: The path for saving local recordings is set in System Configuration. Start/stop digital zoom. For more details, see Using Digital Zoom. Button Description Show/hide the control panel. -
Page 53: (Future) Video Playback And Download With Edge Storage
2. Click and hold the mouse button, and then drag from the top down to specify an area. 3. To restore the original image size, click in the enlarged area, or drag from the bottom top. 4. To exit, click (FUTURE) Video Playback and Download with Edge Storage NOTE! Edge storage refers to recording video to the memory card of a frontend device (mostly a camera). - Page 54 2. Search for video within a specified period. The results will be shown in a list. 3. Select your video and click Download. The video will be downloaded to your local path from the memory card (local path can be changed in System Configuration). 4.
- Page 55 2. Adjust the camera zoom to the desired view. 3. Adjust focus mode as needed to obtain the optimal image. 4. Click to add it as a preset. Enter a number and name for the preset and then click Submit. Go to a preset 1.
-
Page 56: Appendix A Glossary
Appendix A Glossary Acronym Description Address Resolution Protocol Constant Bit Rate Domain Name Service... - Page 57 Acronym Description DDNS Dynamic Domain Name Service DHCP Dynamic Host Configuration Protocol Daylight Saving Time File Transfer Protocol Group Of Pictures Graphical User Interface HTTPS Hyper Text Transfer Protocol over SSL Internet Explorer IMOS IP Multimedia Operation System Internet Protocol IP Camera Maximum Transmission Unit Network Time Protocol...
-
Page 58: Appendix B Faq
Appendix B FAQ What to do if no message prompts me to install ActiveX when I log in on a Windows 7 PC the firt time Answer: Follow these steps to turn off UAC and then log in again: 1. Click the Start button, and then click Control Panel. 2. - Page 59 Revision History Revision Date Comments 3/24/16 Initial Release...
Need help?
Do you have a question about the 3430HD and is the answer not in the manual?
Questions and answers