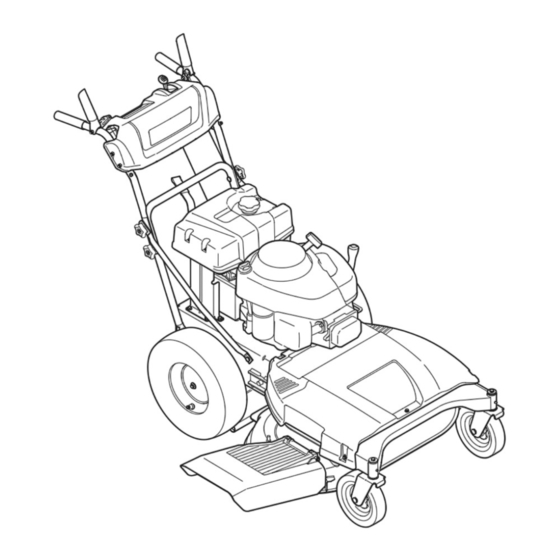
Cub Cadet 12AE764N709 Operator's Manual

Cub Cadet 12AE764N709 Operator's Manual

Wide cut mower
Hide thumbs Also See for 12AE764N709:

Advertisement

Safety • Assembly • Operation • Tips & Techniques • Maintenance • Troubleshooting • Warranty
OPERATOR'S MANUAL
Time Saver
Wide Cut Mower
IMPORTANT
READ SAFETY RULES AND INSTRUCTIONS CAREFULLY BEFORE OPERATION
Warning: This unit is equipped with an internal combustion engine and should not be used on or near any unimproved forest-covered, brush-
covered or grass-covered land unless the engine's exhaust system is equipped with a spark arrester meeting applicable local or state laws (if any).
If a spark arrester is used, it should be maintained in effective working order by the operator. In the State of California the above is required by law
(Section 4442 of the California Public Resources Code). Other states may have similar laws. Federal laws apply on federal lands. A spark arrester
for the muffler is available through your nearest engine authorized service dealer or contact the service department, P.O. Box 361131 Cleveland,
Ohio 44136-0019.
FORM NO. 769-03041B
CUB CADET LLC, P.O. BOX 361131 CLEVELAND, OHIO 44136-0019
3/27/2007
PRINTED IN U.S.A.

Advertisement

Table of Contents
loading

Summary of Contents for Cub Cadet 12AE764N709

  • Page 1 (Section 4442 of the California Public Resources Code). Other states may have similar laws. Federal laws apply on federal lands. A spark arrester for the muffler is available through your nearest engine authorized service dealer or contact the service department, P.O. Box 361131 Cleveland, Ohio 44136-0019. FORM NO. 769-03041B CUB CADET LLC, P.O. BOX 361131 CLEVELAND, OHIO 44136-0019 3/27/2007 PRINTED IN U.S.A.
  • Page 2: Table Of Contents

    Serial Number sary to use the manufacturer’s web site, to obtain assistance from the Customer Support Department, or when contacting an authorized service dealer. CUB CADET LLC P. O. BOX 361131 www.cubcadet.com CLEVELAND, OH 44136 DEALER LOCATOR PHONE NUMBER: 877-282-8684 Customer Support Please do not return the unit to the retailer from which it was purchased, without first contacting Customer Support.
  • Page 3: Slope Gauge

    Use this page as a guide to determine slopes where you may not operate safely. Do not operate your lawn mower on such slopes. Slope Gauge WARNING Do not mow on inclines with a slope in excess of 15 degrees (a rise of approximately 2-1/2 feet every 10 feet).
  • Page 4: Safety

    WARNING: Engine Exhaust, some of its constituents, and certain vehicle compo- nents contain or emit chemicals known to State of California to cause cancer and birth defects or other reproductive harm. DANGER: This machine was built to be operated according to the rules for safe operation in this manual.
  • Page 5: Slope Operation

    19. Shut the engine off and wait until the blade comes to a 6. Extinguish all cigarettes, cigars, pipes and other sources complete stop before removing the grass catcher or unclog- of ignition. ging the chute. 7. Never fuel machine indoor because flammable vapors will The cutting blade continues to rotate for a few seconds after accumulate in the area.
  • Page 6: Assembly

    Please carefully follow these assembly steps to properly prepare your machine for use. We recom- mend that you read this section in its entirety before beginning assembly. WARNING: Disconnect the spark plug wire and ground it against the engine to prevent Assembly unintended starting.
  • Page 7 Shift Lever Setup Attaching the Battery Cables Remove the 5/16-18 screw and the lock nut that hold NOTE: Some models may be shipped with the battery the shift lever to the shift lever plate, Figure 3-4. cables already connected. Remove the remaining screw and nut from the lower shift lever plate, Figure 3-4.
  • Page 8: Operation

    Know Your Lawn Mower Throttle/Choke Control Lever Blade Control Gas Cap Operating the Lawn Ignition Switch Deck Systems Indicator Height Mower Monitor Lever Drive Control Gear Shift Lever WARNING WARNING: Always remove Figure 4-1 the ignition key when leav- WARNING: Be familiar with all the controls and their proper operation; know how to stop the ing mower unattended or machine and disengage them quickly.
  • Page 9: Ignition Switch

    Ignition Switch Systems Indicator Monitor WARNING: Never move the key into the LCD Display Start position while the engine is run- The systems indicator ning; doing so may cause damage to the BATTERY monitor records and engine’s starter. displays, on the LCD, Operating The three-position switch is used hours of mower operation...
  • Page 10: Engine Controls

    Engine Controls Recoil Starter Refer to Figure 4-2 for locations of the engine controls. Air Cleaner Refer to the engine manual for more detailed information. Oil Cap/ Handle Dipstick Recoil Starter The recoil starter is used to pull-start the engine. Operating the Lawn Oil Drain Valve...
  • Page 11 WARNING: The operation of any lawn mower can result in foreign objects being thrown into the eyes, which can damage your eyes severely. Always wear safety glasses while operating the mower, or while performing any adjustments or repairs on it. WARNING: Be sure no one other than the operator is standing near the lawn mower while starting engine or operating mower.
  • Page 12: Starting The Mower

    Starting the Mower Stopping the Mower Release all controls on the mower to prevent wheels Release blade and drive control to stop wheels and or blades from rotating. deck blades. Move gear shift lever to neutral (N) position. Move throttle/choke control lever down to slow (turtle) position.
  • Page 13 Mulching or Side-Discharge Mowing You can use the mower either as a mulching mower or WARNING: Before installing or removing as a side-discharge mower. To use the mulching feature, mulch plug, stop engine, wait for parts to stop moving, and disconnect spark plug insert the mulch plug as described below.
  • Page 14: Maintenance

    General Recommendations • Always observe safety rules when performing any type of maintenance on the mower. • The warranty on this lawn mower does not cover items that have been subjected to operator abuse or negli- gence. To receive full value from warranty, operator must maintain the lawn mower as instructed here. •...
  • Page 15: Changing The Engine Oil

    Changing the Engine Oil CAUTION: Check oil level in engine before every use. To gain access to the oil drain valve on the engine, the right handle brace tube should be pivoted Maintaining forward. the Lawn Remove the upper star knob and carriage screw on the right side of the handle, Mower Figure 5-3.
  • Page 16: Mower Maintenance

    Mower Maintenance WARNING: Before performing any type of maintenance/service, disengage all controls and stop the engine. Wait until all moving parts have come to a complete stop. To prevent unintended starting, disconnect spark plug wire and ground it against the engine and remove ignition key. Always wear safety glasses during operation or while performing any adjustments or repairs.
  • Page 17 Lubrication Pivot Points & Linkage Lubricate all the pivot points on the drive system and lift linkage at least once a season, or 25 hours of operation, with light oil. Maintaining Grease Rear Wheels fitting on the Lawn frame The rear wheels should be removed from the axles once a season.
  • Page 18: Servicing The Cutting Blades

    Rear Tire Pressure WARNING: Never exceed the maximum Flange Nut inflation pressure shown on the sidewall of tire. The recommended operating rear tire pressure is approxi- Maintaining mately 20 psi for the rear tires. IMPORTANT: Refer to the tire sidewall for exact tire the Lawn manufacturer’s recommended or maximum psi.
  • Page 19: Battery Maintenance

    Battery Maintenance Battery Jump Starting WARNING: When removing or installing The battery is sealed and is maintenance-free. Acid levels the battery, follow these instructions to cannot be checked. Maintaining prevent the screwdriver from shorting • Always keep the battery cables and terminals clean against the frame.
  • Page 20: Replacing The Drive Belt

    Replacing Belts The mower uses three belts: 1) drive belt, 2) deck engagement belt, 3) blade timing belt. Before removing belt, observe how the belt is routed around the pulleys and brackets to help when installing a replacement belt. IMPORTANT: The belts on the mower are specially designed to engage and disengage safely. Substitute Maintaining (non-OEM) belts can be dangerous by not disengaging completely.
  • Page 21 Replacing the Deck Engagement Belt WARNING: Before performing any type of maintenance on the machine, wait for all parts to stop moving, and disconnect the spark plug wire. Remove the ignition key from the ignition switch (if equipped). Failure to follow this instruction could result in personal injury or property damage. Maintaining Avoid the possibility of a pinching injury.
  • Page 22 Replacing the Blade Timing Belt WARNING: Before performing any type of maintenance on the machine, wait for all parts to stop moving, and disconnect the spark plug wire. Remove the ignition key from the ignition switch (if equipped). Failure to follow this instruction could result in personal injury or property damage. Stop engine, wait for all parts to stop moving, and Installing the Timing Belt Maintaining...
  • Page 23: Maintenance Schedule

    Maintenance Schedule WARNING: Before performing any type of maintenance/service, disengage all controls and stop the engine. Wait until all moving parts have come to a complete stop. To prevent unintended starting, disconnect spark plug wire and ground it against the engine and remove ignition key. Always wear safety glasses during operation or while performing any adjustments or repairs.
  • Page 24: Troubleshooting

    Troubleshooting WARNING: Before performing any type of maintenance/service, disengage all controls and stop the engine. Wait until all moving parts have come to a complete stop. Disconnect spark plug wire and ground it against the engine to prevent unintended starting. Always wear safety glasses during operation or while performing any adjustments or repairs.
  • Page 25: Off-Season Storage

    Off-Season Storage WARNING: Never store lawn mower with fuel in tank indoors or in poorly ventilated areas where fuel fumes may reach an open flame, spark, or pilot light as on a furnace, water heater, clothes dryer, or gas appliance. Off-Season Preparing the Engine Preparing the Lawn Mower...
  • Page 26 NOTES Use this page to make notes and write down important information.
  • Page 27 NOTES Use this page to make notes and write down important information.
  • Page 28: Warranty

    Refer to applicable manufactur- The limited warranty set forth below is given by Cub Cadet LLC with er’s warranty for terms and conditions. respect to new merchandise purchased or leased and used in the b.

This manual is also suitable for:

12ae764n71012ae764n756

Table of Contents