Table of Contents
Advertisement
Quick Links
Advertisement
Table of Contents

Related Manuals for DigiGrid IOS


Summary of Contents for DigiGrid IOS
-
Page 2: Table Of Contents
3.1 One Computer with a DiGiGrid IOS .............................9 3.2 Adding More I/Os to Your System ............................10 3.3 Multiple Computers with a Single DiGiGrid IOS ......................11 3.4 Advanced Network: Multiple Computers and Multiple I/Os ..................12 4. Software Setup And Controls ..............................14 4.1 Device Firmware .................................. - Page 3 5.1.4 Clip Indication and Small Meters ..........................25 5.2 Clock Page ....................................26 6. IOS Server ......................................28 6.1 Applications of an IOS Server ............................. 29 6.1.1 eMotion ST mixer ................................29 6.1.2 StudioRack ..................................30 7. Moving Audio in a Soundgrid Network ..........................31 7.1 Using an I/O Device with a DAW ............................
-
Page 4: Introduction
DiGiGrid IOS is an audio interface for native DAWs and Waves SoundGrid applications that run on a SoundGrid network. It has eight mic/line inputs and 8 line outs, along with the standard digital ins and outs. Like all DiGiGrid I/O devices, it can be used by the local host or by a remote audio workstation anywhere on the SoundGrid network. -
Page 5: Getting Started
To download IOS software you will need to register your device at www.digigrid.net or www.waves.com. You must know the serial number of your IOS in order to register it, so sign up before you mount it in a rack. The serial number appears on a label on the bottom of the unit or on a sticker on the box. -
Page 6: Software Installation
1.3 Software Installation After you register your new IOS, you can download the installer from the Download/Hardware Drivers section of the Waves website. Since SoundGrid enables you to access an I/O device from any computer in the network, you will need to install the software on each computer in the network. -
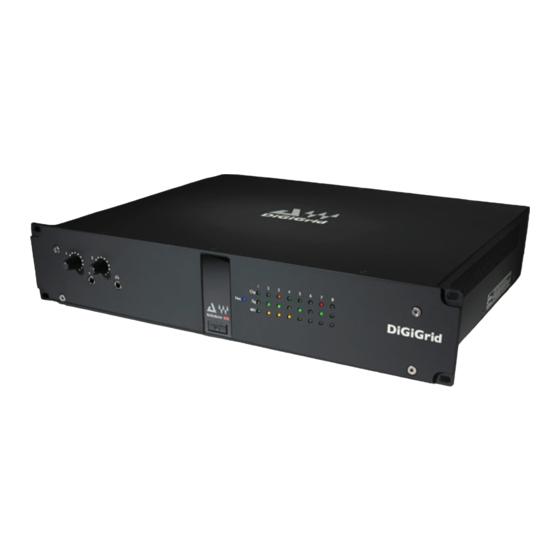
Page 7: Hardware
2. HARDWARE IOS is a 2U rack-mounted device. Aside from headphone jacks, all connections are from the rear panel. IOS Front Panel Front panel LEDs indicate status regarding essential device functions for each channel. Input clipping Red = clipping (level can be set through the control panel) - Page 8 S/PDIF in and out (RCA connectors) AES in and out (XLR connectors) Analog connections 8 mic/line inputs (combo XLR/TRS connectors) 8 line out ¼” TRS connectors Alt line out (DB25 8 channel balanced connector) See connection diagram in IOS specifications section.
-
Page 9: Suggested Uses And Configurations
3. SUGGESTED USES AND CONFIGURATIONS There are many ways to use your DiGiGrid IOS. Your existing (or future) equipment, how you work, and what you need to accomplish are factors to consider when incorporating an IOS into your studio. Project studios with one or two DAWs can share I/O resources, with any of the computers involved capable of claiming the server. -
Page 10: Adding More I/Os To Your System
Add a DiGiGrid IOX and you pick up another 12 mic inputs, 6 line outs, and 4 more individual headphone outputs. Connect the IOX to the built-in Ethernet switch on the rear of the IOS. You can add up to eight SoundGrid I/O devices to a single host. Each of these can be accessed by any computer on the network. -
Page 11: Multiple Computers With A Single Digigrid Ios
If you want to stream audio between several computers in order to combine multiple mixes or elements, connect several DAWs to one IOS interface. Each DAW can send and receive an audio stream, and any computer can control the I/O. Any native DAW—... -
Page 12: Advanced Network: Multiple Computers And Multiple I/Os
DLS units together supply 112 I/O channels to the HD system, with the DLS providing a built-in SoundGrid DSP server for plugin processing. ■ Another DAW system with an IOS can be used as a second control room system, an editing room DAW, or a recording station for the voiceover booth. - Page 13 DigiLink Interface Primary Port Expansion Port DiGiGrid DLS DiGiGrid IOX Ethernet DiGiGrid DLI Ethernet DiGiGrid MGB/MGO DAW / SG Studio Digilink MADI Ethernet Analog Clock MADI Matrix * Dependent on Clock Mode setting in the DLS/DLI control panel DiGiGrid IOS...
-
Page 14: Software Setup And Controls
4. SOFTWARE SETUP AND CONTROLS A SoundGrid network is managed by the SoundGrid Studio Application. This application assigns and removes devices, oversees the network, patches between devices, and provides access to device control panels. To maintain network effectiveness, the SoundGrid Studio Application always runs in the background. - Page 15 In the SoundGrid Studio Setup page, you will see racks containing all of the devices assigned to your system: physical and virtual I/O devices, drivers, and servers. Each I/O rack slot displays the device’s mode, clock status, and sample rate. In this example the IOS is...
- Page 16 To add another SoundGrid device, click on the arrow in an empty rack slot. From the list of available devices, choose the one you want to add, in this case, a DiGiGrid MGB coaxial MADI interface. In this image the IOS is grayed out, and therefore unavailable, since it is already claimed (in this case, by you).
-
Page 17: Device Firmware
4. 1 Device Firmware Firmware is a small program that runs on a device in order to control it. It enables IOS to communicate correctly with SoundGrid Studio. An I/O that is using outdated or incompatible firmware will not work properly in a SoundGrid network until its firmware is updated. -
Page 18: Control Panel
5. CONTROL PANEL Access the IOS Control Panel by clicking on the Gear symbol in the SoundGrid Studio Device Rack. From the IOS Control Panel you can manage: ■ Clock settings: source, sample rate, type, clock status ■ Microphone preamp controls: input gain, phantom on/off ■... - Page 19 Network LED on the front panel of the IOS to flash in a rather psychedelic manner. You can save and load presets of device settings. A saved preset includes all Clock and Control panels parameters. Use IOS presets to use on future sessions or copy them to another computer to duplicate a configuration.
-
Page 20: Controls Page
The Clock and Controls pages are used to set up and manage the IOS. 5. 1 Controls Page This is where you configure the inputs and outputs of the IOS. Mic preamps, line inputs and outputs, digital I/O, level control and metering: all of the things you’d expect from a top-end I/O. -
Page 21: Top Bar
5. 1 . 1 Top Bar The Top Bar of the Controls page includes an illustration of the IOS rear panel. When an input or output is selected in the main section of the page, the corresponding connector is highlighted. - Page 22 This allows you to control preamps “on the fly, ” without leaving your monitor mixer. eMotion ST also provides a digital trim for incoming digital signals. Refer to the eMotion ST user guide to learn how to integrate the IOS with the eMotion ST mixer.
- Page 23 Analog Output Controls In addition to meters and clip and peak indicators—which are identical to the input controls—there is a Headroom switch that provides a -10 dB pad. Presence of the -10 dB pad on an analog output is indicated by a blue light.
-
Page 24: Digital Section
Use the SRC button to enable input sample rate conversion. When SRC is selected, IOS will convert incoming digital stream to the sample rate of the clock that the device is locked to. A yellow light on a channel button indicates that sample rate conversion... -
Page 25: Clip Indication And Small Meters
5. 1 .4 Clip Indication and Small Meters Clip Indication Threshold sets where the clipping is indicated on the meter in the Focus section. This allows you to monitor levels in the way you find most comfortable. The threshold can be set to 0 dB, -1 dB, -2 dB, or -3 dB. This setting is global, not channel-specific. When Clip Indication Threshold is set, this behavior affects level indication for all channels, input and output. -
Page 26: Clock Page
SOURCE sets the clock source Internal The interface itself provides the clock. External WC Clock is provided by an external device via the IOS Word Clock Input connector Sync over Ethernet Word clock is transmitted between SoundGrid devices using Ethernet Digital... - Page 27 In the event that the selected clock source fails, IOS has a series of clock fallback layers, in this order: WC, SoE, AES/EBU, S/PDIF, Internal. If an IOS is clocked to WC and this external source fails, it will first try to clock to SoE. If that not successful, it will try AES/EBU, and so...
-
Page 28: Ios Server
When you connect the IOS to the host computer and run the Wizard, the internal server is assigned a port and configured for the host. Normally that’s all you need to do. The IOS server appears in the SoundGrid Studio Server rack, and the IOS I/O is seen in the Hardware I/O rack. -
Page 29: Applications Of An Ios Server
StudioRack channel can be sent to aux tracks or a main mix. You can set up and control the IOS preamp from eMotion ST, so you never have to leave the mixer to adjust microphones. For further information, refer to the eMotion ST user guide. -
Page 30: Studiorack
When part of a SoundGrid network with a DSP server (such as DiGiGrid IOS), StudioRack can shift plugin processing away from the local CPU and direct it to the SoundGrid DSP server. StudioRack works in conjunction with the eMotion ST mixer to create numerous personalized monitor mixes that use the same plugins heard in the mix—all with virtually no latency. -
Page 31: Moving Audio In A Soundgrid Network
7. MOVING AUDIO IN A SOUNDGRID NETWORK You’ve configured the network and set up the IOS preamps. One last thing to do: Integrate your hosts into the SoundGrid network so that you can send audio to and from devices—and listen to it. In order to do this, the audio must be patched from one point to another. -
Page 32: Using An I/O Device With A Daw
7. 1 Using an I/O Device with a DAW When using a DAW on a SoundGrid network, the SoundGrid ASIO/Core Audio driver serves as a bridge between IOS and the DAW. It enables the I/O to communicate with the DAW, and it provides patch points for connections. Using the driver and routing audio through it involves two steps: patch between the I/O and the driver;... -
Page 33: Patching I/O To Driver And Driver To I/O
7.2 Patching I/O to Driver and Driver to I/O When streaming audio to and from an IOS and a DAW, you must assign IOS inputs and outputs to the SoundGrid ASIO/Core Audio driver. (Alternatively, you may choose to monitor through the eMotion ST mixer. We’ll cover that option later in this section.) In the SoundGrid Studio Patch page, select the Device-to-Device tab. - Page 34 Selecting the Driver in the DAW DAW I/O Setup When a DAW is part of a SoundGrid network, the When you look at the I/O setup page of your DAW, what you see SoundGrid ASIO/Core Audio driver must be its playback are driver channels, not the channels of the I/Os themselves.
- Page 35 Note the relationship between the SoundGrid Studio Patch page and the DAW I/O Setup page. In the Patch page (left), IOS analog channels 1–8 are patched to driver channels 1–8, and IOS AES L and R are patched to driver channels 9 and 10.
-
Page 36: Emotion St Mixer Patching
7.3 eMotion ST Mixer Patching The eMotion ST mixer enables you to create studio monitor mixes as well as personalized headphone mixes. Patch to and from the mixer using the eMotion ST input and output tabs on the left side of the interface. The green buttons indicate whether a channel is mono, left side of a stereo pair, or right side of a stereo pair. -
Page 37: Device-To-Device Patching
Choose this view to patch devices and drivers to each other. All device and driver channels are shown along both the horizontal and vertical axes. There are many ways to patch devices, but normally IOS inputs are patched to the ASIO/Core Audio inputs for recording. -
Page 38: Headphone Patching
7.5 Headphone Patching IOS has two independently adjustable headphone jacks. These appear on the Patch page after the 8 I/O channels. Adjust headphone levels on the IOS front panel. -
Page 39: Using The Ios With Midi
8. USING THE IOS WITH MIDI An external MIDI controller can be connected to an IOS. The IOS software installer includes two MIDI drivers. One driver controls the device’s MIDI ports; the other is for StudioRack (this is explained in greater detail in the StudioRack manual). -
Page 40: Technical Specifications
9. TECHNICAL SPECIFICATIONS General ■ 2U rack-mounted (standard 19” rack-mount wide, 2U high, 380-mm deep excluding connectors) ■ Supported sample rates: 44.1, 48, 88.2 and 96 kHz (176.4 and 192 kHz will be supported in the future) ■ 8 channel mic/line inputs (on XLR/TRS combo) ■... - Page 41 ■ Output Impedance: 50 Ohms ■ Channel Separation: Better than 90 dB (40 Hz to 15 kHz) ■ Harmonic Distortion: Typically < 0.01% @ +10-dB Output @ 1 kHz IOS Analog Connectors DB25 8-channel balanced connector AES59-2012 G C H...
-
Page 42: Installation Notes
9. 1 Installation Notes The IOS unit must be earthed to the mains earth (ground) and installed according to the safety instructions included with the unit. The unit is powered from an IEC inlet on the rear. This must be connected to an earthed mains outlet using a cable that complies with local approvals and regulations.
Need help?
Do you have a question about the IOS and is the answer not in the manual?
Questions and answers