Advertisement
Table of Contents
- 1 Table of Contents
- 2 Front and Rear Panel
- 3 Remote Control
- 4 Connecting to a Television
- 5 Connecting to an Audio System
- 6 Connecting to a DVD Recorder or VCR
- 7 First Time Installation
- 8 Menu System
- 9 PVR Instructions
- 10 Troubleshooting
- 11 Technical Specifications
- Download this manual
See also:
User Manual
Advertisement
Table of Contents

Subscribe to Our Youtube Channel
Related Manuals for Teac HDB849


Summary of Contents for Teac HDB849
- Page 5 Important Safety Instructions 1) Read these instructions. 2) Keep these instructions. 3) Heed all warnings. 4) Follow all instructions. 5) Do not use this apparatus near water. 6) Clean only with dry cloth. 7) Do not block any ventilation openings, install in accordance with the instructions.
- Page 6 This symbol indicates that dangerous voltages constituting a risk of electric shock are present within this unit. This symbol indicates that there are important operating and maintenance instructions in the literature accompanying this unit. This symbol indicates that this product incorporates double insulation between hazardous mains voltage and user accessible parts.
-
Page 7: Table Of Contents
Table of Contents Front and Rear Panel ................1 Remote Control..................2 Connecting to a Television.................4 Connecting to an Audio System..............5 Connecting to a DVD Recorder or VCR............6 First Time Installation................7 Menu System ..................7 PVR Instructions .................. -
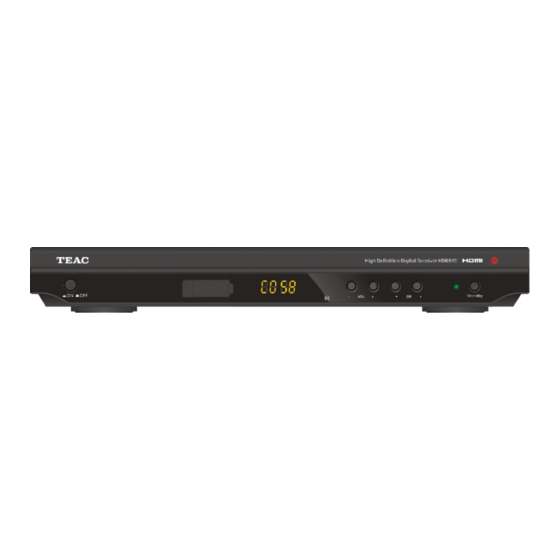
Page 8: Front And Rear Panel
Front and Rear Panel 1. Front panel POWER BUTTON: Push to turn on/off the main power supply. USB: For software upgrade recording and media playback. LED DISPLAY WINDOW: Displays the current channel number. REMOTE CONTROL SENSOR: Used to receive the signal from the Remote Control. VOL+/-: Used to move around the menu screens or adjusting the volume. -
Page 9: Remote Control
Remote Control 1. MUTE: Mute or restore Audio Output. 2. INFO: Displays additional channel information. LIST Also reveals information banner during Time Shift and Recording. 3. TTX: Displays Teletext Information. 4. SUBTITLE: Displays subtitle language options. 5. EXIT: Exits the current Menu or returns to the previous Menu. - Page 10 Installing the Batteries Remove the battery cover from the rear of the Remote Control and place 2xAAA size batteries inside the compartment. Please make sure the battery polarities match the polarity markings inside the compartment. 1.Open the cover 2.Install batteries 3.Close the cover Using the Remote Control To use the Remote Control, point it towards the front of the Digital Set Top Box.
-
Page 11: Connecting To A Television
Connecting to a Television For a basic connection from your Set Top Box to the television, use the Composite connection outlined below. For a higher quality connection, use the Component Video connection outlined below combined with the Composite Audio Connection. For the highest quality connection use a direct HDMI connection, see below. -
Page 12: Connecting To An Audio System
Connecting to an Audio System Digital Audio LOOP THROUGH 100-240V~ 50/60Hz Coaxial VIDEO HDMI OUT COMPONENT VIDEO / AUDIO OUT WHITE Coaxial cable AUDIO IN Coaxial Amplifier VOLUME INPUT SELECTOR POWER BYPASS PRO LOGIC 3 STEREO MODE TEST CHANNEL KARAOKE MUTE DOWN BASS... -
Page 13: Connecting To A Dvd Recorder Or Vcr
Connecting to a DVD Recorder or VCR TV Aerial Digital Audio LOOP THROUGH 100-240V~ 50/60Hz Coaxial VIDEO HDMI OUT COMPONENT VIDEO / AUDIO OUT AUDIO/VIDEO OUT ENABLES THE RECORDER TO ALLOWS THE RECORDER TO RECORD THE DIGITAL CHANNEL YOU RECORD DIFFERENT CHANNELS ARE WATCHING DVD RECORDER AUDIO/VIDEO IN... -
Page 14: First Time Installation
First Time Installation After all connections have been made properly, switch on TV and make sure the unit is connected to the Main Power. Press Power button to switch the unit If you are using the unit for the first time or or have restored the unit to Factory Default, Installation Guide Menu... - Page 15 (a) Program Edit To edit your program preferences (lock, skip, favourite, move or delete), you will need to enter the Program Edit Menu. This Menu requires a password to access. Enter the default password '000000'. The master unlock password '888888' Set Favourite Channels You can create a shortlist of favourite programs that you can easily access.
- Page 16 Move a TV or Radio Program 1. Select the preferred channel then press the RED button. A move symbol will appear. 2. Press UP/DOWN to move the channel. 3. Press OK to confirm. 4. Repeat the above steps to move more channels. Lock Program You can lock selected programs for restricted viewing...
- Page 17 (2). Picture Setting To access the Menu, press MENU then select [Picture] using the RIGHT/LEFT key. The Menu provides options to adjust the video settings. Press UP/DOWN to select an option and press RIGHT/LEFT to adjust that setting. Press EXIT to exit the menu.
- Page 18 (3). Channel Search To access the menu, press MENU select [Channel Search] using the RIGHT/LEFT keys. This enu provides options to adjust the earch hannel settings. Press UP/DOWN to select an option and press RIGHT/LEFT to adjust the setting . Press EXIT to exit (a) Auto Search...
- Page 19 2. Press the RIGHT/LEFT key to select the channel frequency. 3. Press OK to start searching channels. If a channel is found, it is saved and added to the channels list. If channels can not be found during searching, the unit will exit automatically. (c) Country Select your country of residence.
- Page 20 (a) OSD (On Screen Display) Language Select an OSD language for your menus, etc. (b) Subtitle Language Select the preferred subtitle language. (c) Audio Language Select the preferred audio language for watching TV channels. If the language is not available, the default program language will be used. (d) Digital Audio Select digital audio output mode.
- Page 21 (7). USB To access the Menu, press the MENU button and select [USB] using the RIGHT/LEFT keys. The menu provides options to playback Music, Photo and Multimedia files. It can support AVI, MP3, WMA, JPEG and BMP formats. The unit will only support USB device with FAT32 file system. It will not support NTFS file system.
- Page 22 (C) Movie Configure: - Subtitle Font [Small]: Displays the subtitle as small mode. [Normal]: Displays the subtitle as normal mode. [Big]: Displays the subtitle as big mode. - Subtitle Background [White]: Displays the subtitle in white background. [Transparent]: Displays the subtitle in transparent background. [Grey]: Displays the subtitle in grey background.
-
Page 23: Pvr Instructions
(E)PVR Instructions Instant Recording: You can press REC button to record the programs you are watching. Schedule During recording you are able to view other sub-channels broadcast on the Event Program Date Time Repeat Status same frequency. If you try to change frequency, a message will appear asking Event Add Channel Type you to confirm and end recording or cancel. - Page 24 When you return to the EPG screen, the programs you have booked for recording once will be marked, any recordings that are to occur daily or weekly will not be marked due to the static nature of the EPG, however the booked recordings will appear in your recording schedule.
- Page 25 Playback/Recorded List: To view a list of recorded programs, press the LIST key on the remote control. Use the UP/DOWN keys to highlight a program. To view a preview of the program you have highlighted, press the RED button. To view the highlighted program in full screen, press the OK key.
-
Page 26: Troubleshooting
Troubleshooting Problem Potential Reasons What to do Connect the power Power isn't connected No picture The power switch is not on Switch on the power Screen shows DVB-T cable not connected Plug in the DVB-T cable No Signal Check aerial cable and Aerial cable is faulty connections No sound from... -
Page 27: Technical Specifications
Technical Specifications Item Sub Item Parameter Input Frequency 170~230MHz Tuner 470~860MHz -25~-82dBm RF Input level IF Bandwidth 7MHz and 8MHz QPSK,16QAM,64QAM Modulation Decoder Format MPEG4 AVC/H.264 HP@L4 Video MPEG2 MP@ML.HL 576P , 720P, 1080i, 4:3 and 16:9 Output Format HDMI(V1.3C), YPbPr, CVBS Output Port Decoder Format Audio...
Need help?
Do you have a question about the HDB849 and is the answer not in the manual?
Questions and answers