Table of Contents
Advertisement
Quick Links
Advertisement
Table of Contents

Subscribe to Our Youtube Channel
Related Manuals for Triton Blue V700S-E

Summary of Contents for Triton Blue V700S-E
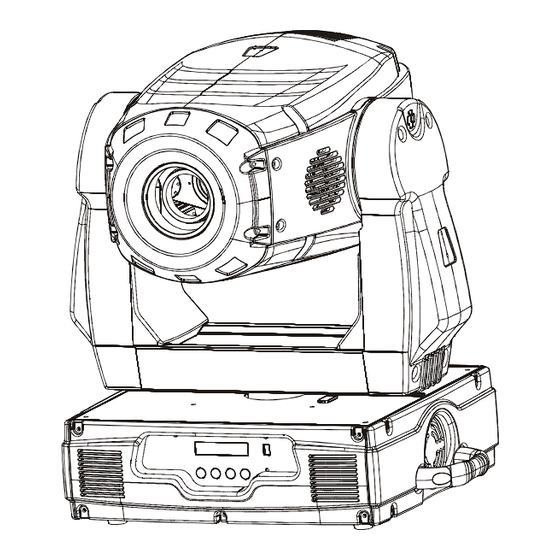
- Page 1 PROFESSIONAL MOVING HEAD USER’S MANUAL V700S-E KEEP THIS MANUAL FOR FUTURE NEEDS...
- Page 2 For your own safety, please read this user manual carefully before installing the device. Every person involved with the installation, operation and maintenance of this device has to: -be qualified -follow carefully the instructions of this manual INTRODUCTION: Thank you for having chosen this professional moving head. You will see you have acquired a powerful and versatile device.
- Page 3 ·Strobe effect with 1-10 flashes per second or random strobe via shutter ·Friendly colored LCD display ·Battery buffered Control Board for operation time readouts etc ·Local and remote lamp on/off ·Preset program: 8 built in programs can be called up via DMX controller ·Editable program: Edit and save the program to inside EEPROM via the control board or external controller, up to 250 scenes can be saved and then can be run in Stand Alone or sound activated.
-
Page 4: Safety Instructions
SAFETY INSTRUCTIONS This device has left the factory in perfect condition. In order to maintain this condition and to ensure a safe operation, it is absolutely necessary for the user to follow the safety instructions and warning notes written in this user manual. If the device has been exposed to temperature changes due to environmental changes, do not switch it on immediately. -
Page 5: Installation Instructions
that the device will serve you for a long time without defects. Do not shake the device. Avoid brute force when installing or operating the device. The device shall only be used complete with its protective shield. While choosing the installation-spot, please make sure that the device is not exposed to extreme heat, moisture or dust. -
Page 6: Mounting The Device
1) Unscrew the 4 screws A, B,C and D on the bottom of the housing, holding the plate where the lamp is underneath. 2) Gently pull the socket holder using the knob in the middle. 3) Carefully insert the lamp into the socket. Please remember there is only one way to insert the lamp. Gently slide the lamp and its lamp holder back into place and fasten the 4 screws. - Page 7 These installations have to be approved by a skilled person once a year. Cautions: The effect should be installed outside areas where persons may reach it, walk by or be seated. Overhead mounting requires extensive experience, including amongst others calculating working load limits, installation material being used, and periodic safety inspection of all installation material and the device.
-
Page 8: Dmx-512 Control Connection
Screw one clamp each via a M12 screw and nut onto the Omega holders. Insert the quick-lock fasteners of the first Omega holder into the respective holes on the bottom of the device. Tighten the quick-lock fasteners fully clockwise. Install the second Omega holder. Pull the safety-rope through the holes on the bottom of the base and over the trussing system or a safe fixation spot. -
Page 9: Control Board
Starting address 49 Starting address 25 Starting address 1 Projector DMX starting address selection All fixtures should be given a DMX starting address when using a DMX signal, so that the correct fixture responds to the correct control signals. This digital starting address is the channel number from which the fixture starts to “listen”... - Page 10 Enter-button. You can leave every mode by pressing the Mode/esc-button. The functions provided are described in the following sections. Default settings shaded Set DMX Address A001~AXXX DMX address setting Value Display PAN…… DMX value display Set To Slave Slave setting Slave1,Slave2,Slave3 Auto Program Auto program...
-
Page 11: Function Mode
Reset Default ON/OFF Restore factory set. Reset all motors Reset All Reset Pan/Tilt Reset Pan&Tilt Reset color wheel Reset Colors Reset gobos Reset Gobos Reset shutter and/or dimmer Reset Shutter Reset other motors Reset Others Test Channel PAN …… Test function Manual Control Fine adjustment of the lamp PAN =XXX... -
Page 12: Music Control
Music control With this function, you can run the internal program sound-controlled. Information Time information Power on time With this function, you can display the temporary running time of the device from the last power on. The display shows “XXXX”, “XXXX” stands for the number of hours. The counter is resetted after turning the device off. Total run time With this function, you can display the running time of the device. -
Page 13: Status Setting
Lamp on/off With this function you can switch the lamp on or off via the Control Board. • Select "Lamp on/off" by turning the encoder. • Press the encoder, the display shows “ON” or “OFF”. • Turn the encoder to select “ON” if you wish to strike the lamp or “OFF” in order to switch it off. •... -
Page 14: Initial Effect
• Set the DMX-value of channel 3 to the desired starting address. If you want to set the starting address to 57, set channel 1 to "7", channel 2 to "7" and channel 3 to "57". If you want to set the starting address to 420,set channel 1 to "7", channel 2 to "8"... -
Page 15: Reset Functions
Reset Default With this function, you can select restore factory set for ON or OFF, the default is OFF. Reset-functions With this function you can reset the device via the Control Board. You can select the different reset functions by turning the encoder. - Page 16 The Slave unit receives data from the Master unit according to the group which the Slave unit was assigned to. If e.g. a Slave unit is set to “Slave 1” in the menu “Set to Slave”, the Master unit sends “Auto Program Part 1” to the Slave unit. If set to “Slave 2”, the Slave unit receives “Auto Program Part 2”.
-
Page 17: Instructions On Use
• Press the Enter button to confirm. • Press the Mode/Esc button in order to return to the main menu. Example: Program 2 includes scenes: 10, 11, 12, 13 Program 4 includes scenes: 8, 9, 10 Program 6 includes scenes: 12, 13, 14, 15, 16 Auto Pro Part 1 is Program 2;... - Page 18 0-255 Cyan (0-white, 255-100% Cyan) Channel 3 - Magenta Color Wheel: 0-255 Magenta (0-white, 255-100% magenta) Channel 4 - Yellow Color Wheel: 0-255 Yellow (0-white, 255-100% Yellow) Channel 5 - PAN movement 8bit: Channel 6 - TILT movement 8bit: Channel 7 - Speed pan/tilt movement: 0-225 max to min speed 226-235 blackout by movement...
- Page 19 Open 10-19 Rot. gobo 1 20-29 Rot. gobo 2 30-39 Rot. gobo 3 40-49 Rot. gobo 4 50-59 Rot. gobo 5 60-69 Rot. gobo 6 70-89 Gobo 1 shake slow to fast 90-109 Gobo 2 shake slow to fast 110-129 Gobo 3 shake slow to fast 130-149 Gobo 4 shake slow to fast 150-169 Gobo 5 shake slow to fast 170-189 Gobo 6 shake slow to fast...
- Page 20 248-255 Macro 16 Channel 13 – Focus: 0-255 Continuous adjustment from near to far Channel 14 – Stepless Zoom 0-255 Zoom adjustment from small to big Channel 15 - Shutter, strobe: 0-31 Shutter closed 32-63 No function (shutter open) 64-95 Strobe effect slow to fast 96-127 No function (shutter open)
- Page 21 Channel 21 - Color macros - CMY and color wheel: 128-135 Macro16 8-15 Macro1 136-143 Macro17 16-23 Macro2 144-151 Macro18 24-31 Macro3 152-159 Macro19 32-39 Macro4 160-167 Macro20 40-47 Macro5 168-175 Macro21 48-55 Macro6 176-183 Macro22 56-63 Macro7 184-191 Macro23 64-71 Macro8 192-199...
- Page 22 Channel 24– Tilt fine 16bit ERROR MESSAGE When you turn on the fixture, it will make a reset first. The display may show “XXer” while there are problems with one or more channels. “XX” stands for channel 1, 2, 3, 4, 5, 6, 8, 9, 10, 11, 12, 13, 14, 17, 18 who has the testing sensor for positioning.
-
Page 23: Cleaning And Maintenance
Gobo wheel 2 Er (Gobo wheel 2 - error) This message will appear after the reset of the fixture if the magnetic-indexing circuit malfunction (sensor failed or magnet missing) or the stepping-motor is defective (or its driving IC on the main PCB). -
Page 24: Technical Specifications
We recommend a frequent cleaning of the device. Please use a moist, lint- free cloth. Never use alcohol or solvents. There are no serviceable parts inside the device except for the lamp. Please refer to the instructions under “Installation instructions”. Should you need any spare parts, please order genuine parts from your local dealer.
Need help?
Do you have a question about the V700S-E and is the answer not in the manual?
Questions and answers