Table of Contents
Advertisement
Quick Links
Service
Manual
Service Support
Options for service support include:
Technical Assistance Service (TAS). A list of official TAS providers is available at
●
http://www.navienuk.com. Contact a TAS for all warranty claims.
The technician or company that installed your boiler.
●
A registered service provider.
●
When you contact a TAS, please have the following information available.
Model number
●
Serial number
●
Date of purchase
●
Installation location and type
●
Error code information from the front display panel if available
●
Condensing Combi Boiler
KD Navien Co.,Ltd
Version: 1.0 (Oct. 19. 2015)
Advertisement
Table of Contents
Troubleshooting

Related Manuals for Navien NCB-24LSWE


Summary of Contents for Navien NCB-24LSWE
- Page 1 When you contact a TAS, please have the following information available. Model number ● Serial number ● Date of purchase ● Installation location and type ● Error code information from the front display panel if available ● Version: 1.0 (Oct. 19. 2015) KD Navien Co.,Ltd...
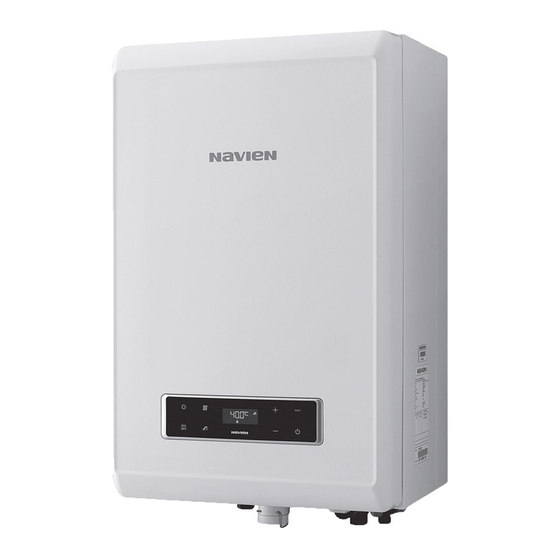
- Page 2 Condensing Combi Boiler Service Manual Model NCB-24LSWE NCB-28LSWE NCB-34LSWE NCB-40LSWE Keep this manual near the boiler for future reference. WARNING The safety information contained in this manual is important. Not following the safety precautions may cause a fire or explosion and result in property damage, injury, or death.
- Page 3 Revisions Version Description of changes Date 1.00 First issue Mar. 12, 2015 Version 1.0 NCB Service Manual 1...
-
Page 4: Table Of Contents
5.2.2 Error 003 Contents 5.2.3 Error 004 5.2.4 Error 012 5.2.5 Error 016 5.2.6 Error 030 1. Safety Information 5.2.7 Error 046 1.1 Safety Definitions 5.2.8 Error 047 1.2 Safety Symbols 5.2.9 Error 060 5.2.10 Error 109 1.3 Instructional Symbols 5.2.11 Error 110 1.4 Safety Precautions 5.2.12 Error 205... -
Page 5: Navien Warranty
Navien. When the product is installed in relocating or moving the Product from its original a new installation, the warranty period will start from the installation site, or any accidental or intentional damage date the end-user takes responsibility for the property. - Page 6 Abbreviations and Definitions Abbreviation Definition NCB-CE General name for NCB-24LSWE, NCB-28LSWE, NCB-34LSWE, and NCB-40LSWE products Natural Gas Propane Gas Air Pressure Air Pressure Sensor Domestic Hot Water Fan Motor GARC Gas Air Ratio Control Litre Per Minute Main Gas Valve...
-
Page 7: Safety Information
1. Safety Information 1.1 Safety Definitions 1.3 Instructional Symbols The following safety symbols are used in this manual. Read and follow all safety instructions in this manual to avoid IMPORTANT unsafe operating conditions, fire, explosion, property damage, personal injury, or death. Warns of a risk of damage and environmental pollution. - Page 8 DANGER DANGER WHAT TO DO IF YOU SMELL GAS It is important that these instructions are followed exactly to avoid fire or explosion, property damage, personal injury, or loss of life. DO NOT OPERATE THE BOILER. FLAMMABLE VAPOUR DO NOT CREATE ANY SOURCES OF Vapours from flammable liquids can IGNITION explode and cause fire resulting in...
- Page 9 For your safety and comfort, the DANGER default water temperature setting is 49°C. Increasing the temperature increases the risk of accidental burns or scalds. Water temperature at or above 52°C can cause instant scalding, severe burns, or death. Before you change the temperature setting, read the following table carefully.
- Page 10 If the gas or power supplies do not DO NOT turn on the boiler if the match the specifications do not main water supply valve is closed. connect the boiler. Contact Navien Ensure the boiler’s power supply is for assistance. isolated before removing the front cover.
- Page 11 DO NOT operate the boiler with WARNING an open front cover. Doing so may result in fire or carbon monoxide (CO) poisoning and may result in property damage, personal injury, or death. DO NOT operate this boiler without proper flue system. Doing so may result in fire or carbon monoxide (CO) poisoning ...
- Page 12 DO NOT remove the front cover CAUTION unless the power to the boiler is Do not attempt to repair or turned off or disconnected. replace any part of the boiler Failure to do so may result in unless it is specifically electric shock.
- Page 13 General Installation Guidelines EC Conformity Declaration Navien guarantees that no harmful substances or materials have been used in the manufacture of this product. All current and local laws and regulations must be observed when the boiler. The boiler must be installed in an Navien, hereby declares that the boiler models: adequately ventilated area.
-
Page 14: Product Information
Depending on the heat capacity, three models are available with different ratings: 24 kW, 28 kW, 34kW, and 40 kW. Model Maximum Space Heating Input Maximum DHW INPUT NCB-24LSWE 20.0 kW 24.0 kW NCB-28LSWE 24.0 kW 28.0 kW... -
Page 15: Components
2.2 Components The following diagram shows the key components of the boiler. Component assembly diagrams and particular parts lists are included in the appendices. NCB-24/28/34LSWE Version 1.0 NCB Service Manual 13... - Page 16 NCB-24/28/34LSWE 14 NCB Service Manual Version 1.0...
- Page 17 NCB-40LSWE Version 1.0 NCB Service Manual 15...
- Page 18 NCB-40LSWE 16 NCB Service Manual Version 1.0...
-
Page 19: Technical Data
3. Technical Data 3.1 General Specifications The table below lists the boiler’s general specifications. NCB- NCB- NCB- NCB- Specification Unit 24LSWE 28LSWE 34LSWE 40LSWE Heating capacity (max/min) 20.0/4.2 24.0/4.2 29.0/5.1 34.0/4.0 DHW heat capacity (max/min) 24.0/4.2 28.0/4.2 34.0/5.1 40.0/4.0 Heating output (max/min) at 80/60°C 19.5/4.0 23.3/4.2 28.4/4.9... - Page 20 NCB- NCB- NCB- NCB- Specification Unit 24LSWE 28LSWE 34LSWE 40LSWE Specific flow for kitchens (ΔT=45°C) l/min 10.8 12.7 Electrical supply 230 V / 50 Hz Nominal current 0.62 Electrical maximum rating Electrical protection IP X5D Boiler mounting method Wall-mounted Flue exhaust/Air intake system types B23-B33-B53-C13-C33-C43-C53-C63-C83 Flue exhaust/Air intake system diameters Coaxial Ø60/100 and Ø80/125–Dual duct Ø80/80...
-
Page 21: Dimensions
22 mm Hot water outlet (DHW) 15 mm Gas supply inlet 22 mm Cold water inlet (DHW) 15 mm Space heating return 22 mm Overhead View Supply Connections * NCB-24LSWE/28LSWE: 350 mm NCB-34LSWE/40LSWE: 380 mm Version 1.0 NCB Service Manual 19... -
Page 22: System Details
4. System Details 4.1 Setting the DIP Switches Switch Function Setting Normal operation 1-OFF, 2-OFF CAUTION 24/28/34 LSWE Do not remove the front cover 1-ON, 2-OFF DHW 2- unless the power supply is turned 40LSWE stage off or disconnected. Failure to do so may result in electric shock. -
Page 23: Front Panel Dip Switches
4.1.2 Front Panel DIP Switches 4.2 Measuring the Incoming Gas Pressure Setting the Front Panel DIP Switches The DIP switch on the front panel configures the fuel WARNING selection, source of the heat demand, and the temperature control standard. The boiler does not function correctly if there is insufficient incoming gas pressure. - Page 24 Remove the boiler’s front cover by loosening the 4 Open multiple hot water outlets that that have high Phillips head screws securing it to the case. flow rates, such as bathtub taps and shower mixers, to allow the boiler to operate at its maximum firing rate.
-
Page 25: Gas Conversion
4.3 Gas Conversion Gas orifice specifications This default gas supply configuration for this boiler is Natural Gas. If it is converted to Propane Gas, the Model conversion kit supplied with the boiler must be used. NCB-24LSWE Ø5.7 Ø4.5 WARNING NCB-28LSWE Ø5.7 Ø4.5... - Page 26 Loosen the four screws indicated in the illustration With the internal components exposed, locate the below. gas inlet pipe and the gas valve in the middle of the unit as shown in Figure 2-1 and Figure 2-2. Remove the PCB assembly. Figure 2-1.
- Page 27 LP orifice for installation. could result in damage to the valve or other property, serious personal injury, o r death. Navien NCB LSWE boilers are shipped configured for natural gas installations ONLY.
- Page 28 Figure 5-2. Exploded View of Gas Pipe Assembly Figure 5-1. Exploded View of Gas Pipe Assembly (NCB-40LSWE) (NCB-24/28/34LSWE) DANGER See Figure 5-1. Inspect the O-ring each time the connection between the venturi and gas valve inlet adapter is disassembled. The O-ring must always be installed and also must not be damaged.
- Page 29 Replace the orifice with the new LP gas orifice. Ensure that the orifice is seated properly inside the port before DANGER proceeding to the next step. When a gas conversion is performed, Reinstate the gas inlet pipe to its original position and replace all of the screws and ensure all ensure the front panel DIP switches connections are secure.
- Page 30 If the CO2 value does not match the values listed in Table 2 at a high flame 9.27% 8.78% setting, do not adjust the gas valve. Check that NCB-24LSWE the orifice is the correct specification. 10.40% 10.00% 9.20% 8.65%...
- Page 31 Gas type [20 mbar] [37 mbar] Model Output Consumption Gas flow Gas flow Load Kcal/h Max. 16,770 19.5 20.0 2.142 0.804 NCB-24LSWE Min. 3,552 0.450 0.169 Max. 20,124 23.4 24.0 2.570 0.964 NCB-28LSWE Min. 3,522 0.450 0.169 Max. 24,317 28.3 29.0...
-
Page 32: The Front Panel
4.4 The Front Panel The front panel enables users to adjust the water temperature and view the operating status and error codes. Remove the protective sheet from the front panel before using it. 4.4.1 LCD Display Display Function Remarks Space heating mode is activated. Space Heating mode DHW mode is activated. -
Page 33: Buttons
Segment Status Function Remarks Display System is waiting for a response from the main controller when the WAIT boiler performs an error test or an error history report. Error reset Deleting the error history and parameters. Factory reset INIT Maintenance alarm OT remote controller in use 4.4.2 Buttons Short Key... - Page 34 Long Key Combination Function Remarks [Power] long key Power ON / OFF (300 msec) Accessible from <Normal [ECO] + [Space Heating] long key Displays error history operation mode> or <Error display (2 sec) mode> only. Accessible from <Normal Displays user parameters [Eco] long key (2 sec) operation mode>...
-
Page 35: Turning The Boiler On Or Off
4.4.4 Normal Operation 4.4.3 Turning the Boiler ON or OFF When the boiler is OFF, start <Normal Operation To turn the boiler ON or OFF, press the [Power] button. mode> by pressing the [Power] button. The current supply or return water temperature is displayed depending on the selected heating mode (supply or return temperature mode). - Page 36 Item Description Display The current water temperature and the space heating icon are displayed. In this example, the current water temperature Boiler ON in <Normal (60°C) is displayed. 1. Normal status operation mode> The current water temperature and the space heating icon, and the error code are alternately displayed for a second.
-
Page 37: Displaying And Resetting Errors
4.4.5 Displaying and resetting errors 4.4.6 Adjusting the Space Heating Temperature set point When an error higher than Level 2 occurs, the Boiler may stop operating or have only basic functions. The To adjust the heating temperature set point: boiler will enter <Error display mode> directly from Press the Space heating button. -
Page 38: Adjusting The Dhw Temperature
The temperature can be adjusted while the display is flashing. If no buttons are pressed for 5 seconds or if the ECO button is pressed, the current temperature setting will be stored automatically. NOTE Record the original heating temperature setting in case you want to restore it to the default. -
Page 39: Viewing Basic Information
4.4.8 Viewing Basic Information ① To enter <Basic information mode>, press [ECO] for > 2 seconds from <Normal operation mode>. ② Press [+] or [-] to navigate through the user parameters. ③ The current parameter setting has a letter prefix followed by 3 digits. ④... - Page 40 Item Description Display A flow rate sensor is used to detect flow in the system. Eg.) 10.2LPM The current flow rate (LPM) is (E) Flow rate displayed. An optional thermostat is used to detect the outdoor temperature in degrees Celsius (℃). The current outdoor Eg.) at 15℃...
-
Page 41: Displaying Error History
4.4.9 Displaying Error History NOTE In <Normal operation mode> or <Error history In <Error history mode>, the first mode>, press [ECO] and [Space Heating] for > 2 seconds to access the error history mode. The most digit indicates the order of the recent error will be displayed first. -
Page 42: Displaying Service Information
4.4.10 Displaying Service Information In <Normal operation mode> or <Error display mode>, press [ECO]+[DHW] at the same time for 5 sec to access service information. Press [+] or [-] to navigate through the user parameters. The current data stored for each service item has a letter prefix followed by 3 digits of configuration data. Press [Reset] once to return to <Normal operation mode>. - Page 43 Item Description Display A flow rate sensor is used to detect flow in the system. The current flow rate Eg.) 10.2LPM (E) Flow rate (LPM) is displayed. Eg.) at 15℃ The current outdoor temperature is (F) Outdoor air temperature displayed. Outdoor reset control can be Eg.) Finned tube baseboard is set as the heating configured for various types of...
- Page 44 Item Description Display Displays the APS voltage value to one decimal place. Eg.) 3.2 V The target APS voltage (V) is (N) Target APS displayed. Displays the APS voltage value to one decimal place. Eg.) 3.2 V The current APS voltage (V) is (O) Current APS displayed.
-
Page 45: Service Status Information
4.4.11 Service Status Information 1. From <Normal operation mode> or <Error display mode>, press and hold [Summer/Winter] and [DHW] simultaneously for > 5 seconds to enter <Service status mode>. 2. Press [+] or [-] to navigate through the service status information items. 3. - Page 46 Eg.) Five successful second ignitions have occurred. (H) Successful second The number of successful second ignitions is displayed. ignition Eg.) Three successful third ignitions have occurred. Successful third The number of successful third ignition ignitions is displayed. Eg.) Two successful fourth ignitions have occurred. (J) Successful fourth The number of successful fourth ignition...
-
Page 47: Parameter Setting Mode
4.4.12 Parameter Setting Mode Parameter settings can be modified for boiler operations in different operating conditions, such as the space heating and DHW temperature ranges. Follow the instructions below to access special parameter mode and change the available settings. CAUTION Parameters must be set by a qualified technician with extensive knowledge of the boiler system. - Page 48 Entering Parameter Setting Mode 1. Press [+] or [-] to navigate through the parameter setting items. 2. Parameter setting items are identified with a letter prefix followed by three digits of related data. 3. The display goes into <Power off mode> if no activity is detected for 5 minutes. 4.
- Page 49 Item Description Display Outdoor reset in use (A) Outdoor This mode is used to configure the Outdoor Reset Control. Reset By default, the mode is disabled. Outdoor reset not in use This mode is used to configure the type of heating system that Outdoor Reset Control mode is used with.
- Page 50 Item Description Display Highest outdoor This mode is used to configure the highest outdoor temperature setting. temperature (°C) The boiler will operate at the highest setting in the supply or return temperature setting range for that temperature. (D) Highest Outdoor High Temperature Setting Range outdoor Highest outdoor temperature...
- Page 51 Item Description Display The anti-fast cycling time is the duration that the boiler stops space heating when the supply or return temperatures reach the set temperatures. The boiler will not resume heating until the duration Eg.) Anti-fast cycling set elapses even if the space heating supply or return temperatures return to at 3 minutes Anti-fast within the set range.
- Page 52 Item Description Display During heating, the boiler turns off the burner when the supply temperature meets or exceeds the burner OFF temperature. Eg.) at 2 ℃ (N) CH burner OFF temp Range Default 0 to 30 ℃ 2 ℃ During heating, the boiler turns on the burner when the supply temperature is below the burner ON temperature.
- Page 53 Item Description Display This menu sets the burner to operate at a low flame setting during initial heating. If low burner time is set at 15 minutes. (T) Low burner time Range Default 0 to 20 min 1 min This menu sets the burner’s acceleration time. If burner acceleration (U) Burner time set at 3 minutes.
- Page 54 Item Description Display This menu sets the maintenance time. Maintenance time (W) Maintenance Range Default time 0 to 999 days In <Parameter initializing mode>, This menu resets all boiler parameters to the default settings. To reset: press [+] or [-] (+) Reset all 1.
- Page 55 Entering Test Information Mode In <Normal operation mode> or <Error display mode>, press [ECO]+[Summer/Winter]+[S.H] for > 5 sec to access <Test information mode> Press [+] or [-] to navigate through the test information mode items. Press [ECO] once to access the currently displayed mode. Item Description Display...
- Page 56 Component Test performed Display The current APS value and the current speed (rpm) are Gradually increases the fan motor displayed alternately at two second intervals. Fan motor speed from 0 rpm to full speed and then decreases the speed to 0 rpm. Turns ON the pump for 10 sec and Displays ON or OFF based on the pump’s status.
- Page 57 Setting Operational Conditions In <Test information mode>, press [+] or [-] until “2. OPR” is displayed on the front panel. Then, press [ECO] once. <Normal operation mode> cannot be accessed if the boiler is in an error condition. When <Normal operation mode> opens, either Summer mode or Winter mode is automatically selected depending on the season.
-
Page 58: Resetting The Boiler (Factory Reset)
4.4.13 Resetting The Boiler (Factory Reset) To resolve some error conditions, reset the boiler by pressing [Reset]. If the problem is unresolved after resetting the boiler, refer to the Troubleshooting section of this manual or contact a TAS. In <Power off mode>, press and hold [ECO]+[Summer/Winter]+[S.H]+[DHW] buttons for more than 5 sec to initialise the system to the factory default settings. -
Page 59: Version Display
4.5 Version Display Press [RESET]+[+] for more than 5 sec in <Power Off mode>. Then, the Main Controller firmware version and the Panel firmware version will each be displayed for 3 seconds before the system returns to <Power Off mode>. Item Description Display... -
Page 60: Electrical Diagnostic Contacts And Wiring Diagram
4.8 Electrical Diagnostic Contacts and Wiring Diagram 58 NCB Service Manual Version 1.0... - Page 61 Colour coding Section Test points Readings Remarks Terminals Wires BLUE CON1 (1,3) AC 230 V BROWN 3.15 A fuse is connected to the Input voltage BROWN cable. GREEN CON17 Earth YELLOW Ignition Input voltage CONW1 (2,4) BROWN - BLUE 2P AC 230 V transformer Circulation...
-
Page 62: Key Component Descriptions
4.9 Key Component Descriptions 4.9.1 PCB Item Description Controls each component and monitors the overall performance of the unit. Function PCB malfunction. Fault A system component may not operate and generate an error code. In most PCB failures, the boiler Symptoms will not operate until the fault is resolved. -
Page 63: High Temperature Limit Switch
4.9.2 High Temperature Limit Switch Item Description 1. Overheat prevention switch. 2. If the switch detects extremely high temperature, the boiler will automatically trip and shut Function down. 3. Excessive high water temperatures (> 105°C) in the heat exchanger will activate the high limit switch. -
Page 64: Thermistor
4.9.3 Thermistor Item Description Measure hot and cold water temperature at the boiler’s space heating outlet and inlet Function connections. Inaccurate water temperatures from inside the boiler. Fault 1. If a thermistor fails, an error code is displayed before the boiler operates. Symptoms 2. -
Page 65: Fan Motor
4.9.4 Fan Motor Item Description Supplies combustion air for the burner and purges exhaust flue gas. Function To maintain gas input over long flue runs, the fan use APS to provide ideal combustion levels. 1. Fan speed failure: When fan speed is approximately 0 rpm. Fault 2. -
Page 66: Flame Rod Assembly
4.9.5 Flame Rod Assembly Item Description Repeatedly discharges a high voltage spark at the main burner until the gas ignites. Function 1. Unable to ignite the gas. Fault 2. Results in multiple unsuccessful ignition attempts. 1. The boiler does not ignite and error code “E003” or “E004” is displayed. Symptoms 2. -
Page 67: Ignition Transformer
4.9.6 Ignition Transformer Item Description Provides voltage for the igniter for gas ignition purposes. Function 1. The igniter is unable to ignite the gas. Fault 2. Results in multiple unsuccessful ignition attempts to. 1. The boiler does not ignite and error code “E003” or “E004” is displayed. Symptoms 2. -
Page 68: Aps
4.9.7 APS Item Description Measures the air pressure entering the burner system. Function 1. Noises occur during combustion. Fault 2. Imperfect and/or abnormal gas flame. 3. Incorrect voltage at the APS. 1. The boiler does not operate. Symptoms 2. Excessive carbon monoxide emissions are generated. E110 Error codes 1. -
Page 69: Main Gas Valve
4.9.8 Main Gas Valve Item Description 1. Controls the amount of gas supplied to the burner based on fan speed. Function 2. When the unit experiences abnormal combustion, it automatically shuts off the gas supply to prevent unsafe situations. Fault Unable to open/close 1. -
Page 70: Burner (To Be Revised)
4.9.9 Burner (to be revised) Item Description 1. Pre-mixes air and gas to reduce emissions and increase efficiency. Function 2. The burner produces the optimum air/gas mixture required to produce the correct level of heat during combustion. 1. Unable to initiate or sustain combustion. Fault 2. -
Page 71: Flow Sensor (To Be Revised)
4.9.10 Flow Sensor (to be revised) Item Description To detect water flow in LPM (litres per minute) to provide a steady hot water temperature. Function 1. Unable to detect or measure water flow rate. Fault 2. Damage to and/or leakage from the water flow sensor. 1. -
Page 72: Primary Heat Exchanger
4.9.11 Primary Heat Exchanger Item Description 1. Main component used in the boiler for heat transfer. Function 2. Multiple pipes on surface of the heat exchanger and inside the combustion chamber are used to minimise heat loss. 1. Water and/or exhaust gas leaks. Fault 2. -
Page 73: Secondary Heat Exchanger
4.9.12 Secondary Heat Exchanger Item Description 1. Secondary component used in the boiler for heat transfer. Function 2. There are multiple paths of water pipes on the heat exchanger as well as inside the combustion chamber which minimises heat loss. 1. -
Page 74: Dhw Heat Exchanger
4.9.13 DHW Heat Exchanger Item Description Heat transfer between space heating and DHW water. Water heated in the primary and secondary Function heat exchangers is circulated to the plate heat exchanger. Also, the plate heat exchanger filters the water in the space heating system to prevent faults in other parts of the heating system. 1. -
Page 75: Circulation Pump
4.9.14 Circulation Pump Item Description 1. Provides internal or external water circulation. Function 2. Internal circulation minimises the effects of temperature fluctuations. External circulation quickly delivers hot water to taps and results in water conservation. Unable to detect or measure water flow. Fault 1. -
Page 76: Way Valve
4.9.15 3 Way Valve Item Description Uses a DHW flow sensor and PCB to cycle water between the space heating system and the DHW Function heat exchanger. 1. No hot water in space heating mode. Fault 2. No domestic hot water in DHW mode. DHW supply stops and flow continues in the space heating system when the space heating water Symptoms temperature is lower than the set point. -
Page 77: Water Pressure Sensor
4.9.16 Water Pressure Sensor Item Description Analysis of heating system water pressure ratios. Function Unable to detect or measure changes of water pressure. Fault Symptoms The water top-up system does not operate automatically. E351, E352, E353 Error codes 1. Visual inspection: Check the circulation pump’s wiring connections. Diagnostics 2. -
Page 78: Dual Venturi
4.9.17 Dual venturi Item Description Controls the TDR by adjusting the gas/air mixture rate. Function A synchronous motor is used to provide two control phases for mixing gases. 1. Blades will not close. Fault 2. Blades will not open. 1. Boiler operation starts and stops frequently because of excessive heat supply. Symptoms 2. -
Page 79: Expansion Tank
4.9.18 Expansion tank Item Description 1. Removes air from the system during heating. 2. Relieves system pressure caused by expansion as the water temperature increases. Function 3. Uses a built-in low level water sensor to maintain the water in the boiler at a consistent volume. -
Page 80: Troubleshooting
5. Troubleshooting 5.1 Error Code Classification Error Classification Error Level Function Diagnosis/Actions Code E001 Heat exchanger overheating Manual reset E003 Ignition error Manual reset E004 False flame detection Auto reset E012 Flame loss Manual reset E016 Heat exchanger overheating Manual reset Combustion Exhaust overheat: exhaust limit switch stops the system... -
Page 81: Error Code List And Actions
5.2 Error Code List and Actions Error Function Diagnosis/Actions Code Code 1. Clean the strainer. 2. Check voltage via PCB at the pump 3. (AC 230 V) 4. Check that the flow rate is correct E001 Heat exchanger overheat 5. Check if water is circulating in the heating lines. - Page 82 Error Function Diagnosis/Actions Code Code 1. Check and clean the air intake filter. 2. Check and clean the fan motor. Fan motor activity error E109 3. Test the voltage from the PCB to ensure that it is correct. Replace fan if PCB voltage is normal.
- Page 83 Check the PCB. E782 If the actions contained in the table above do not resolve the boiler fault, contact the Navien technical support team on 1-800- 519-8794. To assist with fault resolution, error codes are displayed on the front panel and saved on a PCB board in the boiler providing a record of the faults and failures that occur.
-
Page 84: Error
5.2.1 Error 001 Error Conditions and Checklist Error Description 1. If the space heating water temperature is higher than 105 ℃ , E001 will be displayed on the front panel to warn users of high temperature conditions. E001 2. If the space heating water temperature decreases below 105 ℃ , E001 will automatically reset Heat exchanger overheat and the boiler will repeat the combustion cycle. - Page 85 Testing methods Error type Cause Testing method The circulation pump and fan run continuously in the error condition, Circulation pump 1. Check the power supply to the circulation pump (AC 230 V). fault 2. Replace the PCB if power is not available at the pump. Check that the 3-way valve is operating correctly in DHW mode.
-
Page 86: Error
5.2.2 Error 003 Error Conditions and Checklist Error Description When ignition faults occur, the boiler will attempt ignition 5 times. If a flame does not start, the E003 system displays ‘003E’ on the front panel. This error code can be cleared manually. Ignition fault 1. - Page 87 Scenario2 Version 1.0 NCB Service Manual 85...
- Page 88 Testing method Error Cause Testing method 1. Check that the main gas valve is open. 2. Check the gas supply pressure. NG: 17 - 25 mbar, LP: 25 – 35 mbar LP pressure drops can occur during winter. Gas supply fault 3.
- Page 89 Failure Cause Check method mode Bracket Igniter Flame rod Ignition gap: 3.5-4.5 mm (1/8”) When no discharge is seen at the electrode during ignition: Remove the electrode and check for cracks in the insulator. Adjust the gap if discharge is visible. ...
- Page 90 Error Cause Testing method 1. Test the primary and secondary voltages at the main gas valve. Use a multimeter, between the YELLOW - WHITE wires and verify the voltage is DC 24 V 2. If there is no voltage, replace the PCB. Main gas valve 3.
- Page 91 Error Cause Testing method 1. Inspect the flame area for deformation or foreign deposit. Repair or replace the part. 2. Check that the flame rod wiring connections are secure and free from damage. Flame error 3. Check the boiler case grounding connection is connected and secure. ...
-
Page 92: Error
5.2.3 Error 004 Error Conditions and Checklist Error Description 1. Pre ignition false-flame 2. If a flame signal is detected continuously for 3 sec before combustion (stand-by, pre-purge, pre- ignition), a false-flame error 004E (automatically cleared) is displayed on the front panel. The system E004 performs a continuous post-purge and starts the circulation pump. -
Page 93: Error
5.2.4 Error 012 Error Conditions and Checklist Error Description If the system detects a loss of flame during combustion, the system stops the gas supply and attempts to E012 restart. Then, the system adds the instance to the flame loss count. If flame loss occurs 20 times Loss of flame consecutively, error code ‘012E’... - Page 94 Testing method Fault Possible causes Testing method 1. Check the gas supply pressure. NG: 17 - 25 mbar, LP: 25 – 35 mbar LP pressure drop occurs frequently during winter. 2. When static pressure is normal, the use of other gas appliances may cause the boiler’s gas pressure to drop.
- Page 95 Fault Possible causes Testing method Flame loss and noise occurs after ignition Flame loss will occur if the gas orifices in the dual venturi are clogged. Flame loss Blockage in the Remove the gas inlet pipe and check for debris inside the dual venturi. Remove during Stage 2 gas orifice plate.
-
Page 96: Error
5.2.5 Error 016 Error Conditions and Checklist Error Description If the overheat controller on the heat exchanger is initiated during boiler combustion or standby, the E016 system displays ‘016E’ (manually cleared) on the front panel. The boiler switches to Lock-out mode and Bi-metal performs a continuous post-purge and starts the circulation pump. - Page 97 Testing method Fault Possible Cause Testing method Check if the overheat controller’s contacts are faulty. Defective Use a multimeter to test the resistance. Normal resistance is 0.3Ω and a fault overheat controller condition would be infinity (∞). Defective safety device Overheat controller Check if the overheat control wiring is disconnected ( normal resistance: 0.3 Ω...
-
Page 98: Error 030
5.2.6 Error 030 Error occurrence conditions and check items Error Description If the overheat controller on the top of the exhaust duct is initiated, the system displays the heat exchanger bimetal overheat message 030E (cleared manually) on the front panel. The boiler switches into Lock-Out, and performs post-purge continuously and operates the pump. - Page 99 Testing method Fault Possible causes Testing method 1. High exhaust gas temperatures can cause damage to or obstruct the heat Damaged or exchanger. Heat exchanger obstructed heat overheat 2. Flush the heat exchanger to remove scale deposits. exchanger 3. Replace the heat exchanger if it is damaged or cannot be unclogged. Faulty terminals on the exhaust gas overheat controller (110°C max) Defective ...
-
Page 100: Error
5.2.7 Error 046 Error Conditions and Checklist 5.2.8 Error 047 Error Conditions and Checklist 98 NCB Service Manual Version 1.0... -
Page 101: Error 060
5.2.9 Error 060 Error Conditions and Checklist Error Description Dual venturi wiring is disconnected or the dual venturi malfunctions. E060 The boiler switches to Lock-out mode, performs a continuous post-purge continuously, and starts the Dual venturi circulation pump. error 1. Check that the dual venturi is operating correctly. Run in dual venturi test mode. Checklist 2. - Page 102 Testing method Fault Possible causes Testing method Defective dual 1. Disconnect all cables from the dual venturi. venturi cable or 2. Use a multi-meter to test the dual venturi’s electrical wiring. harness 1. Turn off the power to the boiler at the main power switch (not the front panel power button) and wait for 10 sec.
-
Page 103: Error 109
5.2.10 Error 109 Error occurrence conditions and check items Error Description The system checks the fan speed signal when the fan starts. The error message 109E (cleared manually) is displayed in the following cases: 1. If fan speed is low or close to 0, the system detects a speed error and the boiler switches to Lock-out E109 mode (gas valve and ignition transformer locked). - Page 104 Testing method Fault Possible Causes Testing method 1. Check the voltage at the fan. Black + Yellow, DC 340 V 2. Replace the PCB if the voltage is not present. When replacing a PCB, turn off No fan operation the boiler and wait for at least 10 sec before proceeding.
-
Page 105: Error 110
5.2.11 Error 110 Error Conditions and Checklist Error Description The system detects the air pressure and the fan speed and displays 110E on the front panel in the following cases: E110 1. When the initial fan auto-adjustment is not performed. Air pressure error 2. -
Page 106: Error
Testing method Fault Possible causes Testing method 1. If 110E occurs intermittently during ignition or combustion, compare the standard speed with the current speed at min/max combustion. If the current speed is higher than normal, check the following: 110E Intake air supply / ... - Page 107 Check method Fault Possible causes Testing method Check if the temperature sensor is open and if the connector is connected Temperature sensor properly. connection fault Test the resistance of the temperature sensor. The sensor is faulty if the resistance Faulty sensor is 30 kΩ...
-
Page 108: Error
5.2.13 Error 218 Error conditions and checklist Error Description E218 Open heat If an open (-10°C or lower) heat exchanger input temperature sensor is detected, the system displays exchanger input ‘218E’ on the front panel. If this occurs, the boiler initiates shutdown. temperature sensor 1. - Page 109 Testing method Fault Possible causes Testing method Check if the temperature sensor is open and if the connector is connected Temperature sensor properly. connection fault Check the resistance of the temperature sensor. The sensor is faulty if the resistance is 30kΩ or higher) Defective sensor ...
-
Page 110: Error
5.2.14 Error 302 Error conditions and checklist Error Description Low pressure faults are monitored by a water pressure sensor and when a fault is detected the system E302 displays ‘E302’ Low water level error is generated if water pressure is 0.5 bar or less for 3 sec. Low water The error is automatically cancelled if water pressure returns to 0.5 bar or above. -
Page 111: Error
5.2.15 Error 352 Error conditions and checklist Error Description If an error signal is received from the water pressure sensor, the system displays the ‘E352’ on the front E352 panel. High water pressure errors occur if the water pressure is 3.9 bar or higher for 3 sec. High water The error is automatically cancelled if the water pressure returns to 3.9 bar or lower. -
Page 112: Error
5.2.16 Error 353 Error conditions and checklist Error Description E353 If a voltage error (< 0.3 V or > 5 V) at the water pressure sensor is detected continuously for 3 sec, the Water pressure system displays ‘E353’. When this error occurs, the boiler shuts down. sensor fault 1. -
Page 113: Error
5.2.17 Error 407 Error conditions and checklist Error Description E407 If an error (open: -10°C or lower) in the DHW Outlet Elbow input temperature sensor is detected, the Hot water outlet system displays the 407E error on the front panel. thermistor open or short 1. - Page 114 Check method Fault Possible Causes Check method Defective Check if the temperature sensor is open and if the connector is connected temperature sensor properly. connector Check the resistance of the temperature sensor. (Defective if it is 30kΩ or higher) Defective sensor ...
-
Page 115: 421Error
5.2.18 421Error Error conditions and Check Items Error Description E421 Cold water inlet If an error (open: -10°C or lower) in the DHW Outlet Elbow input temperature sensor is detected, the thermistor open or system displays the 421E error on the front panel. short 1. - Page 116 Check method Fault Possible Causes Check method Defective Check if the temperature sensor is open and if the connector is connected temperature sensor properly. connector Check the resistance of the temperature sensor. (Defective if it is 40kΩ or higher) Defective sensor ...
-
Page 117: 515Error
5.2.19 515Error Error occurrence conditions and check items Error Description If an error occurs in the internal circuit of the PCB (e.g., resistance, transistor or relay fault), the system E515 error displays 515E (cleared manually) on the PCB. 1. Defective PCB 2. -
Page 118: 517Error
5.2.20 517Error Error occurrence conditions and check items 5.2.21 594Error Error occurrence conditions and check items Error Description If the communication is abnormal in parts of PCB, the system displays E594 on the PCB. E594 error Check the PCB. Check items Error occurrence conditions and check items Possible Fault... -
Page 119: 740Error
5.2.23 740Error Error conditions and Check Items Error Description If an error (under 2.2kΩ or over 122.2kΩ) in the outdoor sensor is detected continuously for 3 seconds, The E740 system displays the error message E740 on the front panel. If this occurs, the boiler changes the control Abnormal mode from Reset Curve Mode to Normal Mode. -
Page 120: 782Error
5.2.24 782Error Error occurrence conditions and check items 118 NCB Service Manual Version 1.0... -
Page 121: Troubleshooting Guide By Symptom
5.3 Troubleshooting guide by symptom 5.3.1 Noise Error type Cause Check method Incorrect mounting to the wall or in an improper location. Defective Check for improper installation and reinstall the unit if necessary. installation Vibration caused due to defective blower. Vibration noise ... -
Page 122: Water Temperature Issue
5.3.2 Water Temperature Issue Error type Cause Check method Front panel power Hot water does not run if the front panel is switched off. The boiler does not work due to the defective flow sensor. The flow sensor impeller will not rotate if it contains excessive scale or debris. -
Page 123: Circuit Breaker Operation
5.3.3 Circuit breaker operation Error type Cause Check method The circuit breaker trips immediately as soon as the power cord is plugged in the receptacle. Power supply Check the sheath of power cord, or if there is short-circuit. Check the components in order from the power transformer to the PCB. If the circuit breaker operates after repairs check the wiring of each part. -
Page 124: Replacement Of Parts
To remove and replace any parts from the boiler, you will need a screwdriver that is at least 8 ~ 10 inches long. A flashlight and magnetic tip are also recommended. Navien 6.1 Replacement Procedure recommends the use of a parts tray to hold small parts and screws. -
Page 125: Components Replacement Instructions
6.2 Components Replacement NOTE Instructions All wiring harness connections to the 6.2.1 PCB PCB should match in colour and pin types. Do not use excessive force Turn off the gas supply to the unit. when removing the connectors as Disconnect the unit from the power supply. this may cause damage to the PCB. -
Page 126: Flame Rod
assembly by using the 3 screws as shown in figure 6. Reconnect the wiring connector from the fan assembly. Turn on water supply, power supply, and gas supply to the unit. NOTE Figure 4 Do not over-tighten the screws for the fan motor replacement with high Disconnect the wiring connector from the fan assembly, and then remove the 2 screws from the... -
Page 127: Ignition Transformer
Remove the flame rod wiring connector. Figure 9 Remove the 2 screws from the Igniter Transformer. Figure 8 Remove the flame rod from the burner assembly and replace with the new part. Reconnect the 2 ignition transformer insulated cables to the new flame rod. Place the new flame rod back onto the burner assembly and secure it by using the 2 screws from figure 7. -
Page 128: Aps
6.2.6 APS Turn off the gas supply to the unit. NOTE Disconnect the unit from the power supply. Confirm that the new air pressure Turn off the water supply to the unit. sensor is in the proper position Refer to figure11 and remove the air pressure sensor before turning the unit back on. -
Page 129: Condensate Trap
Remove the 2 screws located at the bottom of the 6.2.8 Condensate Trap unit that are attached to the gas valve. Turn off the gas supply to the unit. Disconnect the unit from the power supply. Turn off the water supply to the unit. Remove the pin that secures the condensate drain cap and then remove the cap. -
Page 130: Circulation Pump
6.2.9 Circulation Pump 6.2.10 Flow Sensor Turn off the gas supply to the unit. Turn off the gas supply to the unit. Disconnect the unit from the power supply. Disconnect the unit from the power supply. Turn off the water supply to the unit. Turn off the water supply to the unit. -
Page 131: 3-Way Valve
6.2.11 3-way Valve 6.2.12 Water Pressure Sensor Turn off the gas supply to the unit. Turn off the gas supply to the unit. Turn off the 230V power supply to the unit. Turn off the 230V power supply to the unit. Turn off the water supply to the unit. -
Page 132: Dhw Heat Exchanger
6.2.13 DHW Heat exchanger 6.2.14 Expansion tank Turn off the gas supply to the unit. Turn off the gas supply to the unit. Turn off the 230V power supply to the unit. Turn off the 230V power supply to the unit. Turn off the water supply to the unit. -
Page 133: Components Diagram And Part List
7. Components Diagram and Part List 7.1 Case Assembly Description Part # Remark Front Cover ass'y 30014038A Panel KDC-820-1P NCB-CE, PANEL 30013543A 20030440A 34, 40K NG Panel Bracket, Top 20030321A 24, 28K NG PCB KDC-820-XM NCB-CE, MAIN 30013542A Base Clamp 20030601A Air Pressure Sensor(APS) , APS-03-B 30013812A... -
Page 134: Burner Assembly
7.2 Burner Assembly Description Part # Remark FAN DAMPER 30008825A FAN PACKING 20022744A FAN B/K, FRONT 20022095A FAN B/K, BACK 20022096A 20033575A 24, 28K NG Mixing Chamber 20031254A 34, 40K NG 20027108A 24, 28K NG Mixing Chamber Packing 20022743A 34, 40K NG 30011854A 24, 28K NG Burner... -
Page 135: H-Ex Assembly
7.3 H-Ex Assembly Description Part # Remark EXHAUST THERMISTOR 30009478A THERMISTOR 30008366A Adapter SC OUT 20030566A 30013744A 24, 28K NG H/E MIDDLE PIPE 30011916A 34, 40K NG 30014183A 24, 28K NG FLAME ROD ASS'Y 30012226A 34, 40K NG Adapter COND OUT 20030564A FASTENER, F 20007853A... -
Page 136: Waterway Assembly
7.4 Waterway Assembly Description Part # Remark 30014535A 24K NG 30014536A 28K NG DHW H/E 30014537A 34K NG 30014538A 40K NG Water Pressure Sensor(WPS) HUBA, TIPO 505 30014542A Air Vent Ass'y 30014543A CIR Pump GRUNDFOS, UP015-60, CESAO3 30014554A THERMISTOR 30008366A Motor(3way-valve), 220/240V 50HZ 30014546A 30014541A... -
Page 137: Gas Assembly
7.5 Gas Assembly Description Part # Remark VENTURY INLET ADP 30009921A 40K NG O-RING 20006934A 40K NG 30013571A 24, 28K NG Gas Pipe Ass'y 30013592A 34K NG 30013604A 40K NG GAS VALVE, ET76S Time 30013623A Version 1.0 NCB Service Manual 135... -
Page 138: Fan Assembly
7.6 Fan Assembly Description Part # Remark FAN PACKING 20022744A 20018079A 40K NG O-RING 20007001A 24, 28, 34K NG 30013553A 24, 28K NG Inlet Pipe(FAN) 30013554A 34K NG 30015141A 40K NG Single Venturi 30014044A 24, 28, 34K NG DUAL Venturi 20022118A 40K NG 20031101A... -
Page 139: Inspection And Maintenance Schedule
8. Inspection and Maintenance Schedule 8.1 Annual Servicing 8.3 Maintenance Schedules In order to maintain its safe and efficient operation, it is Owner maintenance recommended that the boiler is serviced annually. Check boiler area Daily Check pressure / temperature CAUTION gauge Servicing must be performed by a... - Page 140 Memo 138 NCB Service Manual Version 1.0...
- Page 141 Memo Version 1.0 NCB Service Manual 139...
- Page 142 Memo 140 NCB Service Manual Version 1.0...
- Page 143 Memo Version 1.0 NCB Service Manual 141...
- Page 144 Memo 142 NCB Service Manual Version 1.0...
Need help?
Do you have a question about the NCB-24LSWE and is the answer not in the manual?
Questions and answers