Table of Contents
Advertisement
Quick Links
Advertisement
Table of Contents

Related Manuals for Sanan 20SA-2305A

Summary of Contents for Sanan 20SA-2305A
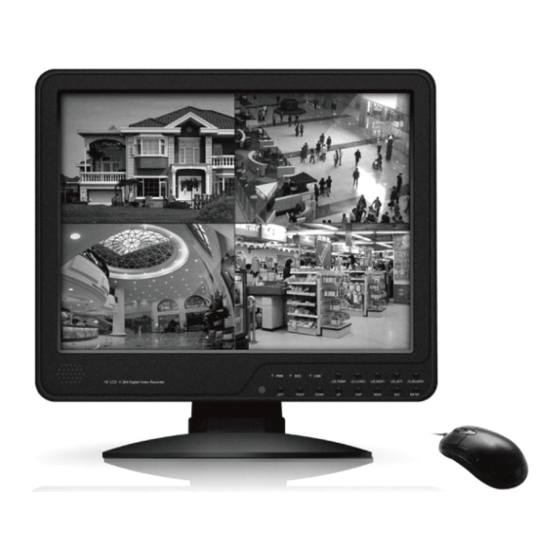
- Page 1 4 / 8-channel Embedded Digital Video Recorder...
-
Page 2: Table Of Contents
15"LCD 4/8-channel H.264 DVR COMBO Notes....................3 Chapter 1 Overview................3 1.1 Introduction................3 1.2 Packaging and accessories..........4 1.3 Main features............... 4 1.4 Technical parameters............5 1.5 Product appearance and interface definition....7 1.5.1 Front panel..............7 1.5.2 Back panel..............8 1.6 Remote controller..............8 1.7 Mouse................. - Page 3 15"LCD 4/8-channel H.264 DVR COMBO 3.6.3 User password............25 3.6.4 Display setup............26 3.6.5 Video/Audio setup........... 27 3.7 Advanced functions............28 3.7.1 Alarm setup.............. 29 3.7.2 System info.............. 31 3.7.3 Motion detection............31 3.7.4 Mobile phone monitoring........33 3.7.5 System maintenance..........34 3.7.6 PTZ setup..............35 3.7.7 Network setup............
-
Page 4: Notes
15"LCD 4/8-channel H.264 DVR COMBO Notes Notes Notes Notes � The power supply of this DVR is provided through DC12V5A adapter, please check the power outlet before installation and ensure it can meet the requirements of adaptor; � Do not place the DVR at a place subject to rain or moisture; �... -
Page 5: Packaging And Accessories
15"LCD 4/8-channel H.264 DVR COMBO standard chassis is suitable for small-scale monitoring places such as shop, supermarket, residential, school, hotel, Internet cafe, family and other civilian sites where require more on video quality, network transmission and real-time playback. Packaging and a a a a ccessories ccessories 1.2 Packaging Packaging... -
Page 6: Technical Parameters
15"LCD 4/8-channel H.264 DVR COMBO ◎ Support network to implement multi-screen real-time browsing, parameter setting, copy or playback ◎ Support mobile phone monitoring ◎ Support event classification and precise time search and playback ◎ Defaulted parameter value fast recovery ◎ Flexible USB interface for mouse Technical parameters 1.4 Technical... - Page 7 15"LCD 4/8-channel H.264 DVR COMBO resolution Recording diaplay Special player,support AVI file format conversion JPEG capture function Support,3M Pixels@10fps Audio input/output 4-channels input,1-channel output Alarm-action Recording Support Email alarm Send pictures to the designated Email Privacy mask Support Support PTZ protocol PELCO-D,PELCO-P Support 1 SATA HDD,capacity to 2T HDD remain time hint...
-
Page 8: Product Appearance And Interface Definition
15"LCD 4/8-channel H.264 DVR COMBO Product Product appearance appearance interface interface definition definition 1.5 Product Product appearance appearance and and interface interface definition definition 1.5.1 Front panel 1.5.1 1.5.1 1.5.1 Front Front Front panel panel panel Front panel 1 Connect HDD area interface ,... -
Page 9: Back Panel
15"LCD 4/8-channel H.264 DVR COMBO 1.5.2 Back panel 1.5.2 1.5.2 1.5.2 Back Back Back panel panel panel Physical interface Interface description AUDIO Audio input and output interfaces, please connect according to the digital ID of extension cable VIDEO Video iutput and output interface NETWORK Network interface, connect the Ethernet RS485+/-... - Page 10 15"LCD 4/8-channel H.264 DVR COMBO Functional definition Spare keys Mute Channel selection; number keys PTZ Control Single and multi-split screen Quit shortcut menu Shortcut menu Direction buttons: Next, on the left and right Exit / Return MENU Enter the main menu STARTREC Start recording (please refer to 2.4.7 for the method) STOPREC Stop recording (please refer to 2.4.7 for...
-
Page 11: Mouse
15"LCD 4/8-channel H.264 DVR COMBO Mouse Mouse 1.7 Mouse Mouse This equipment supports USB1.1 mouse, so the user can operate with mouse (mouse operation is as same as WINDOWS operating setting) to realize menu functions. It is just ok to insert the mouse with USB interface to the mouse interface in this equipment. -
Page 12: Alarm Input And Output
15"LCD 4/8-channel H.264 DVR COMBO Alarm Alarm input input output output 1.8 Alarm Alarm input input and and output output Alarm input close connection: Infra Infrared alarm 47kΩ ALARM IN + + + + - - - - NC NC C C C C 1 2 3 4 5 6 7 8 G ND + + + + 12 Alarm input open connection:... -
Page 13: Chapter 2 Quick Installation
15"LCD 4/8-channel H.264 DVR COMBO Chapter Chapter Chapter 2 2 2 2 Quick Quick Quick installation installation Chapter Quick installation installation 2.1 Combo Combo installation Combo Combo installation installation installation Easy installation method as shown below: Folding Folding Folding i i i i nstallation nstallation nstallation Folding... -
Page 14: Boot
15"LCD 4/8-channel H.264 DVR COMBO D、Finally,ensure the screws of HDD support lock stably newly newly fixed fixed harddisk harddisk can be be be be served served served video video recording recording after after Note: the the newly newly fixed fixed harddisk harddisk can served for for video... -
Page 15: System Login
15"LCD 4/8-channel H.264 DVR COMBO The newly installed harddisk must not be used until formatted in the equipment as follows: main interface > harddisk management > harddisk formatting. The system will be restarted after completion of formatting. 2. 2. 2. 2.3 3 3 3 System System System login... -
Page 16: Main Menu
15"LCD 4/8-channel H.264 DVR COMBO 2.4.1 Main menu 2.4.1 2.4.1 2.4.1 Main Main Main menu menu menu Click "Main Menu" to enter the main menu interface, please see 3.1. 2.4.2 2.4.2 Lock Lock 2.4.2 2.4.2 Lock Lock When the password function is on (please see 2.3), click right button in monitoring interface, and select "Lock"... -
Page 17: Mute/Open Volume
15"LCD 4/8-channel H.264 DVR COMBO PTZ speed (fast or slow) can be controlled in this interface, zoom, focus and aperture is also controllable. 2.4.6 2.4.6 2.4.6 2.4.6 Mute/open Mute/open Mute/open Mute/open volume volume volume volume Close or open the sound output in the preview mode. 2.4.7 2.4.7 Manual... -
Page 18: Chapter 3 Advanced Settings
15"LCD 4/8-channel H.264 DVR COMBO Chapter Chapter Chapter 3 3 3 3 Advanced Advanced Advanced settings settings Chapter Advanced settings settings Main menu 3.1 Main Main Main menu menu menu The main menu has the “Video Search”, “Recording Mode”, “Harddisk Management”, “Basic Setup”, “Advanced Functions”... - Page 19 15"LCD 4/8-channel H.264 DVR COMBO Channel Channel Channel: used to select if the video recording function is enabled for the Channel corresponding recording channel. R R R R ESOLUTION: ESOLUTION: ESOLUTION: ESOLUTION:available in the 3 levels of best, fine and normal, in which the recording resolution is the highest at the highest level;...
-
Page 20: Video Search
15"LCD 4/8-channel H.264 DVR COMBO Channel Channel Channel Channel: You may choose either “All” or a single channel. Time configuration Time Time Time configuration configuration configuration: First select from the 3 modes of alarm recording, general recording and no recording for your desired recording mode for a certain lattice, and configure specific recording time lattices (each lattice represents 1hr). - Page 21 15"LCD 4/8-channel H.264 DVR COMBO Enter the year, month and date to be searched in the “Time Input” box and click “Search” to view the record state of this date, as shown below: Month Month Month: displaying the record information of every day in the current month. Month A green block indicates normal recording, a red block indicates alarm recording, and the background color indicates no recording.
- Page 22 15"LCD 4/8-channel H.264 DVR COMBO Notes: In the “Detailed File” list, by which recording channel is the current record file recorded is displayed at “Channel”, the starting and ending times of record packaging at “Record Time”, the size (unit: MByte) of this record file at “Size”, and the type of this record file at “Type”, with the two options of normal and alarm.
-
Page 23: Backup
15"LCD 4/8-channel H.264 DVR COMBO Backup Backup 3.4 Backup Backup Enter the “Detailed File List” (see 3.3 Video Search) screen for the backup operation. The record file may be backed up by a USB storage device. Before the record file is backed up, the user must insert the peripheral storage device into the USB2.0 slot of this unit. - Page 24 15"LCD 4/8-channel H.264 DVR COMBO Harddisk state Harddisk Harddisk Harddisk state state state: After the harddisk is connected, the system will detect if the harddisk is correct automatically. If the harddisk needs formatting, “Unformatted” will be displayed in the harddisk state, when you can click “Format HDD”...
-
Page 25: Basic Setup
15"LCD 4/8-channel H.264 DVR COMBO The “Default” button is used to restore the factory default values. Note: In order to connect the harddisk data on the DVR securely, we recommend that the harddisk must be formatted before the first time of recording. Basic Basic setup... -
Page 26: Time Setup
15"LCD 4/8-channel H.264 DVR COMBO The system has optional multiplex languages ,after choosing the language,click "Apply" button to save, and it will go into effect after system restart. 3.6.2 3.6.2 3.6.2 3.6.2 Time Time Time Time setup setup setup setup Move the cursor to the “Time Setup”... -
Page 27: Display Setup
15"LCD 4/8-channel H.264 DVR COMBO log in successfully; if it is disabled, the main menu of the system can be logged in directly; User User User User Password Password Password Password: This option is operated with keys or the mouse. Enter digits directly to set the user password;... -
Page 28: Video/Audio Setup
15"LCD 4/8-channel H.264 DVR COMBO between name positions; there are 5 setup options: top left, bottom left, top right, bottom right and off; Color Color setup setup setup: Move the cursor to “Setup” of the corresponding channel, and press Color Color setup “Enter”... -
Page 29: Advanced Functions
15"LCD 4/8-channel H.264 DVR COMBO resolution resolution resolution: Left-click or press “Enter” to set the VGA output resolution, VGA resolution with the 3 options of 1280*1024, 1024*768 and 800*600; Camera system Camera Camera Camera system system system: Left-click or press “Enter” to change over between the two camera systems of PAL and NTSC;... -
Page 30: Alarm Setup
15"LCD 4/8-channel H.264 DVR COMBO The advanced functions include the 7 options of alarm setup, system information, motion detection, mobile phone monitoring, system maintenance, PTZ Setup and Network Setup. 3.7.1 3.7.1 Alarm Alarm setup setup 3.7.1 3.7.1 Alarm Alarm setup setup Move the cursor to the “Alarm Setup”... - Page 31 15"LCD 4/8-channel H.264 DVR COMBO Video loss alarm Video Video Video loss loss loss alarm alarm alarm: On: When the video of a certain channel is lost, this channel will display in the lower part of the Video Preview screen: “Video Loss”. Alarm Alarm Alarm...
-
Page 32: System Info
15"LCD 4/8-channel H.264 DVR COMBO server whose port number is 465. SMTP SMTP server server server: the server address of the mailbox used, for example, the SMTP SMTP SMTP server server of the Yahoo mailbox is smtp.mail.yahoo.com.cn; please check this address to your mailbox supplier. - Page 33 15"LCD 4/8-channel H.264 DVR COMBO Channel Channel switch switch switch: Each channel has a corresponding switch. Press “Enter” to Channel Channel switch select motion detection “On” or “Off”. Detection sensitivity Detection Detection Detection sensitivity sensitivity sensitivity: Each channel has a corresponding sensitivity setting, with the 4 levels of 1, 2, 3 and 4, in which 4 is the highest.
-
Page 34: Mobile Phone Monitoring
15"LCD 4/8-channel H.264 DVR COMBO A. Turn “On” the corresponding channel in the “Channel Switch” option; Set the sensitivity level as necessary, usually set at 3 or 4; Set the motion area of the corresponding channel in the “Area Setup” option;... -
Page 35: System Maintenance
15"LCD 4/8-channel H.264 DVR COMBO Wireless network Wireless Wireless Wireless network network network: The criteria for selection of wireless network include 3G, 2.5G and 2.75G. Press “Enter” to change over between these 3 criteria. Please make a choice based on your local mobile operator and the network standard supported by your mobile phone. -
Page 36: Ptz Setup
15"LCD 4/8-channel H.264 DVR COMBO 3.7.6 setup 3.7.6 3.7.6 3.7.6 PTZ PTZ setup setup setup Enter the “PTZ Setup” screen from “Main Menu” →“Advanced Functions”, as shown below: Channel Channel Channel: selecting the channel to which the dome camera is connected (to select Channel any of the latter 4 channels, click “Next Page”) Protocol... - Page 37 15"LCD 4/8-channel H.264 DVR COMBO Connection mode Connection Connection Connection mode mode mode: with 3 options: static configuration, DHCP and PPPOE Static configuration Static Static Static configuration configuration configuration: allocating an IP address manually DHCP DHCP DHCP: acquiring an IP address automatically DHCP After selecting the DHCP mode, restart the system after confirmation.
- Page 38 15"LCD 4/8-channel H.264 DVR COMBO PPPOE Setup screen. After entering the broadband user name and password, click “Enter” and the system will restart. After that, the DVR will establish a network connection in the PPPOE mode automatically. After successful connection, the IP on the IP address will be modified to the acquired dynamic WAN IP address automatically.
-
Page 39: Domain Name Application
15"LCD 4/8-channel H.264 DVR COMBO DDNS (domain name resolution) DDNS DDNS DDNS (domain (domain (domain name name name resolution) resolution) resolution): with the two options of “Enable” and “Disable”; when a domain name resolution server is available, please select DDNS Enable; Server Server address... - Page 40 15"LCD 4/8-channel H.264 DVR COMBO After confirmation, the system will prompt that the verification message has been sent to the designated mailbox, as shown below: Activate account in your mailbox and open the confirmation link sent from support@dyndns.com, as shown below: Click the link below and enter the website to activate the account.
- Page 41 15"LCD 4/8-channel H.264 DVR COMBO After successful activation, open the home page http://www.dyndns.com/ to log in. After successful login, click “Services” →“Dynamic DNS”, as shown below: Application for free domain name After entering the “Dynamic DNS Services” screen, click “Dynamic DNS Free” to apply for a free dynamic domain name, as shown below:...
- Page 42 15"LCD 4/8-channel H.264 DVR COMBO Enter the “Dynamic DNS Free” screen, as shown below. Click “ ”. Enter the hostname, select the service type and then enter the dynamic IP address (usually being the dynamic IP address of the network of the DVR host) to be tied in the Add New Hostname screen, as shown below.
- Page 43 15"LCD 4/8-channel H.264 DVR COMBO...
-
Page 44: Port Mapping
15"LCD 4/8-channel H.264 DVR COMBO Port mapping 3.9 Port Port Port mapping mapping mapping Mapping procedures: Set the host IP address. See the relevant section. Log in the router. If the IP address of the router is 192.168.1.1. After this IP has been entered in the IE address bar, a login prompt box will appear, as shown below: Click “Enter”... - Page 45 15"LCD 4/8-channel H.264 DVR COMBO Click “Applications& Gaming ”, as shown below:...
-
Page 46: Chapter 4 Dvr Network
15"LCD 4/8-channel H.264 DVR COMBO As shown above, fill in the IP and the port number in the corresponding files, and select “Both” in [Protocol]. The tick below [Enable] denotes “selected”. After setup, click “Save Setting” to save the settings. 80 stands for the WEB port, 9000 for the media port and 6000 for the mobile phone port. -
Page 47: Ie Log-In
15"LCD 4/8-channel H.264 DVR COMBO After setup, enter the IP address in the IE address bar, and complete the automatic installation of the plug-in unit as prompted. 4.3 IE IE IE IE log-in log-in log-in log-in Log in the system after the plug-in unit has been installed. For example, if the domain name of the DVR dvrtest05.eicp.net and its port is 80, enter the domain name in the IE address bar, as shown below, enter the user name and the password, select “LAN”... -
Page 48: Record Playback
15"LCD 4/8-channel H.264 DVR COMBO Record Record playback playback 4.5 Record Record playback playback Click "PLAYBACK"to enter the Record Playback screen, as shown below: First select the date of the record to be played and the channel and record types,... -
Page 49: Recording Mode
15"LCD 4/8-channel H.264 DVR COMBO and then click “Search”. The eligible record files will appear in the file list, with the bold numbers denoting dates with record data, as shown in the figure above. Select the file to be played back, and double-click this file or click “Playback” to play it. -
Page 50: Ptz Control
15"LCD 4/8-channel H.264 DVR COMBO The setup method is the same as the mainframe menu. See “Alarm Setup” in Chapter 3 for details. control control 4.8 PTZ PTZ control control Click “Setup” →“PTZ ” to enter the PTZ Control mode. See Figure 5-6: See Chapter 3 “Network Setup”... -
Page 51: System Setup
15"LCD 4/8-channel H.264 DVR COMBO 4.10 4.10 System System setup setup 4.10 4.10 System System setup setup Click “Setup” →“Setting” to enter the Setting screen, as shown below: INTERNET INTERNET INTERNET: setting the code stream; the higher the code stream is, the clearer INTERNET the remote image will be, but the network bandwidth must be high, otherwise the image may have a delay. -
Page 52: Appendix 1. Q&A
15"LCD 4/8-channel H.264 DVR COMBO operating state of the harddisk, the time remaining and the software version and MAC address of this system. Appendix Appendix Appendix 1. 1. 1. 1. Q&A Q&A Q&A Appendix Q&A 1. How to recover password if forgotten? A: Please contact technicians from vender or manufacturer if you have forgotten the password. - Page 53 15"LCD 4/8-channel H.264 DVR COMBO A: DVR will produce certain heat during its running, please put DVR at a safe place with good ventilation, to avoid to damage stability and service life of the system because of high temperature for long-time. 5.
- Page 54 15"LCD 4/8-channel H.264 DVR COMBO 11. Can not find any information record when playback? A: please check the harddisk data cable connection, and whether system time is adjusted illegally. Try it several times, and test whether the harddisk is damaged if above still appears. 12.
- Page 55 15"LCD 4/8-channel H.264 DVR COMBO 16. Remote login interface is available, but show “Login failed” when login? A: 1) Please check whether the account matches the password you entered, if you forget the password, please enter “User Password” interface of mainframe, and click “Clear IE Password”, and login again.
-
Page 56: Appendix 2 Harddisk Space Occupation Calculation
15"LCD 4/8-channel H.264 DVR COMBO Appendix Appendix Appendix 2 2 2 2 harddisk harddisk harddisk space space occupation occupation calculation calculation Appendix harddisk space space occupation occupation calculation calculation This DVR data harddisk occupation per channel/hour is as following table according to different bit rate and resolution: (The table is only for reference, the real product shall prevail) Unit: Megabyte /Channel/Hour... - Page 57 15"LCD 4/8-channel H.264 DVR COMBO...
Need help?
Do you have a question about the 20SA-2305A and is the answer not in the manual?
Questions and answers