Table of Contents
Advertisement
Advertisement
Table of Contents

Related Manuals for midiplus BK492


Summary of Contents for midiplus BK492
-
Page 2: Table Of Contents
1.5 Power supply ..................4 Chapter 2:The basic MIDI Controllers ............5 2.1 BK492 Function Buttons ..............5 2.1.1 BK492 Function Buttons Screenshot ........... 5 2.1.2 Set Controller Buttons ..............5 2.1.3 Set Mode Button ................. 5 2.2 Setting ....................6 2.2.2 Initialization ................. -
Page 3: Preface
The eight fully assignable knobs and sliders allow for instant control of your software’s features and can pick up just where you left off. The versatile and easy-to-use BK492 is a great controller in the studio and concert. What’s in the Box? The following items should be in your package. -
Page 4: Chapter 1:Quick Start
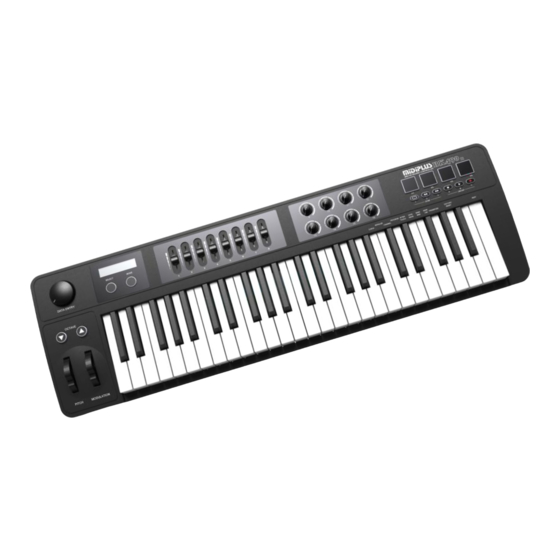
Chapter 1:Quick Start 1.1 BK492 Overview 1.1.1 Front panel Overview 1.1.2 Rear panel overview BATTERY MIDIPLUS Co, Ltd. http://www.midiplus.com.tw... -
Page 5: Controllers Description
MIDIPLUS suggests that you connect directly to your computer built in USB ports. 1.3 Installation BK492 does not need other driver to work with a computer, only needs the USB Audio Driver built in the system. The first time you connect BK492 to your computer, it will automatically install the general USB-Audio Driver. -
Page 6: Play With Your Application Software
If the BK492 driver is properly installed, and there is not other MIDI device connected, the MIDI In port of BK492 In-1 (or "Port 1"on the Mac) will be selected as the first midi input, while the MIDI Out port of BK492 Out-1 (or Port 1) will be selected as the first midi output. -
Page 7: Chapter 2:The Basic Midi Controllers
MIDI data out including the midi message. A virtual instrument can change it into a track of your DAW software and creates the sound based on the MIDI message received from BK492. For more details on using virtual instruments, please refer to the documentation in your DAW software. -
Page 8: Setting
Press the "MODE" Button again (LED lights off) to save the edit. 2.2.2 Initialization The initialization will restore BK492's factory settings, which will erase all the presets and the saved values. To do the Initialization, you need to do as follows: ... -
Page 9: Global Channel
Activating this function the keyboard becomes a set of function Buttons for setting MIDI parameter commands. The BK492's global MIDI channel is assigned by the following steps: Press the "MODE" Button and the LED under the button will light on. -
Page 10: Transpose
You can see the Control Number on the LCD screen. Press the "Next" Key to set the channel. Turn the "Data Entry" Knob or Press the "Octave UP & Down" button to MIDIPLUS Co, Ltd. http://www.midiplus.com.tw... -
Page 11: Reset
Press the "MODE" Button again (LED lights off) to save the edit. 2.2.7 Reset To restore BK492's factory settings, which will erase any presets or other saved value; you need to do as follows: Press the "MODE" Button and the LED under the button will light on. -
Page 12: Velocity Curve
Velocity Curve MIDIPLUS Co, Ltd. http://www.midiplus.com.tw... -
Page 13: Trigger Pads Controller Information
51-D#3 Ride Cymbal 1 82-A#5 Shaker 52-E3 Chinese Cymbal 83-B5 Jingle Bell 53-F3 Ride Bell 84-C6 Belltree 54-F#3 Tambourine 85-C#6 Castanets 55-G3 Splash Cymbal 86-D6 Mute Surdo[EXC6] 56-G#3 Cowbell 87-D#6 Open Surdo[EXC6] 57-A3 Crash Cymbal 2 MIDIPLUS Co, Ltd. http://www.midiplus.com.tw... -
Page 14: Transport Controls Information
8 Programmable Knobs slider 8 Assignable Sliders Power Jack, USB, USB/Keyboard MIDI OUT, Jacks Sustain Switch Power supply USB / Batteries Accessories User’s Manual, USB cable Inputs/outputs MIDI OUT 5-pin DIN*2 USB-B Sustain Pedal 1/4 " pedal jack MIDIPLUS Co, Ltd. http://www.midiplus.com.tw...
Need help?
Do you have a question about the BK492 and is the answer not in the manual?
Questions and answers