Table of Contents
Advertisement
Advertisement
Table of Contents
Troubleshooting

Related Manuals for Technika LCD 24-621


Summary of Contents for Technika LCD 24-621
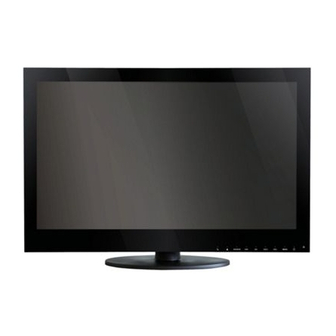
- Page 1 User Guide...
-
Page 3: Table Of Contents
INTRODUCTION HDMI..............................5 SAFETY IS IMPORTANT.........................5 IN THE BOX.............................5 SAFETY INFORMATION KEEP THIS INSTRUCTION......................6 IMPORTANT.............................6 ELECTRICAL INFORMATION......................7 TV FUNCTIONS / TV CONNECTORS TV FRONT CABINET FUNCTIONS....................8 TV CONNECTIONS.........................9 CONNECTING THE TV ANTENNA....................10 CONNECTING EXTERNAL DEVICES..................10 CONNECTING DIAGRAM......................11 COMMON INTERFACE SLOT COMMON INTERFACE.........................12 WALL MOUNTING WALL MOUNTING.........................13 REMOTE CONTROL... - Page 4 VGA & PC SETUP PC SETUP.............................36 PICTURE............................37 MULTIMEDIA & USB PVR FUNCTIONS MULTIMEDIA..........................38 MY ALBUM............................38 MY MUSIC.............................39 MY MOVIE.............................40 MY RECORDER..........................40 USB PVR RECORDING & PLAYBACK FUNCTION..............42 PVR TIME SHIFT...........................42 USB PVR FUNCTION ATTENTIONS....................43 DVD OPERATION BASIC OPERATION........................44 SUPPORTING DVD FORMAT.......................45 DVD FUNCTIONS OPERATING INSTRUCTIONS...............46 MP3 / JPEG PLAYBACK.......................48 FUNCTION SETTINGS.........................49...
-
Page 5: Introduction Hdmi
HD Ready 1080p LCD/DVD TV User Guide Power Cable Remote Control 2 x AAA Batteries... -
Page 8: Tv Functions / Tv Connectors
TV Function / TV Connectors TV FRONT CABINET FUNCTIONS 3. Mains Power Switch - Completely turns ON or OFF the power to the TV set to save on electricity. Sencor Touch Keyboard (controlled by a soft finger touch) LABEL SIDE... -
Page 9: Tv Connections
TV Function / TV Connectors TV CONNECTIONS 1. 12V DC power input (intended for feeding to the TV using a car battery power or external 12V DC power supply adapter) 2. HDMI input 3. PC VGA input 4. PC audio input 5. -
Page 10: Connecting The Tv Antenna
TV Function / TV Connectors (CVBS / YPbPr cables) You can connect this TV to a compatible device using CVBS and YPbPr cables. Connect the red, white and yellow (CVBS) or the red, green and blue (YPbPr) outputs to the matching coloured inputs on the compatible device. -
Page 11: Connecting Diagram
TV Function / TV Connectors... -
Page 18: Let's Start Switching On
INPUT SOURCE HDMI SCART YPBPR... -
Page 19: First Time Installation
FIRST TIME INSTALLATION ENGLISH CHANNEL LIST... - Page 20 Analogue (ATV) Setup Between now and the end of 2012 the UK will be turning off all old “analogue” TV transmitters and switching your TV signal to “digital”. Digital TV offers new ways to enjoy your TV. You will have a greater choice of TV channels as well as access to additional features and services which will enhance your TV-watching experience.
-
Page 21: Tv Information
Analogue (ATV) Setup TV Information PICTURE PICTURE PICTURE MODE STANDARD CONTRAST BRIGHTNESS COLOR TINT SHARPNESS COLOR TEMP. NORMAL NOISE REDUCTION MOVE EXIT SELECT MENU... -
Page 22: Sound
Analogue (ATV) Setup SOUND STANDARD SOUND MODE BASS TREBLE BALANCE MOVE EXIT SELECT MENU... -
Page 23: Setting
Analogue (ATV) Setup SETTING SETTING LANGUAGE ENGLISH OSD TIMER 15 SEC TRANSPARENCE OVERSCAN RESET MOVE EXIT SELECT MENU FUNCTION FUNCTION SLEEP TIMER FULL ASPECT WEST TT LANGUAGE BLUE SCREEN SYSTEM LOCK MOVE EXIT SELECT MENU... - Page 24 Analogue (ATV) Setup ENTER PASSWORD FUNCTION SYSTEM LOCK CHILD LOCK KEY LOCK PARENTAL CHANGE CODE MOVE EXIT SELECT MENU...
-
Page 25: Channel
Analogue (ATV) Setup CHANNEL CHANNEL COUNTRY AUTO SEARCH MANUAL PROGRAM PROGRAM EDIT MOVE EXIT SELECT MENU CHANNEL PROGRAM AUTO COLOR. SYS AUTO SOUND. SYS MANUAL SEARCH 192.25 MHz FINE SKIP MOVE EXIT SELECT MENU... - Page 26 Analogue (ATV) Setup PROGRAM EDIT LOCK NAME INSERT MOVE EXIT MENU...
-
Page 27: Teletext Function
TELETEXT FUNCTION... - Page 28 Digital TV Setup If the TV finds some, but not all, of the Digital channels, the TV is functioning correctly but the signal being received is not strong enough. (The signal strength needs to be above 85% - you can see the signal strength the TV is receiving when you search channels/ programmes) you will need to increase the signal reception in order to receive all of the channels available.
-
Page 29: Channel
Digital TV Setup CHANNEL CHANNEL COUNTRY AUTO SEARCH MANUAL PROGRAM PROGRAM EDIT CI MENU TIMER MOVE EXIT SELECT MENU CHANNEL PROGRAM BEGIN START SEARCH CHANNEL FOUND SIG. QUALITY SIG. STRENGTH 474.00 FREQUENCY MOVE EXIT SELECT MENU... - Page 30 Digital TV Setup...
- Page 31 Digital TV Setup...
- Page 32 Digital TV Setup...
-
Page 33: Timer
Digital TV Setup... - Page 34 Digital TV Setup...
- Page 35 Digital TV Setup...
-
Page 36: Vga & Pc Setup
VGA & PC Setup PC SETUP PC SETUP H-POSITION V-POSITION CLOCK PHASE AUTO ADJUST MOVE EXIT SELECT MENU... -
Page 37: Picture
VGA & PC Setup PICTURE PICTURE STANDARD PICTURE MODE CONTRAST BRIGHTNESS COLOR TEMP. MOVE EXIT SELECT MENU... -
Page 38: Multimedia & Usb Pvr Functions
Multimedia & USB PVR Function... -
Page 39: My Music
Multimedia & USB PVR Function... -
Page 40: My Movie
Multimedia & USB PVR Function... - Page 41 Multimedia & USB PVR Function...
-
Page 42: Usb Pvr Recording & Playback Function
Multimedia & USB PVR Function USB PVR RECORDING & PLAYBACK FUNCTION USB PVR Recording PVR Time Shift... -
Page 43: Usb Pvr Function Attentions
Multimedia & USB PVR Function PVR Recording USB PVR Function Important Information About USB PVR Function You can purchase high speed memory sticks from most Electrical or PC stores. Before making your purchase please confirm the memory stick meets the minimum specifications as below: Read Speed 20MB/s (Mega Byte Per Second) Write Speed 6 MB/s (Mega Byte Per Second) -
Page 44: Basic Operation
BASIC OPERATION 1. Turn ON and OFF the DVD function - Turn on the LCD TV and then press INPUT repeatedly to select DVD mode. 2. Insert Disc to DVD - Insert the Disc to the Disc slot (mirror (record) side of the disc has to face towards front of the unit), the player will load the disc automatically.There will have an on screen indication “... -
Page 45: Supporting Dvd Format
Super VCD/ VCD/ CD /CD-G/ D-CD discs DVD / MP3 / JPEG discs PROG PROG [--] [--] [--] [--] [--] [--] [--] [--] [--] [--] [--] [--] [--] [--] [--] [--] PLAY CLEAR PLAY CLEAR If it is in PBC ON status, using program playback will turn to PBC OFF automatically. - According to the highlight area input the title and chapter number by numeric buttons, press button to start;... -
Page 46: Dvd Functions Operating Instructions
DVD FUNCTIONS OPERATING INSTRUCTIONS 1. Play (for DVD/ Super VCD/ VCD/ CD/ CD-G/HD-CD and Mp3/ JPEG discs) For DVD disc, press button from root or title menu; while playing the DVD, you may play your favorite title directly with title selection by pressing the TITLE button. - For Super VCD &... -
Page 47: Subtitle
7. Display (for DVD/ Super VCD/ VCD/ CD/ CD-G/HD-CD and Mp3/ JPEG discs) - Press D.DISP button to activate the on screen roll-down menu for the current Title, Chapter, time and other information. For DVD discs, (2 pages) Press D.DISP button once to display first page as shown below Disc Type Chapter -/-(Current/Full) -
Page 48: Mp3/Jpeg Playback
13. Mute (for DVD/ Super VCD/ VCD/ CD/ CD-G/HD-CD and Mp3/ JPEG discs - Press MUTE button to mute the audio output. There will have an on screen symbol indicate “MUTE”. - Press again to cancel, or Press VOL + to cancel and adjust the volume. - In case there is no audio output, try to press MUTE button to cancel mute. -
Page 49: Function Settings
- Using the navigation buttons to check you favorite folder and playback the first file or move to the your favorite file. NOTE: - Press buttons to move the highlight to folders, documents or mode selection. - Press numeric buttons to select the contents directly. For number over 10, use numeric buttons directly or press - / -- button first(E.g. - Page 50 SYSTEM SETUP TV SYSTEM SOURCE AUTO This menu enables you to set the picture format for your TV SYSTEM DISC TV/DVD TV TYPE NTSC PASS WORD CARD This format is used by some other countries, e.g. USA RATING DEFAULT This is the format used in the EUROPE and the default setting EXIT SETUP AUTO This format can be used if your TV/DVD is capable of both...
- Page 51 16:9 Choose this setting if you have a widescreen television NOTE: - Playback screen size may vary according to the discs contents. - For discs with 4:3 contents, using any mode would only display a 4:3 screen - Screen ratio selection should be according to the connected TV / Display aspect ratio PASSWORD - The default setting is locked.
-
Page 52: Language Setup
Language Setup Press SETUP button to enter the DVD OSD menu. - OSD Language LANGUAGE SETUP Use navigation buttons to select the OSD LANGUAGE OSD LANGUAGE ENGLISH setup icon, press OK button to confirm. There are few GERMAN AUDIO LANG languages for your selection, press buttons to SPANISH... -
Page 53: Audio Setup
MENU Language LANGUAGE SETUP - Use navigation buttons to select the MENU LANG setup OSD LANGUAGE icon, press OK button to confirm. There are 6 AUDIO LANG languages for you selection, press buttons to SUBTITLE LANG ENGLISH toggle between different languages. (ENGLISH / MENU LANG GERMAN GERMAN / SPANISH / FRENCH / PORTUGUESE /... -
Page 54: Dolby Digital Setup
Dolby Digital Setup Dynamic Range DIGITAL SETUP DYNAMIC RANGE - When switch the compress mode to “Audio output”, FULL DUAL MONO adjust the compress ratio for different effect. When 6 / 8 4 / 8 selected FULL, the peak signal value is smallest. EXIT SETUP 2 / 8 When selected OFF, the peak signal value is biggest. -
Page 55: Care And Maintenance
CARE AND MAINTENANCE Early malfunctions can be prevented. Careful and regular cleaning can extend the amount of time you will have your new TV. Be sure to turn the power off and unplug the power cord before you begin any cleaning. -
Page 58: Specifications Specifications
23.6" : 60cm 23.6" : 1920 x 1080 Video format CVBS / RGB / YPbPr / VGA...
Need help?
Do you have a question about the LCD 24-621 and is the answer not in the manual?
Questions and answers
CAN I USE A FIRESTICK