
Subscribe to Our Youtube Channel
Related Manuals for HPI Racing PULSE 4.6 Buggy


Summary of Contents for HPI Racing PULSE 4.6 Buggy
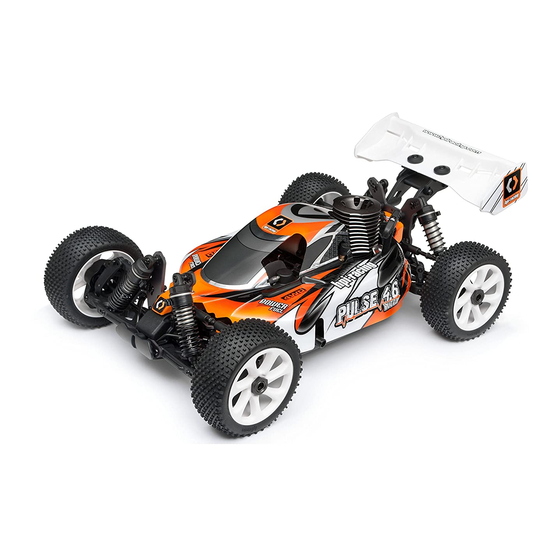
- Page 1 Instruction Manual Bauanleitung Manuel de montag Manual de instrucción Pulse 4.6 Buggy 104115...
- Page 2 CAUTIONS To prevent serious personal injury and/or property damage, operate all remotely controlled models in a responsible manner as outlined herein. Glow engine R/C car models can exceed speeds of 31 mph (50km/h) and use highly flammable and poisonous fuels. CHOOSE THE RIGHT PLACE TO OPERATE YOUR R/C MODEL.
- Page 3 VORSICHTSMAßNAHMEN Alle ferngesteuerten Modelle müssen zur Verhinderung schwerer Verletzungen und/oder Sachbeschädigung auf eine verantwortliche und in diesem Handbuch angegebene Weise betrieben werden! RC-Car-Modelle mit Glühkerzen-Verbrennungsmotoren können Geschwindigkeiten von mehr als 50 km/h erreichen und verwenden hochgradig entzündliche und giftige Kraftstoffe. WÄHLEN SIE DEN RICHTIGEN ORT ZUM BETRIEB IHRES RC-MODELLS.
- Page 4 Tools recommended, Outils recommandés, Empfohlene Werkzeuge, Herramientas recomendadas Side cutters Long nose pliers Pince coupante de côté Pinces de serrage longues Seitenschneider Zange mit langer Nase Alicates cortaalambres Alicates de punta fina Screwdriver (large) Tournevis (gros) Schraubendreher (groß) Destornillador (grande) Modelling knife Couteau -spatule Modelliermesser...
- Page 5 Start Up Guide, Guide de démarrage, Vorbereitungen, Guía de iniciación • The start up guide section of this manual was designed to give you the basic information needed to get your PULSE 4.6 running in the shortest amount of time. For detailed information about the PULSE 4.6, please refer to the full build section in the back of this manual. •...
- Page 6 Receiver battery installation, Installation des piles du récepteur, Empfängerbatterien einlegen , Instalación de la batería del receptor Caution / Attention / Vorsicht! / Precaución • Do not use any damaged batteries. • N’utilisez aucune pile endommagée. • Keine beschädigten Batterien verwenden. •...
- Page 7 Transmitter battery installation, Installation des piles de l’émetteur, Senderbatterien einlegen, Instalación de la batería de la emisora • Only use alkaline batteries in the transmitter. • N’utilisez que des piles alcalines dans l’émetteur. • Verwenden Sie im Sender ausschließlich Alkalibatterien. •...
- Page 8 Steering Operation, Fonctionnement de la direction, Lenkung, • Straight (Neutral) • Point mort droit • Straight (Neutral) • Right turn • Geradeaus • Point mort droit • Left turn • Tourner à droite • Right turn • Left turn • neutral •...
- Page 9 Engine Break In, Rodage du moteur, Motor einlaufen lassen, Rodaje del motor • Break-in the new engine before driving the car! • Rodez le nouveau moteur avant de conduire votre voiture ! Lassen Sie den neuen Motor vor dem Betrieb des Wagens einlaufen! •...
- Page 10 Turn on radio system, Allumage du système de radio, Die Fernsteueranlage einschalten, Encienda el sistema de radio RTR VERSION / VERSION RTR / VERSION RTR Switch on. Allumez. Einschalten. Encendido • After the transmitter is on turn on the receiver. •...
- Page 11 Stopping the engine, Arrêt du moteur, Motor abstellen, Cómo detener el motor Flywheel Volant Schwungrad Volante de inercia Caution / Attention / Vorsicht / Precaución • Use the rag to cover the exhaust tip. This will stop the motor. Be careful! The exhaust is extremely hot so use a thick cloth or rag.
-
Page 12: Troubleshooting
Troubleshooting Problem Cause Remedy The vehicle does not move Transmitter or receiver is off Turn on both the transmitter and receiver Batteries are not placed correctly in Place batteries in the transmitter the transmitter properly The vehicle does not follow your driving Transmitter or receiver is off Turn on both the transmitter and inputs... -
Page 13: Dépannage
Dépannage Problème Cause Solution Le véhicule ne bouge pas L’émetteur ou le récepteur est éteint Allumez l’émetteur et le récepteur Les piles ne sont pas correctement Mettez correctement les piles dans installées dans l’émetteur l’émetteur La batterie principale n’est pas assez Chargez la batterie principale chargée Le véhicule ne suit pas vos commandes... -
Page 14: Fehlersuche
Fehlersuche Problem Ursache Abhilfe Fahrzeug bewegt sich nicht Sender oder Empfänger Sender und Empfänger einschalten ausgeschaltet Batterien nicht richtig in den Sender Batterien richtig in den Sender eingesetzt einsetzen Hauptbatterie nicht genug Hauptbatterie aufladen aufgeladen Fahrzeug befolgt die Fahrbefehle nicht Sender oder Empfänger Sender und Empfänger einschalten ausgeschaltet... -
Page 15: Localización Y Solución De Averías
Localización y solución de averías Problema Causa Solución El vehículo no se mueve El transmisor o el receptor están apagados Encienda tanto el transmisor como el receptor No se han colocado correctamente las pilas Coloque las pilas en el transmisor de la en el transmisor manera correcta La batería principal no se cargado lo... - Page 16 Starting Engine and Break In Puesta en marcha y rodaje These instructions will explain the running procedure, how to prepare the car, turn on radio equipment, start the engine, break in the engine, shut off the engine, and shut off the radio equipment. When starting the engine for the first time, you must perform the break in procedure. Make sure no one is using the same frequency.
- Page 17 Step 5 Glow Plug and Starter Bujía y puesta en marcha Attach the glow igniter to the glow plug. Start the engine by pulling the starter cord in short pulls (no longer than 12”max). Remove the glow igniter as soon as the engine is running.
- Page 18 Zona seguridad ( 99°C ) Rich Fuel Mixture 74151 A slightly rich fuel mixture delivers a cooler running HPI Racing Temp Gun 190°F temperature and more lubrication but with slightly Termómetro HPI Racing ( 90°C ) less power and longer engine life.
-
Page 19: Optional Tuning Ajustes Opcionales
Fuel Mixture Tuning Tips Ajuste de altas Following the tuning steps, tune the engine until its maximum performance is reached. While a lean motor will have higher performance, it can ● lead to premature engine wear or failure. Use the following information to tune your engine to your driving conditions. Remember a slightly rich setting is a safer setting. -
Page 20: Glow Plug
Carburetor Factory Setting (Break In Setting) Carburador ajustado de fabrica (Ajustes de rodaje) High Speed Needle is set flush with groove, Idle Adjustment Screw, Low speed needle and Mid Range Needle are designed to be set flush with the Low Speed Needle Mid Range Needle carburetor body. -
Page 21: Engine Maintenance
NITRO STAR K4.6 HO ENGINE Maintenance Mantenimiento motor Nitro Star K4.6 HO Engine Maintenance Mantenimiento motor Drain all remaining fuel from the fuel tank. Use a fully charged glow igniter and try to restart the engine to burn any remaining fuel out of the lines. After burning off the fuel, remove the glow plug and add several drops of after run oil, then crank the engine over to spread it throughout the engine. - Page 22 Rebuilding The Engine エンジンのリビルド There comes a time when your engine just won’t provide the performance it 2.5mm did when it was new. When that time comes a rebuild is in order. Follow the steps below to disassemble, repair and then reassemble the engine. Thread Lock Oil Spray Fijatornillos...
- Page 23 101903/101908 (EU) MARCHE 87546...
- Page 24 ARRET Page 24...
- Page 28 P.23 P.26 101541 101541...
- Page 29 87546 P.23 P.26...
- Page 30 Differential Z721 ×2 Différentie × 101350 Differenzial Diferencial 101391 Z083 ×8 101350 101353 × 101350 101350 101350 ×4 101350 B095 101391 101351 101392 ×8 × Z721 101391 101356 ×4 × 101350 101350 ×4 × 101350 ×4 × 101356 101392 Z083 B095 101350 B095...
- Page 31 101339 Gearbox ×2 Boîte de vitesse × × Getriebe 101339 Tren de rodadura B085 101354 B085 ×2 101354 101375 101339 101332 B085 ×4 101375 ×2 × 101332 Z354 Front Gearbox ×4 Boîte de vitesse avant × Vorderes Getriebe Tren de rodadura delantero 101364 Z354 Front Steering blocks...
- Page 32 Front arms Z725 ×2 Bras avant For adjusting the droop. × Vordere Arme Pour ajuster la flexion. Brazos delanteros Zur Einstellung des Durchhangs. Z663 BOTTOM Para ajustar la caída. 0 mm × 101416 × Z725 Z519 101399 ×2 Z663 Z519 ×2 ×...
- Page 33 Z354 Rear gearbox ×4 Boîte de vitesse arrière × Hinteres Getriebe Tren de rodadura trasero 101364 Z354 × Rear hubs 101340 ×2 Moyeux arrières × × Hintere Naben Cubos traseros 101338 101368 B085 ×4 101340 × < > 101368 B085 101340 ×2 B085...
- Page 34 Attaching rear arms Z700 × Réglage des bras arrières × Befestigung der hinteren Arme Fijación de los brazos traseros Z663 × Z663 Z085 Z085 × × 10133 Z700 101385 ×2 × Z700 < > 101476 101334 < > 101388 Z700 101388 ×2 ×...
- Page 35 Attaching rear gearbox Z263 × Réglage de la boîte de vitesse arrière × Einbau des hinteren Getriebes Fijación del tren trasero Z263 Rear turnbuckles Z663 × Tendeurs arrières Hintere Spannschlösser Tensores traseros 101419 32MM ×4 × 101383 101381 Z356 ×2 101383 ×...
- Page 36 Front turnbuckles Z663 × Tendeurs avant Vordere Spannschlösser Tensores delanteros 101419 ×4 × 101375 101382 101375 Z356 ×2 × 101419 101419 Z663 Z357 ×2 × < > < > Z357 101382 ×2 Z663 Z356 Rear Wing mount Z519 Z519 ×4 Support d’aile arrière 101369 ×...
- Page 37 Centre gearbox Z263 × Boîte de vitesse centrale Mittleres Getriebe × Tren central 101333 101333 101333 101333 101456 × 101456 Z263 Drivetrain Transmission 90MM Antrieb Chasis 101342 ×2 101358 ×1 101358 101342 101342 101357 100MM 101357 ×1 Page 37...
- Page 38 Brakes 101389 ×4 Freins × 101341 Bremsen Frenos 101341 101333 101341 101389 101389 101341 ×4 101389 101389 101333 101341 101341 ×4 101341 101341 Z083 Attaching brakes × Réglage des freins × Einbau der Bremsen Fijación de los frenos 101460 101460 ×...
- Page 39 Z081 Attaching steering assembly ×2 Réglage du montage de direction × Einbau der Lenkungsbaugruppe Fijación del conjunto de la dirección 101420 ×2 Z081 101367 101367 Z352 ×2 × 101367 Z081 × × 101420 101367 101367 101420 Z352 Z352 Attaching side guards Z663 ×...
- Page 40 Attaching engine parts Réglage des pièces du moteur 86077 ×1 Montage der Motorteile Fijación de las piezas del motor 101346 ×1 Z544 Z544 × × 101393 ×1 101345 × 101395 ×2 × Z544 B021 ×2 × × 101345 86077 101349 ×3 101346 101348...
- Page 41 Engine mounting 101390 ×4 Montage du moteur × Motoreinbau Soporte del motor 87049 Insert a sheet of paper before installing. Insérez une feuille de papier avant l’installation. Vor dem Einbau ein Blatt Papier einlegen. Introduzca una hoja de papel antes del montaje. Loosen 4x8mm bolts and properly position pinion gear Allow clearance for gears to run smoothly.
- Page 42 Attaching fuel tank Z354 101372 Réglage du réservoir de carburant Einbau des Kraftstofftanks Fijación del depósito de combustible Z354 101372 Z352 ×1 × 101372 Z083 ×2 × Z354 ×2 × Z354 101331 101331 101333 Z352 101372 Z083 Z083 Fuel tube - Engine Tuyau carburant - Moteur Kraftstoffschlauch –...
- Page 43 Z353 ×5 Radio tray Porte -radio Z353 × Z357 Z354 Wanne für die Fernsteueranlage Bandeja de la radio Z353 Z354 ×1 Z353 × Z357 101330 ×1 × 101328 101330 101330 101330 Z353 Attaching servos ×2 Réglage servos × Einbau der Servos Fijación de los servos Z561 Z561...
- Page 44 Z083 × Attaching radio tray × Réglage porte -radio Einbau der Wanne für die Fernsteueranlage Fijación de la bandeja de la radio Z353 ×4 × Z353 Z353 Z083 Z083 Z083 Z083 Attaching rear brace Z352 ×1 Réglage renfort arrière × Einbau der hinteren Klammer Fijación del soporte trasero Z357...
- Page 45 Z083 Switch × Commutateur × Schalter Interruptor Z083 101330 101453 Receiver battery tray Support des piles du récepteur Fach für die Empfängerbatterie Bandeja de la batería del receptor Attaching receiver Réglage du récepteur Einbau des Empfängers Fijación del receptor 101512 ×1 Z150 Z150...
- Page 46 1. Installez les piles. Checking R/C equipment 2. Étendez l’antenne. Vérification de l’équipement de radiocommande 3. Desserrez et étalez. RC-Anlage überprüfen Comprobación del equipo de radiocontrol 4. Connectez les piles chargées. 5. Allumez. Connect charged 6. Allumez battery. 7. Compensateurs au point mort Put both switches to Extend antenna.
- Page 47 Attaching servo linkage Z663 × Réglage de la tringlerie de servo Einbau der Servostange Fijación del varillaje del servo Z085 101393 ×1 × Z352 ×1 × 101393 Z085 × × Z663 Z352 Brake cams Cames de frein Bremsnocken 101367 Levas de freno 101344 ×2 101344...
- Page 48 Z353 Attaching centre diff plate ×4 Réglage du disque diff. central × Einbau der mittleren Differenzialplatte Z353 Fijación de la placa diferencial central 101329 Z700 Attaching brake rods × Réglage des tiges de frein × Einbau der Bremsstangen Fijación de las varillas del freno Z700 Linkage Adjustment Ajustement de la tringlerie...
- Page 49 For rear For front Z661 Shock assembly ×4 Pour l’arrière Pour l’avant Montage amortisseurs Für vorne Für hinten Stoßdämpferbaugruppe Para la parte Para la parte delantera trasera Conjunto de amortiguadores 101422 ×8 101376(Front) 101394 ×8 101375 × 101377(Rear) 101418 ×4 101422 101374 101379...
- Page 50 For front For rear Shock spring Pour l’avant Pour l’arrière Ressort d’amortisseur Für vorne Für hinten Stoßdämpferfeder Para la parte Para la parte 101417 101417 Muelle de amortiguador delantera trasera ×4 Front Shock Rear Shock Amortisseur avant Amortisseur arrière Vorderer Stoßdämpfer Hinterer Stoßdämpfer Amortiguador delantero Amortiguador trasero...
- Page 51 Air filter Filtre à air Luftfilter 101452 6203 Filtro de aire ×1 6203 101452 101452 101452 101452 Screw Wing assembly Z354 ×2 Schraube Montage aile × Montage der Kotflügel Conjunto del ala Z354 × 101446 101446 Wheel, tyre & insert Roue, pneu et empiècement Rad, Reifen &...
- Page 52 Wheel Installation Installation de la roue Radmontage 101421 Instalación de las llantas ×4 101421 101421 Body Installation Installation de la caisse Montage der Karosserie 6203 Instalación de la carrocería ×2 6203 6203 Page 52...
- Page 53 Mounting the transponder (racing) Montage du transpondeur (de course) Einbau des Transponders (Rennbetrieb) Montaje del transpondedor (competición) 101331 101451 Notes Page 53...
- Page 54 Plastic Parts, Pièces en plastique, Plastikteile, Piezas plásticas 101375 101369 101331 101332 101374 101334 101351 Page 54...
- Page 55 101368 101361 101330 101363 101372 101470 101333 Page 55...
- Page 56 101383 101452 101425 101446 101362 101367 Page 56...
- Page 57 Z700 × Z357 ×2 101389 ×4 × × Z721 ×7 × 101385 ×4 101339 ×6 × × × Z741 ×1 101386 × ×4 × Z084 ×16 × 101387 ×2 × Z725 ×4 × Z544 × 101388 ×4 × × Z081 ×4 ×...
- Page 58 101350 ×8 101350 101394 ×8 ×6 × 101362 × ×4 × × 101367 ×1 101350 ×8 101367 ×2 B085 ×16 × 101343 ×4 101367 ×1 101346 ×1 101419 ×8 × 101416 101349 × ×3 101341 ×4 87077 ×1 101421 ×4 101418 ×4 101455...
- Page 59 Smooth Med. Rough Name: Surface: High Med. Track: Traction: Date: Sandy Clay Temperature: Soft Dirt Grass Dusty Blue Groove Other Indoor Outdoor Setup Sheet / Setup Blatt / Feuille de glage / hoja de la disposición Engine Venturi Plug Mu er Fuel Clutch alloy...
- Page 60 HPI Racing USA HPI Japan HPI Europe 70 Icon Street 3-22-20 Takaoka-Kita, Hamamatsu 19 William Nadin Way, Swadlincote, Foothill Ranch, CA 92610 USA Shizuoka, Japan Derbyshire, DE11 0BB, UK (949) 753-1099 053-430-0770 (44) 01283 229400...
Need help?
Do you have a question about the PULSE 4.6 Buggy and is the answer not in the manual?
Questions and answers