
Related Manuals for HPI Racing SAVAGE XL FLUX


Summary of Contents for HPI Racing SAVAGE XL FLUX
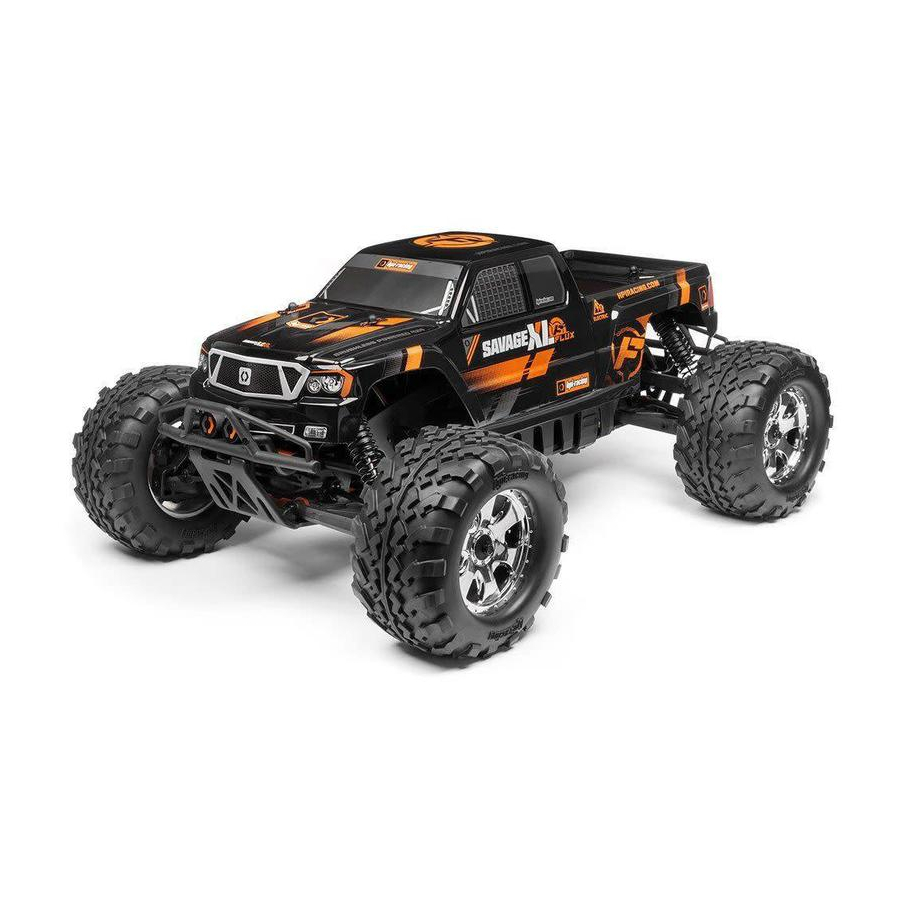
- Page 1 Instruction Manual Русский Ру Manuel de montage 取扱説明書 En Ру Fr Jp Вер.1 117116 RTR SAVAGE XL FLUX EУn...
- Page 2 ● Thank you for selecting this HPI RACING product! This kit is designed to be fun to drive and uses top quality parts for durability and perfor- mance. The instruction manual you are reading was designed to be easy to follow yet thorough in its explanations. HPI Racing wants you to enjoy driving your new R/C kit.
- Page 3 ● Merci d’avoir choisi ce produit HPI Racing! Ce kit a été conçu pour être amusant à conduire, et utilise des pièces de la plus haute qualité pour la longévité et les performances. Le manuel d’utilisation qui est entre vos mains a été conçu pour vous fournir des explications faciles à suivre mais complètes. HPI Racing espère que vous aurez plaisir à...
-
Page 4: Table Of Contents
Contents Section Contents Page Overview Start Up Guide Charging battery Setup Before Starting Radio Control Car Operating Procedures Trouble Shooting Maintenance Chassis Maintenance Wheel Maintenance Motor and Pinion Gear Maintenance Shock Maintenance Diffrential Maintenance Radio Maintenance Exploded View Parts List Option Parts List Содержание... - Page 5 Table des matières Section Contenu Page Vue d’ensemble Charging battery Guide de démarrage Setup Before Starting Radio Control Car Operating Procedures Dépannage Entretien Chassis Maintenance Wheel Maintenance Entretien du moteur et du pignon Shock Maintenance Entretien du différentiel Radio Maintenance Vue éclatée Pièces détachées Liste des pièces optionnelles...
-
Page 6: Overview
PLAZMA 1.5V アルカリ単三型 バッテリー ミニクロスレンチ Equipment Needed Необходимое оборудование Benötigtes Zubehör 別にお買い求めいただく物 74151 HPI Racing Temp Gun Термометр HPI Racing Sonde de temperature HPI Racing HPI Racing Temp Gun Li-Po Ni-MH 101974 (US 2 PIN) батарея батарея 101972 (EU 2 PIN) - Page 7 About Battery О батарее À propos de la batterie 走行用バッテリーについて 31мм Maximum battery dimensions Максимальный размер батареи Dimensions maximales de la batterie バッテリー最大サイズ 143мм 47мм Li-Po батарея 50mm 2-3 cell LiPo (7.4 to 11.1v) battery pack 2-3S Lipo батарея (7.4 или 11.1В) 2-3 cellules ( 7.4-11.1V) Lithium-polymère 160mm 2-3セル(7.4-11.1V)LiPOバッテリー...
-
Page 8: Start Up Guide
Краткое руководство Start Up Guide スタートアップガイド Die ersten Schritte 2 - 1 Charging Battery Зарядка батареи Laden des Fahrakkus 走行用バッテリーの充電 Charging The Drive Battery Зарядка батареи машины Recharge de la batterie motrice 走行用バッテリーの充電 Do not use NiCd/NiMH battery chargers for LiPO batteries. If you do not use a special charger for LiPO batter- Cautions ies, they will be damaged. - Page 9 Transmitter Preparation Подготовка передатчика Préparation de l’émetteur 送信機の準備 Reverse Switch Переключатели реверса Commutateur d’inversion リ Switch factory setting. Заводское положение Réglages d’usine du servo スイッチの位置を確認します。 Mode Switch Переключатель мощности Commutateur de mode モードスイッチ Switch factory setting. Заводское положение Réglages d’usine du servo スイッチの位置を確認します。...
- Page 10 Battery Installation Установите батарею Einbau des Fahrakkus バッテリーの搭載 This step same for left and right. Выполнить слева и справа Cette étape même pour la gauche et la droite. 図を参考に左側、右側を同様に作業します。 Use foam sheet / blocks to keep your batteries secure. Для обеспечения безопасности батарей используйте пенопластовые...
- Page 11 Assemble carefully, and do not pinch the wires in the case. Тщательно соберите и убедитесь, что не зажали провода.. Montez soigneusement, et ne pincez pas les câbles dans le boîtier. 断線の可能性があるのでコー ドを挟まないよう注 意してください。 ВЫКЛ. ARRÊT オフ Cautions Внимание! Précautions ВЫКЛ. 警...
- Page 12 ESC Setup Настройка регулятора скорости Calibration du contrôleur de vitesse スピードコントローラーのセットアップ You must setup the ESC before running the first time. After th initial setup, it is not required before every run. Please read through the instructions and get familiar with the procedure before starting setup. The setup process moves quickly, and it will help you to be ready for each step.
- Page 13 ESC setup procedure Программирование регулятора скорости Procédure de réglage du contrôleur électronique de vitesse 下記の手順でセットアップをします。 Hold down the setup button while Release the setup button turning on the ESC. once the LED flashes ВКЛ. КРАСНЫЙ MARCHE ROUGE Удерживайте нажатой кнопку set Как...
- Page 14 Checking Fail Safe Operation Проверка функции Fail Safe Vérification du fonctionnement de la sécurité intégrée フェイルセーフの動作確認 This car has a built-in fail safe system. If the radio glitches, because of interference or the car goes out of range, it will go into neutral to protect your car. The fail safe system has been setup at the factory, but you should become familiar with the function of the fail safe and check the operation before running.
- Page 15 ВЫКЛ. ARRÊT オフ Z680 86804 Z260 Z569 86249 Z680 86804 Z260 86249 86804 86249 Z260 Z680 86249 86804 Z260 Z680...
-
Page 16: Radio Control Car Operating Procedures
2 - 3 Radio Control Car Operating Procedures Эксплуатация радиоуправляемой модели Umgang mit Ferngesteuerten Modellautos ラジオコントロールカーの走らせ方 Turn on Switch Включите питание передатчика Allumage du système radio スイッチをONにします。 Antenna Антенна Antenne アンテナ ВКЛ. MARCHE オン ВЫКЛ. ВКЛ. ARRÊT MARCHE オフ オン Put the car on a stand. - Page 17 Checking radio range Проверка дальности радиосигнала Vérification de la portée du système radio 操作可能範囲の確認 To properly check the range, have a friend hold the truck and walk to the farthest distance that you plan to operate your model. Operate the controls to make sure the model responds correctly.
- Page 18 Transmitter Operation Функции передатчика Fonctionnement de l’émetteur 送信機の操作方法 Steering Wheel Рулевое колесо ステアリングホイール Lenkrad Front Left turn Straight (Neutral) Right turn Left turn Right turn Перед Поворот влево Прямо (Нейтраль) Поворот вправо Поворот влево Поворот вправо Vers la gauche Tout droit (neutre) Vers la droite Vers la gauche Avant...
- Page 19 74151 Cautions Горячие HPI Racing Temp Gun Опасно! Термометр HPI Racing Précautions детали Sonde de temperature HPI Racing 警 告 高温注意 HPI Racing Temp Gun Thermal Protection Function Защита от перегрева Temperatur des Reglers スピードコントローラーのヒートプロテクター機能 If the temperature of the ESC is too high, the Thermal Protection Function will activate. Once the ESC has cooled down to normal temperature, it will work as normal.
- Page 20 Turning R/C Unit Off Выключение машины и передатчика Éteindre l’unité de radio-commande スイッチの切り方 Turn off receiver first, then turn off transmitter. Attention Всегда сначала выключайте питание приемника, а затем передатчик. Внимание! Éteignez d’abord le récepteur, puis l’émetteur. Attention 始めにR/CカーのスイッチをOFFにします。 次に送信機のスイッチをOFFにします。 注...
-
Page 21: Trouble Shooting
Trouble Shooting Устранение неполадок Fehlerbehebung トラブルシューティング If R/C car does not move or you have no control, see below. Если ваша модель не едет или не контролируется, смотрите возможные причины ниже. Si le véhicule télécommandé ne bouge pas ou si vous n’en avez pas le contrôle, voyez ci-dessous. R/Cカーが動かない、動作がおかしいと思った場合は表を参考に原因を調べてください。... -
Page 22: Maintenance
Maintenance Техническое обслуживание メンテナンス Wartung Maintenance Chart График техобслуживания Wartungs-Übersicht メンテナンス項目 For maintenance schedule, refer to bottom chart. After running, clean the chassis and check all moving parts for damage. If any parts are broken or damaged, repair or replace them before the next run.Regular maintenance is necessary to prevent damage to the car and maintain its performance. График... -
Page 23: Chassis Maintenance
4 - 1 Chassis Maintenance Обслуживание шасси Wartung des Chassis シャーシのメンテナンス After running, clean the car and lubricate these points. Replace damaged parts, check that all the screws are tight. После запуска очистите машину и смажьте металлические узлы. Замените поврежденные детали, проверьте, что все винты... -
Page 24: Motor And Pinion Gear Maintenance
4 - 3 Motor and Pinion Gear Maintenance Обслуживание мотора и шестерни Motor und Ritzel Wartung モーター、ピニオンギヤのメンテナンス Replace Pinion Gear Замена шестерни ピニオンギアの交換 Tauschen des Ritzels Adjust pinion gear mesh to suit running condition. Выбирайте моторную шестерню соответствующую условиям езды. Réglez l’engrènement du pignon pour qu’il soit adapté... - Page 25 Slipper Clutch Installation is reverse of removal. Слиппер Собирать в обратной последовательности. Slipper Einstellung L’ordre d’installation est inverse de l’ordre de démontage. 組 み立ては逆の手順で図を参考にしてください。 スリッパークラッチ Z260 86130 Pin 2.5x12mm 72130 Штифт 2.5x12мм 107456 107452 Goupille 2.5x12mm ピン 2.5x12mm 107456 72130 Z684 Z700 Set Screw M3x3mm Flanged Lock Nut M4...
-
Page 26: Shock Maintenance
4 - 4 Shock Maintenance Обслуживание амортизаторов Stoßdämpfer ショックのメンテナンス Needle Nosed Pliers Z950 Пассатижи с Ветошь Cross Wrench тонкими губками Inspect shock for oil leaking and for bent shock shaft. Repair Chiffon Крестовый ключ Pince à bec fin or replace if necessary ウエス... - Page 27 Refilling Oil Shock Заправка маслом オイルの入れ方 Befüllen der Dämpfer mit Öl ❶ 100961 ❶ 100961 Use a Rag. 87500 Используйте ветошь Shock Oil 87500 Utilisez un chiffon. Масло для 100948 Bladder 16x5mm オイルを拭き取ります。 амортизаторов Колпачок 16х5мм Huile d’amortisseur Reservoir Souple ブラダー...
-
Page 28: Diffrential Maintenance
4 - 5 Differential Maintenance Обслуживание дифференциалов Wartung des Differentials デフのメンテナンス This step same for front and rear. Выполнить спереди и сзади. Même étape pour l’avant et l’arrière. 図を参考にフロント、リヤ側を同様に作業してください。 Screwdriver (NO.2) Крестовая отвертка (№.2) Tournevis (N° 2) プラスドライバー 大 ❷ 85234 Z164 Grease... - Page 29 If parts are damaged, repair or replace them according to the instruction below. Если детали повреждены, отремонтируйте или замените их, руководствуясь инструкцией, которая расположена ниже. Si des pièces sont endommagées, réparez-les ou remplacez-les suivant les instructions ci-dessous. 消耗した部品は交換します。 Z260 Pin 2.5x12mm Штифт...
-
Page 30: Radio Maintenance
Radio Maintenance Обслуживание радиоаппаратуры RC-Anlage プロポシステムのメンテナンス Steering Dual Rate Throttle Trim Antenna Battery Level Indicator Двойные расходы руля Триммер газа Антенна Индикатор питания Double débit de direction Trim d’accélération Antenne Indicateur du niveau des piles ステアリングデュアルレート スロットルトリム アンテナ バッテリーレベルインジケーター To be used for Centering the throttle. Good Batteries Используйте... - Page 31 Receiver and Servo Приемник и серво Récepteur et servo 受信機、サーボ Receiver Connections Подключение приемника. Connexions du récepteur Receiver Switch 受信機側配線図 Выключатель питания приемника Interrupteur du récepteur 受信機スイッチ 120010 FLUX MLH-2200 BRUSHLESS MOTOR БЕСКОЛЛЕКТОРНЫЙ МОТОР MOTEUR SANS BALAIS ブラシレスモーター CH1: 110650 HPI SS-40WP Steering Servo CH2:...
- Page 32 Binding and Fail Safe Инициализация связи и функция Fail Safe バインド &フェイルセーフ Programming a receiver to recognize the code of only one specific transmitter. Binding and fail-safe is pre-set from the factory. Инициализация связи приемника выполняется, чтобы приемник распознавал код только одного конкретного передатчика. Этот процесс и программирование...
- Page 33 Fail Safe Setup Программирование Fail Safe Réglage de sécurité フェイルセーフセットアップ Cautions Any new binding of transmitter & receiver will clear the preset fail safe. Опасно! Любой новый процесс инициализации связи стирает настройки функции Fail Safe. Précautions Toute nouvelle association entre un émetteur et un récepteur annulera les réglages de la sécurité intégrée. 警...
- Page 34 End Point Adjustment / EPA Регулировка конечных точек/ЕРА De point de limite エンドポイント / EPAの設定 Adjustment tool End point adjustments allow you to set the limits of steering and throttle. Инструмент для Регулировка ЕРА позволяет установить пределы расходов по каналу рулевого управления и газа. регулировки...
- Page 35 Changing the Setup Изменение настроек Modifier le réglage 設定の変更方法 If you are using a LiPo battery pack it is mandatory to use a Low voltage cut-off setting. This will shut down the ESC when the battery goes below a pre-set voltage (3V per cell) to protect your battery from over-discharge and possible damage.
- Page 36 HOLD HOLD Удерживать нажатой ВКЛ. Удерживать нажатой ENFONCÉ MARCHE ENFONCÉ ホールド オン ホールド Индикатор Индикатор GREEN КРАСНЫЙ ЗЕЛЕНЫЙ ROUGE VERT レッド グリーン Red Led Flashes For 4 Seconds. While switching on ESC hold down the setup button. Continue to hold the setup button while the LED’s flash. Green Led Will Begin To Flash.
- Page 37 Programmable Mode Settings Программируемые режимы Programmierbare Modi プログラムモードセッティング The ESC has a number of programmable modes that can be altered to suit a variety of functions. Each set of green LED flashes/b ep represents the Programmable Mode (1 flash = Running mode, 2 flashes = Drag brake Force and 3 fla s = Auto-lipo settings etc..) and each set of red LED flashes/b ep represents that Modes value.
- Page 38 Program Modes Параметры режимов Programm Modi プログラムモード RUNNING MODE FWD w/Brake - This mode offers forward and Brake only. РЕЖИМ РАБОТЫ FWD/REV/Brake - This mode offers Forward, Brake and Reverse. Note, The Reverse function uses a soft start “Double click” function which will only allow MODE D’ALLUMAGE reverse to be activated once the motor has stopped moving forward.
-
Page 40: Exploded View
Exploded View Схема сборки 展開図 Explosionszeichnung Z569 Z529 111298 B085 75080 116709 86248 Z150 6811 86032 87511 Z260 86827 87511 Z529 86827 Z517 86032 Z877 Z663 105551 86032 86827 86099 108946 Z260 86827 86827 6811 85058 86827 B032 Z567 Z520 86032 86248 86827... - Page 41 Z224 Z303 6123 Z663 Z569 Z547 Z663 6123 85234 100949 100949 86059 Z680 86804 Z581 Z260 Z649 Z224 Z224 85234 B085 Z520 86059 Z634 93535 Z663 85059 Z649 Z288 85234 Z286 Z569 6123 Z634 Z663 B085 86249 85235 85234 Z224 85234 85048 105891...
-
Page 42: Parts List
Parts List Список деталей Ersatzteilliste パーツリスト Parts List Parts # Description Parts # Description 4462 GT2 Tires S Compound (160X86mm/2Pcs) 109448 Center Gear Box Set 6123 Body Pin (8mm/Silver/Large/20Pcs) 109907 Drive Shaft 8X70.5mm 6163 Servo Tape 20X100mm (10Pcs) 110211 Binder Head Screw M3X25mm (8Pcs) 6561 Spring 18X20X1.7X5 (Black/2Pcs) 110650... -
Page 43: Схема Сборки
Список деталей Ру № Название № Название 4462 Шины GT2 компаунд S (160X86мм/2шт) 109448 Центральный редуктор (комплект) 6123 Клипсы кузова (8мм/серебристые/20шт) 109907 Вал привода 8X70.5мм 6163 Двухсторонний скотч 20X100мм (10шт) 110211 Винт M3X25мм (8шт) 6561 Пружины 18X20X1.7X5 (черные/2шт) 110650 Серво HPI SS-40WP (влагозащита/6.0В/10кг/метал. редуктор) Кольцо... -
Page 44: Pièces Détachées
Pièces Pièces détachées Numéro Description Numéro Description 4462 Pneu gt2 gomme s (160x86mm/2p.) 109448 Ens. boite vitesses centrale 6123 Clip carrosserie (8mm/argent/grand/20p.) 109907 Axe transmission 8x70.5mm 6163 Double face 20x100mm (10p.) 110211 Vis tole tete plate m3x25mm (8p.) 6561 Ressort 18x20x1.7x5 (noir/2p.) 110650 Servo HPI SS-40WP (etanche/6.0v/10kg/metal) 6811... -
Page 45: パーツリスト
パーツリスト 日本語 品 番 品 名 品 番 品 名 4462 GT2タイヤ Sコンパウンド (160x86mm/2pcs) 109448 センターギヤボックス 6123 ボディピン大 (8mm/シルバー/20pcs) 109907 ドライブシャフト 8x70.5mm 6163 強力両面テープ 20x100mm (10pcs) 110211 バインドネジ M3x25mm (8pcs) 6561 スプリング 18x20x1.7x5 (ブラック/2pcs) 110650 HPI SS-40WPサーボ(ウォータープルーフ/6.0v/10Kg/メタル) 6811 Oリング 6x9.5x2mm (ブラック/8pcs) 111167 アイドラーギヤ... -
Page 46: Option Parts List
Option Parts List Список опциональных деталей オプションパーツリス ト Tuningteileliste 100913 102359 A720 86156 100914 HD HEATSINK MOTOR PLATE 10mm BIG BORE ALUMINUM SHOCK SET HEAVY-DUTY SUSPENSION SHAFT (7075S/GRAY) (ASSEMBLED) 4x62mm PINION GEAR (1M / 5mm SHAFT) МОТОРНАЯ ШЕСТЕРНЯ (1M/вал 5мм) HD ПЛАТА... - Page 48 HPI RACING LTD. Serial Number Серийный номер 19 William Nadin Way, Numéro de série Swadlincote, Derbyshire, シリアルナンバー DE11 0BB, UK +44 1283 226570...
Need help?
Do you have a question about the SAVAGE XL FLUX and is the answer not in the manual?
Questions and answers