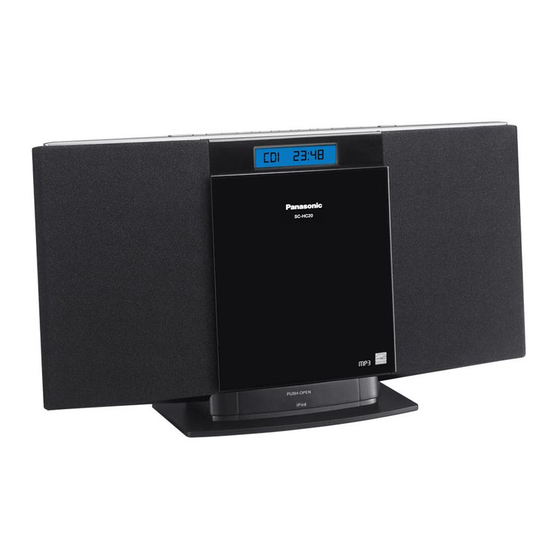
Panasonic SC-HC20 Operating Instruction
Compact stereo system
Hide thumbs
Also See for SC-HC20:
- Operating instructions manual (20 pages) ,
- Operating instructions manual (28 pages) ,
- Operating instructions manual (24 pages)
Table of Contents
Advertisement
Quick Links
Changing the main unit and remote
9
control mode
The remote control and main unit are factory-set to "REMOTE 1" mode.
If you find the remote control unintentionally also controls other equipment, you can switch to operate in
"REMOTE 2" mode.
To switch to "REMOTE 2" mode (by main unit
To return to "REMOTE 1" mode
only)
Repeat the steps (➡ left) but replace [2] with [1].
Press [FM/AM/AUX] to select ''AUX''.
("REMOTE 1" will be displayed.)
Press and hold [FM/AM/AUX] and then press
[2] until "REMOTE 2" is displayed.
Press and hold [OK] and [2] for at least 2
seconds.
10
Troubleshooting guide
Before requesting service, make the following checks. If you are in doubt about some of the check
points, or if the remedies indicated in the chart do not solve the problem, consult your dealer for
instructions.
g Common problems
Incorrect display or play will not start
•
You have not inserted the disc properly. Insert it correctly.
•
The disc is scratched or dirty (Tracks skipped).
•
There is moisture on the lens. Wait for about an hour and then try again.
MP3 cannot be read
•
You may not be able to play MP3 if you have copied a multi-session disc that has no data between
sessions.
•
When creating a multi-session disc, it is necessary to close the session.
•
The amount of data on the disc is too small. Set the amount of data to above 5 MB.
Noise is heard or no sound
•
While playing MP3, noise may occur if the recording is poor.
•
Keep this unit away from mobile phones if the interference is apparent.
•
Turn the volume up.
•
Switch the unit off, check and correct the connection and then switch the unit on. Causes include
straining of the speakers through excessive volume or power and using the unit in a hot environment.
Humming heard during play
•
An AC mains lead or fluorescent light is near the cords. Keep other appliances and cords away from
this unit's cables.
A beat sound or noise is heard while receiving radio broadcast
•
Switch the television or other audio player off or separate it from the unit.
•
Switch the portable audio player off if connected to the AUX port.
A low hum or noise is heard during AM broadcast
•
Keep the antenna away from other cables and cords.
•
Keep the AM antenna away from the unit.
The picture on the television near the unit disappears or stripes appear on the screen
•
The location and orientation of the antenna are incorrect.
•
The television antenna wire is too close to the unit. Separate the antenna wire of the television from
the unit.
No response when remote control buttons are pressed
•
Check that the batteries are inserted correctly (➡ Section 2).
g Display
"--:--"
•
You plugged the AC mains lead in for the first time or there was a power failure recently. Set the time
(➡ Section 6).
"ADJUST CLOCK"
•
Clock is not set. Adjust the clock accordingly.
"ADJUST TIMER"
•
Play timer is not set. Adjust the play timer accordingly.
"PGM FULL"
•
The number of programmed tracks is limited to 24. No further tracks can be programmed.
"NO PLAY"
•
A CD-ROM disc that is not in CD-DA or MP3 format is inserted. It cannot be played.
"ERROR"
•
Incorrect operation is performed. Read the instructions and try again.
"F61" or "F76"
•
There is a power supply problem. Consult the dealer.
"AUTO OFF"
•
The unit has been left unused for about 29 minutes and will shut down in a minute. Press any button to
cancel it.
"ILLEGAL OPEN"
•
Sliding door is not in correct position. Turn the unit off and on again.
"NODEVICE"
•
The iPod/iPhone device is not inserted correctly. Read the instructions and try again
(➡ Section 8).
"REMOTE 1"
•
The main unit is in "REMOTE 1" mode. Switch the remote control to "REMOTE 1" mode
(➡ Section 9).
"REMOTE 2"
•
The main unit is in "REMOTE 2" mode. Switch the remote control to "REMOTE 2" mode
(➡ Section 9).
g iPod/iPhone
iPod/iPhone does not turn on
•
Verify that the iPod/iPhone battery is not depleted before connecting it to the unit.
•
Before inserting the iPod/iPhone into the dock, turn both the unit and the iPod/iPhone off. Turn the
power on and select the appropriate source.
No sound is heard from the speakers
•
The iPod/iPhone is not inserted correctly into the dock. Turn the iPod/iPhone off and remove it from
the dock connector. Reinsert it and turn it on again.
•
Make sure that the iPod/iPhone is actually playing something.
•
Adjust the volume.
Distorted sound or the sound level is too low
•
Make sure the equalizer function of the
iPod/iPhone is turned off.
iPod/iPhone cannot be controlled by the remote control or main unit
•
Make sure the iPod/iPhone is inserted properly into the dock.
•
Check the dock connection and make sure that iPod/iPhone is selected as the source of music
(➡ Section 8).
iPod/iPhone does not charge
•
Check all connections (➡ Section 1, 8).
11
Specifications
g AMPLIFIER SECTION
Audio Output (Disc)
Number of channels
FL, FR, 2 channel
RMS Output Power Stereo mode
Front Ch (both ch driven)
g SPEAKER SECTION
5 W per channel (6 Ω), 1 kHz, 10 % THD
Type
1 way, 1 speaker system (Bass reflex)
Phone jack
Speaker unit(s)
Terminal
Stereo, 3.5 mm jack
Full range
8 cm Cone type
Output level (CD, 1 kHz, -20 dB)
max. 0.385 mW + 0.385 mW, 32 Ω
Impedance
Aux (Rear)
Output sound pressure
83 dB/W (1.0 m)
Sensitivity
Frequency range
60 Hz to 25 kHz (-16 dB)
Normal level
504 mV, 12.4 kΩ
90 Hz to 22 kHz (-10 dB)
High level
100 mV, 12.4 kΩ
Terminal
Stereo, 3.5 mm jack
g GENERAL
Power supply
AC 220 V to 240 V, 50 Hz
g TUNER SECTION
Power consumption
Preset Memory
FM 30 stations
Dimensions (W x H x D)
AM 15 stations
384 mm x 214 mm x 112 mm
Frequency Modulation (FM)
(D = 69 mm minimum)
Frequency range
(D = 147 mm tray open)
87.50 MHz to 108.00 MHz (50 kHz step)
Mass
Approx. 2.1 kg
Antenna terminals
75 Ω (unbalanced)
Operating temperature range
0 °C to +35 °C
Amplitude Modulation (AM)
Operating humidity range
Frequency range
35 % to 80 % RH (no condensation)
522 kHz to 1629 kHz (9 kHz step)
520 kHz to 1630 kHz (10 kHz step)
Power consumption in standby mode:
0.3 W (approx.)
g DISC SECTION
Disc played [8 cm or 12 cm]
•
Specifications are subject to change without
(1) CD-Audio (CD-DA)
notice.
(2) CD-R/RW (CD-DA, MP3)
•
Total harmonic distortion is measured by the
(3) MP3*
digital spectrum analyser.
* MPEG-1 Layer 3, MPEG-2 Layer 3
Pick up
Wavelength
785 nm
Laser power
CLASS 1
12
Safety precautions
Placement
Foreign matter
Set the unit up on an even surface away
Do not let metal objects fall inside the unit.
from direct sunlight, high temperatures, high
This can cause electric shock or malfunction.
humidity, and excessive vibration. These
Do not let liquids get into the unit. This
conditions can damage the cabinet and other
can cause electric shock or malfunction. If
components, thereby shortening the unit's
this occurs, immediately disconnect the unit
service life.
from the AC mains supply and contact your
Do not place heavy items on the unit.
dealer.
Do not spray insecticides onto or into the
Voltage
unit. They contain flammable gases which
can ignite if sprayed into the unit.
Do not use high voltage power sources.
This can overload the unit and cause a fire.
Service
Do not use a DC power source. Check the
Do not attempt to repair this unit by
source carefully when setting the unit up on
yourself. If sound is interrupted, indicators
a ship or other place where DC is used.
fail to light, smoke appears, or any other
AC mains lead protection
problem that is not covered in these
instructions occurs, disconnect the AC
Ensure the AC mains lead is connected
mains lead and contact your dealer or an
correctly and not damaged. Poor connection
authorized service centre. Electric shock or
and lead damage can cause fire or electric
damage to the unit can occur if the unit is
shock. Do not pull, bend, or place heavy
repaired, disassembled or reconstructed by
items on the lead.
unqualified persons.
Grasp the plug firmly when unplugging the
Extend operating life by disconnecting the
lead. Pulling the AC mains lead can cause
unit from the AC mains if it is not to be used
electric shock.
for a long time.
Do not handle the plug with wet hands.
This can cause electric shock.
13
Memory reset (Initialization)
When the following situations occur, reset the memory:
•
There is no response when buttons are pressed.
•
You want to clear and reset the memory contents.
To reset memory
Disconnect the AC mains lead. (Wait for at least 3 minutes before proceeding to step 2.)
While pressing and holding down [8] on the main unit, reconnect the AC mains lead.
"--------" appears on the display.
Release [8].
All the settings are returned to the factory preset. You will need to reset the memory items.
Maintenance
g Pull out the power plug from the outlet for
•
When using a chemical cloth, follow the
maintenance beforehand and then wipe it
precautions.
using a soft and dried cloth.
g Care on the CD lens
•
When dirt is heavy, wring the cloth moistened
•
Clean the lens regularly to prevent malfunctions.
in water tightly to wipe the dirt, and then wipe it
Use a blower to remove dust and a cotton swab
with a dried cloth.
if it is extremely dirty.
•
Do not use solvents such as benzine, thinner,
•
Do not use the lens cleaner of the CD type.
alcohol and detergent, which may deform the
coating of the outer case.
"Made for iPod" means that an electronic accessory has been designed to connect specifically to iPod
and has been certified by the developer to meet Apple performance standards.
"Works with iPhone" means that an electronic accessory has been designed to connect specifically to
6 Ω
iPhone and has been certified by the developer to meet Apple performance standards.
Apple is not responsible for the operation of this device or its compliance with safety and regulatory
standards.
iPod is a trademark of Apple Inc., registered in the U.S. and other countries. iPhone is a trademark of
Apple Inc.
18 W
-If you see this symbol-
Information on Disposal in other Countries outside the European Union
This symbol is only valid in the European Union.
If you wish to discard this product, please contact your local authorities or dealer and ask for
the correct method of disposal.
Notes on CD-R and CD-RW
Limitations on MP3
•
This unit can play CD-R and CD-RW recorded
•
This unit is compatible with multi-sessions and
with CD-DA or MP3.
it takes more time to start playing.
•
Use an audio recording disc for CD-DA and
•
This unit cannot play files recorded using
finalise* it when you finish recording.
packet write.
* A process performed after recording that
•
If the disc includes both MP3 and normal audio
enables CD-R or CD-RW players to play
data (CD-DA), the unit plays the type recorded
audio CD-R and CD-RW.
in the inner part of the disc.
•
The unit may not be able to play some discs
If the disc includes both MP3 and other types of
due to the condition of the recording.
audio data (e.g. WMA or WAV), the unit plays
•
Do not use irregularly shaped CDs.
only the MP3.
•
Do not attach extra labels and stickers.
•
Depending on how you create the MP3 files,
•
Do not use CDs with labels and stickers that
they may not play in the order you numbered
are coming off or with excessive adhesive
them or may not play at all.
under the labels and stickers.
•
Do not attach scratch-proof covers or any other
Notes on iPhone:
kind of accessories.
•
All phone features can only be controlled by the
•
Do not write anything on the CDs.
iPhone's touch screen.
•
Do not clean CDs with liquids (Wipe with a soft
•
The unit does not display incoming calls or the
and dried cloth).
phone status.
•
The ringtone of incoming call can be heard
from the iPhone's speaker. When the unit is in
Creating MP3 files playable on this unit
iPod/iPhone mode, the ringtone can also be
•
Maximum number of tracks and albums: 999
heard from the unit's speakers.
tracks and 255 albums.
•
The voice of caller cannot be heard on the
•
Compatible compression rate: Between 64
unit's speakers. The user can use the iPhone
kbps and 320 kbps (stereo). 128 kbps (stereo)
internal microphone though.
is recommended.
•
Connecting or disconnecting the iPhone from
•
Disc formats: ISO9660 level 1 and level 2
the unit will not cancel a call.
(except for extended formats).
•
There is no Apple Inc. specification that will
•
The time for reading TOC depends on
guarantee the iPhone responses (➡ Section 8).
the number of the tracks, folders or folder
iPhone responses may vary on new iPhone
structures.
models or iPhone new software updates.
■ Compatible iPod
Name
Memory size
iPod nano 5th generation (video camera)
8 GB, 16 GB
iPod touch 2nd generation
8 GB, 16 GB, 32 GB, 64 GB
iPod classic
120 GB, 160 GB (2009)
iPod nano 4th generation (video)
8 GB, 16 GB
iPod classic
160 GB (2007)
iPod touch 1st generation
8 GB, 16 GB, 32 GB
iPod nano 3rd generation (video)
4 GB, 8 GB
iPod classic
80 GB
iPod nano 2nd generation (aluminum)
2 GB, 4 GB, 8 GB
iPod 5th generation (video)
60 GB, 80 GB
iPod 5th generation (video)
30 GB
iPod nano 1st generation
1 GB, 2 GB, 4 GB
iPod 4th generation (colour display)
40 GB, 60 GB
iPod 4th generation (colour display)
20 GB, 30 GB
iPod 4th generation
40 GB
iPod 4th generation
20 GB
iPod mini
4 GB, 6 GB
■ Compatible iPhone
Name
Memory size
iPhone 3GS
16 GB, 32 GB
iPhone 3G
8 GB, 16 GB
iPhone
4 GB, 8 GB, 16 GB
•
Compatibility depends on the software version of the iPod/iPhone.
or
Compact Stereo System
Supplied accessories
Please check and identify the supplied
accessories.
1 AC mains lead
1 AM loop antenna
1 FM indoor antenna
2 Batteries
1 Remote control (N2QAYB000518)
•
The included AC mains lead is for use with this unit only.
Do not use it with other equipment.
•
Do not use an AC mains lead of other equipment.
Panasonic Corporation
Web Site: http://panasonic.net
© Panasonic Corporation 2010
CAUTION!
THIS PRODUCT UTILIZES A LASER.
USE OF CONTROLS OR ADJUSTMENTS
OR PERFORMANCE OF PROCEDURES
OTHER THAN THOSE SPECIFIED HEREIN
MAY RESULT IN HAZARDOUS RADIATION
EXPOSURE.
DO NOT OPEN COVERS AND DO NOT
REPAIR YOURSELF. REFER SERVICING TO
QUALIFIED PERSONNEL.
WARNING:
TO REDUCE THE RISK OF FIRE, ELECTRIC
SHOCK OR PRODUCT DAMAGE,
* DO NOT EXPOSE THIS APPARATUS
TO RAIN, MOISTURE, DRIPPING OR
SPLASHING AND THAT NO OBJECTS
FILLED WITH LIQUIDS, SUCH AS VASES,
SHALL BE PLACED ON THE APPARATUS.
* USE ONLY THE RECOMMENDED
ACCESSORIES.
* DO NOT REMOVE THE COVER (OR BACK);
THERE ARE NO USER SERVICEABLE
PARTS INSIDE. REFER SERVICING TO
QUALIFIED SERVICE PERSONNEL.
The socket outlet shall be installed near the
equipment and easily accessible.
The mains plug of the power supply cord shall
remain readily operable.
To completely disconnect this apparatus from the
AC Mains, disconnect the power supply cord plug
from AC receptacle.
THIS UNIT IS INTENDED FOR USE IN
MODERATE CLIMATES.
RQT4389ZAA
Inside of product
Operating Instructions
SC-HC20
Model No.
Dear customer
Thank you for purchasing this product.
Before connecting, operating or
adjusting this product, please read the
instructions completely. Please keep
this manual for future reference.
Operations in these instructions are
described using remote control, but you
can do the operations with the main
unit if the controls are the same.
Your unit may not look exactly as
illustrated
GN
En
RQTX1058-2B
H0310HU2050
CAUTION!
•
DO NOT INSTALL OR PLACE THIS UNIT
IN A BOOKCASE, BUILT-IN CABINET OR
IN ANOTHER CONFINED SPACE. ENSURE
THE UNIT IS WELL VENTILATED. TO
PREVENT RISK OF ELECTRIC SHOCK OR
FIRE HAZARD DUE TO OVERHEATING,
ENSURE THAT CURTAINS AND ANY OTHER
MATERIALS DO NOT OBSTRUCT THE
VENTILATION VENTS.
•
DO NOT OBSTRUCT THE UNIT'S
VENTILATION OPENINGS WITH
NEWSPAPERS, TABLECLOTHS, CURTAINS,
AND SIMILAR ITEMS.
•
DO NOT PLACE SOURCES OF NAKED
FLAMES, SUCH AS LIGHTED CANDLES, ON
THE UNIT.
•
DISPOSE OF BATTERIES IN AN
ENVIRONMENTALLY FRIENDLY MANNER.
CAUTION
Danger of explosion if battery is incorrectly
replaced. Replace only with the same
or equivalent type recommended by the
manufacturer. Dispose of used batteries
according to the manufacturer's instructions.
MPEG Layer-3 audio decoding technology licensed
from Fraunhofer IIS and Thomson.
This product may receive radio interference caused
by mobile telephones during use. If such
interference is apparent, please increase
separation between the product and the mobile
telephone.
RQLS0418
Advertisement
Table of Contents

Related Manuals for Panasonic SC-HC20


Summary of Contents for Panasonic SC-HC20
- Page 1 H0310HU2050 humidity, and excessive vibration. These Do not let liquids get into the unit. This © Panasonic Corporation 2010 • The television antenna wire is too close to the unit. Separate the antenna wire of the television from •...
- Page 2 Connections Control guide Disc operations (continued) Back View MP3: Press [e,r] to select the album. AM allocation setting Remote control Basic play Press [y/i] once and then the • Refer to the numbers in parentheses for section reference. numeric buttons to select the track.
Need help?
Do you have a question about the SC-HC20 and is the answer not in the manual?
Questions and answers