Table of Contents
Advertisement
Quick Links
Advertisement
Table of Contents

Related Manuals for Linksys ADSL2MUE


Summary of Contents for Linksys ADSL2MUE
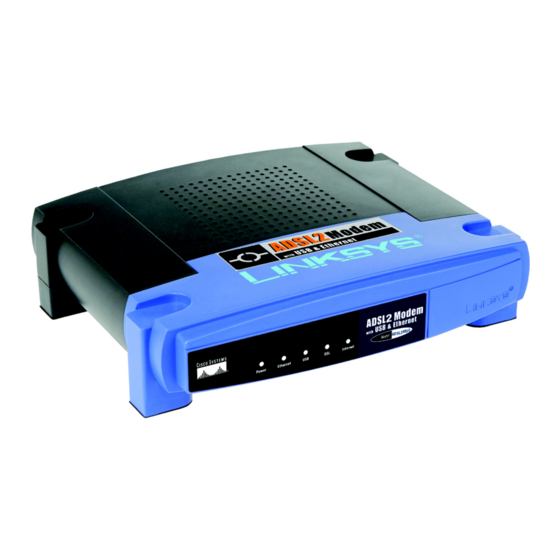
- Page 1 • ADSL2 Modem • Power Adapter • USB Cable • CAT 5 Ethernet Network Cable • RJ-11 Phone Cable • User Guide and USB Drivers CD-ROM • Quick Installation ADSL2 Modem with USB and Ethernet Quick Installation Guide WIRED ADSL2MUE(EU/LA) Model No.
-
Page 2: Connecting The Modem
Connecting the Modem In Step 1, you will connect the Modem to your ADSL line and to a computer in your home or business. Use Step 1A to connect the Modem using an Ethernet connection or use Step 1B to connect the Modem using a USB connection. - Page 3 Connect the other end of the cable to the Ethernet port on the back of the Modem. (C2) Connect the power adapter to the Modem (D1) and to the electrical outlet (D2). Turn on the Modem. Turn on your PC. NOTE: A small device called a microfilter (not included) may be necessary between each phone and wall jack to prevent...
- Page 4 Connect the Modem with USB Connect one end of the provided phone cable to the ADSL (RJ-11 phone) port that is on the back of the Modem. NOTE: To use a USB connection, your PC must use Windows 98, 98SE, Me, 2000, or XP.
- Page 5 Installing the USB Driver If you are connecting the Modem to your computer using the USB port, then you will need to install the USB driver. Proceed to the section for your PC’s Windows operating system. Windows XP Power on your computer. Windows XP will automatically detect the Modem.
- Page 6 Windows 2000 Power on your computer. Windows 2000 will automatically detect the Modem. Insert the User Guide and USB Drivers CD-ROM into your computer’s CD-ROM drive. On the first screen of the Found New Hardware Wizard, click Next. Select Search for a suitable driver for my device (recommended).
- Page 7 Windows Millennium Power on your computer. Windows Millennium will automatically detect the Modem. Insert the User Guide and USB Drivers CD-ROM into your computer’s CD-ROM drive. On the first screen of the Add New Hardware Wizard, select Automatic search for a better driver (Recommended).
- Page 8 Finish. Installation is complete. If you need to configure your Modem, Linksys is a registered trademark or trademark of Cisco Systems, Inc. and/or its affiliates in the U.S. refer to the User Guide (English and certain other countries. Copyright © 2004 only) on the CD-ROM.
- Page 9 ® A Division of Cisco Systems, Inc. Pakkens indhold • ADSL2-modem • Strømforsyning • USB-kabel • CAT 5 Ethernet-netværkskabel • RJ-11-telefonledning • CD-ROM med brugervejledning og USB-drivere • Installationsvejledning ADSL2-modem med USB og Ethernet Installationsvejledning WIRED ADSL2MUE (DK) Modelnr.
- Page 10 Tilslutning af modemet I trin 1 tilslutter du modemet til ADSL-linjen og til en computer i dit hjem/din virksomhed. Brug trin 1A for at tilslutte modemet ved hjælp af en Ethernet- tilslutning eller trin 1B for at tilslutte modemet ved hjælp af en USB-tilslutning. Fortsæt til trin 2, hvis du tilslutter modemet ved hjælp af USB.
- Page 11 Tilslut den anden ende af kablet til Ethernet-porten bag på modemet. (C2) Tilslut strømforsyningen til modemet (D1) og stikkontakten (D2). Tænd modemet. Tænd pc'en. BEMÆRK: Det kan være nødvendigt at placere en lille enhed, kaldet et mikrofilter, mellem hver telefon og vægstik for at undgå interferens.
- Page 12 Tilslutning af modem til USB Tilslut den ene ende af telefonledningen til ADSL-porten (RJ-11-telefonstikket) bag på modemet. BEMÆRK: For at kunne bruge en USB- tilslutning skal din pc bruge Windows 98, 98SE, Me, 2000 eller XP. USB-porten understøttes ikke af andre operativsystemer. Tilslut den anden ende af telefonledningen til ADSL- vægstikket.
- Page 13 Installation af USB-driveren Hvis du tilslutter modemet til computeren ved hjælp af USB-porten, skal USB-driveren installeres. Fortsæt til afsnittet med operativsystemet for din Windows XP Tænd computeren. Windows XP finder automatisk modemet. Placer cd-rom'en med brugervejledningen og USB- driverne i computerens cd-rom- drev.
- Page 14 Windows 2000 Tænd computeren. Windows 2000 finder automatisk modemet. Placer cd-rom'en med brugervejledningen og USB- driverne i computerens cd-rom- drev. Klik på Next (Næste) på det første skærmbillede i Guiden Ny hardware fundet. Vælg Search for a suitable driver for my device (recommended) (Søge efter en passende driver til enheden (Anbefales)).
- Page 15 Windows Millennium Tænd computeren. Windows Millennium finder automatisk modemet. Placer cd- rom'en med brugervejledningen og USB-driverne i computerens cd-rom-drev. Vælg Automatic search for a better driver (Recommended) (Automatisk søge efter en bedre driver (Anbefales)) på det første skærmbillede i Guiden Ny hardware fundet.
- Page 16 (kun på engelsk) på cd-rom'en. Linksys er et registreret varemærke tilhørende Cisco Systems, Inc. og/eller Cisco Systems associerede selskaber i USA og visse andre lande. Copyright © 2004 Cisco Systems, Inc. Alle rettigheder forbeholdes.
- Page 17 ® A Division of Cisco Systems, Inc. Lieferumfang • ADSL2-Modem • Netzstromadapter • USB-Kabel • Ethernet-Netzwerkkabel der Kategorie 5 • Telefonkabel RJ-11 • Benutzerhandbuch- und USB-Treiber-CD-ROM • Kurzanleitung ADSL2-Modem mit USB und Ethernet Kurzanleitung WIRED ADSL2MUE (DE) Modell-Nr.
- Page 18 Anschließen des Modems In Schritt 1 schließen Sie das Modem an Ihre ADSL-Verbindung und einen Computer in Ihrer Heim- oder Unternehmensumgebung an. Fahren Sie mit Schritt 1A fort, um das Modem über eine Ethernet-Verbindung anzuschließen. Wenn Sie das Modem über eine USB-Verbindung anschließen möchten, fahren Sie mit Schritt 1B fort. Wenn Sie das Modem über USB anschließen, fahren Sie mit Schritt 2 fort.
- Page 19 Schließen Sie das andere Ende des Kabels an den Ethernet-Port an der Rückseite des Modems an. (C2) Schließen Sie den Netzstromadapter an das Modem (D1) und an die Netzsteckdose (D2) an. Schalten Sie das Modem ein. Schalten Sie Ihren PC ein. HINWEIS: Ein so genannter Mikrofilter muss u.
- Page 20 Anschließen des Modems über USB Schließen Sie ein Ende des Telefonkabels an den ADSL-Port (RJ-11-Telefonbuchse) auf der Rückseite des Modems an. HINWEIS: USB-Verbindungen können nur unter Windows 98, 98 SE, ME, 2000 oder XP verwendet werden. Unter anderen Betriebssystemen wird der USB-Port nicht unterstützt.
- Page 21 Installieren des USB-Treibers Wenn Sie das Modem über den USB-Port an Ihren Computer anschließen, müssen Sie den USB-Treiber installieren. Fahren Sie mit den Anweisungen im jeweiligen Abschnitt zu Ihrem Windows- Betriebssystem fort. Windows XP Schalten Sie Ihren Computer ein. Windows XP erkennt das Modem automatisch.
- Page 22 Windows 2000 Schalten Sie Ihren Computer ein. Windows 2000 erkennt das Modem automatisch. Legen Sie die Benutzerhandbuch- und USB- Treiber-CD-ROM in das CD-ROM- Laufwerk Ihres Computers ein. Klicken Sie im ersten Fenster des Assistenten für das Suchen neuer Hardware auf Weiter. Wählen Sie Nach einem passenden Treiber für das Gerät suchen (empfohlen) aus.
- Page 23 Windows Millennium Schalten Sie Ihren Computer ein. Windows Millennium erkennt das Modem automatisch. Legen Sie die Benutzerhandbuch- und USB- Treiber-CD-ROM in das CD-ROM- Laufwerk Ihres Computers ein. Wählen Sie im ersten Fenster des Hardware-Assistenten die Option Automatisch nach dem besten Treiber suchen (empfohlen) aus.
- Page 24 Website http://www.linksys.com/international Benutzerhandbuch (nur auf Englisch verfügbar) auf der CD-ROM. Linksys ist eine eingetragene Marke bzw. eine Marke von Cisco Systems, Inc. und/oder deren Zweigunternehmen in den USA und anderen Ländern. Copyright © 2004 Cisco Systems, Inc. Alle Rechte vorbehalten.
- Page 25 • Cable de red Ethernet de categoría 5 • Cable telefónico RJ-11 • CD-ROM con guía del usuario y controladores USB • Guía de instalación rápida Módem ADSL2 con USB y Ethernet Guía de instalación rápida WIRED ADSL2MUE (ES) Nº de modelo...
- Page 26 Conexión del módem En el paso 1, debe conectar el módem a la línea ADSL y a un ordenador de casa o de la oficina. Siga el paso 1A para conectar el módem mediante una conexión Ethernet o el paso 1B para hacerlo mediante una conexión USB. A continuación, si conecta el módem mediante USB, vaya al paso 2.
- Page 27 Conecte el otro extremo del cable al puerto Ethernet de la parte posterior del módem. (C2) Conecte el adaptador de corriente al módem (D1) y a la toma de corriente (D2). Encienda el módem. Encienda el PC. NOTA: Puede ser necesario colocar un pequeño dispositivo denominado microfiltro entre cada teléfono y el jack de pared para evitar interferencias.
- Page 28 Conexión del módem con USB Conecte un extremo del cable telefónico al puerto ADSL (conexión telefónica RJ-11) de la parte posterior del módem. NOTA: Para usar una conexión USB, el PC debe utilizar Windows 98, 98 SE, Me, 2000 o XP.
- Page 29 Instalación del controlador USB Si va a conectar el módem al ordenador mediante el puerto USB, deberá instalar el controlador USB. Siga en la sección correspondiente al sistema operativo Windows del PC. Windows XP Encienda el ordenador. Windows XP detecta el módem de forma automática.
- Page 30 Windows 2000 Encienda el ordenador. Windows 2000 detecta el módem de forma automática. Inserte el CD-ROM con la guía del usuario y los controladores USB en la unidad de CD-ROM del ordenador. En la primera pantalla del Asistente para hardware nuevo encontrado, haga clic en Siguiente.
- Page 31 Windows Millennium Encienda el ordenador. Windows Millennium detecta el módem de forma automática. Inserte el CD-ROM con la guía del usuario y los controladores USB en la unidad de CD-ROM del ordenador. En la primera pantalla del Asistente para agregar nuevo hardware, seleccione Buscar automáticamente el controlador (recomendado).
- Page 32 La instalación ha finalizado. Si necesita configurar el módem, Linksys es una marca registrada o marca comercial de Cisco Systems, Inc. y/o sus filiales consulte la guía del usuario (sólo en de EE.UU. y otros países. Copyright © 2004 Cisco inglés) que encontrará...
- Page 33 • Câble USB • Câble de catégorie 5 pour réseau Ethernet • Câble téléphonique RJ-11 • Guide de l'utilisateur et pilotes USB sur CD-ROM • Guide d'installation rapide Modem ADSL2 avec USB et Ethernet Guide d'installation rapide CABLE ADSL2MUE (FR) Modèle réf.
- Page 34 Connexion du modem L'étape 1 consiste à connecter le modem à votre ligne ADSL ainsi qu'à l'ordinateur installé à votre domicile ou sur votre lieu de travail. L'étape 1A consiste à connecter le modem à l'aide d'une connexion Ethernet et l'étape 1B à l'aide d'une connexion USB.
- Page 35 Branchez l'autre extrémité du câble sur le port Ethernet situé à l'arrière du modem (C2). Branchez l'adaptateur électrique sur le modem (D1) et sur une prise électrique (D2). Mettez le modem sous tension. Mettez l'ordinateur sous tension. REMARQUE : Il peut être nécessaire de placer un petit périphérique appelé...
- Page 36 Connexion du modem avec un câble USB Branchez l'une des extrémités du câble téléphonique sur le port ADSL (RJ-11) situé à l'arrière du modem. REMARQUE : Pour utiliser une connexion USB, votre ordinateur doit fonctionner sous Windows 98, Windows 98 Deuxième Edition, Windows Me, Windows 2000 ou Windows XP.
- Page 37 Installation du pilote USB Si vous connectez le modem à votre ordinateur à l'aide du port USB, vous devez installer le pilote USB. Reportez-vous à la section correspondant au système d'exploitation de votre ordinateur. Windows XP Mettez votre ordinateur sous tension.
- Page 38 Windows 2000 Mettez votre ordinateur sous tension. Windows 2000 détecte le modem automatiquement. Insérez le CD-ROM contenant le Guide de l'utilisateur et les pilotes USB dans le lecteur de CD-ROM de votre ordinateur. Dans la première fenêtre de l'Assistant Matériel détecté, cliquez sur Suivant.
- Page 39 Windows Millennium Mettez votre ordinateur sous tension. Windows Millennium détecte le modem automatiquement. Insérez le CD-ROM contenant le Guide de l'utilisateur et les pilotes USB dans le lecteur de CD-ROM de votre ordinateur. Dans la première fenêtre de l'Assistant Ajout de nouveau matériel, sélectionnez Rechercher automat.
- Page 40 Guide de l'utilisateur (en anglais uniquement) disponible sur le CD-ROM. Linksys est une marque déposée ou une marque commerciale de Cisco Systems, Inc. et/ou ses filiales aux Etats-Unis et dans certains autres pays. Copyright © 2004 Cisco Systems, Inc. Tous droits réservés.
- Page 41 • Cavo di rete Ethernet CAT 5 • Cavo telefonico RJ-11 • CD-ROM della User Guide (Guida per l'utente) e dei driver USB • Guida di installazione rapida Modem ADSL2 con USB e Ethernet Guida di installazione rapida WIRED ADSL2MUE (IT) N. modello...
- Page 42 Collegamento del modem Nella Fase 1 il modem viene collegato alla linea ADSL e al computer di casa o dell'ufficio. Seguire la procedura della Fase 1A per collegare il modem tramite connessione Ethernet o quella descritta nella Fase 1B per collegare il modem tramite connessione USB.
- Page 43 Collegare l'altra estremità del cavo alla porta Ethernet sul retro del modem. (C2) Collegare l'adattatore di corrente al modem (D1) e alla presa elettrica (D2). Accendere il modem. Accendere il PC. NOTA È possibile che sia necessario inserire un piccolo dispositivo, chiamato microfiltro, tra il telefono e la presa a muro per prevenire possibili interferenze.
- Page 44 Collegare il modem con USB Collegare un'estremità del cavo telefonico alla porta ADSL (porta telefonica RJ-11) che si trova sul retro del modem. NOTA Se si desidera utilizzare una connessione USB, è necessario che il PC esegua Windows 98, 98SE, Me, 2000 o XP. La porta USB non è...
- Page 45 Installazione del driver USB Se si intende collegare il modem al computer mediante la porta USB, è necessario installare il driver USB. Andare alla sezione relativa al sistema operativo Windows in uso sul PC. Windows XP Accendere il computer. Windows XP rileva automaticamente il modem.
- Page 46 Windows 2000 Accendere il computer. Windows 2000 rileva automaticamente il modem. Inserire il CD-ROM dei driver USB e della User Guide (Guida per l'utente) nell'unità CD-ROM del computer. Nella prima schermata dell'Installazione guidata nuovo hardware, fare clic su Avanti. Selezionare Cerca un driver adatto alla periferica (scelta consigliata), quindi fare clic su Avanti.
- Page 47 Windows Millennium Accendere il computer. Windows Millennium rileva automaticamente il modem. Inserire il CD-ROM dei driver USB e della User Guide (Guida per l'utente) nell'unità CD-ROM del computer. Nella prima schermata dell'Installazione guidata nuovo driver di periferica, selezionare Cercare un driver migliore (scelta consigliata), quindi fare clic su Avanti.
- Page 48 Sito Web in inglese) disponibile sul CD-ROM. http://www.linksys.com/international Linksys è un marchio registrato o un marchio di Cisco Systems, Inc. e/o dei relativi affiliati negli Stati Uniti e in altri paesi. Copyright © 2004 Cisco Systems, Inc. Tutti i diritti riservati.
- Page 49 • Cabo USB • Cabo de rede Ethernet CAT 5 • Cabo telefónico RJ-11 • CD-ROM com Manual do Utilizador e controladores USB • Instalação Rápida Modem ADSL2 com USB e Ethernet Manual de Instalação Rápida WIRED ADSL2MUE (PT) Modelo n.º...
- Page 50 Ligar o Modem No Passo 1, o Modem será ligado à linha ADSL e ao computador em casa ou na empresa. Siga as instruções no Passo 1A para ligar o Modem utilizando uma ligação Ethernet ou as instruções no Passo 1B para ligar o Modem utilizando a ligação USB.
- Page 51 Ligue a outra extremidade do cabo à porta Ethernet situada na parte posterior do Modem. (C2) Ligue o transformador ao Modem (D1) e à tomada (D2). Ligue o Modem. Ligue o computador. NOTA: Poderá ser necessário utilizar um pequeno dispositivo designado por microfiltro entre cada telefone e a ficha para evitar interferências.
- Page 52 Ligar o Modem por USB Ligue uma extremidade do telefone à porta ADSL (cabo telefónico RJ-11) situada na parte posterior do Modem. NOTA: Para utilizar uma ligação USB, o computador tem de ter instalado o Windows 98, 98SE, Me, 2000 ou XP. A porta USB não é...
- Page 53 Instalar o controlador USB Se o Modem estiver a ser ligado ao computador utilizando a porta USB, será necessário instalar o controlador USB. Avance para a secção correspondente ao sistema operativo Windows instalado no computador. Windows XP Ligue o computador. O Windows XP detectará...
- Page 54 Windows 2000 Ligue o computador. O Windows 2000 detectará o Modem automaticamente. Coloque o CD-ROM com Manual do Utilizador e com os controladores USB na unidade de CD-ROM do computador. No primeiro ecrã do Assistente de novo hardware encontrado, clique em Seguinte. Seleccione Procurar um controlador adequado ao dispositivo (recomendado).
- Page 55 Windows Millennium Ligue o computador. O Windows Millennium detectará automaticamente o Modem. Coloque o CD-ROM com Manual do Utilizador e com os controladores USB na unidade de CD-ROM do computador. No primeiro ecrã do Assistente Adicionar Novo Hardware, seleccione Procurar automaticamente um controlador melhor (Recomendado).
- Page 56 A instalação está concluída. Se necessitar de configurar o Modem, consulte o Manual o Utilizador Linksys é uma marca registada ou marca comercial da Cisco Systems, Inc. e/ou das (disponível apenas em inglês) respectivas afiliadas nos E.U.A. e noutros países.
- Page 57 ® A Division of Cisco Systems, Inc. Innehåll i förpackningen • ADSL2-modem • Strömadapter • USB-kabel • Ethernet-nätverkskabel, kategori 5 • RJ-11-telefonkabel • CD-skiva med användarhandbok och USB-drivrutiner • Snabbinstallation ADSL2-modem med USB och Ethernet Snabbinstallationshandbok WIRED ADSL2MUE (SE) Modellnr...
- Page 58 Ansluta modemet I steg 1 ansluter du modemet till ADSL-linjen och till datorerna hemma eller på jobbet. Gå till steg 1A om du vill ansluta modemet genom att använda en Ethernet-anslutning, eller gå till steg 1B om du vill ansluta modemet genom att använda en USB-anslutning.
- Page 59 kabeln till Ethernet-porten på baksidan av modemet (C2). Anslut strömadaptern till modemet (D1) och eluttaget (D2). Sätt på modemet. Starta datorn. OBS! Om du vill undvika störningar kanske du måste placera en liten enhet som kallas ett mikrofilter mellan varje telefon och vägguttaget.
- Page 60 Ansluta modemet med USB Anslut enda änden av telefonkabeln till ADSL-porten (RJ-11-telefon) på baksidan av modemet. OBS! Om du vill använda en USB-anslutning måste datorn köra Windows 98, 98SE, Me, 2000 eller XP. USB-porten kan inte hanteras av andra operativsystem. Anslut den andra änden av telefonkabeln till det vägguttag där ADSL-tjänsten installerats.
- Page 61 Installera USB-drivrutinen Om du ansluter modemet till datorn genom att använda USB-porten måste du installera USB-drivrutinen. Fortsätt till avsnittet som behandlar din version av operativsystemet Windows. Windows XP Sätt på datorn. Windows XP identifierar modemet automatiskt. Sätt in cd-skivan med användarhandbok och USB- drivrutiner i datorns cd-enhet.
- Page 62 Windows 2000 Sätt på datorn. Windows 2000 identifierar modemet automatiskt. Sätt in cd- skivan med användarhandbok och USB-drivrutiner i datorns cd- enhet. Klicka på Nästa på den första skärmen i guiden Ny maskinvara. Markera Söka efter en lämplig drivrutin för enheten (rekommenderas).
- Page 63 Windows Millennium Sätt på datorn. Windows Millennium identifierar modemet automatiskt. Sätt in cd- skivan med användarhandbok och USB-drivrutiner i datorns cd- enhet. Markera Sök automatiskt efter en bättre drivrutin (rekommenderas) på den första skärmen i guiden Lägg till ny maskinvara. Klicka därefter på...
- Page 64 (endast på engelska) på cd-skivan. Webbplats http://www.linksys.com/international Linksys är ett registrerat varumärke eller ett varumärke som tillhör Cisco Systems, Inc. och/ eller dess samarbetspartner i USA och vissa andra länder. Copyright © 2004 Cisco Systems, Inc. Med ensamrätt.
- Page 65 ® A Division of Cisco Systems, Inc. ADSL2 Modem with USB and Ethernet User Guide WIRED ADSL2MUE (EU/UK/LA) Model No.
- Page 66 ADSL2 Modem with USB and Ethernet Copyright and Trademarks Specifications are subject to change without notice. Linksys is a registered trademark or trademark of Cisco Systems, Inc. and/or its affiliates in the U.S. and certain other countries. Copyright © 2004 Cisco Systems, Inc. All rights reserved.
-
Page 67: Table Of Contents
ADSL2MUE Modem with USB and Ethernet Table of Contents Chapter 1: Introduction Welcome What’s in this Guide? Chapter 2: Getting to Know the ADSL2 Modem The Back Panel The Front Panel Chapter 3: Connecting the ADSL2 Modem Overview Connecting the Modem using an Ethernet Connection... - Page 68 ADSL2MUE Modem with USB and Ethernet Appendix C: Glossary Appendix D: Specifications Appendix E: Warranty Information Appendix F: Regulatory Information Appendix G: Contact Information...
- Page 69 ADSL2MUE Modem with USB and Ethernet List of Figures Figure 2-1: Back Panel Figure 2-2: Front Panel Figure 3-1: Modem Figure 3-2: ADSL Connection Figure 3-3: Ethernet Connection Figure 3-4: Power Connection Figure 3-5: USB Connection Figure 4-1: XP Welcome...
- Page 70 ADSL2MUE Modem with USB and Ethernet Figure 5-5: PPPoA Figure 5-6: Bridged Mode Only Figure 5-7: Network Setup Figure 5-8: Modem Password Figure 5-9: System Log Figure 5-10: Ping Test Figure 5-11: Restore Factory Default Figure 5-12: Firmware Upgrade Figure 5-13: Modem Information...
-
Page 71: Chapter 1: Introduction
Installation is quick and simple. Connect it directly to any PC with an available USB or Ethernet port, and you’re ready to surf the Internet. Or connect it to a Linksys router and share that high-speed Internet access with everyone on your home network. - Page 72 This appendix supplies the Modem’s warranty information. • Appendix F: Regulatory Information This appendix supplies the Modem’s regulatory information. • Appendix G: Contact Information This appendix provides contact information for a variety of Linksys resources, including Technical Support. Chapter 1: Introduction What’s in this Guide?
-
Page 73: Chapter 2: Getting To Know The Adsl2 Modem
Power The Power port is where you connect the power adapter. With these, and many other Linksys products, your networking options are limitless. Go to the Linksys website at www.linksys.com/international for more information about products that work with the Modem. -
Page 74: The Front Panel
ADSL2 Modem with USB and Ethernet The Front Panel The Modem's LEDs, where information about network activity is displayed, are located on the front panel. Figure 2-2: Front Panel Power Green. The Power LED lights up when the Modem is powered on. Ethernet Green. -
Page 75: Chapter 3: Connecting The Adsl2 Modem
ADSL2 Modem with USB and Ethernet Chapter 3: Connecting the ADSL2 Modem Overview In this chapter, you will connect the Modem to your ADSL line and to a computer in your home or business. You have a choice of using an Ethernet or USB connnection. Proceed to the section for the connection you want to use. -
Page 76: Connecting The Modem Using A Usb Connection
ADSL2 Modem with USB and Ethernet Connecting the Modem using a USB Connection 1. Connect one end of the phone cable to the ADSL (RJ-11 phone) port on the back of the Modem. (See Figure 3- 2.) Connect the other end of the phone cable to the wall jack with ADSL service. 2. -
Page 77: Chapter 4: Installing The Usb Driver
ADSL2 Modem with USB and Ethernet Chapter 4: Installing the USB Driver Overview The first time you connect the Modem using a USB connection, you will need to install the USB driver. Installing the USB Driver If you are connecting the Modem to your computer using the USB port, then you will need to install the USB driver. Proceed to the section for your PC’s Windows operating system. -
Page 78: Figure 4-3: 2000 Welcome
ADSL2 Modem with USB and Ethernet Windows 2000 1. Power on your computer. 2. Windows 2000 will automatically detect the ADSL2 Modem. Insert the User Guide and USB Drivers CD-ROM into your computer’s CD-ROM drive. 3. On the first screen of the Found New Hardware Wizard, click Next. Figure 4-3: 2000 Welcome 4. -
Page 79: Figure 4-6: 2000 Search Results
ADSL2 Modem with USB and Ethernet 6. On the Driver Files Search Results screen, click Next. 7. You may see a Windows Digital Signature warning. As this product has been tested to work with Windows, you may continue. Figure 4-6: 2000 Search Results 8. -
Page 80: Figure 4-8: Me Locating Software
ADSL2 Modem with USB and Ethernet Windows Millennium 1. Power on your computer. Figure 4-8: Me Locating Software 2. Windows Millennium will automatically detect the ADSL2 Modem. Insert the User Guide and USB Drivers CD- ROM into your computer’s CD-ROM drive. 3. -
Page 81: Figure 4-12: 98 Search
ADSL2 Modem with USB and Ethernet Windows 98 1. Power on your computer. 2. Windows 98 will automatically detect the ADSL2 Modem. Insert the User Guide and USB Drivers CD-ROM into your computer’s CD-ROM drive. 3. On the first screen of the Add New Hardware Wizard, select click Next. Figure 4-12: 98 Search 4. -
Page 82: Figure 4-15: 98 Updated Driver
ADSL2 Modem with USB and Ethernet 7. After Windows 98 has found the driver, click Next. Figure 4-15: 98 Updated Driver 8. When Windows 98 has finished installing the driver, click Finish. Figure 4-16: 98 Install Best Driver Installation is complete. Figure 4-17: 98 Complete Chapter 4: Installing the USB Driver Installing the USB Driver... -
Page 83: Chapter 5: Configuring The Adsl2 Modem
ADSL2 Modem with USB and Ethernet Chapter 5: Configuring the ADSL2 Modem Overview The ADSL2 Modem has been designed to be functional right out of the box, with the default settings. However, if you'd like to change these settings, the ADSL2 Modem can be configured through your web browser with the Web-Based Utility. -
Page 84: Figure 5-2: Dynamic (Dhcp) Ip
ADSL2 Modem with USB and Ethernet Encapsulation. The Modem supports four Encapsulations (Internet connection types): RFC 1483 Bridged, RFC 2516 PPPoE, RFC 2364 PPPoA, and Bridged Mode Only. Each Basic Setup screen and available features will differ depending on what type of encapsulation you select. The encapsulations are described below. RFC 1483 Bridged Dynamic IP IP Settings. -
Page 85: Figure 5-4: Pppoe
ADSL2 Modem with USB and Ethernet RFC 2516 PPPoE Some DSL-based ISPs use PPPoE (Point-to-Point Protocol over Ethernet) to establish Internet connections. Check with your ISP to see if they use PPPoE. If they do, you will have to enable PPPoE. •... -
Page 86: Figure 5-6: Bridged Mode Only
ADSL2 Modem with USB and Ethernet When finished making your changes on this tab, click the Save Settings button to save these changes, or click the Cancel Changes button to undo your changes. Bridged Mode Only If you would like to use your Modem as a bridge, which makes the Modem act like a standalone modem (without NAT or Routing), select Bridged Mode Only. -
Page 87: Administration Tab
ADSL2 Modem with USB and Ethernet • Number of Address. Enter the maximum number of computers that you want the DHCP server to assign IP addresses to. This number cannot be greater than 253. By default, as shown in Figure 5-9, the range is 192.168.1.2 to 192.168.1.254. -
Page 88: Diagnostics
ADSL2 Modem with USB and Ethernet Diagnostics Ping Test. This feature is used to find out if an IP Address is operating and available to receive and respond to traffic. • Ping Target IP. Enter the IP Address that you want to ping in the field. This can be either a local (LAN) IP or an Internet (WAN) IP address. -
Page 89: Status Tab
1. Go to the Linksys website at www.linksys.com/international and download the firmware that you want to use. Extract or unzip the file. 1. Click the Browse button to find the firmware upgrade file that you downloaded from the Linksys website and then extracted. -
Page 90: Status Tab
ADSL2 Modem with USB and Ethernet Status Tab Local Network The Local Network information that is displayed is the local IP Address, Subnet Mask, and DHCP Server. To view the DHCP Clients Table, click the DHCP Clients Table button. DHCP Clients Table. Click the DHCP Clients Table button to show the current DHCP Client data. You will see the MAC address, computer name, and IP address of the network clients using the DHCP server. -
Page 91: Appendix A: Troubleshooting
Provided are possible solutions to problems that may occur during the installation and operation of the Modem. Read the descriptions below to help you solve your problems. If you can’t find an answer here, check the Linksys website at www.linksys.com/international. - Page 92 ADSL2MUE Modem with USB and Ethernet 7. Toward the bottom of the window, select Use the following DNS server addresses, and enter the Preferred DNS server and Alternative DNS server (provided by your ISP). Contact your ISP or go on its website to find the information.
- Page 93 5. I need to upgrade the firmware. In order to upgrade the firmware with the latest features, you need to go to the Linksys website and download the latest firmware at www.linksys.com/international. • Follow these steps: 1.
-
Page 94: Frequently Asked Questions
ADSL2MUE Modem with USB and Ethernet 7. The Power LED flashes continuously. The Power LED lights up when the device is first powered up. In the meantime, the system will boot up itself and check for proper operation. After finishing the checking procedure, the LED remains steady to show that the system is working fine. - Page 95 Does the Gateway support any operating system other than Windows 98SE, Windows Millennium, Windows 2000, or Windows XP? Yes, but Linksys does not, at this time, provide technical support for setup, configuration or troubleshooting of any non-Windows operating systems. The web page hangs; downloads are corrupt, or nothing but junk characters are being displayed on the screen.
- Page 96 ADSL2MUE Modem with USB and Ethernet I have my Linksys Router connected to my Modem and I can no longer access the Web-based utility to change my settings. What can I do? You can disconnect your Router from the Modem, so the Modem will be directly connected to your PC and you can have access to the Modem’s Web-based utility.
-
Page 97: Appendix B: Upgrading Firmware
Appendix B: Upgrading Firmware The Modem’s firmware is upgraded through the Web-Utility's Security tab. Follow these instructions: 1. Download the firmware from Linksys's website at www.linksys.com/international. 2. Click Upgrade Firmware from the Web-Utility's Help tab, and the Upgrade Firmware screen will appear. -
Page 98: Appendix C: Glossary
ADSL2 Modem with USB and Ethernet Appendix C: Glossary 802.11a - A wireless networking standard that specifies a maximum data transfer rate of 54Mbps and an operating frequency of 5GHz. 802.11b - A wireless networking standard that specifies a maximum data transfer rate of 11Mbps and an operating frequency of 2.4GHz. - Page 99 ADSL2 Modem with USB and Ethernet Buffer - A shared or assigned memory area that is used to support and coordinate different computing and networking activities so one isn't held up by the other. Byte - A unit of data that is usually eight bits long Cable Modem - A device that connects a computer to the cable television network, which in turn connects to the Internet.
- Page 100 ADSL2 Modem with USB and Ethernet DTIM (Delivery Traffic Indication Message) - A message included in data packets that can increase wireless efficiency. Dynamic IP Address - A temporary IP address assigned by a DHCP server. EAP (Extensible Authentication Protocol) - A general authentication protocol used to control network access. Many specific authentication methods work within this framework.
- Page 101 ADSL2 Modem with USB and Ethernet Infrastructure - A wireless network that is bridged to a wired network via an access point. IP (Internet Protocol) - A protocol used to send data over a network. IP Address - The address used to identify a computer or device on a network. IPCONFIG - A Windows 2000 and XP utility that displays the IP address for a particular networking device.
- Page 102 Passphrase - Used much like a password, a passphrase simplifies the WEP encryption process by automatically generating the WEP encryption keys for Linksys products. Ping (Packet INternet Groper) - An Internet utility used to determine whether a particular IP address is online.
- Page 103 ADSL2 Modem with USB and Ethernet SMTP (Simple Mail Transfer Protocol) - The standard e-mail protocol on the Internet. SNMP (Simple Network Management Protocol) - A widely used network monitoring and control protocol. Software - Instructions for the computer. A series of instructions that performs a particular task is called a "program".
- Page 104 ADSL2 Modem with USB and Ethernet TKIP (Temporal Key Integrity Protocol) - a wireless encryption protocol that provides dynamic encryption keys for each packet transmitted. Topology - The physical layout of a network. TX Rate - Transmission Rate. UDP (User Datagram Protocol) - A network protocol for transmitting data that does not require acknowledgement from the recipient of the data that is sent.
-
Page 105: Appendix D: Specifications
ADSL2 Modem with USB and Ethernet Appendix D: Specifications Standards G.992.1 (G.dmt), G.992.2 (G.lite), G.992.3 (ADSL2), T1.413i2, Reach-Extended ADSL (READSL), ADSL2+ Upgradeable (G.992.5), RFC 1483/2684, RFC 2364 PPPoA, RFC 2516 PPPoE, USB 1.1, IEEE 802.3, IEEE 802.3u Buttons Reset, On/Off Ports ADSL: RJ-11 Ethernet: 10/100 RJ-45 Port... -
Page 106: Appendix E: Warranty Information
Your exclusive remedy and Linksys' entire liability under this warranty will be for Linksys at its option to repair or replace the Product or refund Your purchase price less any rebates. This limited warranty extends only to the original purchaser. -
Page 107: Appendix F: Regulatory Information
ADSL2 Modem with USB and Ethernet Appendix F: Regulatory Information FCC STATEMENT This product has been tested and complies with the specifications for a Class B digital device, pursuant to Part 15 of the FCC Rules. These limits are designed to provide reasonable protection against harmful interference in a residential installation. - Page 108 ADSL2 Modem with USB and Ethernet The REN is useful to determine the quantity of devices that may be connected to the telephone line and still have all of those devices ring when your telephone number is called. In most, but not all areas, the sum of RENs should not exceed 5. To be certain of the number of devices that may be connected to the line, as determined by the total RENs, contact the telephone company to determine the maximum REN for the calling area.
-
Page 109: Appendix G: Contact Information
ADSL2 Modem with USB and Ethernet EC DECLARATION OF CONFORMITY (EUROPEAN COMMUNITY) This product conforms to the Directive 1999/5/EC (R&TTE). The following standards were applied during the assessment of the product against the requirements of the aforementioned directives: • EN 55022: 1997 (Emission) •... - Page 110 Appendix G: Contact Information Need to contact Linksys? Visit us online for information on the latest products and updates to your existing products at: http://www.linksys.com/international If you experience problems with any Linksys product, you can e-mail us at: In Europe E-mail Address Austria support.at@linksys.com...
Need help?
Do you have a question about the ADSL2MUE and is the answer not in the manual?
Questions and answers